LENCO PMX-160BK Mode D'emploi
Table des Matières
Les langues disponibles
Les langues disponibles
Liens rapides
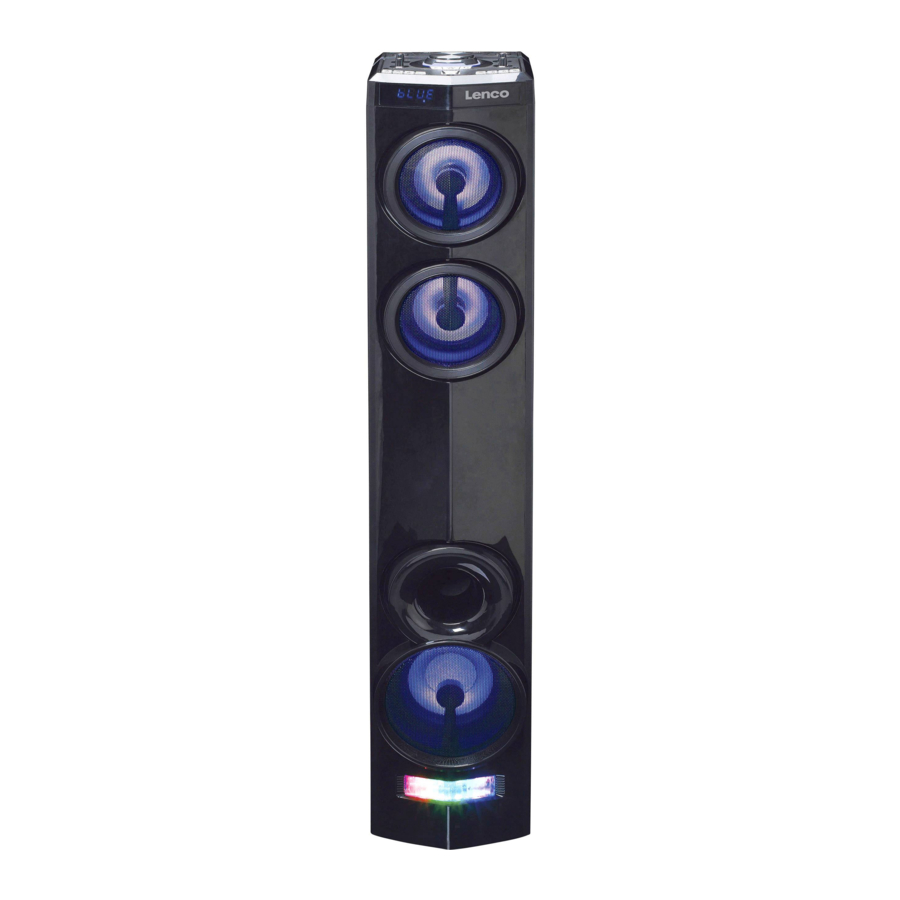
Model PMX-160BK
User Manual - High power music system with FM radio, digital mixer, USB, Bluetooth, lights
Gebruikshandleiding - Krachtig muzieksysteem met FM-radio, digitale mixer, USB, Bluetooth, verlichting
Benutzerhandbuch – Hochleistungsmusiksystem mit FM-Radio, Digitalmixer, USB, Bluetooth und Beleuchtung
Mode d'emploi - Système de musique de forte puissance avec radio FM, mixage numérique, USB,
Bluetooth, effet de lumière
Manual del usuario - Sistema de música de gran potencia con radio FM, mezclador digital, USB, Bluetooth, luces
Table des Matières

Manuels Connexes pour LENCO PMX-160BK


Sommaire des Matières pour LENCO PMX-160BK
- Page 1 Model PMX-160BK User Manual - High power music system with FM radio, digital mixer, USB, Bluetooth, lights Gebruikshandleiding - Krachtig muzieksysteem met FM-radio, digitale mixer, USB, Bluetooth, verlichting Benutzerhandbuch – Hochleistungsmusiksystem mit FM-Radio, Digitalmixer, USB, Bluetooth und Beleuchtung Mode d’emploi - Système de musique de forte puissance avec radio FM, mixage numérique, USB, Bluetooth, effet de lumière...
-
Page 41: Français
Français PMX-160 ATTENTION : L’utilisation de commandes ou de réglages ou l’exécution de procédures autres que ceux spécifiés dans ce manuel peut entraîner une exposition à des rayonnements dangereux. Cet appareil ne doit pas être réglé ou réparé par quiconque d’autre que du personnel qualifié. PRÉCAUTIONS AVANT UTILISATION GARDEZ CES INSTRUCTIONS À... - Page 42 Cet appareil n’est pas destiné à être utilisé par des personnes (enfants compris) souffrant de handicaps physiques, sensoriels ou mentaux, ou manquant d’expérience et de connaissances, sauf si elles sont sous surveillance ou ont reçu des instructions sur l’utilisation correcte de l’appareil par la personne qui est responsable de leur sécurité. Ce produit est réservé...
-
Page 43: Panneau Du Haut
PANNEAU DU HAUT 1. - MIC ECHO + Tournez ce bouton pour mixer l’effet d’écho du microphone 2. NIVEAU DE DJ MIXER Tournez ce bouton pour mixer la source audio A et B 3. – MIC VOL + Tournez ce bouton pour changer le niveau d’entrée du microphone 4. - Page 44 5. A /SCAN FM : Maintenez enfoncée cette touche pour lancer la recherche automatique et l’enregistrement des stations disponibles (jusqu’à 30 peuvent être enregistrées) USB A/MICRO SD/BT A : Appuyez sur cette touche pour interrompre la lecture. Appuyez encore une fois pour reprendre la lecture 6.
-
Page 45: Affichage
FAÇADE 1. Zone de réception IR 2. Affichage PANNEAU ARRIÈRE 1. ENTRÉE SECTEUR Branchez le cordon d’alimentation à cette prise 2. TOUCHE ALLUMER/ÉTEINDRE C’est le commutateur d’alimentation secteur pour allumer ou éteindre l’appareil. 3. ANT Cette antenne filaire FM devrait être déployée et rectifiée pour assurer une bonne réception FM... -
Page 46: Répétition
TÉLÉCOMMANDE MISE EN VEILLE PRÉCÉDENT SUIVANT VOL - VOL + PAVÉ NUMÉRIQUE/ A/B/100 + RÉPÉTITION LECTURE/PAUSE MODE SOURDINE Utilisation de la télécommande Une pile CR2025 est déjà installée dans la télécommande. Avant utilisation, sortez la bande isolante du compartiment à pile comme indiqué... -
Page 47: Fonctionnement De Base
Pour installer une pile neuve, consultez la figure ci-dessous. En installant une pile, veillez à suivre les instructions. Compartiment à pile Sortez le compartiment à pile Poussez dans ce sens Pile CR2025 Si la télécommande entre en conflit avec d’autres appareils, le fonctionnement sera affecté. ... -
Page 48: Utilisation De La Radio Fm
Lorsque l’affichage indique l’état du groupe de la Source B, la lettre « B » s’affiche comme illustré ci-dessous. DISPLAY AFFICHAGE Source B Group indicatior Témoin du groupe de la Source B Appuyez sur la touche [MODE] pour sélectionner les différentes sources. Le groupe de la Source B comprend : ... -
Page 49: Fonctionnement De L'usb / La Carte Micro Sd
Bluetooth continueront de clignoter. Activez la fonction Bluetooth de votre appareil et activez la recherche jusqu’à ce qu’il ait trouvé « Lenco PMX-160_B ». Sélectionnez « Lenco PMX-160_B » sur l’appareil Bluetooth pour établir la connexion. Saisissez le mot de passe « 0000 », si nécessaire. -
Page 50: Entrée Micro (Karaoké)
[B ] pour déconnecter la connexion Bluetooth B. Vous pouvez ensuite rechercher de nouveaux appareils Bluetooth sur votre autre lecteur Bluetooth et cherchez soit « Lenco PMX-160_A » ou « Lenco PMX-160_B » selon vos préférences. LINE IN Elle vous permet de brancher le son d’un lecteur externe à... -
Page 51: Économie D'énergie
ÉCONOMIE D’ÉNERGIE Conformément à la législation ErP catégorie II et afin de préserver l’environnement, l’appareil passera automatiquement en mode veille au bout de 15 minutes sans lecture de musique. Lorsque l’appareil est éteint en raison des mesures concernant les produits liés à l’énergie, appuyer sur le bouton MISE EN VEILLE allume de nouveau l’appareil. -
Page 52: Caractéristiques Techniques
Dépannage Pas d’alimentation • Vérifiez que le cordon secteur est correctement branché. • Vérifiez que le l’interrupteur de l’appareil est mis sur ON. La télécommande ne fonctionne pas • Utilisez la télécommande en la rapprochant de l’appareil. • Pointez la télécommande vers le capteur de la télécommande de l’unité. •... -
Page 53: Clause De Non-Responsabilité
CLAUSE DE NON-RESPONSABILITÉ Des mises à jour du logiciel et/ou des composants informatiques sont régulièrement effectuées. Il se peut donc que certaines instructions, caractéristiques et images présentes dans ce document diffèrent légèrement de votre configuration spécifique. Tous les articles décrits dans ce guide sont fournis uniquement à des fins d’illustration et peuvent ne pas s’appliquer à une configuration spécifique.