Table des Matières
Publicité
Les langues disponibles
Les langues disponibles
Liens rapides
Publicité
Table des Matières

Manuels Connexes pour NGM WeMove Wilco


Sommaire des Matières pour NGM WeMove Wilco
-
Page 3: Table Des Matières
Guida rapida - Italiano ... 5 Quick guide - English ... 21 Kurzanleitung - Deutsch ..37 Guía rápida - Español ... 53 Guide rapide - Français ..69... - Page 4 ITALIANO...
-
Page 5: Guida Rapida - Italiano
Guida rapida - Italiano ITALIANO... - Page 6 SIM preferita per chiamate, videochiamate e connessione dati; un vantaggio esclusivamente NGM! Visitando il sito ufficiale www.ngm.eu potrete conoscere l’intera gamma di telefoni NGM, provare il nostro pratico e funzionale servizio di e-commerce per acquistare telefoni ed accessori, richiedere assistenza, accedere al forum di assistenza tecnica e scaricare aggiornamenti software.
- Page 7 Lo slot USIM 1 supporta USIM WCDMA. Inserire la scheda di memoria: Per sfruttare tutte le funzioni di NGM WeMove Wilco, si consiglia l'utilizzo di una micro-SD: la scheda va collocata nella parte posteriore del telefono dopo aver rimosso la cover posteriore e la batteria;...
- Page 8 Il vostro apparecchio è fornito con una batteria a ioni di litio ed è progettato per l’uso esclusivo di batterie e accessori originali NGM. La batteria va collocata nella parte posteriore del telefono. Inserite la batteria nel vano batteria con i contatti rivolti verso l’alto, in corrispondenza di quelli del telefono.
- Page 9 Attenzione: Non collegate il telefono ad un computer che si sta accendendo o spegnendo per evitare sbalzi di tensione. Per preservare la corretta funzionalità del prodotto e l'integrità della garanzia si raccomanda l'utilizzo di caricabatterie originali NGM. Procedete alla ricarica esclusivamente al coperto e in luoghi asciutti. Un leggero riscaldamento del telefono durante il processo di ricarica è...
- Page 10 Fotocamera frontale Sensori luminosità e prossimità Fotocamera e Flash Connettore Ricevitore Micro USB Ingresso auricolare Volume “+” e “-“ Tasto On/Off e Standby Touch screen capacitivo Menu contestuale Microfono Tasto Home Tasto Indietro Speaker 10 ITALIANO...
-
Page 11: Schermata Di Standby
Schermata di Standby La schermata principale: Home Usate il touch screen toccando, tenendo premuto o trascinando un dito sullo schermo. La schermata principale è il punto di partenza per l'utilizzo di tutte le applicazioni Tocca e trascina del telefono cellulare. Altre pagine si trovano affiancate l’elemento centrale rispetto a quella principale, alle quali si può... -
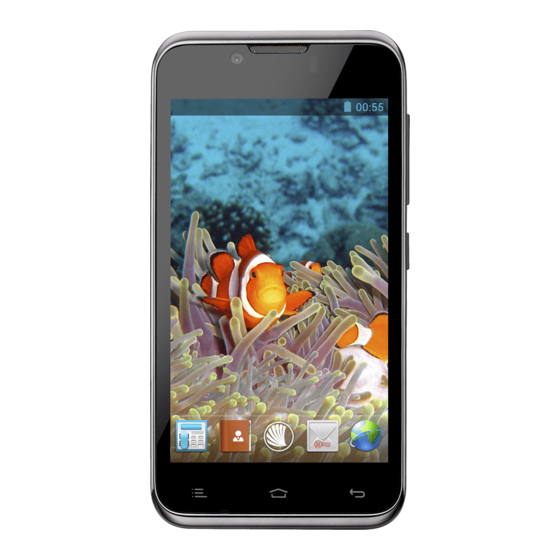
Page 12: Schermata Principale
Schermata Principale Menu Principale Intensità segnale USIM e livello batteria Pannello di notifica Barra indicatore pagine Messaggi Internet Rubrica Menu Principale Menu Chiamata Scorrimento schermate HOME Scorrimento menu 12 ITALIANO... - Page 13 Scelte rapide Pannello di notifica: per aprire il pannello di notifica, toccate l'area delle icone nella parte alta dello schermo e trascinate il dito in basso. Per nascondere il pannello, trascinate in alto la parte inferiore dell'elenco oppure toccare il tasto indietro. Dal pannello di notifica è possibile accedere ad un elenco di notifiche provenienti dalle USIM o dal sistema e, nella parte alta, ai 12 widgets di gestione.
- Page 14 Gestire le due USIM Dal menu principale, selezionare Impostazioni > Wireless e Reti: “Gestione SIM”. Selezionare i tasti on/off accanto agli operatori telefonici corrispondenti a “USIM1” e “USIM2” per attivare o disattivare selettivamente le USIM in qualsiasi momento. Da questo menu è...
- Page 15 Note: Nel menu contestuale della Gestire contatti rubrica si ha accesso alle funzioni Aggiungere un nuovo contatto: di importazione/esportazione dei Dal menu principale, selezionare l’icona Contatti. contatti e varie impostazioni utili. Premere l’icona contrassegnata dal simbolo “+” sulla barra in basso. Scegliere dove si intende salvare il nuovo contatto (telefono, USIM1 o USIM2).
- Page 16 Inviare e leggere SMS e MMS Inviare SMS e MMS: Dalla pagina o dal menu principale, scegliere Messaggi e quindi l’icona con la “+”. Digitare le prime lettere di un nome nel campo destinatario per ricercare un contatto e selezionarlo dall’elenco pop-up o inserire direttamente il numero del destinatario oppure premere l’icona con la “+”...
- Page 17 Connettersi a Internet con la funzione Wi-Fi®: Potete collegarvi alla rete WiFi utilizzando la funzione Wi-Fi. Per attivarla, dal menu principale scegliere Impostazioni > Wireless e Reti ”WiFi” on/off. Attenetevi a tutte le avvertenze e le indicazioni specificate dal personale autorizzato quando vi trovate in aree in cui l’uso dei dispositivi wireless è...
- Page 18 Per il corretto funzionamento del dizionario, è necessario installare nel telefono una micro-SD. Per cambiare i parametri di inserimento del testo, Personale “Lingua e input” selezionare Impostazioni > > SwiftKey for NGM-Mobile. 18 ITALIANO...
- Page 19 Per limitare il consumo di batteria e memoria, si raccomanda di disattivare il GPS quando non viene usato. Il telefono dispone © del sistema di navigazione NGM NAVIGATION SYSTEM preinstallato. Per ulteriori dettagli sul funzionamento del sistema visitare il sito www.ngm.eu. ITALIANO...
- Page 20 NGM Italia. Bluetooth® è un marchio commerciale registrato in tutto il mondo della Bluetooth SIG, Inc.
-
Page 21: Quick Guide - English
Quick Guide - English ENGLISH... - Page 22 Internet with just a single touch! It will be like having a small tablet, Smartphone and a GPS navigation system all in one, stylish device. Compared to the usual Mono SIM Smartphones available on the market, NGM WeMove Wilco offers the convenience of DUAL SIM, which has always distinguished the entire spectrum of NGM phones, i.e.
- Page 23 Insert your USIM cards simply by sliding them into their slots; follow the illustration. Slot 1 supports WCDMA. Installing the memory card: In order to use all functions of NGM WeMove Wilco, it is advisable to install a micro-SD card: the card has to be inserted in the back side of the phone, after removing the back cover and the battery;...
- Page 24 Your device is provided with a lithium-ion battery and is designed to be used exclusively with original NGM batteries and chargers. The battery must be inserted into the backside of the phone (see illustration below) with the battery contacts facing the contacts in the battery tray.
- Page 25 In order to preserve the correct functioning of the device and in order not to compromise warranty, the sole use of original NGM battery chargers and accessories are recommended. Please charge the battery indoors, in a dry and favorable environment. It’s normal for the battery to get slightly warm during the charging process.
- Page 26 Brightness and Proximity Sensors Front Camera Camera and Flash Micro USB Receiver Connector Earphone Plug Volume “+” e “-“ On/Off and Stand-by Key Capacitve Touch Screen Contextual Menu Microphone Back Home Key Speaker 26 ENGLISH...
-
Page 27: Standby Screen
Standby Screen The Main Screen: Home Use the touch screen by touching, pressing, sliding your finger over it. The home screen is the starting point for the use of all applications of the phone. Other home screen Hold and drag the pages are available (as indicated by the white bar), just central element to swipe the screen left or right. -
Page 28: Home Screen
Home Screen Main Menu USIM signal intensity and battery level Notification Panel Page Indicator Bar Messaging Browser Phonebook Call menu Main Menu Scroll HOME Scroll menu 28 ENGLISH... - Page 29 Rapid access Notification panel: Open the notification panel by touching the upper area containing the battery and signal - intensity icons and drag it downwards. To hide the panel, push it up again starting from the bottom. In the panel you have rapid access to a list of notifications from the USIM or the System and to the control panel with 12 management and settings - widgets.
- Page 30 Managing the two USIM cards From the main menu, select Settings > Wireless and networks: “SIM Management”. Select the “USIM1” and/or “USIM2” on/off operator checkboxes to activate/deactivate the USIM cards selectively in any moment. In this menu you can moreover assign custom colors to each USIM card and define the card for your voice calls, video calls or data connections.
- Page 31 Note: In the contextual menu of Managing contacts the phonebook, you can access Add a new contact: the import/export functions and From the main screen/menu, select the Contacts icon. several other settings. Select the icon with the “+” on the bottom bar. Select the storage (Phone, USIM1 or USIM2).
- Page 32 Send and receive messages Send SMS e MMS: From the main screen or menu, select Messaging and select the icon with the “+” symbol to access the text input screen for a new message. Write the first few letters of a contact name into the recipients bar and select the desired contact from the popup contact list that will appear, or directly insert the recipient’s number.
- Page 33 Connect to the Internet using Wi-Fi®: Connect to the wireless net using the Wi-Fi function. In order to activate it, from the main menu choose Settings > Wireless and Networks > “WiFi” on/off. Please follow all warnings and indications concerning the use of wireless devices in areas where the use of such functions is restricted (airplanes, hospitals, etc.).
- Page 34 For the correct use of this function, the micro-SD contained in the selling package has to be installed into the phone. To change input methods, select Settings > Personal: “Language and Input” > SwiftKey for NGM-Mobile. 34 ENGLISH...
- Page 35 Limit the use of battery and memory by switching off this function when you don’t need it. The phone integrates the NGM NAVIGATION SYSTEM©, that is accessible through the main menu. For more details please visit www.ngm.eu.
- Page 36 In such case, the latter shall govern. Copyright © 2012 NGM Italia No part of this manual may be reproduced, distributed, translated, or transmitted in any form or by any means, electronic or mechanical, including photocopying, recording, or storing in any information storage and retrieval system, without the prior written permission of NGM Italia.
-
Page 37: Kurzanleitung - Deutsch
Kurzanleitung - Deutsch DEUTSCH... - Page 38 . Danke dass Sie NGM Herzlich willkommen in der Welt von NGM Android WeMove Wilco gekauft haben. Mit diesem Gerät können Sie Zugang zu den vielfältigen Android Funktionen Zugang haben um Ihre Kontakte, E-Mails, Sozialnetzwerke und Internetzugang zu verwalten. Erleben Sie ein kleines Tablet, ein Telefon und ein Navigationsgerät in einem einzigen, eleganten Gerät! Im...
- Page 39 Entfernen Sie den Akku. Fügen Sie Ihre USIM Karten in die entsprechenden Slots mit den goldenen Kontaktflächen nach unten weisend ein. Slot 1 unterstützt WCDMA. Speicherkarte einfügen: Um alle Funktionen von NGM WeMove Wilco zu verwenden, ist es ratsam eine Micro-SD einzusetzen: der Slot für die Micro-SD Karte befindet sich über dem Akkufach.
- Page 40 Akku einsetzen: Ihr Gerät wird mit einem Lithium Akku geliefert und ist dazu entworfen worden, ausschließlich mit originalen NGM Akkus und Zubehör betrieben zu werden. Der Akku muss in die Rückseite des Telefons eingesetzt werden, richten Sie die goldenen Kontaktflächen des Akkus mit den entsprechenden Kontaktflächen des Akkufaches aus.
- Page 41 Achtung: Verbinden Sie das Telefon nicht mit einem ein-oder ausschaltenden PC, um Spannungssprünge zu vermeiden. Um die korrekte Funktion und die Produkt-Garantie zu bewahren verwenden Sie immer originale NGM Ladegeräte. Laden Sie das Gerät immer in trockenen Innenräumen auf. Eine leichte Erwärmung des Gerätes während der Ladung ist normal.
- Page 42 Helligkeit und Nähe Sensor Vordere Kamera Kamera und Flash Hörer Micro USB Buchse Kopfhörer Buchse Ein/Aus Taste und Standby Lautstärke “+” und “-“ Kapazitives Touch Screen Kontextuelles Menü Home Mikrofon Zurück Lautsprecher Taste 42 DEUTSCH...
- Page 43 Standby Bildschirm Der Hauptbildschirm Tasten und Icons im Touch Screen können mit dem Finger gedrück, verschoben und gedrückt gehalten werden. Der Hauptbildschirm ist der Ausgangspunkt für alle Funktionen im Berühren und verschieben Telefon. Es hat weitere Seiten, die durch das Verschieben vom Sie das zentrale Element nach links um die Kamera Bildschirm nach rechts und links direkt besichtigt werden...
- Page 44 Hauptmenü Hauptbildschirm USIM Signalstärke und Akku Niveau Hinweistafel Bildschirmindikator Leiste Mitteilungen Internet Anruf Menü Kontakte Hauptmenü HOME Bildschirme durchblättern Hauptmenü durchblättern 44 DEUTSCH...
- Page 45 Abkürzungen Hinweistafel: Um die Hinweistafel zu öffnen, berühren Sie die schwarze Hinweisbarre auf der oberen Seite des Bildschirmes und ziehen Sie sie nach unten. Wenn nicht mehr nötig, schieben Sie sie wieder nach oben. Durch diese Hinweistafel haben Sie Zugang zu Benachrichtigungen von den USIM Karten den 12 Verwaltungs- und Einstellungs-Widgets.
- Page 46 USIM Verwaltung Im Hauptmenü wählen Sie Einstellungen > Drahtlos&Netzwerke: SIM Verwaltung. Um in jedem Moment beliebig die USIM Karten zu aktivieren oder deaktivieren, wählen Sie den Betreibernamen der gewünschten USIM Karte. Wenn Sie die USIM1 und/oder USIM2 Icons direkt wählen, öffnen Sie ein Menü in dem Sie den USIM Karten die Hintergrundfarbe zuteilen können.
- Page 47 Kontakte verwalten Hinweis: Im Kontextuellen Menü des Einen neuen Kontakt hinzufügen: Telefonbuchs haben Sie Zugang zu den Importieren/Exportieren-Funktionen und Im Hauptmenü wählen Sie Kontakte. zu weiteren nützlichen Menü-Funktionen. Wählen Sie das Icon mit dem „+“ Symbol. Wählen Sie den Speicherort aus (Telefon oder USIM Karten) Geben Sie Namen und Nummer und eventuelle andere Details ein (wenn Sie auf Telefon speichern) und bestätigen Sie die Speicherung mit Fertig.
- Page 48 SMS e MMS lesen und schreiben SMS und MMS versenden: Aus dem Hauptmenü oder Hauptbildschirm heraus wählen Sie Mitteilungen und dann das Icon mit dem „+“-Symbol. Wählen Sie direkt die Empfängernummer ein oder berühren Sie das Kontakte-Icon um den Empfänger aus den Kontakten zu wählen. Geben Sie den Text in das dedizierte Rechteck mit der virtuellen Tastatur ein.
- Page 49 Internetverbindung mit WiFi®: Um WiFi zu aktivieren, wählen Sie Ein/Aus in Einstellungen > Drahtlos & Netzwerke: WiFi. Wenn Sie WiFi drücken, öffnen Sie die WiFi-Direkt-Einstellungen, wo alle Parameter festgelegt werden können. Folgen Sie immer allen Hinweisen und Warnungen wenn Sie sich in solchen Bereichen befinden, in denen der Gebrauch von Wireless Geräten verboten ist, sowie zum Beispiel auf Flugzeugen oder in Krankenhäusern.
- Page 50 Wörterbuch, das Vokabeln auch aus anderen Telefonanwendungen ergreift, wie zum Beispiel das Telefonbuch oder die Sozialnetzwerke. Um korrekt zu funktionieren, muss eine Micro-SD Speicherkarte korrekt im Telefon installiert werden. Um die Parameter zu ändern, wählen Sie Einstellungen > Persönlich: Sprache & Eingabe > SwiftKey for NGM-Mobile 50 DEUTSCH...
- Page 51 Verbindung für das Download der Vorhersagen der Satellitenumlaufbahnen). Um Ressourcen zu sparen (Akku und Speicher), ist es ratsam, diese Funktion auszuschalten wenn sie nicht nötig ist. Das Telefon beinhaltet das NGM NAVIGATION SYSTEM© Sprach- Navigationssystem, im Hauptmenü verfügbar. Für weitere Details sehen Sie bitte www.ngm.eu.
- Page 52 Betriebssystemen abhängig. Der Hersteller übernimmt keine Verantwortung für die Nicht- Einhaltung der angegebenen Richtlinien oder den nicht ordnungsgemäßen Gebrauch des Mobiltelefons. NGM behält sich das Recht vor, Änderungen am Inhalt dieser Bedienungsanleitung auch ohne öffentliche Bekanntgabe vorzunehmen. Der Inhalt dieser Anleitung kann vom tatsächlichen, im Mobiltelefon angezeigten, Inhalt abweichen.
-
Page 53: Guía Rápida - Español
Guía rápida - Español ESPAÑOL... - Page 54 único y elegante dispositivo. Con respecto a los Smartphones mono SIM que están en el mercado, NGM WeMove Wilco ofrece la comodidad del DUAL SIM, que desde siempre caracteriza le entera gama de los teléfonos NGM, es decir, la posibilidad de gestionar dos SIMs al mismo tiempo configurando la SIM preferida para llamadas, llamadas de vídeo y conexión datos;...
- Page 55 El slot USIM 1 soporta USIM WCDMA. Introducir la tarjeta de memoria: Para disfrutar de todas las funciones NGM WeMove Wilco, se recomienda utilizar una micro-SD: la micro-SD se coloca en la parte posterior del teléfono después de haber quitado la carcasa posterior y la batería.
- Page 56 Este móvil está dotado de una batería de iones de litio y diseñado para un uso exclusivo de batería y accesorios originales NGM. La batería se coloca en la parte posterior del teléfono. Alinear las placas doradas de la batería con los conectores situados en la parte superior del hueco de la batería, a continuación, deslizar la batería en esta posición.
- Page 57 Atención: No conectar el teléfono a un ordenador que se está encendiendo o apagando para evitar cambios de tensión. Se recomienda utilizar el cargador original NGM. Proceder con la carga exclusivamente en un lugar abierto y seco. Un ligero calentamiento del teléfono durante el proceso de carga es normal.
- Page 58 Cámara frontal Sensores luminosidad y proximidad Cámara posterior y Flash Conector Receptor Micro USB Entrada auricular Volumen “+” y “-“ Tecla On/Off y Standby Touch screen capacitivo Menú contextual Micrófono Tecla Home Tecla Atrás Altavoz 58 ESPAÑOL...
- Page 59 Pantalla de Standby La Pantalla principal Controlar el touch screen tocándolo, teniéndolo pulsado o arrastrando el dedo por la pantalla. La pantalla principal es el punto de partida para la utilización de todas las aplicaciones del teléfono móvil. Las otras páginas se encuentran al lado de la principal, para acceder a ellas, desplazar la pantalla hacia la derecha/izquierda.
-
Page 60: Pantalla Principal
Pantalla Principal Menú Principal Intensidad señal USIM y nivel batería Panel de notificación Barra indicador páginas Mensajes Internet Menú Principal Agenda Menú llamada Desplazamiento pantalla HOME Desplazamiento Menú 60 ESPAÑOL... - Page 61 Opciones directas Panel de notificación: para abrir el panel de notificación, tocar el área de los iconos situados en la parte alta de la pantalla y arrastrar el dedo hacia abajo. Para esconder el panel, arrastrar hacia arriba la parte baja del panel o tocar la tecla Atrás. Desde el panel de notificación se puede acceder a la lista de notificaciones procedentes de las USIMs o del sistema y, en la parte alta, a los 12 widgets de gestión.
- Page 62 Gestionar las dos USIMs En el menú principal, seleccionar Configuración > Inalámbrico y Redes “Adm. tarjeta SIM”. Seleccionar las teclas no/sí al lado de los operadores telefónicos correspondientes a “USIM1” y “USIM2” para activar o desactivar selectivamente las USIMs en cualquier momento.
- Page 63 Gestionar contactos Nota: En el menú contextual de la agenda se tiene acceso a las funciones Añadir un nuevo contacto: importación/exportación Desde el menú principal, seleccionar Contactos. contactos y varias configuraciones útiles Pulsar el icono con el símbolo “+”. Elegir dónde se quiere guardar el nuevo contacto (teléfono, USIM1 o USIM2). Introducir Nombre, Teléfono y otros datos del contacto.
- Page 64 Enviar y leer SMS y MMS Enviar SMS y MMS: Desde la página o desde el menú principal, elegir Mensajes y pulsar el icono con el símbolo “+” para acceder a la pantalla de introducción texto. Digitar las primeras letras de un nombre en la sección destinatario para buscar un contacto y seleccionarlo de la lista pop-up o introducir directamente el número del destinatario o pulsar el icono con la “+”...
- Page 65 Conectarse a Internet con la función Wi-Fi®: Podéis conectaros a la red wireless utilizando la función WiFi. Para activarla, seleccionar Configuración > WiFi no/sí. Prestar atención a todas las advertencias e indicaciones específicas del personal autorizado cuando os encontráis en áreas donde el uso de los dispositivos wireless está...
- Page 66 Para un correcto funcionamiento del diccionario, es necesario instalar en el teléfono una micro-SD. Para cambiar los parámetros de introducción del texto, seleccionar, Configuración > Personal “Idioma y entrada” > SwiftKey for NGM. 66 ESPAÑOL...
- Page 67 órbitas de los satélites). Para limitar el consumo de batería y memoria se recomienda desactivar esta función cuando no se utiliza. El teléfono incorpora el sistema © satelitario NGM NAVIGATION SYSTEM preinstalado. Para más información sobre el funcionamiento del sistema visitar el sitio Web www.ngm.eu. ESPAÑOL...
- Page 68 Ninguna parte de esta publicación puede ser extraída, reproducida, traducida o utilizada de cualquier forma o en cualquier medio, electrónico o mecánico, incluido fotocopias y microfilm, sin previa autorización escrita por la NGM Italia. Bluetooth® es una marca comercial registrada en todo el mundo del Bluetooth SIG, Inc.
-
Page 69: Guide Rapide - Français
Guide rapide - Français FRANÇAIS... - Page 70 élégant dispositif. Par rapport aux Smartphones mono SIM sur le marché, NGM WeMove Wilco offre la commodité du DUAL SIM, qui depuis toujours caractérise l’entière gamme des téléphones NGM, ou la possibilité de gérer deux SIM en même temps en configurant la SIM prédéfinie pour les appels, appel vidéo et connexion...
- Page 71 Enlever la batterie. Insérer les cartes USIM dans les fentes respectives suivant le schéma d’insertion reporté ci-dessous. La fente USIM 1 support USIM WCDMA. Introduire la carte mémoire: Pour utiliser toutes les fonctions de NGM WeMove Wilco, il est conseillé l’utilisation d’une carte micro–SD: la carte doit être reliée à...
- Page 72 à ions de lithium et est projeté pour l‘utilisation exclusive de batterie et accessoires originaux NGM. La batterie va reliée à la partie postérieure du téléphone. Insérez la batterie dans le compartiment batterie avec les contacts retournes vers le haut, en correspondance avec ceux du téléphone.
- Page 73 éviter baisses de tension. Pour préserver le bon fonctionnement du produit et l’intégrité de la garantie nous recommandons l’utilisation du chargeur originale NGM. Procédez au rechargement en lieu couvert et sec. Un léger réchauffement du téléphone pendant le processus de rechargement est normal. La batterie atteindra son efficacité...
- Page 74 Releveur luminosité et proximité App.photo frontal App. photo et Flash Connecteur Receveur Micro USB Entrée écouteur Volume “+” e “-“ Touche On/Off et Standby Écran tactile capacitif Menu instantanè Micro Touche retour Touche Home parleur 74 FRANÇAIS...
- Page 75 Affichage de Standby L’écran principal Utiliser l’écran tactile touchant, appuyant ou déplaçant le doigt sur l’écran. L’écran principal est le point de départ pour l’utilisation de toutes les applications du téléphone Touche et traine portable. D’autres pages se trouvent sur le côté par l’élément central rapport à...
-
Page 76: Affichage Principal
Affichage Principal Menu Principal Intensité signal USIM et niveau batterie Panneau notifications Barre indicateur pages Messages Internet Rubrique Menu Principal Menu Appel Parcourir Affichage HOME Parcourir Menu 76 FRANÇAIS... - Page 77 Choix rapide Panneau de notifications : pour ouvrir le panneau de notifications, touchez l’espace des icônes dans la partie haute de l‘écran et trainez le doigt vers le bas. Pour cacher le panneau trainez le doigt vers le haut la partie inférieure de la liste ou touchez la touche retour. Du panneau de notifications il est possible d’accéder à...
- Page 78 Gèrer les deux USIM Menu principale, selectionner Réglages > Sans fils et reseau : “Gestion SIM”. Selectioner les noms operateurs tèlèphoniques correspondants a “SIM1” et”SIM2” pour actionner ou désactionner en selectionnant à n importe quel moment les SIM. De ce menu il est aussi possible personnaliser la couleur à...
- Page 79 Note: dans menu instantané de la Gérer les contacts rubrique on peut accéder aux Ajouter un nouveau contact: fonctions d’importation/exportation Du menu principal, sélectionner icône contacts. des contacts et configurations utiles. Appuyer l’icône indiquée par le symbole“+“ sur la barre du bas. Choisir où...
- Page 80 Envoyer et lire SMS et MMS Envoyer et lire SMS et MMS : De la page ou du menu principal, choisir Messages et donc l’icône avec le “+”. Composer les premières lettres du nom dans le champs destinataire pour rechercher un contact et sélectionner le contact de la liste pop-up, ou introduire directement le numéro du destinataire ou appuyer sur l’icône«...
- Page 81 Se connecter à Internet avec la fonction Wi-Fi®: vous pouvez vous connectez au réseau sans fil en utilisant la fonction WiFi. Pour l’activer, du menu principale choisir Réglages > Sans fil et réseau ”WiFi”ON/OFF. Tenir compte de la notice et des indications spécifiées par le personnel autorisé...
- Page 82 Pour le fonctionnement correct du dictionnaire, il est nécessaire d’installer une micro-SD. Pour changer les paramètres d’insertion du texte, sélectionner Réglages > Langues et saisie > SwiftKey pour NGM-Mobile. 82 FRANÇAIS...
- Page 83 Pour limiter la consommation de batterie et mémoire, on conseille de désactiver le GPS quand pas utilisé. Le téléphone dispose d’un système de navigation NGM NAVIGATION SYSTEM© prédéfini. Pour plus de détails sur le fonctionnement visitez le site www.ngm.eu.
- Page 84 électronique ou mécanique, y compris photocopie, enregistrement ou sauvetage dans n’importe quelle archive d’informations ou système de piochage, sans autorisation écrite par NGM Italia. Bluetooth® est une marque commerciale enregistrée dans tout le monde de la Bluetooth SIG, Inc.
- Page 86 www.ngm.eu...