Télécharger Imprimer la page
Ryobi P2108 Manuel D'utilisation

Ryobi P2108 Manuel D'utilisation

Soufflante de 18 v one+

Publicité

Les langues disponibles

Les langues disponibles

Liens rapides

OPERATOR'S MANUAL
MANUEL D'UTILISATION
MANUAL DEL OPERADOR
18 VOLT ONE+
BLOWER
SOUFFLANTE DE 18 V ONE+
SOPLADORA DE 18 V ONE+
P2108
Your blower has been engineered and manufactured to our high standard for dependability, ease of operation, and operator
safety. When properly cared for, it will give you years of rugged, trouble-free performance.
WARNING:
before using this product.
Thank you for your purchase.
SAVE THIS MANUAL FOR FUTURE REFERENCE
Ce soufflante a été conçu et fabriqué conformément à nos strictes
normes de fiabilité, simplicité d'emploi et sécurité d'utilisation.
Correctement entretenu, cet outil vous donnera des années de
fonctionnement robuste et sans problème.
AVERTISSEMENT :
Pour réduire les risques de blessures, l'utilisateur doit lire et
veiller à bien comprendre le manuel d'utilisation avant d'employer
ce produit.
Merci de votre achat.
CONSERVER CE MANUEL POUR
FUTURE RÉFÉRENCE
To reduce the risk of injury, the user must read and understand the operator's manual
Su sopladora ha sido diseñado y fabricado de conformidad con
nuestras estrictas normas para brindar fiabilidad, facilidad de uso
y seguridad para el operador. Con el debido cuidado, le brindará
muchos años de sólido funcionamiento y sin problemas.
ADVERTENCIA:
Para reducir el riesgo de lesiones, el usuario debe leer y
comprender el manual del operador antes de usar este producto.
Le agradecemos su compra.
GUARDE ESTE MANUAL PARA
FUTURAS CONSULTAS

Publicité

loading

Sommaire des Matières pour Ryobi P2108

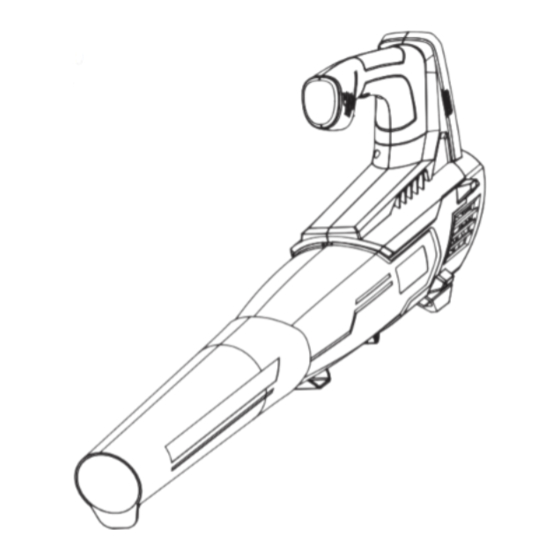
  • Page 1 SOUFFLANTE DE 18 V ONE+ SOPLADORA DE 18 V ONE+ P2108 Your blower has been engineered and manufactured to our high standard for dependability, ease of operation, and operator safety. When properly cared for, it will give you years of rugged, trouble-free performance.
  • Page 2 See this fold-out section for all of the figures referenced in the operator’s manual. Consulter l’encart à volets afin d’examiner toutes les figures mentionnées dans le manuel d’utilisation. Consulte esta sección desplegable para ver todas las figuras a las que se hace referencia en el manual del operador. Fig.
  • Page 3 Fig. 2 Fig. 4 A - Switch trigger (gâchette, gatillo) Fig. 5 PROPER OPERATING POSITION BONNE POSITION DE TRAVAIL POSICIÓN CORRECTA PARA EL MANEJO DE LA HERRAMIENTA C - Blower tube (tube de soufflante, tubo de la A - Tab (languette, orejeta) aspiradora) B - Blower housing outlet (prise de boîtier D - Slot (fente, ranura)
  • Page 4: Table Des Matières

    TABLE OF CONTENTS TABLE DES MATIÈRES / ÍNDICE DE CONTENIDO  Introduction..................................2 Introduction / Introducción  Important Safety Instructions ............................3-4 Règles de sécurité importantes / Instrucciones importantes de seguridad  Symbols ..................................5-6 Symboles / Símbolos  Features .................................... 6 Caractéristiques / Características ...
  • Page 5: Important Safety Instructions

    IMPORTANT SAFETY INSTRUCTIONS  Do not operate charger with a damaged cord or plug, When using an electrical appliance, basic precautions should always be followed, including the following: which could cause shorting and electric shock. If damaged, have the charger replaced by an authorized WARNING! service center.
  • Page 6 IMPORTANT SAFETY INSTRUCTIONS  Always wear safety glasses with side shields.  Check the work area before each use. Remove all Everyday glasses have only impact resistant lenses. They objects such as rocks, broken glass, nails, wire, or string are NOT safety glasses. Following this rule will reduce which can be thrown or become entangled in the machine.
  • Page 7: Symbols

    SYMBOLS The following signal words and meanings are intended to explain the levels of risk associated with this product. SYMBOL SIGNAL MEANING Indicates an imminently hazardous situation, which, if not avoided, will result DANGER: in death or serious injury. Indicates a potentially hazardous situation, which, if not avoided, could result WARNING: in death or serious injury.
  • Page 8: Features

    SYMBOLS Some of the following symbols may be used on this product. Please study them and learn their meaning. Proper inter- pretation of these symbols will allow you to operate the product better and safer. SYMBOL NAME DESIGNATION/EXPLANATION Volts Voltage Minutes Time Direct Current...
  • Page 9: Assembly

    ASSEMBLY UNPACKING WARNING: This product requires assembly.  Carefully remove the product and any accessories from Do not attempt to modify this product or create acces- the box. Make sure that all items listed in the packing list sories not recommended for use with this blower. Any are included.
  • Page 10: Operation

     Locate the latches on the side of the battery pack and depress both sides to release the battery pack from the This product will accept Ryobi One+ 18 V lithium-ion battery blower. packs and Ryobi One+ 18 V nickel-cadmium battery packs.
  • Page 11: Operating The Blower

    OPERATION OPERATING THE BLOWER  Watch out for children, pets, open windows, or freshly washed cars, and blow debris safely away. See Figure 5.  After using blowers or other equipment, CLEAN UP!  To keep from scattering debris, blow around the outer Dispose of debris properly.
  • Page 12: Warranty

    Straps, Guide Bars, Saw Chains purchase. Techtronic Industries North America, Inc., reserves the right  Three years if the product is used for personal, family to change or improve the design of any RYOBI brand ™ or household use;...
  • Page 13: Règles De Sécurité Importantes

    RÈGLES DE SÉCURITÉ IMPORTANTES En utilisant un appareil électrique, précautions fondamentales  Ne recharger qu’avec l’appareil indiqué. Pour utiliser avec toujours devraient être suivies, y compris le suivre : nickel-cadmium et lithium-ion bloc-piles de 18 V, consulter le supplément de raccordement pour chargeur/outils/piles/ AVERTISSEMENT ! appareil n˚...
  • Page 14 RÈGLES DE SÉCURITÉ IMPORTANTES  Ne pas faire fonctionner l’équipement pied nus ou en réparer l’outil avant de l’utiliser de nouveau. Beaucoup portant des sandales ou des chaussures légères similaires. d’accidents sont causés par des outils mal entretenus. Porter des chaussures de protection qui protègent les pieds et ...
  • Page 15 SYMBOLES Les termes de mise en garde suivants et leur signification ont pour but d’expliquer le degré de risques associé à l’utilisation de ce produit. SYMBOLE SIGNAL SIGNIFICATION Indique une situation extrêmement dangereuse qui, si elle n’est pas évitée, DANGER : aura pour conséquences des blessures graves ou mortelles.
  • Page 16: Poignée Surmoulés

    SYMBOLES Certains des symboles ci-dessous peuvent être utilisés sur produit. Veiller à les étudier et à apprendre leur signification. Une interprétation correcte de ces symboles permettra d’utiliser produit plus efficacement et de réduire les risques. SYMBOLE DÉSIGNATION / EXPLICATION Volts Tension Minutes Temps...
  • Page 17: Assemblage

    ASSEMBLAGE DÉBALLAGE AVERTISSEMENT : Ce produit nécessite l’assemblage.  Avec précaution, sortir le produit et les accessoires de la Ne pas essayer de modifier cet outil ou de créer des boîte. S’assurer que toutes les pièces figurant sur la liste accessoires non recommandés pour l’outil.
  • Page 18: Utilisation

    PROTECTION DES PILES au moment de transporter le soufflante afin d’éviter un Les piles au lithium ion de Ryobi sont conçues de manière à démarrage accidentel qui pourrait entraîner des blessures protéger les piles au lithium ion et à maximiser l’autonomie graves.
  • Page 19: Utilisation De La Soufflante

    UTILISATION UTILISATION DE LA SOUFFLANTE  Prêter attention aux enfants, animaux, fenêtres ouvertes ou véhicules fraîchement lavés et souffler les débris en Voir la figure 5. direction opposée.  Pour éviter d’éparpiller les débris, souffler autour des  Après utilisation de la soufflante ou de tout autre bords des tas.
  • Page 20: Énoncé De La Garantie Limitée

    Le produit, y compris toutes les pièces défectueuses devront AMERICA, INC., DANS LE CADRE DE CETTE GARANTIE être retournés à un centre de réparations Ryobi agréé, avant SE LIMITENT EXCLUSIVEMENT À LA RÉPARATION OU expiration de la période de garantie. Les frais d’expédition AU REMPLACEMENT DES PIÈCES DÉFECTUEUSES...
  • Page 21: Instrucciones Importantes De Seguridad

    INSTRUCCIONES IMPORTANTES DE SEGURIDAD Cuando se usa un electrodoméstico, las precauciones básicas  Cargue solamente con el cargador indicado. Para utilice siempre se deben seguir, inclusive lo siguiente: con baterías de níquel-cadmio y iones de litio de 18 V, consulte el folleto de la herramienta/aparato/paquete de baterías/ ¡ADVERTENCIA! cargador complementario 987000-432.
  • Page 22 INSTRUCCIONES IMPORTANTES DE SEGURIDAD a utilizarla. Numerosos accidentes son causados por  No accione el equipo cuando esté descalzo o al llevar sopladoras mal cuidadas. puestas sandalias o calzado liviano similar. Use calzado de seguridad que le proteja sus pies y mejore su postura en  Mantenga la sopladora y su mango secos, limpios y sin superficies resbaladizas.
  • Page 23 SÍMBOLOS Las siguientes palabras de señalización y sus significados tienen el objeto de explicar los niveles de riesgo relacionados con este producto. SÍMBOLO SEÑAL SIGNIFICADO Indica una situación peligrosa inminente, la cual, si no se evita, causará la PELIGRO: muerte o lesiones serias. Indica una situación peligrosa posible, la cual, si no se evita, podría causar ADVERTENCIA: la muerte o lesiones serias.
  • Page 24 SÍMBOLOS Es posible que se empleen en este producto algunos de los siguientes símbolos. Le suplicamos estudiarlos y aprender su significado. Una correcta interpretación de estos símbolos le permitirá utilizar mejor y de manera más segura el producto. SÍMBOLO NOMBRE DENOMINACIÓN/EXPLICACIÓN Volts Voltaje...
  • Page 25: Montaje De Los Tubos De La Sopladora

    ARMADO DESEMPAQUETADO ADVERTENCIA: Este producto requiere armado.  Extraiga cuidadosamente de la caja, el producto y los No intente modificar este producto ni hacer accesorios accesorios. Asegúrese de que estén presentes todos los no recomendados para la misma. Cualquier alteración o artículos enumerados en la lista de empaquetado.
  • Page 26  Mantener terrazas y caminos de entrada libres de recortes componentes internos. de hierba, hojas, agujas de pino y otros desechos del jardín Este producto acepta los paquetes de baterías Ryobi de iones Para el desmontaje: de litio de 18 V.
  • Page 27: Almacenamiento

    FUNCIONAMIENTO ENCENDIDO Y APAGADO DE LA  Conserve agua utilizando sopladores motorizados en lugar de mangueras para numerosos usos de jardinería, SOPLADORA incluso para canalones, pantallas, patios, parrillas, Vea la figura 4. porches y jardines.  Para arrancar la sopladora, oprima el gatillo del interruptor. ...
  • Page 28 O DE CUALQUIER TIPO, PIERDEN TOTALMENTE SU reparado o reemplazado por un centro de servicio autorizado VALIDEZ DESPUÉS DEL VENCIMIENTO DEL PERÍODO de herramientas para uso en el exterior de la marca RYOBI ™ DE GARANTÍA CORRESPONDIENTE DE CINCO AÑOS O sin cargo alguno al comprador por concepto de piezas y mano NOVENTA DÍAS.
  • Page 29 NOTES / NOTAS...
  • Page 30 CÓMO OBTENER PIEZAS DE REPUESTO: Una lista de piezas de repuesto está disponibles en línea en la dirección www.ryobitools.com. Las piezas de repuesto se RYOBI is a trademark of Ryobi Limited and is used pursuant to a license granted by Ryobi Limited.
  • Page 31 OPERATOR’S MANUAL MANUEL D’UTILISATION MANUAL DEL OPERADOR 18 VOLT STRING TRIMMER/EDGER 18 V TAILLE-BORDURES À LIGNE/COUPE-BORDURES 18 V RECORTADORA DE HILO/ RECORTADORA DE BORDES P2008 ACCEPTS ALL ONE+ BATTERY PACKS BATTERIES AND CHARGERS SOLD SEPARATELY COMPATIBLE AVEC TOUS LE BLOC-PILES ONE+ PILE ET CHARGEUR VENDUS SÉPARÉMENT ACEPTA TODOS LOS PAQUETES DE BATERÍAS ONE+ LAS BATERÍAS Y EL CARGADOR SE VENDEN POR SEPARADO...
  • Page 32 See this fold-out section for all the figures Fig. 5 referenced in the operator’s manual. Voir que cette section d’encart pour toutes les figures a adressé dans le manuel d’utilisation. Vea esta sección de la página desplegable para todas las figuras mencionó en el manual del operador. Fig.
  • Page 33 Fig. 8 Fig. 11 Fig. 15 PROPER EDGING OPERATING POSITION POSITION D’UTILISATION CORRECTE POUR COUPE-BORDURES POSICIÓN CORRECTA PARA EL MANEJO DE LA CORTAR BORDES A - Knob (bouton, perilla) Fig. 9 A - Line cut-off blade (lame coupe-ligne, cuchilla de corte) PROPER TRIMMER OPERATING POSITION B - Line (ligne, línea) TAILLE-BORDURE POSITION DE TRAVAIL...
  • Page 34: Garantie / Garantía

    TABLE OF CONTENTS TABLE DES MATIÈRES / ÍNDICE DE CONTENIDO  Introduction ..................................2 Introduction / Introducción  Important Safety Instructions ............................3-4 Instructions importantes concernant la securite / Instrucciones de seguidad importantes  Symbols .................................... 5 Symboles / Símbolos  Features .................................... 6 Caractéristiques / Características ...
  • Page 35: Important Safety Instructions

    IMPORTANT SAFETY INSTRUCTIONS  Avoid body contact with grounded surfaces such as pipes, WARNING! radiators, ranges, and refrigerators. There is an increased risk of electric shock if your body is grounded. When using electric gardening appliances, basic safety precautions should always be followed to reduce the risk  Avoid Dangerous Environments - Don’t expose appliance of fire, electric shock and personal injury.
  • Page 36 IMPORTANT SAFETY INSTRUCTIONS  Use only the manufacturer’s replacement line in the  Do not charge battery tool in rain, or damp or wet location. cutting head. Do not use any other cutting attachment, Following this rule will reduce the risk of electric shock. for example, metal wire, rope, or the like.
  • Page 37: Symbols

    SYMBOLS The following signal words and meanings are intended to explain the levels of risk associated with this product. SYMBOL SIGNAL MEANING Indicates an imminently hazardous situation, which, if not avoided, will result DANGER: in death or serious injury. Indicates a potentially hazardous situation, which, if not avoided, could result WARNING: in death or serious injury.
  • Page 38: Features

    FEATURES PRODUCT SPECIFICATIONS Motor ..............18 Volt DC Line Size ....0.065 in. diameter round or twisted or 0.080 in. diameter twisted Cutting Swath ..........11 in. / 13 in. KNOW YOUR STRING TRIMMER/EDGER HANDLE OVERMOLD See Figure 1. Handle overmold provides added user comfort. The safe use of this product requires an understanding of LOCK-OUT BUTTON the information on the tool and in this operator’s manual as...
  • Page 39: Tools Needed

    ASSEMBLY  Remove the battery pack if installed. WARNING:  Align the arrows on the string trimmer/edger attachment and the power head. Insert the plug on the string trimmer/ Do not attempt to modify this product or create edger attachment into the opening on the power head accessories not recommended for use with this product.
  • Page 40: Operation

    ADJUSTABLE FRONT HANDLE This product will accept Ryobi One+ 18 V lithium-ion battery See Figure 8. packs and Ryobi One+ 18 V nickel-cadmium battery packs. The angle of the front handle can be adjusted 180°.
  • Page 41: Cutting Tips

    OPERATION ADVANCING THE LINE MANUALLY  Cut tall grass from the top down. This will prevent grass from wrapping around the boom housing and string head See Figure 12. which may cause damage from overheating.  Remove the battery pack. If grass becomes wrapped around the string head:  Push the black button located on the string head while  Remove the battery pack.
  • Page 42: Maintenance

    MAINTENANCE SPOOL REPLACEMENT See Figure 16. WARNING: Use only 0.065 in. diameter round or twisted or 0.080 in. When servicing, use only identical replacement parts. diameter twisted line. Use original manufacturer’s replacement Use of any other parts can create a hazard or cause line for best performance.
  • Page 43: Troubleshooting

    Make sure shaft trimmer is securely seated in the coupler completely. on the power head. CALL US FIRST For any questions about operating or maintaining your product, call the Ryobi Help Line! ™ Your product has been fully tested prior to shipment to ensure your complete satisfaction.
  • Page 44: Warranty

    The product, including any defective part, must be returned THE REPAIR OR REPLACEMENT OF DEFECTIVE PARTS to an authorized Ryobi service center within the warranty AND TECHTRONIC INDUSTRIES NORTH AMERICA, period. The expense of delivering the product to the service INC., DOES NOT ASSUME OR AUTHORIZE ANYONE...
  • Page 45: Instructions Importantes Concernant La Sécurité

    INSTRUCTIONS IMPORTANTES CONCERNANT LA SÉCURITÉ  Éviter tout contact du corps avec des surfaces mises à la terre, AVERTISSEMENT ! telles que tuyaux, radiateurs, cuisinières et réfrigérateurs. Le risque de choc électrique est accru lorsque le corps est mis Lors de l’utilisation d’outils de jardinage, toujours suivre à...
  • Page 46 INSTRUCTIONS IMPORTANTES CONCERNANT LA SÉCURITÉ  S’assurer que tous les dispositifs de protection, sangles,  Ne pas exposer le bloc-piles ou l’appareil près d’un incendie déflecteurs et poignées sont correctement installés et ou à une température extrême. L’exposition à un incendie ou solidement assujettis.
  • Page 47 SYMBOLES Les termes de mise en garde suivants et leur signification ont pour but d’expliquer le degré de risques associé à l’utilisation de ce produit. SYMBOLE SIGNAL SIGNIFICATION Indique une situation extrêmement dangereuse qui, si elle n’est pas évitée, DANGER : aura pour conséquences des blessures graves ou mortelles.
  • Page 48: Caractéristiques

    CARACTÉRISTIQUES FICHE TECHNIQUE Moteur ..............20 V C.C Diamètre de ligne......rond ou torsadé de 1,6 mm (0,065 po) de diamètre ou un fil monofilament torsadé de Largeur de coupe ....279 mm/330 mm (11 po/13 po) 2,0 mm (0,080 po) de diamètre VEILLER À...
  • Page 49: Outils Nécessaires

    ASSEMBLAGE L’accessoire se raccorde au bloc-moteur à l’aide d’un AVERTISSEMENT : dispositif de couplage.  Si est installé, retirer le bloc de piles. Ne pas essayer de modifier cet produit ou de créer des accessoires non recommandés pour l’produit. De ...
  • Page 50: Utilisation

    PROTECTION DES PILES Voir la figure 8. Les piles au lithium ion de Ryobi sont conçues de manière à La poignée avant peut être réglée à un angle de 180°. protéger les piles au lithium ion et à maximiser l’autonomie ...
  • Page 51: Utilisation Du Taille-Bordures

    UTILISATION UTILISATION DU TAILLE-BORDURES  Attendre deux secondes puis appuyer sur la gâchette. Voir la figure 9. NOTE : À chaque activation de la gâchette, la ligne Suivre ces conseils lors de l’utilisation de la tondeuse s’allongera de 6,35 mm (1/4 po) jusqu’à ce qu’elle soit de à...
  • Page 52: Remplacement De La Bobine

    ENTRETIEN REMPLACEMENT DE LA BOBINE AVERTISSEMENT : Voir la figure 16. Utiliser seulement un fil rond ou torsadé de 1,6 mm Utiliser exclusivement des pièces d’origine pour les répa- (0,065 po) de diamètre ou un fil monofilament torsadé de 2,0 rations.
  • Page 53: Dépannage

    NOUS APPELER D’ABORD Pour toute question concernant l’utilisation ou l’entretien utiliser ce Ryobi produit , appeler le service d’assistance téléphonique ™ Le taille-bordures à été entièrement testé avant expédition pour assurer la complète satisfaction de l’utilisateur.
  • Page 54: Énoncé De La Garantie Limitée

    Le produit, y compris toutes les pièces défectueuses devront AMERICA, INC., DANS LE CADRE DE CETTE GARANTIE être retournés à un centre de réparations Ryobi agréé, avant SE LIMITENT EXCLUSIVEMENT À LA RÉPARATION OU expiration de la période de garantie. Les frais d’expédition AU REMPLACEMENT DES PIÈCES DÉFECTUEUSES...
  • Page 55: Instrucciones De Seguridad Importantes

    INSTRUCCIONES DE SEGURIDAD IMPORTANTES  Evite el contacto del cuerpo con objetos conectados a tierra, ¡ADVERTENCIA! como las tuberías, radiadores, estufas y refrigeradores. Existe un mayor riesgo de descargas eléctricas si el cuerpo está en Al utilizar herramientas eléctricas para el cuidado del jardín, contacto con tierra.
  • Page 56 INSTRUCCIONES DE SEGURIDAD IMPORTANTES  Asegúrese de que todas las protecciones, correas,  No exponga el paquete de baterías o el artefacto al fuego deflectores y mangos estén firme y correctamente instalados. o a temperaturas excesivas La exposición al fuego o a temperaturas sobre los 130 ºC (265 ºF) puede provocar ...
  • Page 57 SÍMBOLOS Las siguientes palabras de señalización y sus significados tienen el objeto de explicar los niveles de riesgo relacionados con este producto. SÍMBOLO SEÑAL SIGNIFICADO Indica una situación peligrosa inminente, la cual, si no se evita, causará PELIGRO: la muerte o lesiones serias. Indica una situación peligrosa posible, la cual, si no se evita, podría causar ADVERTENCIA: la muerte o lesiones serias.
  • Page 58: Características

    CARACTERÍSTICAS ESPECIFICACIONES Motor ..............18 V c.c. Diámetro del hilo ....monofilamento redonda o trenzada con un diámetro de 1,6 mm (0,065 pulg.) o trenzada con Ancho de corte ... 279 mm/330 mm (11 pulg./13 pulg.) un diámetro de 2 mm (0,080 pulg.) FAMILIARÍCESE CON SU RECORTADORA DE SOBREMOLDEADO MANGO HILO/RECORTADORA DE BORDES...
  • Page 59: Herramientas Necesarias

    ARMADO El aditamento se conecta al cabezal motor mediante un dispositivo acoplador. ADVERTENCIA:  Si está instalado, retire el paquete de baterías. Si hay piezas dañadas o faltantes, no utilice esta producto sin haber reemplazado las piezas dañadas o  Alinee las flechas del accesorio de la recortadora de faltantes.
  • Page 60  Seleccione la velocidad de funcionamiento deseada (ALTA Este producto acepta los paquetes de baterías Ryobi One+ o BAJA). de iones de litio de 18 V y los paquetes de baterías Ryobi  Oprima y no suelte el botón del seguro. One+ de níquel-cadmio de 18 V.
  • Page 61 FUNCIONAMIENTO MANEJO DE LA RECORTADORA DE HILO  Espere dos segundos y oprima el gatillo del interruptor. Vea la figura 9. NOTA: El hilo se extiende aproximadamente 6,35 mm Siga las siguientes recomendaciones a manejar la (1/4 pulg.) cada vez que se apaga y enciende el gatillo recortadora de hilo: del interruptor hasta que el hilo alcanza la longitud de la cuchilla de corte del deflector de pasto.
  • Page 62 MANTENIMIENTO REEMPLAZO DEL CARRETE Vea la figura 16. ADVERTENCIA: Use únicamente línea monofilamento redonda o trenzada Al dar servicio a la unidad, sólo utilice piezas de repuesto con un diámetro de 1,6 mm (0,065 pulg.) o trenzada con un idénticas. El empleo de piezas diferentes podría causar diámetro de 2 mm (0,080 pulg.).
  • Page 63: Corrección De Problemas

    LLÁMENOS PRIMERO Si tiene preguntas sobre el funcionamiento o el mantenimiento este Ryobi producto,llame al teléfono de atención al consumidor de ™ La recortadora ha sido probada enteramente antes de embarcarse para asegurar la satisfacción del consumidor.
  • Page 64 O DE CUALQUIER TIPO, PIERDEN TOTALMENTE SU reparado o reemplazado por un centro de servicio autorizado VALIDEZ DESPUÉS DEL VENCIMIENTO DEL PERÍODO de herramientas para uso en el exterior de la marca RYOBI ™ DE GARANTÍA CORRESPONDIENTE DE TRES AÑOS O sin cargo alguno al comprador por concepto de piezas y mano NOVENTA DÍAS.
  • Page 65 NOTES / NOTAS...
  • Page 66 NOTES / NOTAS...
  • Page 67 NOTES / NOTAS...
  • Page 68 1-800-860-4050. Las piezas de repuesto también se pueden obtener en uno de nuestros Centros de Servicio Autorizados. RYOBI is a trademark of Ryobi Limited and is used pursuant to a license granted by Ryobi Limited.
  • Page 69 OPERATOR’S MANUAL MANUEL D’UTILISATION MANUAL DEL OPERADOR 18 VOLT CHAIN SAW SCIE À CHAÎNE DE 18 V MOTOSIERRA DE 18 V P548 Your chain saw has been engineered and manufactured to our high standard for dependability, ease of operation, and operator safety.
  • Page 70: Garantie / Garantía

    TABLE OF CONTENTS TABLE DES MATIÈRES / ÍNDICE DE CONTENIDO  Introduction ............................2 Introduction / Introducción  General Power Tool Safety Warnings .................... 3-4 Avertissements règles de sécurité relatives aux outils électriques / Advertencias de seguridad para herramientas eléctricas  Chain Saw Safety Warnings ......................5-9 Avertissements de sécurité...
  • Page 71: General Power Tool Safety Warnings

    GENERAL POWER TOOL SAFETY WARNINGS Use of a cord suitable for outdoor use reduces WARNING the risk of electric shock.  If operating a power tool in a damp location Read all safety warnings and all instructions. is unavoidable, use a ground fault circuit Failure to follow the warnings and instructions interrupter (GFCI) protected supply.
  • Page 72 GENERAL POWER TOOL SAFETY WARNINGS POWER TOOL USE AND CARE BATTERY TOOL USE AND CARE  Do not force the power tool. Use the correct  Recharge only with the charger specified by power tool for your application. The correct the manufacturer.
  • Page 73: Chain Saw Safety Warnings

    CHAIN SAW SAFETY WARNINGS  Keep all parts of the body away from the Proper handling of the chain saw will reduce the saw chain when the chain saw is operating. likelihood of accidental contact with the moving Before you start the chain saw, make sure saw chain.
  • Page 74 CHAIN SAW SAFETY WARNINGS hearing and head protection when operating  Do not overreach and do not cut above this equipment. shoulder height. This helps prevent unintended tip contact and enables better control of the  Always be aware of what you are doing when chain saw in unexpected situations.
  • Page 75 CHAIN SAW SAFETY WARNINGS  Check for damaged parts. Check for alignment  Do not force the chain saw. The job can be of moving parts, binding of moving parts, performed better and safer at the rate for which breakage of parts, mounting, and any other it was intended.
  • Page 76 CHAIN SAW SAFETY WARNINGS KICKBACK ROTATIONAL See Figures 1 - 3. KICKBACK  WARNING: Kickback may occur when the moving chain contacts an object at the upper portion of the tip of the guide bar or when the wood closes in and pinches the saw chain in the cut.
  • Page 77 CHAIN SAW SAFETY WARNINGS Low kickback saw chain is chain that has met  Keep proper footing and balance at all times. the kickback performance requirements of ANSI  Do not cut above chest height or overreach B175.1 (American National Standard for Power when cutting.
  • Page 78: Symbols

    SYMBOLS The following signal words and meanings are intended to explain the levels of risk associated with this product. SYMBOL SIGNAL MEANING Indicates a hazardous situation, which, if not avoided, will result DANGER: in death or serious injury. Indicates a hazardous situation, which, if not avoided, could WARNING: result in death or serious injury.
  • Page 79 SYMBOLS Some of the following symbols may be used on this product. Please study them and learn their meaning. Proper interpretation of these symbols will allow you to operate the product better and safer. SYMBOL NAME DESIGNATION/EXPLANATION Kickback DANGER! BEWARE OF KICKBACK. Bar Nose Contact Avoid bar nose contact.
  • Page 80: Glossary Of Terms

    GLOSSARY OF TERMS Bucking Lock-out Button The process of cross cutting a felled tree or log A movable stop that prevents the unintentional into lengths. operation of the switch until manually actuated. Chain Saw Powerhead Low-Kickback Chain A chain saw without the saw chain and guide bar. A chain that complies with the kickback performance requirements of ANSI B175.1 when Drive Sprocket or Sprocket...
  • Page 81: Product Specifications

    FEATURES PRODUCT SPECIFICATIONS Motor ............................18 Volt DC Bar Length ............................12 in. Chain oil tank capacity ........................6.8 oz. NOTE: This saw was designed for occasional light duty use and has some limitations as to what it can cut. BATTERY PORT FRONT HAND GUARD CHAIN...
  • Page 82: Features

    FEATURES KNOW YOUR CHAIN SAW LOCK-OUT BUTTON See Figure 4. A control feature designed to prevent the motor The safe use of this product requires an from being accidently started. understanding of the information on the product and LOW KICKBACK SAW CHAIN in this operator’s manual as well as a knowledge The low kickback saw chain helps minimize the of the project you are attempting.
  • Page 83: Assembly

    ASSEMBLY UNPACKING WARNING: This product has been shipped completely If any parts are damaged or missing do not assembled. operate this product until the parts are replaced.  Carefully remove the product and any Use of this product with damaged or missing accessories from the box.
  • Page 84: Applications

    You may use this product for the following purposes:  Limbing and pruning branches from trees  Felling small trees  Bucking the fallen tree into shorter lengths LATCH This product will accept RYOBI ONE+ 18 V ™ ™ lithium-ion battery packs and RYOBI...
  • Page 85 Failure to lubricate the chain will cause damage to the bar and chain. CHAIN OIL  Use RYOBI Bar and Chain Lubricant. It is formu- TANK CAP lated to perform over a wide temperature range with no dilution required.
  • Page 86 OPERATION STARTING AND STOPPING THE CHAIN See Figure 7. WARNING: Keep body to the left of the chain line. Never straddle the saw or chain, or lean over past the LOCK-OUT BUTTON chain line. SWITCH Starting the chain saw: TRIGGER ...
  • Page 87 OPERATION PREPARATION FOR CUTTING PROPER GRIP ON HANDLES See Figures 8 - 10. Refer to Chain Saw Safety Warnings earlier in this manual for appropriate safety equipment.  Wear non-slip gloves for maximum grip and protection.  Hold the saw firmly with both hands. Always keep your left hand on the front handle and your right hand on the rear handle so that your body is to the left of the chain line.
  • Page 88 OPERATION PROPER CUTTING STANCE See Figure 11 - 12. WARNING: Alway use the proper cutting stance described in this section. Never kneel when using the chain saw except when felling a tree as shown STRAIGHT ARM CHAIN LINE POSITION in figure 12. Kneeling could result in loss of sta- bility and control of the saw resulting in serious personal injury.
  • Page 89: Felling Trees

    OPERATION  Do not fell trees near electrical wires or build- ings. Leave this operation for professionals.  Cut only when visibility and light are adequate for you to see clearly. FELLING TREES See Figures 13 - 16. HAZARDOUS CONDITIONS 45°...
  • Page 90 OPERATION will fall. Do not try to fell a tree along a line dif- ferent from its natural line of fall.  The chain saw operator should keep on the HINGE uphill side of the terrain as the tree is likely to 2 in.
  • Page 91 OPERATION REMOVING BUTTRESS ROOTS See Figure 17. A buttress root is a large root extending from the trunk of the tree above the ground. Remove large buttress roots prior to felling. Make the horizontal VERTICAL cut into the buttress first, followed by the vertical cut.
  • Page 92 OPERATION BUCKING LOGS UNDER STRESS LOG SUPPORTED AT ONE END: See Figures 20 - 21. LOAD When the log is supported along its entire length, it should be cut from the top or overbucking. FINISHING CUT When the log is supported on one end, cut 1/3 the diameter from the underside or underbuck- ing.
  • Page 93 OPERATION Limbing is removing branches from a fallen tree.  Work slowly, keeping both hands on the chain saw with a firm grip. Always make sure your footing is secure and your weight is distributed evenly on both feet.  Leave the larger support limbs under the tree to keep the tree off the ground while cutting.
  • Page 94: Maintenance

    MAINTENANCE WARNING: WARNING: To avoid serious personal injury, always remove Do not at any time let brake fluids, gasoline, the battery pack from the product when clean- petroleum-based products, penetrating oils, ing or performing any maintenance. etc., come in contact with plastic parts. Chemicals can damage, weaken or destroy plastic which could result in serious personal WARNING:...
  • Page 95 MAINTENANCE  Remove the battery pack before you do any  Install the chain tension assembly on the new work on the chain saw. bar by inserting the tab into one bar hole and  Rotate the chain cover lock knob counterclock- installing the screw through the other.
  • Page 96 MAINTENANCE  Hold the chain in position on the bar and place  Release the tip of the guide bar and turn the the loop around the sprocket. chain tensioning knob 1/2 turn clockwise. Repeat this process until sag does not exist. ...
  • Page 97: Adjusting The Chain Tension

    MAINTENANCE ADJUSTING THE CHAIN TENSION Use only low-kickback chain on this saw. This fast-cutting chain will provide kickback reduction See Figures 34 - 35. when properly maintained. For smooth and fast cutting, chain needs to be WARNING: maintained properly. Stop the motor and remove the battery pack. The chain requires sharpening when the wood chips Never touch or adjust the chain while the motor are small and powdery, the chain must be forced...
  • Page 98 NOTE: If you do not fully understand the correct procedure for sharpening the chain after read- ing the instructions that follow, have the saw chain sharpened by a Ryobi Service dealer or Fig. 37 replace with a recommended low-kickback chain.
  • Page 99 MAINTENANCE TOP PLATE FILING ANGLE CORRECT TOP PLATE INCORRECT TOP PLATE FILING See Figure 41. FILING ANGLE ANGLE  CORRECT 30° - File holders are marked with LESS MORE guide marks to align file properly to produce THAN 30° THAN 30° 30°...
  • Page 100: Maintaining The Guide Bar

    MAINTENANCE MAINTAINING THE GUIDE BAR TRANSPORTING AND STORING See Figure 46. When the guide bar shows signs of wear, reverse  Do not store or transport the chain saw when it on the saw to distribute the wear for maximum it is running.
  • Page 101: Troubleshooting

    CALL US FIRST For any questions about operating or maintaining your product, call the RYOBI Help Line! ® Your product has been fully tested prior to shipment to ensure your complete satisfaction.
  • Page 102: Warranty

    Straps, Guide Bars, Saw Chains purchase. Techtronic Industries North America, Inc., reserves the  Three years if the product is used for personal, family right to change or improve the design of any RYOBI brand ® or household use;...
  • Page 103: Avertissements Règles De Sécurité Relatives Aux Outils Électriques

    AVERTISSEMENTS RÈGLES DE SÉCURITÉ RELATIVES AUX OUTILS ÉLECTRIQUES  Ne pas maltraiter le cordon d’alimentation. Ne AVERTISSEMENT jamais utiliser le cordon d’alimentation pour Lire tous les avertissements et toutes transporter l’outil et ne jamais débrancher les instructions. Ne pas suivre l’ensemble ce dernier en tirant sur le cordon.
  • Page 104: Utilisation Et Entretien Des Outils Électriques

    AVERTISSEMENTS RÈGLES DE SÉCURITÉ RELATIVES AUX OUTILS ÉLECTRIQUES  Porter une tenue appropriée. Ne porter ni  Utiliser l’outil, les accessoires et embouts, vêtements amples, ni bijoux. Garder les etc. conformément à ces instrutions pour cheveux, les vêtements et les gants à l’écart les applications pour lesquelles ils sont des pièces en mouvement.
  • Page 105: Avertissements De Sécurité Relatifs Au Scie À Chaîne

    AVERTISSEMENTS DE SÉCURITÉ RELATIFS AU SCIE À CHAÎNE  Éloigner toutes les parties du corps de la scie à  Transporter la scie à chaîne par la poignée chaîne pendant que cette dernière fonctionne. avant, avec l’interrupteur positionné à éteint Avant de démarrer la scie à...
  • Page 106 AVERTISSEMENTS DE SÉCURITÉ RELATIFS AU SCIE À CHAÎNE des jambières en tissu résistant ou dotés de Le rebond est causé par une utilisation et/ou des pièces résistantes aux coupures. Porter des méthodes de travail incorrectes et il peut être évité chaussures de sécurité...
  • Page 107 AVERTISSEMENTS DE SÉCURITÉ RELATIFS AU SCIE À CHAÎNE  Entretenir soigneusement l’outil. Garder  Ne pas couper de lianes ou de petites l’outil bien affûté et propre, pour obtenir des broussailles. performances optimales et réduire les risques  Ne pas travailler en se tenant dans un arbre, d’accident.
  • Page 108 AVERTISSEMENTS DE SÉCURITÉ RELATIFS AU SCIE À CHAÎNE REBOND Voir les figures 1 à 3. REBOND ROTATIF  AVERTISSEMENT : Le rebond se produit lorsque la chaîne en rotation heurte un objet dans la partie supérieure de l’extrémité du guide ou lorsque l’entaille du bois se referme et pince la chaîne dans le bois.
  • Page 109: Compréhension Des Dispositifs De Sécurité De La Scie À Chaîne Chaîne À Rebond Réduit

    AVERTISSEMENTS DE SÉCURITÉ RELATIFS AU SCIE À CHAÎNE rebond. Utiliser exclusivement les guides et mordre trop profondément dans la zone de rebond. chaînes à faible rebond spécifiés par le fab- Utiliser exclusivement des chaînes de rechange ricant pour la scie. équivalentes à...
  • Page 110 SYMBOLES Les termes de mise en garde suivants et leur signification ont pour but d’expliquer le degré de risques associé à l’utilisation de ce produit. SYMBOLE SIGNAL SIGNIFICATION Indique une situation dangereuse qui, si elle n’est pas évitée, DANGER : aura pour conséquences des blessures graves ou mortelles.
  • Page 111 SYMBOLES Certains des symboles ci-dessous peuvent être utilisés sur ce produit. Veiller à les étudier et à apprendre leur signification. Une interprétation correcte de ces symboles permettra d’utiliser ce produit plus efficace- ment et de réduire les risques. SYMBOLE DÉSIGNATION / EXPLICATION Rebond DANGER ! ATTENTION AUX REBONDS.
  • Page 112: Glossaire

    GLOSSAIRE Tronçonnage Bouton de verrouillage de gâchette Coupe transversale d’un arbre abattu ou d’une Butée articulée empêchant d’actionner bille de bois pour le débiter en tronçons. accidentellement le commutateur tant qu’il n’est pas manuellement actionné. Bloc moteur de scie à chaîne Chaîne à...
  • Page 113: Caractéristiques

    CARACTÉRISTIQUES FICHE TECHNIQUE Moteur ............................18 V c.c. Longueur du guide ...................... 304,8 mm (12 po) Volume du réservoir de lubrifiant de chaîne ..............200 ml (6,8 oz) NOTE : Cette scie est conçue pour des travaux occasionnels légers et sa capacité de coupe présente certaines limites.
  • Page 114: Bouton De Verrouillage De Gâchette

    CARACTÉRISTIQUES POUR SE FAMILIARISER AVEC LA SCIE BOUTON DE VERROUILLAGE DE À CHAÎNE GÂCHETTE Voir la figure 4. Une fonction de commande permettant d’empêcher de démarrer le moteur accidentellement. L’utilisation sûre de ce produit exige une comprehension des renseignements figurant sur CHAÎNE À...
  • Page 115: Assemblage

    ASSEMBLAGE DÉBALLAGE AVERTISSEMENT : Ce produit a été expédié complètement assemblé. Si des pièces manquent ou sont endommagées,  Avec précaution, sortir le produit et les accessoires ne pas utiliser ce produit avant qu’elles aient été de la boîte. S’assurer que toutes les pièces remplacées.
  • Page 116: Applications

     Ébranchage et émondage LOGEMENT  Abattage d’arbustes DE PILES  Tronçonnage des arbres abattus Ce produit est compatible avec les piles 18 V au lithium-ion et au nickel cadmium de RYOBI ONE+ ™ ™ LOQUETS Pour prendre connaissance de l’ensemble des instructions relatives à...
  • Page 117: Système De Lubrification De La Chaîne

    à environ 1,27 mm (0,050 po) de la rainure du guide.  Utiliser de la lubrifiant RYOBI pour guide et chaîne. Pour bien ajuster la tension de la chaîne, consulter Cette lubrifiant est formulée pour fonctionner dans les instructions Ajuster la tension de la chaîne...
  • Page 118: Démarrage Et Arrêt De La Scie Àchaîne

    UTILISATION DÉMARRAGE ET ARRÊT DE LA SCIE À CHAÎNE Voir la figure 7. AVERTISSEMENT : Garder le corps à droite de la ligne de chaîne. Ne jamais chevaucher la scie ou la chaîne ou se BOUTON DE pencher au-delà de la ligne de chaîne. VERROUILLAGE DE GÂCHETTE Démarrage de la scie à...
  • Page 119: Préparation Pour La Coupe Saisir Correctement Les Deux Poignées

    UTILISATION PRÉPARATION POUR LA COUPE SAISIR CORRECTEMENT LES DEUX POIGNÉES Voir les figures 8 á 10. Voir Avertissements de sécurité relatifs au scie à chaîne, plus haut dans ce manuel, pour des informations détaillées au sujet de l’équipement de sécurité. ...
  • Page 120: Position De Coupe Correcte

    UTILISATION POSITION DE COUPE CORRECTE Voir les figures 11 et 12. AVERTISSEMENT : Toujours, employer une position de coupe LIGNE DE BRAS TENDU adéquate comme décrite dans ce chapitre. Ne CHAÎNE jamais s’agenouiller pendant l’utilisation de la scie à chaîne sauf pour abattre un arbre comme démontré...
  • Page 121: Abattage D'arbres

    UTILISATION  Toujours couper avec les deux pieds posés sur un sol ferme pour éviter toute perte d’équilibre.  Ne pas couper au-dessus du niveau de la poitrine, car il est difficile de contrôler une scie maintenue plus haut en cas de rebond. ...
  • Page 122 UTILISATION prévue. Lorsque l’arbre commence à tomber, il faut s’écarter de la ligne de chute et suivre le chemin d’échappement et s’éloigner d’au moins 6 m (20 pi) du tronc au cas où l’arbre rebondirait CHARNIÈRE, 51 mm (2 po) OU 1/10 ÈME DU DIAMÈTRE sur la souche.
  • Page 123: Élimination Des Racines Échasses

    UTILISATION ÉLIMINATION DES RACINES ÉCHASSES Voir la figure 17. Une racine échasse est une grosse racine qui s’étend à partir du tronc au-dessus du sol. Retirer les grosses COUPE racines échasses avant d’abattre l’arbre. Pratiquer VERTICALE d’abord l’entaille horizontale dans la racine échasse, puis l’entaille verticale.
  • Page 124: Types De Coupe Utilisés

    UTILISATION son diamètre. Ensuite la coupe de finition doit être pratiquée par le dessus, de manière à rejoindre la BILLE SOUTENUE À UNE EXTRÉMITÉ : coupe initiale. CHARGE À mesure qu’elle est coupée, la bille a tendance COUPE DE FINITION à...
  • Page 125 UTILISATION  Travailler lentement et tenir la scie fermement à deux mains. Toujours veiller à se tenir bien campé et en équilibre sur les deux pieds.  Ne pas couper les grosses branches soutenant l’arbre, afin de le maintenir à distance du sol. ...
  • Page 126: Remplacement Du Guide Et De La Chaîne

    ENTRETIEN AVERTISSEMENT : AVERTISSEMENT : Pour empêcher un démarrage accidentel pouvant Ne jamais laisser de liquides tels que le fluide de entraîner des blessures graves, toujours retirer freins, l’essence, les produits à base de pétrole, le piles de l’produit avant tout nettoyage ou les huiles pénétrantes, etc., entrer en contact avec entretien.
  • Page 127 ENTRETIEN  Engager les maillons d’entraînement de la  Retirer le guide et la barre de leur support. chaîne dans la rainure du guide conformément à  Retirer la chaîne usée du guide. l’illustration.  Retirer le vis et l’assemblage du tendeur de chaîne NOTE : S’assurer du sens de la chaîne.
  • Page 128: Réglage De La Tension De La Chaîne

    ENTRETIEN  Éliminer complètement le mou de la chaîne en de tension de la chaîne 1/4 de tour vers la gauche. tournant l’anneau de réglage de tension de la Relever l’extrémité du guide et serrer fermement chaîne vers la droite jusqu’à ce que la chaîne couvercle de chaîne de bouton de verrouillage.
  • Page 129: Entretien De La Chaîne

    NOTE : Pendant l’utilisation normale de la scie, la remplacer le pignon dans un centre de réparations température de la chaîne augmente. Les maillons Ryobi. d’entraînement d’une chaîne chaude correctement tendue pendent à environ 1,25 mm (0,050 po) MÉPLATS DES MAILLONS D’ENTRAÎNEMENT au-dessous de la rainure du guide.
  • Page 130: Comment Affûter Les Dents

    ENTRETIEN COMMENT AFFÛTER LES DENTS INSPECTER Voir les figures 38 - 40. LE PIGNON D’ENTRAÎNEMENT NOTE : Si les instructions d’affûtage de la chaîne ne sont pas bien comprises confier l’affûtage de la chaîne à un centre de réparations agréé ou la remplacer par une chaîne à...
  • Page 131: Angle De Plaque Latérale

    ENTRETIEN ANGLE D’AFFÛTAGE DE LA PLAQUE ANGLE D’AFFÛTAGE DE ANGLE D’AFFÛTAGE DE SUPÉRIEURE LA PLAQUE SUPÉRIEURE LA PLAQUE SUPÉRIEURE CORRECT INCORRECT Voir la figure 41. MOINS PLUS DE  CORRECT 30° - Les porte-limes sont dotés de DE 30° 30° 30°...
  • Page 132: Entretien Du Guide

    ENTRETIEN TRANSPORTING AND STORING à ne pas toucher la face de la gouge avec la lime plate lors de l’ajustement des limiteurs de profondeur. Voir la figure 46.  Ne jamais remiser ou transporter la scie lorsque ENTRETIEN DU GUIDE le moteur tourne.
  • Page 133: Dépannage

    NOUS APPELER D’ABORD Pour toute question concernant l’utilisation ou l’entretien utiliser ce produit, appeler le service d’assistance téléphonique Ryobi ® Le taille-bordures à été entièrement testé avant expédition pour assurer la complète satisfaction de l’utilisateur.
  • Page 134: Énoncé De La Garantie Limitée

    Le produit, y compris toutes les pièces défectueuses devront LES OBLIGATIONS DE TECHTRONIC INDUSTRIES NORTH être retournés à un centre de réparations Ryobi agréé, avant AMERICA, INC., DANS LE CADRE DE CETTE GARANTIE expiration de la période de garantie. Les frais d’expédition SE LIMITENT EXCLUSIVEMENT À...
  • Page 135: Advertencias De Seguridad Para Herramientas Eléctricas

    ADVERTENCIAS DE SEGURIDAD PARA HERRAMIENTAS ELÉCTRICAS Los cordones eléctricos dañados o enredados ADVERTENCIA aumentan el riesgo de descargas eléctricas.  Al utilizar una herramienta eléctrica a la Lea todas las advertencias de seguridad y las intemperie, use un cordón de extensión apropiado instrucciones.
  • Page 136 ADVERTENCIAS DE SEGURIDAD PARA HERRAMIENTAS ELÉCTRICAS  Si se suministran dispositivos para conectar  Utilice la herramienta eléctrica, los accesorios mangueras de extracción y captación de polvo, y brocas, hojas y cuchillas de corte, ruedas asegúrese de que éstas estén bien conectadas y de esmeril, etc.
  • Page 137 ADVERTENCIAS DE SEGURIDAD DE LA MOTOSIERRA  Mantenga todas las partes del cuerpo alejadas de  Siga las instrucciones para lubricar la herramienta, tensionar la cadena y cambiar los accesorios. la motosierra mientras esté en funcionamiento. Antes de encender la motosierra, asegúrese de Si la cadena no está...
  • Page 138 ADVERTENCIAS DE SEGURIDAD DE LA MOTOSIERRA ANSI Z87.1, junto con protección oídos y la cabeza  No se estire ni corte por encima de la altura del cuando utilizar este equipo. hombro. Esto ayuda a evitar el contacto accidental con la punta y permite un mejor control de la  En todo momento esté...
  • Page 139 ADVERTENCIAS DE SEGURIDAD DE LA MOTOSIERRA  Inspeccione para ver si hay piezas dañadas.  No fuerce la motosierra. La herramienta efectúa el Verifique la alineación de las partes móviles, que no trabajo mejor y de manera más segura si se maneja haya atoramiento de partes móviles, que no haya a la velocidad para la que está...
  • Page 140 ADVERTENCIAS DE SEGURIDAD DE LA MOTOSIERRA CONTRAGOLPE Vea las figuras 1 a 3. REBOND ROTATIF  ADVERTENCIA: El contragolpe ocurre cuando la cadena en movimiento hace contacto con un objeto en la parte superior de la punta de la barra, o cuando la madera se cierra y pellizca la cadena de la sierra en el punto de corte.
  • Page 141 ADVERTENCIAS DE SEGURIDAD DE LA MOTOSIERRA guía y las cadenas de contragolpe moderado de La cadena de contragolpe moderado es una cadena que repuesto especificadas por el fabricante para su satisface los requisitos relativos al nivel de contragolpe sierra en particular. estipulados en la norma ANSI B175.1 (Norma Nacional Americana para Herramientas Motorizadas - Requisitos ...
  • Page 142 SÍMBOLOS Las siguientes palabras de señalización y sus significados tienen el objeto de explicar los niveles de riesgo relacionados con este producto. SÍMBOLO SEÑAL SIGNIFICADO Indica una situación peligrosa, la cual, si no se evita, causará la muerte PELIGRO: o lesiones serias. Indica una situación peligrosa, la cual, si no se evita, podría causar la ADVERTENCIA: muerte o lesiones serias.
  • Page 143 SÍMBOLOS Es posible que se empleen en este producto algunos de los siguientes símbolos. Le suplicamos estudiarlos y aprender su significado. Una correcta interpretación de estos símbolos le permitirá utilizar mejor y de manera más segura la producto. SÍMBOLO NOMBRE DENOMINACIÓN / EXPLICACIÓN Contragolpe ¡PELIGRO! ESTÉ...
  • Page 144: Glosario De Términos

    GLOSARIO DE TÉRMINOS Tronzado Cadena de contragolpe moderado Es el proceso de cortar transversalmente un árbol o Es una cadena que cumple con los requisitos relativos tronco talado en tramos. al nivel de contragolpe estipulados en la norma ANSI B175.1 al probarse en una muestra representativa de Cabeza motriz de la motosierra las sierras de cadena.
  • Page 145: Características

    CARACTERÍSTICAS ESPECIFICACIONES DEL PRODUCTO Motor ...............................18 V C.C. Longitud de la barra ....................... 304,8 mm (12 pulg.) Capacidad del tanque de aceite de la cadena ................200 ml (6,8 oz.) NOTA: Esta sierra fue diseñada para uso ligero ocasional, y tiene algunas limitaciones en cuanto a lo que puede cortar.
  • Page 146: Anillo De Ajuste De La Tensión De La Cadena

    CARACTERÍSTICAS FAMILIARÍCESE CON LA MOTOSIERRA BOTÓN DE SEGURO DEL GATILLO Vea la figura 4. Es una característica de control cuyo fin es evitar un Para usar este producto con la debida seguridad se debe arranque accidental del motor. comprender la información indicada en la herramienta CADENA DE SIERRA DE CONTRAGOLPE misma y en este manual, y se debe comprender también MODERADO...
  • Page 147: Lista De Empaquetado

    ARMADO DESEMPAQUETADO LISTA DE EMPAQUETADO Embarcamos este producto completamente armado. Motosierra con funda  Extraiga cuidadosamente de la caja el producto y Manual del operador los accesorios. Asegúrese de que estén presentes todos los artículos enumerados en la lista de ADVERTENCIA: empaquetado.
  • Page 148 RECEPTÁCULO DE  Desramado y poda de árboles LAS BATERÍAS  Tala de árboles pequeños  Tronzado del árbol talado en tramos más cortos Este producto acepta baterías RYOBI ONE+ de iones ™ ™ PESTILLOS de litio de 18 V y de níquel-cadmio de 18 V. El período de funcionamiento obtenible con cada carga depende del tipo de trabajo hecho.
  • Page 149 Retire el paquete de baterías de la unidad. Llene el en la parte inferior de la barra guía, la cadena está tanque de aceite con lubricante Ryobi para la barra ajustada y puede girarse con la mano sin amarrar. y la cadena antes de arrancar la motosierra. Si no Durante el uso normal de la sierra, la temperatura de se lubrica la cadena pueden causarse daños a la...
  • Page 150 FUNCIONAMIENTO ENCENDIDO Y APAGADO DE LA MOTOSIERRA Vea la figura 7. ADVERTENCIA: Mantenga el cuerpo a la izquierda del plano de la cadena. Nunca se coloque a horcajadas por encima de la sierra o de la cadena, ni incline el cuerpo a BOTÓN DE SEGURO través del plano de la cadena.
  • Page 151 FUNCIONAMIENTO PREPARACIÓN PARA EL CORTE SUJECIÓN CORRECTA DE LOS MANGOS Vea las figuras 8 a 10. Con respecto al equipo de seguridad adecuado, consulte la sección Advertencias de seguridad de la motosierra más arriba en este manual.  Póngase guantes antideslizantes para lograr una capacidad de sujeción y protección máximas.
  • Page 152: Tala De Árboles

    FUNCIONAMIENTO  El peso debe quedar distribuido de forma equilibrada con ambos pies en suelo firme.  Mantenga el brazo izquierdo con el codo rígido en posición de “brazo recto” para poder tolerar la fuerza de cualquier contragolpe. POSICIÓN CON EL PLANO DE ...
  • Page 153 FUNCIONAMIENTO ADVERTENCIA: Controle con cuidado que no haya ramas rotas o muertas que puedan caer mientras tala, y no tale cerca de edificios o cables eléctricos si no sabe en qué dirección caerá el árbol. No tale de noche o con malas condiciones climáticas como lluvia, nieve o fuertes vientos, porque tendrá...
  • Page 154 FUNCIONAMIENTO cruzando en ángulo recto el plano de caída. Esta muesca debe limpiarse para dejar una línea recta. Para mantener el peso de la madera fuera de la sierra, siempre efectúe el corte inferior de la muesca BISAGRA 51 mm (2 pulg.) antes del corte superior.
  • Page 155 FUNCIONAMIENTO TRONZADO Vea las figuras 18 a 21. Tronzado es el término aplicado al corte del tronco de un árbol talado, en tramos de la longitud deseada. CORTE  Siempre asegúrese de mantener una postura firme y VERTICAL de distribuir su peso de forma equilibrada en ambos pies.
  • Page 156 FUNCIONAMIENTO Al efectuar tareas de tronzado en una pendiente, TRONCO APOYADO POR UN EXTREMO : siempre párese en el lado colina arriba de los troncos, como se muestra en la figura 19. Al cortar “a través CARGA del tronco”, para mantener un control completo de la CORTE FINAL motosierra, afloje la presión de corte cerca del final del corte sin disminuir la fuerza de sujeción de los...
  • Page 157 FUNCIONAMIENTO  Las ramas bajo tensión deben cortarse de abajo hacia arriba para evitar el atoramiento de la motosierra.  Mantenga el árbol entre usted y la motosierra mientras realice el desramado. Corte desde el lado del árbol que quede opuesto a la rama que esté cortando.
  • Page 158: Mantenimiento General

    MANTENIMIENTO REEMPLAZO DE LA BARRA Y DE LA ADVERTENCIA: CADENA Para evitar lesiones corporales serias, siempre retire Vea las figuras 25 a 33. el paquete de baterías de la herramienta al limpiarla o darle mantenimiento. ADVERTENCIA: Retire el paquete de baterías y asegúrese de que se ADVERTENCIA: haya detenido la cadena antes de realizar cualquier Siempre póngase protección para los ojos con la...
  • Page 159 MANTENIMIENTO Los dientes de corte deben estar orientados en  Acomode la barra contra la superficie de montaje la dirección de desplazamiento de la cadena. Si de manera que los soportes de la barra queden en están orientados en la dirección opuesta, invierta la ranura larga de la misma.
  • Page 160: Ajuste De La Tensión De La Cadena

    MANTENIMIENTO  Levante la punta de la barra guía para revisar la la tapa del cadena de perilla de bloqueo. Asegúrese holgura de la cadena. de que la cadena se desplace sin atorarse.  Suelte la punta de la barra guía y gire 1/2 vuelta AJUSTE DE LA TENSIÓN DE LA hacia la derecha el perilla de tensado de la cadena.
  • Page 161: Mantenimiento De La Cadena

    Si la cadena presentes en las áreas indicadas, lleve la sierra a está bien tensada, estando caliente los eslabones de un establecimiento de servicio de productos RYOBI impulsión sobresalen suspendidos de la ranura de la para que cambien la rueda dentada.
  • Page 162 RYOBI o reemplácela con una cadena de contragolpe moderado recomendada. Tenga cuidado de limar todos los dientes de corte a los ángulos especificados y a la misma longitud, ya...
  • Page 163: Ángulo De La Placa Lateral

    MANTENIMIENTO ÁNGULO DE LIMADURA DE LA PLACA ÁNGULO INCORRECTO DE ÁNGULO CORRECTO DE SUPERIOR LIMADURA DE LA PLACA LIMADURA DE LA PLACA SUPERIOR SUPERIOR Vea la figura 41. MÁS DE MENOS  ÁNGULO CORRECTO: 30º - Los mangos de las 30°...
  • Page 164: Mantenimiento De La Barra Guía

    MANTENIMIENTO TRANSPORTE Y ALMACENAMIENTO Cada calibre de profundidad debe ajustarse con la lima plana, en la misma dirección en que se limó con la lima Vea la figura 46. redonda el diente de corte adyacente. Tenga cuidado  No guarde ni transporte la motosierra mientras la de no tocar la cara del diente de corte adyacente con tenga encendida.
  • Page 165: Correción De Problemas

    LLÁMENOS PRIMERO ¡Si tiene preguntas sobre el funcionamiento o el mantenimiento este producto, llame al teléfono de atención al consumidor de RYOBI! La recortadora ha sido probada enteramente antes de embarcarse para asegurar la satisfacción del consumidor. 33 - Español...
  • Page 166 RIOR NO SE APLIQUE EN EL CASO DE USTED. TECH- sante de la cancelación o rescisión del contrato de venta de TRONIC INDUSTRIES NORTH AMERICA, INC. NO ASUME ninguna herramienta de uso en el exterior de la marca RYOBI NINGUNA RESPONSABILIDAD POR DAÑOS DIRECTOS, ®...
  • Page 167 NOTES / NOTAS...
  • Page 168 NÚMERO DE SERIE _______________________________________________ CÓMO OBTENER PIEZAS DE REPUESTO: Las piezas de repuesto se pueden comprar RYOBI is a registered trademark of Ryobi Limited en nuestro sitio en la red mundial, en la dirección www.ryobitools.com o llamando and is used pursuant to a license granted by al 1-800-860-4050.
  • Page 169 OPERATOR’S MANUAL MANUEL D’UTILISATION MANUAL DEL OPERADOR 18 VOLT HEDGE TRIMMER TAILLE-HAIES 18 V PODADORA DE SETOS DE 18 V P2606 ACCEPTS ALL ONE+ BATTERY PACKS BATTERIES AND CHARGERS SOLD SEPARATELY COMPATIBLE AVEC TOUS LE BATTERIES ONE+ PILES ET CHARGEUR VENDUS SÉPARÉMENT ACEPTA TODOS LOS PAQUETES DE BATERÍAS ONE+ LAS BATERÍAS Y EL CARGADOR SE VENDEN POR SEPARADO Your hedge trimmer has been engineered and manufactured to our high standard for dependability, ease of operation, and...
  • Page 170 See this fold-out section for all of the figures referenced in the operator’s manual. Consulter l’encart à volets afin d’examiner toutes les figures mentionnées dans le manuel d’utilisation. Consulte esta sección desplegable para ver todas las figuras a las que se hace referencia en el manual del operador.
  • Page 171 Fig. 4 Fig. 7 A - Lock-out button (bouton de verrouillage, botón del seguro) Fig. 8 Fig. 10 B - Switch trigger (gâchette, gatillo interruptor) Fig. 5 A - Rotating handle button (bouton de la poignée Fig. 9 pivotante, perilla del mango giratorio) B - Rear Handle (poignée arrière, mango trasero) A - Scabbard (fourreau, funda)
  • Page 172 TABLE OF CONTENTS TABLE DES MATIÈRES / ÍNDICE DE CONTENIDO  Introduction ..................................2 Introduction / Introducción  General Power Tool Safety Warnings ..........................3-4 Avertissements de sécurité généraux aux outils électriques / Advertencias de seguridad generales para el uso de herramientas eléctricas ...
  • Page 173: General Power Tool Safety Warnings

    GENERAL POWER TOOL SAFETY WARNINGS used for appropriate conditions will reduce personal in- juries. WARNING!  Prevent unintentional starting. Ensure the switch is in Read all safety warnings and all instructions. Failure the off-position before connecting to power source to follow the warnings and instructions may result in and/or battery pack, picking up or carrying the tool.
  • Page 174: Hedge Trimmer Safety Warnings

    GENERAL POWER TOOL SAFETY WARNINGS  Keep cutting tools sharp and clean. Properly main- screws or other small metal objects, that can make a tained cutting tools with sharp cutting edges are less connection from one terminal to another. Shorting the likely to bind and are easier to control.
  • Page 175: Symbols

    SYMBOLS The following signal words and meanings are intended to explain the levels of risk associated with this product. SYMBOL SIGNAL MEANING Indicates an imminently hazardous situation, which, if not avoided, will result DANGER: in death or serious injury. Indicates a potentially hazardous situation, which, if not avoided, could result WARNING: in death or serious injury.
  • Page 176 SYMBOLS Some of the following symbols may be used on this product. Please study them and learn their meaning. Proper interpretation of these symbols will allow you to operate the product better and safer. SYMBOL NAME EXPLANATION Failure to use in dry conditions and to observe safe practices Electric Shock can result in electric shock.
  • Page 177: Features

    FEATURES PRODUCT SPECIFICATIONS Motor ..............18 V DC Cutting Capacity............3/4 in. Blade Length .............. 22 in. Cutting Speed ..........1,500 cuts/min KNOW YOUR HEDGE TRIMMER KEYHOLE HANGER See Figure 1. Built in hanger allows you to easily and conveniently store The safe use of this product requires an understanding of the unit safely out of the way.
  • Page 178: Operation

     Trimming and shaping hedges and shrubbery depress both sides to release the battery pack from the hedge trimmer. This product will accept Ryobi One+ 18 V lithium-ion battery packs and Ryobi One+ 18 V nickel-cadmium battery packs. For complete charging instructions, refer to the Operator’s...
  • Page 179: Rotating Handle

    OPERATION STARTING AND STOPPING THE HEDGE CUTTING TIPS TRIMMER See Figure 7. See Figure 4. To start: DANGER:  Remove the scabbard. Never cut near electric cords or lines. If blade jams on  Press and hold the lock-out button. any electrical cord or line, DO NOT TOUCH THE BLADE! IT CAN BECOME ELECTRICALLY LIVE AND VERY ...
  • Page 180: Maintenance

    MAINTENANCE LUBRICATING THE BLADE WARNING: See Figure 8. To avoid serious personal injury, always remove the battery pack from the product before inspecting, cleaning WARNING: or performing any maintenance. Always allow the blades of the hedge trimmer to come to a stop and remove the battery pack before lubricating. Failure to do so could result in accidental starting causing WARNING: possible serious personal injury.
  • Page 181: Storing The Hedge Trimmer

    MAINTENANCE STORING THE HEDGE TRIMMER  Moisture can cause a shock hazard. Wipe off any moisture with a soft dry cloth. See Figure 10.  Use a small brush or the air discharge of a small vacuum  Clean the hedge trimmer thoroughly before storing. Store cleaner brush to clear dust or debris from the air vents the hedge trimmer in a dry, well-ventilated place that is on the motor housing.
  • Page 182: Warranty

    Straps, Guide Bars, Saw Chains purchase. Techtronic Industries North America, Inc., reserves the  Three years if the product is used for personal, family right to change or improve the design of any RYOBI brand ® or household use;...
  • Page 183: Avertissements De Sécurité Généraux Aux Outils Électriques

    AVERTISSEMENTS DE SÉCURITÉ GÉNÉRAUX AUX OUTILS ÉLECTRIQUES ou d’une protection auditive, utilisé dans des conditions appropriées réduira le risque de blessures. AVERTISSEMENT !  Éviter les démarrages accidentels. S’assurer que le Lire tous les avertissements et toutes les instructions. Ne commutateur est en position d’arrêt avant de brancher pas suivre l’ensemble des avertissements et des instructions l’outil.
  • Page 184: Avertissements De Sécurité Pour La Taille-Haies

    AVERTISSEMENTS DE SÉCURITÉ GÉNÉRAUX AUX OUTILS ÉLECTRIQUES pour lesquelles ils sont conçus, en tenant compte des  En cas d’usage abusif, du liquide peut s’échapper des conditions et du type de travail à exécuter. L’usage d’un piles. Éviter tout contact avec ce liquide. En cas de outil motorisé...
  • Page 185 SYMBOLES Les termes de mise en garde suivants et leur signification ont pour but d’expliquer le degré de risques associé à l’utilisation de ce produit. SYMBOLE SIGNAL SIGNIFICATION Indique une situation extrêmement dangereuse qui, si elle n’est pas évitée, DANGER : aura pour conséquences des blessures graves ou mortelles.
  • Page 186 SYMBOLES Certains des symboles ci-dessous peuvent être utilisés sur ce produit. Veiller à les étudier et à apprendre leur signification. Une interprétation correcte de ces symboles permettra d’utiliser l’outil plus efficacement et de réduire les risques. SYMBOLE DÉSIGNATION / EXPLICATION Ne pas utiliser l’équipement dans des conditions sèches et ne Choc électrique pas respecter des méthodes sans danger peut entraîner un choc...
  • Page 187: Assemblage

    CARACTÉRISTIQUES FICHE TECHNIQUE Moteur ..............18 V c.c. Capacité de coupe ........19 mm (3/4 po) Longueur de la lame ........559 mm (22 po) Vitesse de coupe ......1 500 coupes par minute VEILLER À BIEN CONNAÎTRE LE TAILLE- SUSPENSION DE TROU CLÉ HAIES L’attache intégrée vous permet d’entreposer votre élément Voir la figure 1.
  • Page 188: Utilisation

    Ce produit est compatible avec les piles 18 V au lithium-ion  Appuyer sur les loquets se trouvant sur les côtés du bloc- et au nickel cadmium de Ryobi One+. piles pour le séparer du taille-haies. Si l’outil s’arrête en cours d’utilisation, relâcher la gâchette pour le réenclencher et reprendre l’opération.
  • Page 189: Démarrage Et Arrêt Du Taille-Haies

    UTILISATION DÉMARRAGE ET ARRÊT DU TAILLE-HAIES CONSEILS DE COUPE Voir la figure 4. Voir la figure 7. Pour démarrer : DANGER :  Retirer le fourreau.  Maintenir le bouton de verrouillage enfoncé. Ne jamais effectuer de coupes près de cordons ou de fils électriques.
  • Page 190: Transport Et Remisage

    AVERTISSEMENT : bloc-piles avant lubrification l’outil. Le non respect de cet avertissement peut causer un démarrage accidentel, Utiliser exclusivement des pièces Ryobi d’origine pour entraînant des blessures graves. les réparations. L’usage de toute autre pièce pourrait créer une situation dangereuse ou endommager l’outil.
  • Page 191: Affûtage De La Lame

    ENTRETIEN AFFÛTAGE DE LA LAME  Nettoyer la saleté et les débris du corps du taille-haies à l’aide d’un chiffon humide et d’un détergent doux. Voir la figure 9. NOTE : Ne pas utiliser de détergents puissants sur le  Laisser les lames du taille-haies s’arrêter dans la position boîtier en plastique ou la poignée.
  • Page 192 Le produit, y compris toutes les pièces défectueuses devront AMERICA, INC., DANS LE CADRE DE CETTE GARANTIE être retournés à un centre de réparations Ryobi agréé, avant SE LIMITENT EXCLUSIVEMENT À LA RÉPARATION OU expiration de la période de garantie. Les frais d’expédition AU REMPLACEMENT DES PIÈCES DÉFECTUEUSES...
  • Page 193: Advertencias De Seguridad Generales Para El Uso De Herramientas Eléctricas

    ADVERTENCIAS DE SEGURIDAD GENERALES PARA EL USO DE HERRAMIENTAS ELÉCTRICAS  Evite un arranque accidental de la unidad. Asegúrese de que el interruptor esté en la posición de apagado antes de ¡ADVERTENCIA! conectar la herramienta. Portar las herramientas eléctricas Lea todas las advertencias de seguridad y las instrucciones. con el dedo en el interruptor, o conectarlas con el interruptor El incumplimiento de las advertencias e instrucciones puede puesto, propicia accidentes.
  • Page 194: Advertencias De Seguridad De La Podadora De Setos

    ADVERTENCIAS DE SEGURIDAD GENERALES PARA EL USO DE HERRAMIENTAS ELÉCTRICAS  Utilice la herramienta eléctrica, los accesorios y brocas, terminales. Establecer una conexión directa entre las dos hojas y cuchillas de corte, ruedas de esmeril, etc. de terminales de las baterías puede causar quemaduras o conformidad con estas instrucciones, tomando en cuenta incendios.
  • Page 195 SÍMBOLOS Las siguientes palabras de señalización y sus significados tienen el objeto de explicar los niveles de riesgo relacionados con este producto. SÍMBOLO SEÑAL SIGNIFICADO Indica una situación peligrosa inminente, la cual, si no se evita, causará la PELIGRO: muerte o lesiones serias. Indica una situación peligrosa posible, la cual, si no se evita, podría causar la ADVERTENCIA: muerte o lesiones serias.
  • Page 196 SÍMBOLOS Es posible que se empleen en esta producto algunos de los siguientes símbolos. Le suplicamos estudiarlos y aprender su significado para mayor seguridad al manejar este producto. SÍMBOLO NOMBRE DENOMINACIÓN / EXPLICACIÓN Si no se usa la unidad en condiciones secas y no se observan Descarga eléctrica prácticas seguras de trabajo, puede producirse una descarga eléctrica.
  • Page 197 CARACTERÍSTICAS ESPECIFICACIONES DEL PRODUCTO Motor ............18 V, corr. cont. Capacidad de corte .........19 mm (3/4 pulg.) Longitud de la hoja ......... 559 mm (22 pulg.) Velocidad de corte ......1 500 cortes por minuto FAMILIARÍCESE CON LA PODADORA DE SOPORTE BOCALLAVE SETOS El soporte incorporado le permite almacenar la unidad fácil Vea la figura 1.
  • Page 198 Este producto acepta los paquetes de baterías Ryobi One+ de iones de litio de 18 V y los paquetes de baterías Ryobi One+ Para el desmontaje: de níquel-cadmio de 18 V.
  • Page 199 FUNCIONAMIENTO ENCENDIDO Y APAGADO PODADORA DE SUGERENCIAS PARA CORTAR SETOS Vea la figura 7. Vea la figura 4. PELIGRO: Para encendido:  Retire la funda. Nunca realice cortes cerca de cordones o líneas eléctricas. Si la hoja se atora en un cordón o línea eléctrica, ¡NO LA ...
  • Page 200 ADVERTENCIA: DE BATERÍAS PARA EL RECICLADO Al dar servicio a la unidad, sólo utilice piezas de repuesto Ryobi idénticas. El empleo de piezas diferentes puede ADVERTENCIA: causar un peligro o dañar el producto. Al retirar el paquete de baterías, cubra las terminales del mismo con cinta adhesiva reforzada.
  • Page 201: Afilado De La Hoja De Corte

    MANTENIMIENTO AFILADO DE LA HOJA DE CORTE  Limpie toda la tierra y la basura del cuerpo de la podadora de setos con un paño humedecido con un detergente suave. Vea la figura 9. NOTA: No aplique ningún detergente fuerte al alojamiento ...
  • Page 202 O DE CUALQUIER TIPO, PIERDEN TOTALMENTE SU reparado o reemplazado por un centro de servicio autorizado VALIDEZ DESPUÉS DEL VENCIMIENTO DEL PERÍODO de herramientas para uso en el exterior de la marca RYOBI ® DE GARANTÍA CORRESPONDIENTE DE TRES AÑOS, sin cargo alguno al comprador por concepto de piezas y mano UN AÑO O NOVENTA DÍAS.
  • Page 203 NOTES / NOTAS...
  • Page 204 NOTES / NOTAS...
  • Page 205 NOTES / NOTAS...
  • Page 206 1-800-860-4050. par Ryobi Limited. CÓMO OBTENER SERVICIO O ASISTENCIA TÉCNICA AL CONSUMIDOR: Para RYOBI es una marca de Ryobi Limited y se obtener servicio o asistencia técnica al consumidor, sírvase comunicarse con nosotros utiliza conforme a una licencia otorgada por llamando al 1-800-860-4050.