Table des Matières
Publicité
Les langues disponibles
Les langues disponibles
Liens rapides
Mode d'emploi
FR
GB
English, 13
Français, 1
K3G2/O
K3G2S/O
KN3G2S/NL
NL
Nederland, 24
Sommaire
Installation, 2-6
Tableau Caractéristiques des brûleurs et des
injecteurs
Programmateur électronique
CUISINIERE
Publicité
Chapitres
Table des Matières

Manuels Connexes pour Indesit K3G2/O


Sommaire des Matières pour Indesit K3G2/O
-
Page 1: Table Des Matières
Vue d’ensemble Tableau de bord Mise en marche et utilisation, 8-10 Utilisation du plan de cuisson Utilisation du four Programmateur électronique Tableau de cuisson K3G2/O K3G2S/O Précautions et conseils, 11 Sécurité générale KN3G2S/NL Mise au rebut Economies et respect de l’environnement... -
Page 2: Installation
Installation ! Conservez ce mode d’emploi pour pouvoir le pièces voisines (voir figure B) – à condition qu’il ne consulter à tout moment. En cas de vente, de cession s’agisse pas de parties communes du bâtiment, de ou de déménagement, veillez à ce qu’il suive chambres à... -
Page 3: Positionnement Et Nivellement
Positionnement et nivellement intercaler entre l’appareil et le réseau un interrupteur à coupure omnipolaire ayant au moins 3 mm ! L’appareil peut être installé à côté de meubles dont d’écartement entre les contacts, dimensionné à la la hauteur ne dépasse pas celle du plan de cuisson. charge et conforme aux normes NFC 15-100 (le fil de terre ne doit pas être interrompu par l’interrupteur). -
Page 4: Adaptation Aux Différents Types De Gaz
Raccordement gaz par tuyau flexible en caoutchouc Adaptation du plan de cuisson Assurez-vous que le tuyau est bien conforme aux Remplacement des injecteurs des brûleurs du plan de normes applicables dans le pays d’installation. Le cuisson: tuyau doit avoir un diamètre intérieur de : 8 mm en cas 1.enlevez les grilles du plan de cuisson et sortez les d’alimentation au gaz liquide;... - Page 5 4. dévisser l’injecteur du brûleur à l’aide de la clé à tube spéciale pour injecteurs ( voir figure ) ou d’une clé à tube de 7 mm et le remplacer par l’injecteur adapté au nouveau type de gaz ( voir tableau Caractéristiques des brûleurs et des injecteurs ).
-
Page 6: Caractéristiques Techniques
1,00 (Petit)(A) Four 3,10 Nominale (mbar) Pressions Minimum (mbar) d'alimentation Maximum (mbar) A 15°C et 1013 mbar-gaz sec K3G2/O Naturel G25 P.C.S. = 32,49 MJ/m K3G2S/O KN3G2S/NL CARACTERISTIQUES TECHNIQUES Dimensions du 34x39x44 cm ATTENTION! Le couvercle en Four HxLxP verre peut se casser s’il est... -
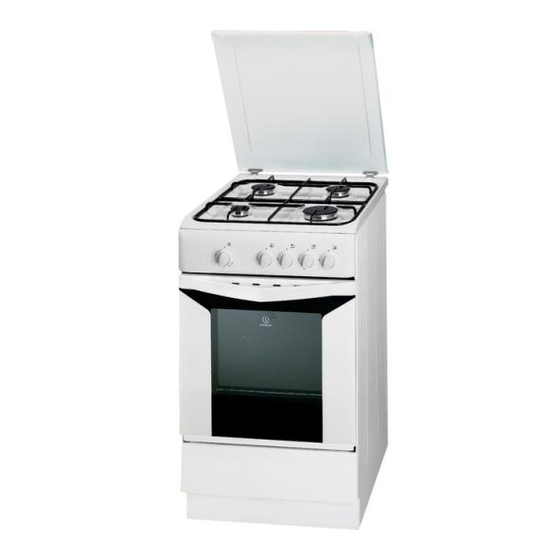
Page 7: Description De L'appareil
Description de l’appareil Vue d’ensemble Le couvercle Brûleur à gaz Plateau du plan de cuisson Grille du plan de cuisson GLISSIERES Tableau de bord de coulissement niveau 5 Support GRILLE niveau 4 niveau 3 Support LECHEFRITE niveau 2 niveau 1 Pied de réglage Pied de réglage Tableau de bord... -
Page 8: Mise En Marche Et Utilisation
Mise en marche et utilisation Utilisation du plan de cuisson Pour distinguer le type de brûleur reportez-vous aux dessins figurant dans le paragraphe "Caractéristiques des brûleurs et des injecteurs" Allumage des brûleurs Un petit cercle plein près de chaque manette Utilisation du four BRULEUR indique le brûleur associé... - Page 9 Eclairage du four Pour le brancher, amener le bouton FOUR sur une position autre que la position "0". Il reste allumé tant que le four ou le gril est en marche. Niche inférieure Une niche ménagée au- dessous du four peut être utilisée pour entreposer des accessoires ou des...
-
Page 10: Tableau De Cuisson
Tableau de cuisson Température Durée Poids Niveau Préchauffage Aliments préconisée cuisson (Kg) enfournement (minutes) (°C) (minutes) Pâtes Lasagnes 200-210 75-85 Cannelloni 50-60 Gratin de pâtes 50-60 Viande Veau 200-210 95-100 Poulet 210-220 90-100 Canard 100-110 Lapin 70-80 Porc 70-80 Agneau 100-105 Poisson Maquereaux... -
Page 11: Précautions Et Conseils
Précautions et conseils ! Cet appareil a été conçu et fabriqué conformément aux • Cet appareil n’est pas prévu pour être utilisé par des normes internationales de sécurité. personnes (y compris les enfants) dont les capacités Ces conseils sont fournis pour des raisons de sécurité et physiques, sensorielles ou mentales sont réduites, ou doivent être lus attentivement. -
Page 12: Nettoyage Et Entretien
Nettoyage et entretien Mise hors tension Le couvercle Pour le nettoyage des Avant toute opération de nettoyage ou d’entretien modèles équipés de couvercle en verre, coupez l’alimentation électrique de l’appareil. utilisez de l’eau tiède. Nettoyage de l’appareil Evitez tout produit abrasif. - Page 13 Technical data Table of burner and nozzle specifications Description of the appliance, 18 Overall view Control panel Start-up and use, 19-21 Using the hob K3G2/O Using the oven Analogue timer K3G2S/O Oven cooking advice table KN3G2S/NL Precautions and tips, 22...
-
Page 14: Installation
Installation ! Before operating your new appliance please read Disposing of combustion fumes this instruction booklet carefully. It contains important information concerning the safe installation The disposal of combustion fumes should be and operation of the appliance. guaranteed using a hood connected to a safe and efficient natural suction chimney, or using an electric ! Please keep these operating instructions for future fan that begins to operate automatically every time... -
Page 15: Electrical Connections
! Once the appliance has been installed, the power • Do not position supply cable and the electrical socket must be blinds behind the HOOD easily accessible. cooker or less than 200 mm away from its Min. ! The cable must not be bent or compressed. sides. -
Page 16: Adapting To Different Types Of Gas
! If one or more of these conditions is not fulfilled or 3. While the burner is alight, quickly change the position if the cooker must be installed according to the of the knob from minimum to maximum and vice versa conditions listed for class 2 - subclass 1 appliances several times, checking that the flame is not (installed between two cupboards), the flexible steel... -
Page 17: Technical Data
(mm) kW (p.c.s.*) 1/100 Nominal Reduced (mm) Fast 3.00 (Large)(R) Semi Fast 1.90 (Medium)(S) Auxiliary 1.00 K3G2/O (Small)(A) Oven 3.10 K3G2S/O Nominal (mbar) Supply KN3G2S/NL Minimum (mbar) Pressures Maximum (mbar) A 15°C et 1013 mbar-gas sec Natural G25 P.C.S. = 32,49 MJ/m... -
Page 18: Description Of The Appliance
Description of the appliance Overall view Control panel Hob BURNER OVEN control knob control knobs OVEN Hob BURNER control knob control knobs Only available in certain models. -
Page 19: Start-Up And Use
Start-up and use Using the hob Burner ø Cookware diameter (cm) Lighting the burners Fast (R) 24 - 26 Semi Fast (S) 16 - 20 For each BURNER knob there is a complete ring showing the strength of the flame for the relevant Auxiliary (A) 10 - 14 burner. - Page 20 Adjusting the temperature To set the desired cooking temperature, turn the OVEN control knob in an anticlockwise direction. Temperatures are displayed on the control panel and may vary between MIN (140°C) and MAX (250°C). Once the set temperature has been reached, the oven will keep it constant by using its thermostat.
-
Page 21: Oven Cooking Advice Table
Oven cooking advice table Foods Weight (in Rack Preheating time (min) Recommended Cooking time position Temperature (°C) (minutes) Pasta Lasagne 200-210 75-85 Cannelloni 50-60 Gratin dishes 50-60 Meat Veal 200-210 95-100 Chicken 210-220 90-100 Duck 100-110 Rabbit 70-80 Pork 70-80 Lamb 100-105 Fish... -
Page 22: Precautions And Tips
Precautions and tips ! This appliance has been designed and manufactured in should you attempt to repair the appliance yourself. compliance with international safety standards. Repairs carried out by inexperienced persons may The following warnings are provided for safety reasons cause injury or further malfunctioning of the appliance. -
Page 23: Care And Maintenance
Care and maintenance Switching the appliance off The cover If the cooker is fitted with a Disconnect your appliance from the electricity supply glass cover, this cover before carrying out any work on it. should be cleaned using lukewarm water. Do not use Cleaning the appliance abrasive products. - Page 24 Tabel eigenschappen Beschrijving van het apparaat, 30 Aanzichttekening Bedieningspaneel Starten en gebruik, 31-33 De kookzones Gebruik van de oven Kooktabel oven K3G2/O K3G2S/O Voorzorgsmaatregelen en advies,34 KN3G2S/NL Algemene veiligheid Afvalverwijdering Energiebesparing en milieubehoud Onderhoud en verzorging, 35 De elektrische stroom afsluiten...
-
Page 25: Installatie
Installatie ! Bewaar dit instructieboekje zorgvuldig voor Afvoer van de verbrandingsgassen eventuele raadpleging in de toekomst. In het geval u De afvoer van de verbrandingsgassen moet het apparaat verkoopt, weggeeft of wanneer u plaatsvinden door middel van een afzuigkap die is verhuist, moet het boekje bij het apparaat bewaard aangesloten op een veilige en goedwerkende worden. -
Page 26: Elektrische Aansluitingen
• als het kookvlak hoger is dan de meubels, moeten • de spanning zich bevindt tussen de waarden die zij op minstens 200 mm van het apparaat vandaan staan aangegeven op het typeplaatje; worden geplaatst; • de contactdoos en de stekker overeenkomen. Als •... -
Page 27: Aanpassen Aan De Verschillende Soorten Gas
• niet in contact komt met scherpe voorwerpen, geschikt zijn voor het nieuwe type gas ( zie Tabel Eigenschappen branders en sproeiers ); scherpe randen, beweegbare onderdelen en niet in de knel raakt; • gedurende de hele lengte makkelijk te 3. -
Page 28: Technische Gegevens
Aanpassingen op de oven TECHNISCHE Het vervangen van de GEGEVENS sproeier van de brander van Afmetingen Oven 34x39x44 cm de oven: HxBxD liter 58 Inhoud 1. verwijder de breedte 42 cm verwarmingslade; Afmetingen van de diepte 44 cm 2. trek de schuifbescherming verwarmingslade hoogte 18 cm A van zijn plaats... - Page 29 Réd. (mm) Snel 3,00 (Groot) (R) Half Snel 1,90 (Medium) (S) Hulp 1,00 (Klein) (A) Oven 3,10 Nominale (mbar) Spanning Minimum (mbar) Maximum (mbar) A 15°C en 1013 mbar-droog gas P.C.S. Natuurlijk gas G25 = 32,49 MJ/m K3G2/O K3G2S/O KN3G2S/NL...
-
Page 30: Beschrijving Van Het Apparaat
Beschrijving van het apparaat Aanzichttekening Bedieningspaneel Knoppen OVENKNOPP KOOKPLATEN Knoppen OVENKNOPP KOOKPLATEN Slechts op enkele modellen aanwezig. -
Page 31: Starten En Gebruik
Starten en gebruik Gebruik van de kookplaat Praktisch advies voor het gebruik van de branders Voor een beter rendement van de branders en een Aansteken van de branders Naast elke BRANDER knop wordt met een vol rondje minimaal gasverbruik dient u pannen te gebruiken met aangegeven bij welke brander deze knop hoort. - Page 32 ! Mocht de vlam per ongeluk uitgaan, doe dan de ! Plaats geen brandbaar materiaal in de onderste brander uit en wacht minstens 1 minuut voordat u de lade. oven weer probeert aan te steken. In de modellen met gasfornuis zit een schuifbescherming A die de onderste lade Regelen van de temperatuur beschermt tegen de hitte van de brander (zie...
-
Page 33: Kooktabel Oven
Kooktabel oven Positie ovenrekken Temperatuur Voorverwarmen Kooktijd Gerecht Gewicht van beneden af (°C) (min.) (min.) Pasta Lasagna 200- 210 75-85 Cannelloni 50-60 50-60 Gegratineerde ovenschotels Vlees 200-210 95-100 Kalfsvlees 210-220 90-100 Eend 100-110 Konijn 70-80 Varkensvlees 70-80 Lamsvlees 100-105 180-200 45-50 Makreel Zwaardvis... -
Page 34: Voorzorgsmaatregelen En Advies
Voorzorgsmaatregelen en advies ! Dit apparaat is ontworpen en vervaardigd volgens onderhoud uit als de stekker nog in het de geldende internationale veiligheidsvoorschriften. stopcontact zit. Deze aanwijzingen zijn geschreven voor uw veiligheid • Probeer in geval van storingen nooit zelf de en u dient ze derhalve goed door te nemen. -
Page 35: Onderhoud En Verzorging
Onderhoud en verzorging De elektrische stroom afsluiten Erkende Servicedienst te wenden. Gebruik de oven niet voordat de reparatie is uitgevoerd. Sluit altijd eerst de stroom af voordat u tot enige handeling overgaat. Vervangen van het ovenlampje Reinigen van het apparaat 1. - Page 36 03/2011- 195048031.02 XEROX FABRIANO...