Table des Matières

Publicité

Les langues disponibles
  • FR

Les langues disponibles

  • FRANÇAIS, page 15

Liens rapides

BRAUN PHOTO TECHNIK GmbH
Nürnberg / Germany
www.braun-phototechnik.de
DF80 / 04.12
DigiFrame 80
Gebrauchsanweisung
Instruction Manual
Mode d'emploi
Manuale di Istruzioni
Instrucciones de manejo
Handleiding
Manual de operação
Bruksanvisning

Publicité

Table des Matières
loading

Sommaire des Matières pour Braun DigiFrame 80

  • Page 1 DigiFrame 80 Gebrauchsanweisung Instruction Manual Mode d'emploi Manuale di Istruzioni Instrucciones de manejo Handleiding BRAUN PHOTO TECHNIK GmbH Nürnberg / Germany Manual de operação www.braun-phototechnik.de Bruksanvisning DF80 / 04.12...
  • Page 2 Deutsch ......1 Hinweis! Dieses Symbol auf dem Produkt oder in der Gebrauchsanleitung bedeutet, dass das Elektrogerät nicht im Hausmüll entsorgt wer- Dieser DigiFrame ist in unterschiedlichen Ver- den darf, sondern EU-weit an speziellen Sammelstellen abgege- sionen erhältlich. Die genauen Funktionen des ben werden muss.
  • Page 3: Table Des Matières

    D E U T S C H Inhaltsverzeichnis Einleitung: Wir danken Ihnen für den Kauf des digitalen Bilder- 1. Produktdarstellung ...........2 rahmens. Er wurde so gestaltet, dass er die 1.1 Fernbedienung ..........2 schnelle und einfache Betrachtung von Fotos, die 1.2 Bestandteile und Bedienelemente....2 Sie mit Ihrer digitalen Kamera oder Ihrem Mobilte- 2.
  • Page 4: Fernbedienung

    D E U T S C H 1 Produktdiagramm 1.2 Bestandteile und Bedienelemente Linke Seite: 1.1 Fernbedienung 1. POWER_ Einschalten/Ausschalten 1 Kartenschlitz: 2. SETUP _ Auf die Maske Kopieren & Löschen SD/SDHC, MMC zugreifen. 2 USB Anschluss 3. ROTATE _ Drücken Sie im Pausenstatus des Ein- 3 Stromeingang: zelbilds ROTATE, um das Bild bei jedem Drücken 5V/1A...
  • Page 5: Erste Schritte

    D E U T S C H 3. Erste Schritte 4.1 Karte und USB Unterstützt werden SD/SDHC/MMC/MS und USB 3.1 Stecken Sie ein Ende des mitgelieferten Wech- 2.0. Nach dem Einstecken einer Karte oder eines selstromadapters in eine elektrische 110-240V USB-Geräts wird automatisch eine Slideshow abge- Wechselstrom-Standardsteckdose und das andere spielt.
  • Page 6: Datei

    D E U T S C H EINSTELLUNGEN, um den SLIDEMODUS (ein Fen- ster/dreifaches Fenster/vier Fenster) auszuwählen, wählen Sie mit aus. Drücken Sie auf OK, um zu bestätigen. 5. Datei Drücken Sie EXIT, um im Hauptmenü „SPEICHER- KARTE“ auszuwählen. Drücken Sie auf DATEI und Funktion Kopieren &...
  • Page 7: Kalender

    D E U T S C H 6. Kalender 7.5 Bildwiedergabe: Wählen Sie aus dem Hauptmenü Kalender aus und Sequentiell / zufällig drücken Sie OK, um darauf zuzugreifen. Die Zeit 7.6 Slideeffekt: zufällig, ein/aus horizontale Teilung, wird in der oberen linken Seite angezeigt. Unter der Jalousie, ein/aus vertikale Teilung, Strahlen, Surro- Zeit werden die Bilder der Speicherkarte automa- und, Verblassen, von rechts aktualisieren, nächstes...
  • Page 8: Anleitung Zur Fehlerbehebung

    D E U T S C H 9. Technische Spezifikationen 8. Anleitung zur Fehlerbehebung Wenn Sie mit Ihrem Abspielgerät Probleme haben, Adapter Eingang: AC 100-240V 50/60HZ sehen Sie bitte sowohl in dieser Anleitung als auch Ausgang: DC 5V/1A im Handbuch nach. Wenn Sie mehr Unterstützung brauchen, setzen Sie sich mit dem technischen Bildformat: Support in Verbindung.
  • Page 9 E N G L I S H CONTENTS Introduction: Thank you for your purchase of the Digital Photo 1. Product Diagram ..........8 Frame. It is designed to allow quick and easy view 1.1 Remote Control .........8 of photos taken from your digital camera, mobile 1.2 Structure and Interfaces ......5 phone, or from a memory storage card.
  • Page 10: Product Diagram

    E N G L I S H 1 Product Diagram 1.2 Structure and Interfaces Left side: 1.1 Remote Control 1. POWER_ Switch On/Off 1 Card slot: 2. SETUP _Enter copy & delete interface. SD/SDHC, MMC 3. Rotate _In the pause status of single picture, 2 USB port press ROTATE to revolve the picture 90°...
  • Page 11: Getting Started

    E N G L I S H 3. Getting Started 4.1 Card and USB It supports SD/SDHC/MMC/MS and USB 2.0. After 3.1 Extend the digital photo frame bracket on the inserting a card or USB device, slideshow will play back of the frame to the widest position for grea- automatically, then press EXIT twice to access to test stability, and then plug one end of the included photo, file, calendar and setup.
  • Page 12: File

    E N G L I S H Change slide mode as follows: press SETUP to choose SLIDE MODE (single /triple/ four windows), select with , press OK to confirm. 5. File Press EXIT to choose "MEMORY CARD" in the main menu.
  • Page 13: Calendar

    E N G L I S H 6. Calendar 7.4 Photo effect: color, mono, sepia Select Calendar from the main menu, press OK to enter. The time is displayed on the top of left 7.5 Slide Show: side.under the time,the pictures in the momory Sequence / Random card slidshow automatically.
  • Page 14: Troubleshooting Guide

    E N G L I S H 8. Troubleshooting Guide 9. Technical Specifications If you are having problems with your player, please Adapter consult both this guide and manual.If you need fur- Input: AC 100-240V 50/60HZ ther assistance, please contact Technical Support. Output: DC 5V/1A Picture Formats: •...
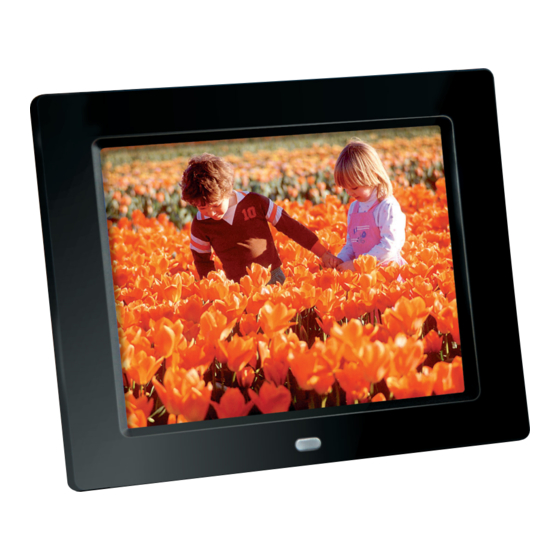
  • Page 15 F R A N Ç A I S Table des matières Introduction: Nous vous remercions de l'achat de ce cadre photo 1. Schéma du produit .........14 numérique. Il a été conçu pour la visualisation rapi- 1.1 Télécommande ........14 de et simple de photos, lesquelles ont été prises 1.2 Composants et commandes.....14 avec votre appareil photo numérique ou votre télé- 2.
  • Page 16: Télécommande

    F R A N Ç A I S 1 Diagramme du produit 1.2 Composants et commandes Partie gauche: 1.1 Télécommande 1. POWER _ Mise en marche/arrêt. 1 Emplacement de carte : 2. SETUP _ Accéder au masque copier & copier. SD/SDHC, MMC 3.
  • Page 17: Premiers Pas

    F R A N Ç A I S 3. Premiers pas 4.1 Carte et USB Supporte les cartes SD/SDHC/MMC/MS et USB 2.0. 3.1 Écartez au maximum les bras situés sur la face Un diaporama est automatiquement mis en marche arrière du cadre photo numérique, ceci afin d'at- après avoir enfiché...
  • Page 18: Fichier

    F R A N Ç A I S sélectionnez RÉGLAGES, afin de sélectionner le mode dia (une fenêtre, fenêtre triple), fenêtre qua- druple). Procédez à la sélection avec et appuy- ez sur OK, pour confirmer. 5. Fichier Appuyez sur QUITTER pour vous rendre au menu principal et sélectionner «...
  • Page 19: Calendrier

    F R A N Ç A I S 6. Calendrier 7.5 Diaporama: Sélectionnez le calendrier dans le menu principal et aléatoire / séquentiel appuyez sur OK pour y accéder. L'heure est 7.6 Effet dia : hasard, marche/arrêt division hori- affichée au haut sur le côté gauche. Les images de zontale, jalousie, marche/arrêt division verticale, la carte mémoire sont automatiquement affichés rayons, cadre, estompage, actualisation de la droite,...
  • Page 20: Instructions De Dépannage

    F R A N Ç A I S 8. Instructions de dépannage 9. Spécifications techniques En cas de problème rencontré avec votre appareil Adaptateur de lecture, nous vous prions de lire ce mode d'em- Entrée : AC 100-240V 50/60HZ ploi et le manuel. Veuillez contacter notre support Sortie : DC 5V/1A technique, si vous nécessitez une aide particulière.
  • Page 21 I T A L I A N O Indice Introduzione: Grazie per aver acquistato la cornice digitale. E’ 1. Descrizione del prodotto .........20 stata progettata in maniera tale da consentire una 1.1 Telecomando ...........20 visualizzazione rapida e facile di fotografie scattate 1.2 Elementi del comando ......20 con la vostra fotocamera digitale, il vostro telefono 2.
  • Page 22: Telecomando

    I T A L I A N O 1 Presentazione del prodotto 1.2 Elementi del comando Lato sinsitro: 1.1 Telecomando 1. POWER _ On/Off 1 Slot per carte: 2. SETUP _ Accesso alla schermata Copia ed Elimina. SD/SDHC, MMC 3. ROTAZIONE _ Premere quando la singola imma- 2 Connessione USB gine è...
  • Page 23: Operazioni Preliminari

    I T A L I A N O 3. Operazioni preliminari 4.1 Scheda e USB Supporta SD/SDHC/MS/MMC/MS e USB 2.0. Dopo 3.1 Tirare le braccia sul retro della cornice digitale aver inserito una scheda o un dispositivo USB la alla massima distanza possibile per ottenere la modalità...
  • Page 24: File

    I T A L I A N O modalità di presentazione (finestra singola / tripla finestra / quadrupla finestra), selezionare con Premere OK per confermare. 5. File Premere EXIT per selezionare nel menu principale Funzioni copia & elimina l’opzione "SCHEDA DI MEMORIA”. Premere su FILE Utilizzare i tasti in modalità...
  • Page 25: Calendario

    I T A L I A N O 6. Calendario 7.5 Riproduzione: Selezionare Calendario dal menu principale e pre- casuale / sequenza mere OK per accedervi. L’ora verrà visualizzata nel- 7.6 Effetto presentazione: casuale, on/off, divisione la parte superiore a sinistra. Sotto l’ora verranno orizzontale, persiana, on/off divisione verticale, rag- riprodotte automaticamente le immagini della sche- gi, surround, dissolvenza, aggiornare da destra,...
  • Page 26: Guida Alla Risoluzione Di Problemi

    I T A L I A N O 8.Guida alla risoluzione di problemi 9. Specifiche tecniche Se avete problemi con il lettore, consultare le istru- Alimentatore zioni d’uso e il manuale utente. Se avete bisogno di Ingresso: AC 100-240V 50/60HZ ulteriore assistenza, si prega di contattare il team di Uscita: DC 5V/1A supporto tecnico.
  • Page 27 E S P A Ñ O L ÍNDICE Introducción: Le estamos agradecidos por la compra del marco 1. Presentación ..........26 digital. Está diseñado de forma que permite la con- 1.1 Mando a distancia ........26 templación rápida y sencilla de fotos que usted ha 1.2 Componentes y elementos de mando..26 sacado con su cámara digital o teléfono móvil, o 2.
  • Page 28: Presentación

    E S P A Ñ O L 1 Diagrama de producto 1.2 Componentes y elementos de mando Lato izquierdo: 1.1 Mando a distancia 1. POWER _ Conexión/Desconexión 1 Ranura de tarjeta: 2. SETUP _ Permite copiar y borrar en la máscara. SD/SDHC, MMC 3.
  • Page 29: Primeros Pasos

    E S P A Ñ O L 3. Primeros pasos 4.1 Tarjeta y USB Soporta SD/SDHC/MMC/MS y USB 2.0. Una vez 3.1. Separe tanto como sea posible los brazos en la introducida la tarjeta o el dispositivo USB se repro- parte trasera del marco digital, para alcanzar la duce automáticamente una presentación.
  • Page 30: Archivo

    E S P A Ñ O L Cambie el modo de presentación de la siguiente manera: Seleccione CONFIGURACIÓN para selec- cionar el MODO DE PRESENTACIÓN (una ventana/tres ventanas/cuatro ventanas), seleccione mediante . Pulse OK para confirmar. 5. Archivo Pulse SALIR para seleccionar „TARJETA DE MEMORIA“...
  • Page 31: Calendario

    E S P A Ñ O L 6. Calendario 7.5 Presentacion: Seleccione Calendario del menú principal y pulse aleatoria / secuential OK, para acceder. La hora aparece en la columna 7.6 Efecto de presentación: casual, on/off división superior izquierda. Debajo se muestran automática- horizontal, celosía, on/off división vertical, brillo, mente imágenes de la tarjeta de memoria como marco, parpadeante, actualizar desde la derecha,...
  • Page 32: Instrucciones Sobre Eliminación De Errores

    E S P A Ñ O L 8. Instrucciones sobre eliminación de 9. Especificaciones técnicas errores Adaptador Si tiene problemas con su aparato reproductor, Entrada: CA 100-240V 50/60HZ consulte estas instrucciones, así como el manual. Salida: CC 5V/1A Si necesita más apoyo, póngase en contacto con el Formato de imagen: servicio técnico.
  • Page 33 N E D E R L A N D S Inhoudsopgave Inleiding: Vriendelijk dank voor de aanschaf van de digitale 1. Productpresentatie..........32 fotolijst. Hij is zo ontworpen, dat het mogelijk is, 1.1 Afstandsbediening ........32 foto's die u met uw digitale camera of mobiele tele- 1.2 Componenten en bedieningselementen ..32 foon hebt opgenomen, of die zich op een geheu- 2.
  • Page 34: Afstandsbediening

    N E D E R L A N D S 1 Productdiagram 1.2 Componenten en bedieningselementen Linker Kant: 1.1 Afstandsbediening 1. POWER _ Inschakelen/uitschakelen 1 Kaartensleuf 2. SETUP _ Toegang tot het menu kopiëren & ver- SD/SDHC, MMC wijderen. 2 USB-aansluiting 3.
  • Page 35: Beginnen

    N E D E R L A N D S 3. Beginnen 4.1 Kaart en USB Ondersteund worden SD / SDHC / MS / MMC / MS 3.1. Trek de armen aan de achterkant van het digi- en USB 2.0. Na het plaatsen van een kaart of een tale fotolijst zo ver mogelijk uit elkaar om de USB-apparaat wordt automatisch een slideshow grootst mogelijke stabiliteit te bereiken.
  • Page 36: Bestand

    N E D E R L A N D S INSTELLINGEN om de SLIDEMODUS (één venster/ drievoudig venster / vier vensters) uit te kiezen, kies met behulp van . Druk op OK om te bevestigen. 5. Bestand Druk op EXIT om in het hoofdmenu „GEHEUGEN- KAART“...
  • Page 37: Kalender

    N E D E R L A N D S 6. Kalender 7.5 Dia show shuffelen: Kies in het hoofdmenu Kalender en druk op OK om Sequence / random toegang tot de kalender te krijgen. De tijd wordt 7.6 Slide-effect: random, aan / uit horizontale verde- weergegeven in de linkerbovenhoek.
  • Page 38: Handleiding Voor Het Oplossen Van Storingen

    N E D E R L A N D S 8. Handleiding voor het oplossen van 9. Technische specificaties storingen Adapter Kijk alstublieft in deze handleiding alsook in de Input: AC 100-240V 50/60 Hz gebruiksaanwijzing als u problemen hebt met uw Output: DC 5V/1A weergave-apparaat.
  • Page 39 P O R T U G U É S Índice Introdução: Agradecemos-lhe a compra da moldura de imagem 1. Apresentação do produto ........38 digital. Ele foi concebido para possibilitar um pro- 1.1 Telecomando ...........38 cessamento fácil e rápido de fotografias, captadas 1.2 Componentes e elementos de comando..38 com a sua câmara digital ou o seu telemóvel, ou 2.
  • Page 40: Telecomando

    P O R T U G U É S 1 Diagrama do produto 1.2 Componentes e elementos de comando Lado esquerdo: 1.1 Telecomando 1. POWER_ Ligar / Desligar 1 Porto para recepção dos 2. SETUP _ Acesso às opções de copiar & apagar. cartões: SD/SDHC, MMC 3.
  • Page 41: Primeiros Passos

    P O R T U G U É S 3. Primeiros passos 4.1 Cartões de memória e USB Suporta SD/SDHC/MS/MMC/MS e USB 2.0. Ao se 3.1. Abra os braços no lado anterior da moldura de inserir um cartão de memória ou um dispositivo de imagem digital o máximo possível para fora, a fim USB, é...
  • Page 42: Ficheiros

    P O R T U G U É S Seleccione CONFIGURAÇÕES, para escolher o MODO DE DIAPOSITIVO (uma janela/quatro jane- las/três janelas), seleccione com . Prima OK para confirmar. 5. Ficheiro Prima SAIR, para seleccionar “CARTÃO DE MEMÓRIA” no menu principal. Prima FICHEIRO e Função Copiar &...
  • Page 43: Calendário

    P O R T U G U É S 6. Calendário 7.5 Presentacion: Seleccione Calendário no menu principal e prima aleatoria / secuential OK, para ter acesso à opção. A hora é indicada no 7.6 Efeito do diapositivo: aleatório, divisão horizontal lado superior esquerdo.
  • Page 44: Eliminação De Avarias

    P O R T U G U É S 8. Eliminação de avarias 9. Especificações técnicas Adaptador Se tiver problemas com o seu aparelho de leitura, Entrada: AC 100-240V 50/60HZ pode consultar tanto estas indicações, como tam- Saída: DC 5V/1A bém no manual de instruções.
  • Page 45 S V E R I G E INNEHÅLLSFÖRTECKNING Inledning: Tack för köpet av vår digitala fotoram. Den har kon- 1. Produktredovisning.........44 struerats, så att den snabbt och enkelt visar foto, 1.1 Fjärrkontroll ..........44 som du tagit med din digitalkamera eller din mobil- 1.2 Komponenter och manöverdon....44 telefon eller som befinner sig på...
  • Page 46: Fjärrkontroll

    S V E R I G E 1 Produktdiagram 1.2 Komponenter och manöverdon Vänstra sidan: 1.1 Fjärrkontroll 1. POWER_ Påkoppling/Avstängning 1 Kartfack: 2. SETUP _ Åtkomst på menyn kopiera & radera. SD/SDHC, MMC 3. ROTATE _ Tryck ROTATE i pausläge, för att 2 USB anslutning rotera bilden 90°...
  • Page 47: De Första Stegen

    S V E R I G E 3. De första stegen 4.1 Kort och USB Kortplats finns för SD/SDHC/MS/MMC/MS och USB 3.1. Dra isär armarna på den digitala fotoramens 2.0. När man satt i ett kort eller en USB-apparat spe- baksida så...
  • Page 48: Fil

    S V E R I G E ”EINSTELLUNGEN” (INSTÄLLNINGAR), för att selektera SLIDELÄGE (ett fönster/tre fönster/fyra fönster), selektera med och tryck på OK, för att bekräfta. 5. Fil Tryck VERLASSEN (LÄMNA), för att selektera ”SPEICHERKARTE” (MINNESKORT) i huvudmenyn. Funktion kopiera & radera Tryck på...
  • Page 49: Kalender

    S V E R I G E 6. Kalender 7.5 Slide show: Sequence / Random Selektera Kalender i huvudmenyn och tryck på OK, 7.6 Slideeffekt: tillfällig, till/från horisontal delning, för åtkomst.. Tiden visas uppe till vänster. Under persienn, till/från vertikal delning, strålar, surround, tiden spelas bilderna på...
  • Page 50: Instruktion För Åtgärdande Av Fel

    S V E R I G E 8. Instruktion för åtgärdande av fel 9. Teknisk specifikation Om du har problem med din uppspelningsapparat, Adapter titta både i denna handledning och i manualen. Ingång: AC 100-240V 50/60HZ Behöver du ytterligare hjälp, kontakta vår tekniska Utgång: DC 5V/1A support.
  • Page 51 G R E E K...
  • Page 52 G R E E K 1.2 Structure and Interfaces Left side: 1 Card slot: SD/SDHC, MMC 2 USB port 3 DC in: 5V/1A Rear side: 1 POWER on/off (long press) 2 Up 3 Play / Pause /OK 4 Right / Forward / Next 5 Left / Back / Previous 6 Down 7 Menu / Exit (short press)
  • Page 53 G R E E K...
  • Page 54 G R E E K...
  • Page 55 G R E E K...
  • Page 56 G R E E K...

Table des Matières