Table des Matières
Publicité
Les langues disponibles
Les langues disponibles
Liens rapides
Publicité
Table des Matières

Manuels Connexes pour Zanussi ZCAN15EW1


Sommaire des Matières pour Zanussi ZCAN15EW1
- Page 1 User Manual GETTING STARTED? EASY. ZCAN15EW1 DE Benutzerinformation Gefriertruhe FR Notice d'utilisation Congélateur coffre Istruzioni per l’uso Congelatore a pozzo EN User Manual Chest Freezer...
-
Page 2: Sicherheitshinweise
BESUCHEN SIE UNSERE WEBSITE, UM: Anwendungshinweise, Prospekte, Informationen zu Fehlerbehebung, Service und Reparatur zu erhalten: www.zanussi.com/support SICHERHEITSHINWEISE Lesen Sie vor der Montage und dem Gebrauch des Geräts zuerst die Bedienungsanleitung. Bei Verletzungen oder Schäden infolge nicht ordnungsgemäßer Montage oder Verwendung übernimmt der Hersteller keine Haftung. - Page 3 Bauernhöfe, Personalküchenbereiche in Geschäften, Büros – und anderen Arbeitsumfeldern; Für Gäste in Hotels, Motels, Pensionen und anderen – wohnungsähnlichen Räumlichkeiten. Um eine Kontaminierung von Lebensmitteln zu vermeiden, • beachten Sie die folgenden Hinweise: Öffnen Sie die Tür nicht über längere Zeit hinweg; –...
-
Page 4: Elektrischer Anschluss
SICHERHEITSANWEISUNGEN MONTAGE • Schließen Sie das Gerät nur an eine ordnungsgemäß installierte WARNUNG! Die Montage des Geräts Schutzkontaktsteckdose an. darf nur von einer qualifizierten • Achten Sie darauf, elektrische Bauteile (wie Fachkraft durchgeführt werden. Netzstecker, Netzkabel und Kompressor) nicht zu beschädigen. Wenden Sie sich an den •... -
Page 5: Montage
• Nehmen Sie keine Gegenstände aus dem • Prüfen Sie regelmäßig den Wasserabfluss des Gefrierfach bzw. berühren Sie diese nicht, falls Geräts und reinigen Sie ihn gegebenenfalls. Bei Ihre Hände nass oder feucht sind. verstopftem Wasserabfluss sammelt sich das • Frieren Sie aufgetaute Lebensmittel nicht wieder Abtauwasser am Boden des Geräts an. - Page 6 ABMESSUNGEN 85° Gesamtabmessungen Platzbedarf insgesamt im Betrieb 1) Höhe, Breite und Tiefe des Geräts einschließlich Griff plus des notwendigen Freiraums für die Zirku- lation der Kühlluft, zuzüglich des Platzes, der not- wendig ist, um eine Türöffnung bis zu dem minima- 1) Breite, Höhe und Tiefe des Geräts ohne Griff len Winkel zu ermöglichen, der die Entfernung der und Füße...
-
Page 7: Elektroanschluss
korrekt, der Energieverbrauch kann sich jedoch Hausanschlusses nicht geerdet sein sollte, leicht erhöhen. lassen Sie das Gerät gemäß den geltenden Vorschriften von einem qualifizierten Elektriker Es muss möglich sein, das Gerät vom erden. Netz zu trennen. Daher muss der • Der Hersteller übernimmt keinerlei Haftung bei Stecker nach der Installation Missachtung der vorstehenden... -
Page 8: Gerätebeschreibung
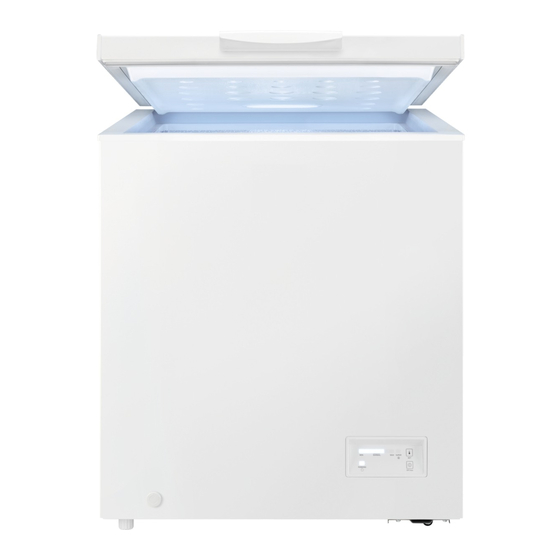
GESAMTANSICHT GERÄTEBESCHREIBUNG Griff Äußerer Ablassstopfen Korb Einstellbare Füße Bedienfeld BEDIENFELD BEDIENFELD Temperaturanzeige SUPER-Anzeige SET-Taste AUS-Taste Betriebsanzeige EIN-/AUSSCHALTEN 1. Schalten Sie das Gerät durch Einstecken des Netzsteckers in die Steckdose ein. 2. Leuchten die Anzeigen nicht, halten Sie die OFF-Taste 3 Sekunden lang gedrückt. -
Page 9: Täglicher Gebrauch
3. Um das Gerät auszuschalten, halten Sie die hinzukommender Lebensmittel beschleunigt und OFF-Taste 3 Sekunden lang gedrückt. gleichzeitig die bereits tiefgekühlten Lebensmittel vor unerwünschter Erwärmung schützt. TEMPERATURREGELUNG Einschalten der Funktion: Einstellen der Temperatur: 1. Drücken Sie die Taste SET wiederholt, bis die Anzeige SUPER leuchtet. -
Page 10: Tipps Und Hinweise
AUFTAUEN Der Gefriervorgang dauert 24 Stunden: Legen Sie während dieses Zeitraums keine weiteren Tiefgefrorene oder gefrorene Lebensmittel können einzufrierenden Lebensmittel in den Gefrierraum. vor der Verwendung je nach der zur Verfügung stehenden Zeit im Kühlschrank oder bei LAGERN VON GEFRORENEN Raumtemperatur aufgetaut werden. - Page 11 HINWEISE ZUR LAGERUNG VON EINKAUFSTIPPS TIEFKÜHLGERICHTEN Nach dem Lebensmitteleinkauf: • Achten Sie darauf, dass die Verpackung nicht • Das Gefrierfach ist mit beschädigt ist - die Lebensmittel könnten gekennzeichnet. verdorben sein. Wenn die Verpackung • Eine gute Temperatureinstellung, die die aufgequollen oder nass ist, wurde das Konservierung von Tiefkühlgerichten sicherstellt, Lebensmittel möglicherweise nicht unter den...
-
Page 12: Reinigung Und Pflege
REINIGUNG UND PFLEGE Nach einer gewissen Zeit kann sich Reif auf der WARNUNG! Siehe Kapitel Oberfläche des Schrankrahmens oder der Sicherheitshinweise. Innenverkleidung ansammeln. Es wird empfohlen, den Reif mit dem REINIGUNG Kunststoffschaber (im Zubehörpaket) jeden Monats zu entfernen oder wenn die Reifschicht eine Stärke VORSICHT! Ziehen Sie vor jeder von etwa 10 mm erreicht hat. - Page 13 Tauen Sie den Gefrierschrank ab, wenn die Reifschicht eine Stärke von etwa 10 mm erreicht hat. 1. Schalten Sie das Gerät aus. 2. Nehmen Sie das gesamte Gefriergut heraus, verpacken Sie es in mehrere Schichten Zeitungspapier und lagern Sie es an einem kühlen Ort.
- Page 14 Störung Mögliche Ursache Abhilfe Es liegt keine Spannung an der Schließen Sie das Gerät an ei- Steckdose an. ne andere Steckdose an. Wenden Sie sich an eine Elektrofachkraft. Das Gerät erzeugt Geräusche. Unebenheiten im Boden wur- Prüfen Sie, ob das Gerät stabil den nicht ausgeglichen.
- Page 15 Störung Mögliche Ursache Abhilfe Zu starke Reif- und Eisbildung. Der Deckel ist nicht richtig ge- Prüfen Sie, ob der Deckel rich- schlossen oder die Dichtung tig geschlossen ist und die hat sich verformt/ist ver- Dichtungen nicht beschädigt schmutzt. oder verschmutzt sind. Die Temperatur wurde falsch Siehe Kapitel „Bedienfeld/ eingestellt.
-
Page 16: Technische Daten
GERÄUSCHE SSSRRR! BRRR! CLICK! HISSS! BLUBB! TECHNISCHE DATEN Die technischen Daten befinden sich auf dem Typenschild innen im Gerät sowie auf der Spannung Frequenz Energieplakette. 220 - 240 V 50 Hz INFORMATIONEN FÜR PRÜFINSTITUTE Die Installation und die Vorbereitung des Geräts für müssen den Angaben in diesem Benutzerhandbuch eine eventuelle EcoDesign-Prüfung müssen mit EN in Kapitel 3 entsprechen. -
Page 17: Garantie
GARANTIE Kundendienst Servicestellen Industriestrasse 10 Le Trési 6 Via Violino 11 5506 Mägenwil 1028 Préverenges 6928 Manno Morgenstrasse 131 3018 Bern Langgasse 10 9008 St. Gallen Am Mattenhof 4a/b 6010 Kriens Schlossstrasse 1 4133 Pratteln Comercialstrasse 19 7000 Chur Ersatzteilverkauf Industriestrasse 10, 5506 Garantieleistung umfasst die Kosten für Material, Mägenwil, Tel. -
Page 18: Sécurité Des Enfants Et Des Personnes Vulnérables
VISITEZ NOTRE SITE WEB POUR : Obtenir des conseils d’utilisation, des brochures, un dépanneur, des informations sur le service et les réparations : www.zanussi.com/support INFORMATIONS DE SÉCURITÉ Avant d'installer et d'utiliser cet appareil, lisez soigneusement les instructions fournies. Le fabricant ne pourra être tenu pour responsable des blessures et dégâts résultant d'une mauvaise... - Page 19 l'utilisation par les clients des hôtels, motels, des – environnements du type chambres d’hôtes et autres environnements à caractère résidentiel. Pour éviter la contamination des aliments, respectez les • instructions suivantes : n’ouvrez pas la porte pendant de longues durées ; –...
-
Page 20: Consignes De Sécurité
CONSIGNES DE SÉCURITÉ INSTALLATION • Veillez à ne pas endommager les composants électriques tels que la fiche secteur, le câble AVERTISSEMENT! L'appareil doit d'alimentation ou le compresseur. Contactez le être installé uniquement par un service après-vente agréé ou un électricien pour professionnel qualifié. -
Page 21: Éclairage Intérieur
• Respectez les instructions de stockage figurant • Examinez régulièrement l'écoulement de sur l'emballage des aliments surgelés. l'appareil et si nécessaire, nettoyez-le. Si l'orifice • Emballez les aliments dans un emballage adapté est bouché, l'eau provenant du dégivrage au contact avec des aliments avant de les s'écoulera en bas de l'appareil. -
Page 22: Dimensions
DIMENSIONS 85° Dimensions générales Espace total requis en service 1) hauteur, largeur et profondeur de l’appareil avec la poignée, plus l’espace nécessaire pour la libre circulation de l’air de refroidissement, plus l’espace nécessaire pour autoriser l’ouverture de la porte à 1) largeur, hauteur et profondeur de l’appareil sans l’angle minimal permettant le retrait de tous les la poignée ni les pieds... -
Page 23: Branchement Électrique
mais la consommation d’énergie pourra contact à cette fin. Si la prise de courant n'est légèrement augmenter. pas mise à la terre, branchez l'appareil à une mise à la terre séparée conformément aux L’appareil doit pouvoir être débranché réglementations en vigueur, en consultant un de l’alimentation électrique. -
Page 24: Présentation Générale
PRÉSENTATION GÉNÉRALE DESCRIPTION DE L'APPAREIL Poignée Bouchon de vidange extérieur Panier Pieds réglables Bandeau de commande BANDEAU DE COMMANDE BANDEAU DE COMMANDE Indicateur de température Voyant SUPER Touche SET (Réglage) Bouton ARRÊT Voyant de fonctionnement MISE EN FONCTIONNEMENT/ARRÊT 1. Pour allumer l’appareil, insérez la fiche dans la prise électrique. -
Page 25: Avant La Première Utilisation
3. Pour éteindre l'appareil, appuyez sur le bouton denrées déjà entreposées contre un réchauffement ARRÊT pendant 3 secondes. indésirable. Pour activer la fonction : RÉGLAGE DE LA TEMPÉRATURE 1. Appuyez plusieurs fois sur la touche SET Pour régler la température : (Réglage) jusqu’à... -
Page 26: Conservation D'aliments Surgelés
DÉCONGÉLATION Le processus de congélation demande 24 heures. Vous ne devez ajouter aucun autre aliment à Avant utilisation, les aliments surgelés ou congelés congeler pendant cette période. peuvent être décongelés dans le réfrigérateur ou à température ambiante en fonction du temps CONSERVATION D'ALIMENTS SURGELÉS disponible pour cette opération. -
Page 27: Conseils Pour Le Stockage Des Plats Surgelés
CONSEILS POUR LE STOCKAGE DES PLATS CONSEILS POUR VOS COURSES SURGELÉS Après vos courses : • Le compartiment congélateur est marqué de • Assurez-vous que l’emballage n’est pas endommagé : les aliments pourraient être détériorés. Si l’emballage est gonflé ou mouillé, •... -
Page 28: Entretien Et Nettoyage
Durée de conservation Type d'aliments (mois) Volaille 9 - 12 Bœuf 6 - 12 Porc 4 - 6 Agneau 6 - 9 Saucisse 1 - 2 Jambon 1 - 2 Restes avec viande 2 - 3 ENTRETIEN ET NETTOYAGE GRATTER LE GIVRE AVERTISSEMENT! Reportez-vous aux chapitres concernant la sécurité. -
Page 29: Dégivrage Du Congélateur
7. Tournez le bouchon de vidange à 180 degrés pour faire couler l’eau de vidange dans le bac. DÉGIVRAGE DU CONGÉLATEUR ATTENTION! N’utilisez aucun dispositif mécanique ou électrique pour accélérer le processus de dégivrage. N’utilisez aucun moyen artificiel. Dégivrez le congélateur lorsque l’épaisseur de la couche de givre est d’environ 10 mm. - Page 30 QUE FAIRE SI… Des bruits peuvent se produire pendant le fonctionnement de l’appareil (par exemple pétillement, ronronnement, craquement ou cliquetis), ce qui est normal. Problème Cause probable Solution L'appareil ne fonctionne pas. L'appareil est à l'arrêt. Mettez l'appareil en marche. La fiche du câble d'alimenta- Vérifiez si l’appareil est bran- tion n'est pas correctement in-...
- Page 31 Problème Cause probable Solution Les aliments introduits dans Laissez refroidir les aliments à l'appareil étaient trop chauds. température ambiante avant de les mettre dans l'appareil. Le couvercle n'est pas correc- Vérifiez si le couvercle ferme tement fermé. correctement et si les joints ne sont pas endommagés ou sa- les.
-
Page 32: Données Techniques
Problème Cause probable Solution Les produits à congeler sont Assurez-vous que l'air froid cir- placés trop près les uns des cule dans l'appareil. autres. L'appareil est positionné près Reportez-vous au chapitre d'une source de chaleur. « Installation/Emplacement ». Si, malgré toutes les vérifications ci-dessus, votre appareil ne fonctionne toujours pas correctement, contactez le service après-vente agréé... -
Page 33: Informations Pour Les Instituts De Test
INFORMATIONS POUR LES INSTITUTS DE TEST L’installation et la préparation de l’appareil pour une indications du chapitre 3 de ce manuel d’utilisation. vérification EcoDesign doivent être conformes à la Veuillez contacter le fabricant pour de plus amples norme EN 62552. Les exigences de ventilation, les informations, notamment les plans de chargement. -
Page 34: Informazioni Di Sicurezza
VISITA IL NOSTRO SITO WEB PER: Ricevere consigli, scaricare i nostri opuscoli, eliminare eventuali anomalie, ottenere informa- zioni sull'assistenza e la riparazione: www.zanussi.com/support INFORMAZIONI DI SICUREZZA Leggere attentamente le istruzioni fornite prima di installare e utilizzare l'apparecchiatura. I produttori non sono responsabili di eventuali lesioni o danni derivanti da un'installazione o un uso scorretti. -
Page 35: Istruzioni Di Sicurezza
Clienti di hotel, motel, bed and breakfast e altri ambienti – residenziali. Per evitare la contaminazione degli alimenti rispettare le • seguenti istruzioni: non aprire la porta per lunghi periodi; – pulire regolarmente le superfici che possono venire a – contatto con gli alimenti e i sistemi di drenaggio accessibili;... -
Page 36: Collegamento Elettrico
pesante. Usare sempre i guanti di sicurezza e le UTILIZZARE calzature adeguate. AVVERTENZA! Rischio di lesioni, • Assicurarsi che l’aria possa circolare scottature o scosse elettriche. liberamente attorno all’apparecchiatura. • Al momento della prima installazione attendere almeno 4 ore prima di collegare l'apparecchiatura alla rete elettrica. -
Page 37: Smaltimento
sono adatte per l'illuminazione di ambienti • Tenere presente che la riparazione autonoma o domestici. non professionale possono avere conseguenze sulla sicurezza e potrebbero invalidare la PULIZIA E CURA garanzia. AVVERTENZA! Vi è il rischio di ferirsi SMALTIMENTO o danneggiare l'apparecchiatura. AVVERTENZA! Rischio di lesioni o soffocamento. -
Page 38: Posizionamento
• Per ottenere le migliori prestazioni, non collocare l’apparecchiatura sotto i pensili Dimensioni complessive sporgenti. • Assicurarsi che l’aria possa circolare liberamente attorno all’apparecchiatura. Se, a causa di una diversa installazione, non vengono rispettate le corrette esigenze di ventilazione, l’apparecchiatura funzionerà correttamente, ma il consumo energetico potrebbe aumentare leggermente. - Page 39 GUIDA ALL'INSTALLAZIONE DEL MANICO Aprire e chiudere più volte il coperchio per accertarsi che il manico sia fissato correttamente. 1. Togliere la base del manico e le 2 viti dal sacchetto di plastica. 2. Posizionare il manico come da foto. Utilizzare un cacciavite a croce per fissare la base del manico al coperchio.
-
Page 40: Descrizione Dell'apparecchiatura
PANORAMICA DESCRIZIONE DELL’APPARECCHIATURA Maniglia Tappo di scarico esterno Cestello Piedini regolabili Pannello dei comandi PANNELLO DEI COMANDI PANNELLO DEI COMANDI Indicatore della temperatura Indicatore SUPER Pulsante SET Pulsante OFF Indicatore di funzionamento ACCENSIONE/SPEGNIMENTO 1. Per accendere l'apparecchio inserire la spina nella presa di corrente. -
Page 41: Prima Di Utilizzare L'elettrodomestico
3. Per spegnere l'apparecchiatura, premere il alimenti già conservati dal riscaldamento tasto OFF per 3 secondi. indesiderato. Per attivare la funzione: REGOLAZIONE DELLA TEMPERATURA 1. Premere ripetutamente il pulsante SET fino a Per impostare la temperatura: quando l’indicatore SUPER non si accende. 2. -
Page 42: Consigli E Suggerimenti Utili
CONSERVAZIONE DEI SURGELATI SCONGELAMENTO Al primo avvio o dopo un periodo di non utilizzo, Prima dell'utilizzo, i cibi surgelati o congelati lasciare in funzione l'apparecchiatura per almeno possono essere scongelati nel frigorifero o, per un 24 ore con una regolazione alta prima di introdurre processo più... -
Page 43: Consigli Per L'acquisto
dell’alimento per vedere la durata di • Per limitare il processo di scongelamento, conservazione degli alimenti. acquistare i prodotti surgelati alla fine della • È importante avvolgere il cibo in modo tale da spesa e trasportarli in un sacchetto termico e evitare che l’acqua, l’umidità... - Page 44 Non usare detersivi, prodotti abrasivi, prodotti con forti profumazioni o cere lucidanti per pulire l'interno dell'apparecchiatura. Non usare una pulitrice a vapore per pulire l'apparecchiatura. Evitare di danneggiare il sistema refrigerante. 1. Spegnere l'apparecchiatura. 2. Rimuovere i surgelati, avvolgerli in alcuni strati di carta di giornale e riporli in un luogo fresco 3.
-
Page 45: Risoluzione Dei Problemi
Assicurarsi che l'acqua non fuoriesca dal vassoio. 8. Pulire il vano interno e asciugarlo accuratamente. 9. Accendere l’apparecchiatura. 10. Impostare la temperatura su un valore più alto e chiudere il coperchio. Attendere due o tre ore prima di rimettere nell’apparecchiatura il cibo precedentemente rimosso. - Page 46 Problema Causa possibile Soluzione La spina non è inserita corret- Controllare se l'apparecchiatu- tamente nella presa di alimen- ra è inserita correttamente nel- tazione. la presa. Assenza di tensione nella pre- Collegare l’apparecchiatura a sa di alimentazione. una presa di alimentazione di- versa.
- Page 47 Problema Causa possibile Soluzione Il coperchio non è perfettamen- Controllare che il coperchio si te chiuso. chiuda perfettamente e che le guarnizioni siano integre e pu- lite. La funzione SUPER è attiva. Vedere il capitolo "Pannello di controllo/funzione SUPER". Presenza di brina e ghiaccio Il coperchio non è...
-
Page 48: Dati Tecnici
Se le soluzioni precedentemente indicate non consentono di risolvere il problema, rivolgersi al Centro di Assistenza autorizzato più vicino. Specificare il modello e il numero di serie dell'apparecchiatura quando si contatta un centro di assistenza autorizzato. Ciò accelererà il supporto ricevuto. RUMORI SSSRRR! BRRR! -
Page 49: Considerazioni Sull'ambiente
GARANZIA Servizio clienti Servizio dopo vendita Industriestrasse 10 Le Trési 6 Via Violino 11 5506 Mägenwil 1028 Préverenges 6928 Manno Morgenstrasse 131 3018 Bern Langgasse 10 9008 St. Gallen Am Mattenhof 4a/b 6010 Kriens Schlossstrasse 1 4133 Pratteln Comercialstrasse 19 7000 Chur Vendita pezzi di ricambio Industriestrasse 10, fattura, del certificato di garanzia o dello scontrino... -
Page 50: Safety Information
VISIT OUR WEBSITE TO: Get usage advice, brochures, trouble shooter, service and repair information: www.zanussi.com/support SAFETY INFORMATION Before the installation and use of the appliance, carefully read the supplied instructions. The manufacturer is not responsible for any injuries or damage that are the result of incorrect installation or usage. -
Page 51: Safety Instructions
To avoid contamination of food respect the following • instructions: do not open the door for long periods; – clean regularly surfaces that can come in contact with food – and accessible drainage systems; WARNING: Keep ventilation openings, in the appliance •... -
Page 52: Electrical Connection
• Do not install the appliance where there is direct • If damage occurs to the refrigerant circuit, make sunlight. sure that there are no flames and sources of • Do not install this appliance in areas that are too ignition in the room. - Page 53 • Please note that self-repair or non-professional • Cut off the mains cable and discard it. repair can have safety consequences and might • Remove the door to prevent children and pets to void the guarantee. be closed inside of the appliance. •...
- Page 54 correct operation of the appliance can only be guaranteed within the specified temperature range. Overall space required in use If you have any doubts regarding where to install the appliance, please 1380 turn to the vendor, to our customer service or to the nearest Authorised Service Centre.
-
Page 55: General Overview
GENERAL OVERVIEW DESCRIPTION OF THE APPLIANCE Handle Outer drain plug Basket Adjustable feet Control panel CONTROL PANEL CONTROL PANEL Temperature indicator SUPER indicator SET button OFF button Running indicator SWITCHING ON/OFF 1. To switch on the appliance insert the plug into the mains socket. -
Page 56: Before First Use
3. To switch off the appliance, press the OFF To activate the function: button for 3 seconds. 1. Press SET button repeatedly until the SUPER indicator lights up. TEMPERATURE REGULATION 2. The function sets 5 seconds after the last press. To set the temperature: The SUPER function stops automatically after 52 1. -
Page 57: Hints And Tips
THAWING You can remove the basket to get Deep-frozen or frozen food, prior to being used, more storage space. can be thawed in the refrigerator or at room temperature, depending on the time available for CAUTION! In the event of accidental this operation. -
Page 58: Shelf Life
• If food has defrosted even partially, do not re- • Respect the expiry date and the storage freeze it. Consume it as soon as possible. information on the package. SHELF LIFE Type of food Shelf life (months) Bread Fruits (except citrus) 6 - 12 Vegetables 8 - 10... -
Page 59: Defrosting The Freezer
7. Set the temperature to MAX setting and close the lid. Wait two or three hours before you reload previously removed food into the appliance. 8. Set the temperature to the desired setting. SCRAPING OFF THE FROST CAUTION! Never use sharp metal tools to scrape off built-up frost as they could damage the appliance. - Page 60 Make sure the water does not spill out of the tray. 8. Clean the interior and dry it thoroughly. 9. Switch on the appliance. 10. Set the temperature to higher setting and close the lid. Wait two or three hours before you reload previously removed food into the appliance.
- Page 61 Problem Possible cause Solution There is too much frost in the Defrost the appliance. Refer to appliance. "Care and cleaning/Defrosting the appliance" chapter. The lid is difficult to open. The lid gasket is dirty or sticky. Clean the lid gasket. The lamp does not work.
- Page 62 Problem Possible cause Solution Many products are stored at Store less products at the the same time. same time. The thickness of the frost is Defrost the appliance. Refer to greater than 4-5 mm. "Care and cleacning/Defrost- ing the appliance" chapter. The lid was opened too often.
-
Page 63: Technical Data
NOISES SSSRRR! BRRR! CLICK! HISSS! BLUBB! TECHNICAL DATA The technical information is situated in the rating plate on the internal side of the appliance and on Voltage Frequency the energy label. 220~240 V 50 Hz INFORMATION FOR TEST INSTITUTES Installation and preparation of the appliance for any as stated in this User Manual at Chapter 3. -
Page 64: Environmental Concerns
GUARANTEE Customer Service Centres Point of Service Industriestrasse 10 Le Trési 6 Via Violino 11 5506 Mägenwil 1028 Préverenges 6928 Manno Morgenstrasse 131 3018 Bern Langgasse 10 9008 St. Gallen Am Mattenhof 4a/b 6010 Kriens Schlossstrasse 1 4133 Pratteln Comercialstrasse 19 7000 Chur Spare parts service Industriestrasse 10, 5506 covers the costs of materials, labour and travel. - Page 68 WWW.ZANUSSI.COM/SHOP...