Table des Matières
Publicité
Les langues disponibles
Les langues disponibles
Liens rapides
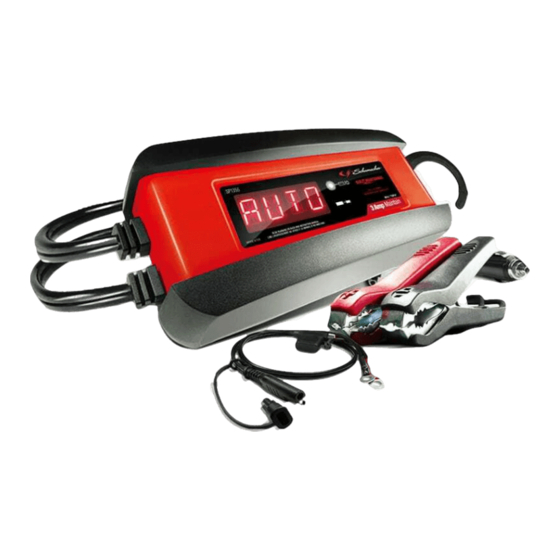
MODEL / MODELO / MODÈLE :
SP1356
Automatic Battery Charger/Maintainer
Cargador de Baterías Automático /
Mantenedor
Chargeur de batterie automatique /
Mainteneur
PLEASE SAVE THIS OWNERS MANUAL AND READ BEFORE EACH USE.
This manual will explain how to use the charger safely and effectively. Please
read and follow these instructions and precautions carefully.
POR FAVOR CONSERVE ESTE MANUAL DEL USUARIO Y LEALO ANTES
DE CADA USO. En este manual le explica cómo utilizar el cargador de manera
segura y confiable. Por favor, lea y siga las siguientes instrucciones y precauciones.
ESSAYER DE GARDER LE MANUEL D'INSTRUCTIONS ET LE LIRE AVANT
CHAQUE UTILISATION. Ce manuel explique comment utiliser l'unité d'une façon
sûre et efficace. S'il vous plaît lisez et suivez ces instructions et précautions.
OWNERS MANUAL
MANUAL DEL USUARIO
GUIDE D'UTILISATION
0099001926-01
Publicité
Table des Matières
Dépannage

Manuels Connexes pour Schumacher Electric SP1356


Sommaire des Matières pour Schumacher Electric SP1356
- Page 1 OWNERS MANUAL MANUAL DEL USUARIO GUIDE D’UTILISATION MODEL / MODELO / MODÈLE : SP1356 Automatic Battery Charger/Maintainer Cargador de Baterías Automático / Mantenedor Chargeur de batterie automatique / Mainteneur PLEASE SAVE THIS OWNERS MANUAL AND READ BEFORE EACH USE. This manual will explain how to use the charger safely and effectively. Please read and follow these instructions and precautions carefully.
-
Page 2: Table Des Matières
CONTENTS IMPORTANT SAFETY INSTRUCTIONS.....................4 PERSONAL SAFETY PRECAUTIONS ....................5 PREPARING TO CHARGE........................5 CHARGER LOCATION ........................6 DC CONNECTION PRECAUTIONS ....................6 FOLLOW THESE STEPS WHEN BATTERY IS INSTALLED IN VEHICLE ........6 FOLLOW THESE STEPS WHEN BATTERY IS OUTSIDE VEHICLE ..........7 GROUNDING AND AC POWER CORD CONNECTIONS ..............7 ASSEMBLY INSTRUCTIONS ......................8 FEATURES ............................8 CONTROL PANEL ..........................8... - Page 3 TABLE DES MATIÈRES CONSIGNES DE SÉCURITÉ IMPORTANTES.................31 MESURES DE SÉCURITÉ PERSONNELLE ...................32 PRÉPARATION POUR LE CHARGEMENT ..................32 EMPLACEMENT DU CHARGEUR ....................33 PRÉCAUTIONS SUR LA CONNEXION C.C..................33 ÉTAPES À SUIVRE QUAND LA BATTERIE EST INSTALLÉE DANS UN VÉHICULE ....34 ÉTAPES À SUIVRE QUAND LA BATTERIE EST INSTALLÉE HORS DU VÉHICULE ....34 MISE À...
-
Page 4: Important Safety Instructions
IMPORTANT SAFETY INSTRUCTIONS SAVE THESE INSTRUCTIONS. 1.1 SAVE THESE INSTRUCTIONS – This manual contains important safety and operating instructions. 1.2 Keep out of reach of children. 1.3 Do not expose the charger to rain or snow. 1.4 Use of an attachment not recommended or sold by Schumacher Electric ®... -
Page 5: Personal Safety Precautions
PERSONAL SAFETY PRECAUTIONS 2.1 Consider having someone close enough by to come to your aid when you work near a lead-acid battery. 2.2 Have plenty of fresh water and soap nearby in case battery acid contacts skin, clothing, or eyes. 2.3 Wear complete eye protection and clothing protection. -
Page 6: Charger Location
CHARGER LOCATION 4.1 Locate charger as far away from battery as DC cables permit. 4.2 Never place charger directly above battery being charged; gases from battery will corrode and damage charger. 4.3 Never allow battery acid to drip on charger when reading electrolyte specific gravity or filling battery. -
Page 7: Follow These Steps When Battery Is Outside Vehicle
FOLLOW THESE STEPS WHEN BATTERY IS OUTSIDE VEHICLE WARNING: A SPARK NEAR THE BATTERY MAY CAUSE A BATTERY EXPLOSION. TO REDUCE THE RISK OF A SPARK NEAR THE BATTERY: 7.1 Check polarity of battery posts. POSITIVE (POS, P, +) battery post usually has a larger diameter than NEGATIVE (NEG, N, –) post. -
Page 8: Assembly Instructions
ASSEMBLY INSTRUCTIONS 9.1 Remove all cord wraps and uncoil the cables prior to using the battery charger. 10. FEATURES 1. AC Power cord 2. Digital display Display/ON button 4. Charging/Charged/Maintaining LED indicator 5. Hook attachment 6. 12V accessory plug quick-connect 7. -
Page 9: Operating Instructions
12. OPERATING INSTRUCTIONS IMPORTANT: Do not start the vehicle with the charger connected to the AC outlet, or it may damage the charger and your vehicle. NOTE: This charger is equipped with an auto-start feature. Current will not be supplied to the battery clamps until a battery is properly connected. The clamps will not spark if touched together. - Page 10 7. When charging is complete, disconnect the charger from the AC power, disconnect the negative clamp, and finally the positive clamp. 8. A marine (boat) battery must be removed and charged on shore. USING THE QUICK-CONNECT CABLE CONNECTORS Connect any of the three output cable assemblies to the charger in a matter of seconds.
- Page 11 BATTERY CHARGING TIMES CCA = Cold Cranking Amps RC = Reserve Capacity Ah = Amp Hour NR = Not Recommended BATTERY SIZE/RATING CHARGE TIME (3A) SMALL BATTERIES 6-12 Ah 1½-2½ h Motorcycle, garden tractor, etc. 12-32 Ah 2½-7 h 200-315 CCA 40-60 RC 7½-9½...
-
Page 12: Display Messages
However, if you use this battery charger to charge a large battery, such as a marine deep-cycle battery, that was not fully charged, you may lose some of the battery’s capacity. Therefore, we do not recommend charging a large battery with this unit. NOTE: The maintain mode technology allows you to safely charge and maintain a healthy battery for extended periods of time. -
Page 13: Maintenance And Care
Circumstances that could cause an Abort situation during maintain: • The battery is severely sulfated or has a weak cell and will not hold a charge. • There is a large draw on the battery and the charger has to supply its maximum maintain current for a 12 hour period to keep the battery at full charge. -
Page 14: Specifications
1-800-621-5485 For REPAIR OR RETURN, contact Customer Service at 1-800-621-5485. DO NOT SHIP UNIT until you receive a RETURN MERCHANDISE AUTHORIZATION (RMA) number from Customer Service at Schumacher Electric Corporation. • 14 •... -
Page 15: Limited Warranty
Manufacturer does not provide any warranty for any accessories used with this product that are not manufactured by Schumacher Electric Corporation and approved for use with this product. This Limited Warranty is void if the product is misused, subjected to careless handling, repaired, or modified by anyone other than Manufacturer or if this unit is resold through an unauthorized retailer. -
Page 16: Instrucciones Importantes De Seguridad
INSTRUCCIONES IMPORTANTES DE SEGURIDAD GUARDE ESTAS INSTRUCCIONES. 1.1 GUARDE ESTAS INSTRUCCIONES – Este manual contiene instrucciones operativas y de seguridad de importancia. 1.2 Manténgase fuera del alcance de los niños. 1.3 No exponga el cargador a la lluvia o a la nieve. 1.4 El uso de un accesorio no recomendado o suministrado por Schumacher ®... -
Page 17: Precauciones De Seguridad Personal
SU NORMAL FUNCIONAMIENTO. POR ESTE MOTIVO, RESULTA DE SUMA IMPORTANCIA QUE SIGA LAS INSTRUCCIONES CADA VEZ QUE UTILIZA EL CARGADOR. b. Para reducir el riesgo de explosión de una batería, siga estas instrucciones y aquellas publicadas por el fabricante de la batería y por el fabricante de cualquier equipo que intente utilizar en la proximidad de la batería. -
Page 18: Preparación Para La Carga
PREPARACIÓN PARA LA CARGA 3.1 Si resulta necesario extraer la batería del vehículo para cargarla, siempre retire el terminal con descarga a tierra en primer lugar. Asegúrese de que todos los accesorios en el vehículo se encuentren apagados para evitar la formación de arcos eléctricos. -
Page 19: Precauciones De Conexión En Cc
PRECAUCIONES DE CONEXIÓN EN CC 5.1 Conecte y desconecte las pinzas de salida CC. sólo después de haber establecido todos los interruptores del cargador a la posición de “apagado” (si es aplicable) y de haber desconectado el enchufe de C.A. del tomacorriente eléctrico. Nunca permita que las pinzas tengan contacto entre sí. -
Page 20: Siga Estos Pasos Cuando La Batería Se Encuentre Fuera Del Vehículo
SIGA ESTOS PASOS CUANDO LA BATERÍA SE ENCUENTRE FUERA DEL VEHÍCULO ADVERTENCIA: UNA CHISPA PROVOCADA CERCA DE LA BATERÍA PUEDE CAUSAR LA EXPLOSIÓN DE LA BATERÍA. PARA REDUCIR EL RIESGO DE PROVOCAR CHISPAS CERCA DE LA BATERÍA: 7.1 Verifique la polaridad de los bornes de la batería. El borne POSITIVO (POS, P, +) de la batería generalmente posee un diámetro mayor al borne NEGATIVO (NEG, N, -). -
Page 21: Uso De Un Cable De Extensión
8.3 USO DE UN CABLE DE EXTENSIÓN El uso de una extensión no se recomienda. Si debe usar una extensión, siga estas pautas: • Las clavijas del enchufe del cable de extensión debe ser el mismo número, tamaño y forma que las del enchufe del cargador. •... -
Page 22: Panel De Control
11. PANEL DE CONTROL PANTALLA DIGITAL La pantalla digital indica la condición de la batería y el cargador. Vea la sección de Muestra de Mensajes para obtener una lista completa de los mensajes. NOTA: Durante la carga, la pantalla entra en el modo de suspensión y no se mostrará... - Page 23 10. Cuando la carga está completa, desconecte el cargador de la alimentación de CA, retire la pinza del chasis del vehículo y quite la pinza de la terminal de la batería. CARGA DE LA BATERÍA FUERA DEL VEHÍCULO 1. Coloque la batería un área bien ventilada. 2.
-
Page 24: Conector De 12 V Conexión Rápida
1. Para sujetarlos permanentemente a la batería, aflójelo y retire las tuercas del perno de los postes de la batería. 2. Conecte el conector, de argolla, rojo POSITIVO al poste POSITIVO de la batería. 3. Conecte el conector, de argolla, negro NEGATIVO al poste NEGATIVO de la batería. -
Page 25: Modo De Carga Automática
MODO DE CARGA AUTOMÁTICA Cuando se realiza una carga automática, el cargador cambia del modo de mantenimiento automáticamente después que la batería se cargue. INDICADOR DE CONEXIÓN DE LA BATERÍA Si el cargador no detecta una batería conectada correctamente, la carga no se iniciará... -
Page 26: Muestra De Mensajes
MODO DE DESULFATACIÓN Si la batería está descargada por un periodo de tiempo prolongado, podría sulfatarse y no aceptar una carga normal. Si el cargador detecta una batería sulfatada, el cargador se cambiará a un modo especial de operación diseñado para este tipo de baterías. -
Page 27: Mantenimiento Y Cuidado
Las circunstancias que pueden causar una situación de abortar durante mantienen: • La batería está muy sulfatada o tiene una célula débil y no mantener la carga. • Hay un gran sorteo de la batería y el cargador tiene que suministrar su máximo mantener vigente durante un período de 12 horas para mantener la batería a plena carga. -
Page 28: Especificaciones
PROBLEMA POSIBLE CAUSA SOLUCIÓN No puedo seleccionar El cargador está equipado con No hay problema; es una los 6 o 12 Voltios. Detección de Auto Voltaje, que condición normal. automáticamente detecta el voltaje y carga la batería. El LED verde es sólida El cargador tiene que comprobar El LED verde será... -
Page 29: Antes De Devolver A Reparaciones
ésta se pueda reparar o reemplazar. El Fabricante no presta garantía por lo accesorios utilizados con este producto que no sean los fabricados por Schumacher Electric Corporation y que no estén aprobados para su uso con este producto. La presente Garantía Limitada será... - Page 30 EXPRESA Y EL FABRICANTE NO ASUME NI AUTORIZA A NADIE A ASUMIR O A ADQUIRIR NINGUNA OTRA OBLIGACIÓN RESPECTO DEL PRODUCTO QUE NO SEA LA PRESENTE GARANTÍA. Schumacher y el logo Schumacher son marcas registradas ® de Schumacher Electric Corporation. • 30 •...
-
Page 31: Consignes De Sécurité Importantes
CONSIGNES DE SÉCURITÉ IMPORTANTES CONSERVER CES INSTRUCTIONS. 1.1 CONSERVER CES INSTRUCTIONS – Ce manuel contient des instructions importantes concernant la sécurité et le fonctionnement. 1.2 Ne le laissez pas a la portée des enfants. 1.3 Ne pas exposer le chargeur à la pluie ou la neige. 1.4 N’utilisez que les accessoires recommandés. -
Page 32: Mesures De Sécurité Personnelle
MESURES DE SÉCURITÉ PERSONNELLE 2.1 Considérez d’être assez proche d’une personne quand vous travaillez près d’un accumulateur au plomb pour qu’elle puisse venir à votre aide en cas d’urgence. 2.2 Ayez assez d’eau fraîche et du savon à proximité au cas ou votre peau, vos yeux ou vos habits viendraient en contact avec l’acide de la batterie. -
Page 33: Emplacement Du Chargeur
3.3 Nettoyer les bornes de la batterie avant de la charger. Lors du nettoyage, ne laissez pas les particules de corrosion entrer en contact avec vos yeux. 3.4 Ajoutez de l’eau distillée dans chaque élément de batterie jusqu’à que le niveau d’acide atteigne celui spécifié... -
Page 34: Étapes À Suivre Quand La Batterie Est Installée Dans Un Véhicule
ÉTAPES À SUIVRE QUAND LA BATTERIE EST INSTALLÉE DANS UN VÉHICULE AVERTISSEMENT : UNE ÉTINCELLE PRÈS DE BATTERIE PEUT CAUSER SON EXPLOSION. POUR RÉDUIRE LES RISQUES D’ÉTINCELLE PRÈS DE LA BATTERIE : 6.1 Placer les cordons c.a. et C.C. de manière à éviter qu’ils soient endommagés par le capot, une portière ou les pièces en mouvement du moteur. -
Page 35: Mise À La Terre Et Cordon D'énergie Ca
7.3 Raccorder la pince POSITIVE (ROUGE) à la borne POSITIVE (POS, P, +) de la batterie. 7.4 Se placer et tenir l’extrémité libre du câble aussi loin que possible de la batterie, puis raccorder la pince négative (noire) du chargeur à l’extrémité libre du câble. 7.5 Ne pas se placer face à... -
Page 36: Directives D'assemblage
DIRECTIVES D’ASSEMBLAGE 9.1 Enlever tous les cordons dérouler sur les câbles avant d’utiliser le chargeur de batterie. 10. CARACTÉRISTIQUES 1. Cordon d’alimentation CA 2. Affichage numérique Bouton / Affichage et Marche 4. Indicateur DEL 5. Attache au crochet 6. Connexion auxiliaire de 12V 7. -
Page 37: Consignes D'utilisation
12. CONSIGNES D’UTILISATION IMPORTANT : Ne pas démarrer le véhicule avec le chargeur branché à la prise, ou il peut endommager le chargeur et votre véhicule. NOTE : Ce chargeur est équipé d’une fonction automatique. Courant ne sera pas fourni aux cosses de la batterie jusqu’à ce que la batterie est correctement connecté. -
Page 38: Utilisation Des Câbles Avec Connexion Rapide
7. Lorsque la batterie est chargée, débranchez la corde du prise CA, puis retirez les cosses de la batterie négative, et enfin la borne positive. 8. Une batterie marine (bateau) doit être retirée et chargée sur le rivage. UTILISATION DES CÂBLES AVEC CONNEXION RAPIDE Branchez l’une des trois ensembles de câbles de sortie pour le chargeur dans une secondes. -
Page 39: Indicateur De Connexion Batterie
4. Branchez le cordon du chargeur sur une prise 120V prise électrique murale. 5. Si la clé de contact du véhicule doit être allumé pour que la prise accessoire de fournir / recevoir la puissance, tourner la clé, sans démarrer le moteur. TEMPS DE CHARGEMENT CCA = Intensité... -
Page 40: Le Maintien D'une Batterie
batterie pourrait être mauvais. Assurez-vous qu’il n’y a aucune charge sur la batterie. S’il ya, de les supprimer. S’il n’y en a pas, faire vérifier la batterie ou la remplacé. LE MAINTIEN D’UNE BATTERIE L’unité maintient les batteries de 6 et 12 volts, et de les garde à pleine charge. Si vous êtes entrain de maintenir une grande batterie entièrement chargée, vous utiliser correctement le chargeur. -
Page 41: Consignes D'entretien
CHARGING 12V – XX% (Voyant vert allumé) – branché sur la prise secteur et correctement connecté à une batterie de 12V déchargée. CHARGING 6V – XX% (Voyant vert allumé) – branché sur la prise secteur et correctement connecté à une batterie 6V déchargée. FULLY CHARGED AUTO MAINTAINING (LED verte pulsation) –... -
Page 42: Tableau De Dépannage
15. TABLEAU DE DÉPANNAGE PROBLÈME CAUSE POSSIBLE SOLUTION Les cosses de batterie Le chargeur est équipé avec une Aucun problème; c’est une ne donne pas des caractéristique d’auto-début. Il ne condition normale. étincelles quand touché fournira pas de courant aux clips de ensemble. -
Page 43: Spécifications
LIMITÉE À L’ACHETEUR D’ORIGINE DU PRODUIT. CETTE GARANTIE LIMITÉE N’EST NI TRANSFÉRABLE NI CESSIBLE. Schumacher Electric Corporation (le « fabricant ») garantit ce chargeur de batterie pour un (1) an, à partir de la date d’achat, contre les défauts de matériaux ou de fabrication qui peuvent survenir dans des conditions normales d’utilisation... - Page 44 Le fabricant ne fournit aucune garantie sur les accessoires utilisés avec ce produit qui ne sont pas fabriqués par Schumacher Electric Corporation et approuvés pour être utilisés avec ce produit. Cette garantie limitée est annulée si le produit est sujet à...
-
Page 45: Warranty Card
WARRANTY CARD SAVE ON POSTAGE! ACTIVATE YOUR WARRANTY ONLINE – THE QUICK AND EASY WAY! Go to www.batterychargers.com to register your product online. (No internet access? Send in the completed warranty card.) • 45 •... -
Page 46: Tarjeta De Garantía
TARJETA DE GARANTÍA ¡AHORRE EN EL ENVÍO! ¡ACTIVE SU GARANTÍA EN LÍNEA – LA FORMA MAS RÁPIDA Y FÁCIL! Visite nuestra página en www.batterychargers.com para registrar su producto en línea. (¿No tiene acceso al internet? Llene la tarjeta de garantía y envíela.) •... -
Page 47: Carte De Garantie
CARTE DE GARANTIE PAS BESOIN DE VOIE POSTAL ! ACTIVEZ VOTRE GARANTIE SUR INTERNET – LA VOIE PLUS RAPIDE ET FACILE! Aller sur www.batterychargers.com pour enregistrer votre produit en ligne. (Pas d’accès internet? Envoyer la carte de garantie par poste.) •...