Table des Matières
Publicité
Les langues disponibles
Les langues disponibles
Liens rapides
DEHUMIDIFIER
Owner's Manual...............................1 - 9
DÉSHUMIDIFICATEUR
Manuel du propriétaire.................10 - 18
DESHUMIDIFICADOR
Manual del propietario.................19 - 27
www.Danby.com
DANBY PRODUCTS LIMITED, ONTARIO, CANADA N1H 6Z9
DANBY PRODUCTS INC., FINDLAY, OHIO, USA 45840
OWNER'S MANUAL
MANUEL DU PROPRIÉTAIRE
MANUAL DEL PROPIETARIO
MODEL • MODÈLE • MODELO
DDR020BIWDB
DDR050BIBDB
2019.08.22
Publicité
Table des Matières
Dépannage

Manuels Connexes pour Danby DDR020BIWDB


Sommaire des Matières pour Danby DDR020BIWDB
- Page 1 DEHUMIDIFIER Owner’s Manual.......1 - 9 MODEL • MODÈLE • MODELO DÉSHUMIDIFICATEUR Manuel du propriétaire....10 - 18 DDR020BIWDB DDR050BIBDB DESHUMIDIFICADOR Manual del propietario....19 - 27 DANBY PRODUCTS LIMITED, ONTARIO, CANADA N1H 6Z9 www.Danby.com DANBY PRODUCTS INC., FINDLAY, OHIO, USA 45840 2019.08.22...
-
Page 11: Besoin D'assistance
Bienvenue Bienvenue à la famille Danby. Nous sommes fi ers de la qualité de nos produits et nous croyons en le service fi able. Nous vous suggérons de lire ce manual d’utilisation avant de brancher votre nouvel appareil car il contient des informations inportantes sur l’utilisation, la sécurité, le dépannage et la maintenance, afi... -
Page 12: Lire Et Suivre Toutes Les Instructions De Sécurité
Informations importantes de sécurité LIRE ET SUIVRE TOUTES LES INSTRUCTIONS DE SÉCURITÉ EXIGENCES DE SÉCURITÉ INSTRUCTIONS DE MISE À LA TERRE Cet appareil n’est pas destiné à être utilisé par Cet appareil doit être mis à la terre. La mise à des personnes (y compris des enfants) dont les la terre réduit le risque de choc électrique en capacités physiques, sensorielles ou mentales... -
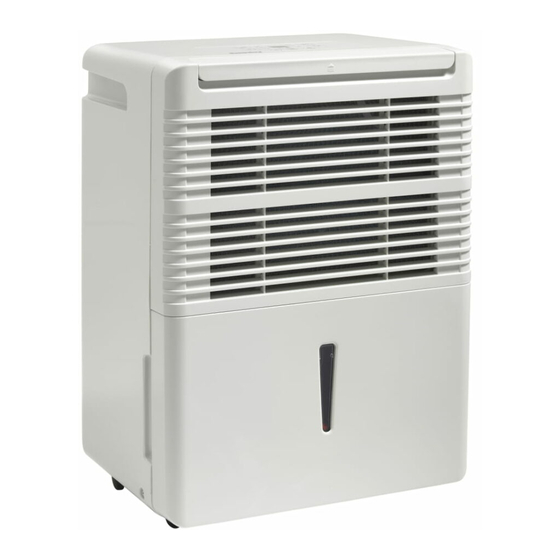
Page 13: Caractéristiques
INSTRUCTIONS D’UTILISATION OPÉRATION CARACTÉRISTIQUES Avant • Placez le déshumidifi cateur sur un sol lisse et horizontal suffi samment solide pour supporter l’appareil avec un seau d’eau plein. 1. Panneau de contrôle 2. Poignées (des deux côtés) • Ne placez pas le déshumidifi cateur sur une 3. -
Page 14: Panneau De Contrôle
INSTRUCTIONS D’UTILISATION PANNEAU DE CONTRÔLE 5. Bouton de minuterie et voyants lumineux 1. Bouton de fi ltre et voyant lumineux • Utilisez ce bouton pour régler la fonction de • La lumière du fi ltre s’allume lorsque le fi ltre minuterie. -
Page 15: Fonction De Minuterie
INSTRUCTIONS D’UTILISATION FONCTION DE MINUTERIE ELIMINATION D’EAU Fonction d’activation automatique Il existe deux façons d’éliminer l’eau collectée de l’appareil. 1. Appuyez sur le bouton de la minuterie jusqu’à 1. Seau d’eau ce que le voyant d’activation automatique s’allume. 2. Utilisez les fl èches haut et bas pour sélectionner Le déshumidifi... - Page 16 INSTRUCTIONS D’UTILISATION ELIMINATION D’EAU 2. Drain continu L’eau peut être retirée de l’appareil à l’aide du drain continu et d’un tuyau d’arrosage standard (non fourni). Avant d’utiliser des fonctions de vidange automatique, vérifi ez que tous les orifi ces de vidange sont propres et exempts de débris.
-
Page 17: Soins Et Maintenance
SOINS ET MAINTENANCE FILTRE À AIR NETTOYAGE Le fi ltre à air doit être nettoyé environ toutes les 2 Pour éviter tout risque d’électrocution, assurez-vous semaines. Le fi ltre à air peut nécessiter un nettoyage que l’appareil est débranché avant d’effectuer un plus fréquent si il y a un choc important ou de la nettoyage ou une maintenance. -
Page 18: Dépannage
DÉPANNAGE Danby soins du consommateur: 1-800-263-2629 Heures d’ouverture: Lundi à Jeudi 8 h 30 à 18 h, heure normale de l’Est Vendredi de 8 h 30 à 16 h, heure normale de l’Est Les informations contenues dans ce manuel sont sujettes à modifi cation sans préavis. - Page 19 En vertu de la présente, il n’existe aucune autre garantie, condition ou représentation, qu’elle soit exprimée ou tacite, de façon Nothing within this warranty shall imply that Danby will be responsible or liable for any spoilage or damage to food or other c ontents of this appliance, whether due manifeste ou intentionnelle, par Danby ou ses distributeurs agréés.
- Page 29 NOTES / REMARQUES / NOTAS : __________________________________________________________________________________________ __________________________________________________________________________________________ __________________________________________________________________________________________ __________________________________________________________________________________________ __________________________________________________________________________________________ __________________________________________________________________________________________ __________________________________________________________________________________________ __________________________________________________________________________________________ __________________________________________________________________________________________ __________________________________________________________________________________________ __________________________________________________________________________________________ __________________________________________________________________________________________ __________________________________________________________________________________________ __________________________________________________________________________________________ __________________________________________________________________________________________ __________________________________________________________________________________________ __________________________________________________________________________________________ __________________________________________________________________________________________ __________________________________________________________________________________________ __________________________________________________________________________________________ __________________________________________________________________________________________ __________________________________________________________________________________________...
- Page 30 NOTES / REMARQUES / NOTAS : __________________________________________________________________________________________ __________________________________________________________________________________________ __________________________________________________________________________________________ __________________________________________________________________________________________ __________________________________________________________________________________________ __________________________________________________________________________________________ __________________________________________________________________________________________ __________________________________________________________________________________________ __________________________________________________________________________________________ __________________________________________________________________________________________ __________________________________________________________________________________________ __________________________________________________________________________________________ __________________________________________________________________________________________ __________________________________________________________________________________________ __________________________________________________________________________________________ __________________________________________________________________________________________ __________________________________________________________________________________________ __________________________________________________________________________________________ __________________________________________________________________________________________ __________________________________________________________________________________________ __________________________________________________________________________________________ __________________________________________________________________________________________...
- Page 31 NOTES / REMARQUES / NOTAS : __________________________________________________________________________________________ __________________________________________________________________________________________ __________________________________________________________________________________________ __________________________________________________________________________________________ __________________________________________________________________________________________ __________________________________________________________________________________________ __________________________________________________________________________________________ __________________________________________________________________________________________ __________________________________________________________________________________________ __________________________________________________________________________________________ __________________________________________________________________________________________ __________________________________________________________________________________________ __________________________________________________________________________________________ __________________________________________________________________________________________ __________________________________________________________________________________________ __________________________________________________________________________________________ __________________________________________________________________________________________ __________________________________________________________________________________________ __________________________________________________________________________________________ __________________________________________________________________________________________ __________________________________________________________________________________________ __________________________________________________________________________________________...