Table des Matières

Publicité

Les langues disponibles
  • FR

Les langues disponibles

  • FRANÇAIS, page 56

Liens rapides

USER´S MANUAL
BEDIENUNGSANLEITUNG
MANUEL D´UTILISATION
MANUAL DE USUARIO
INSTRUKCJA OBSŁUGI
MANUALE D´USO
XNODE 4
4 PORT ETHNET NODE
CLXNODE4

Publicité

Table des Matières
loading

Sommaire des Matières pour Cameo XNODE 4

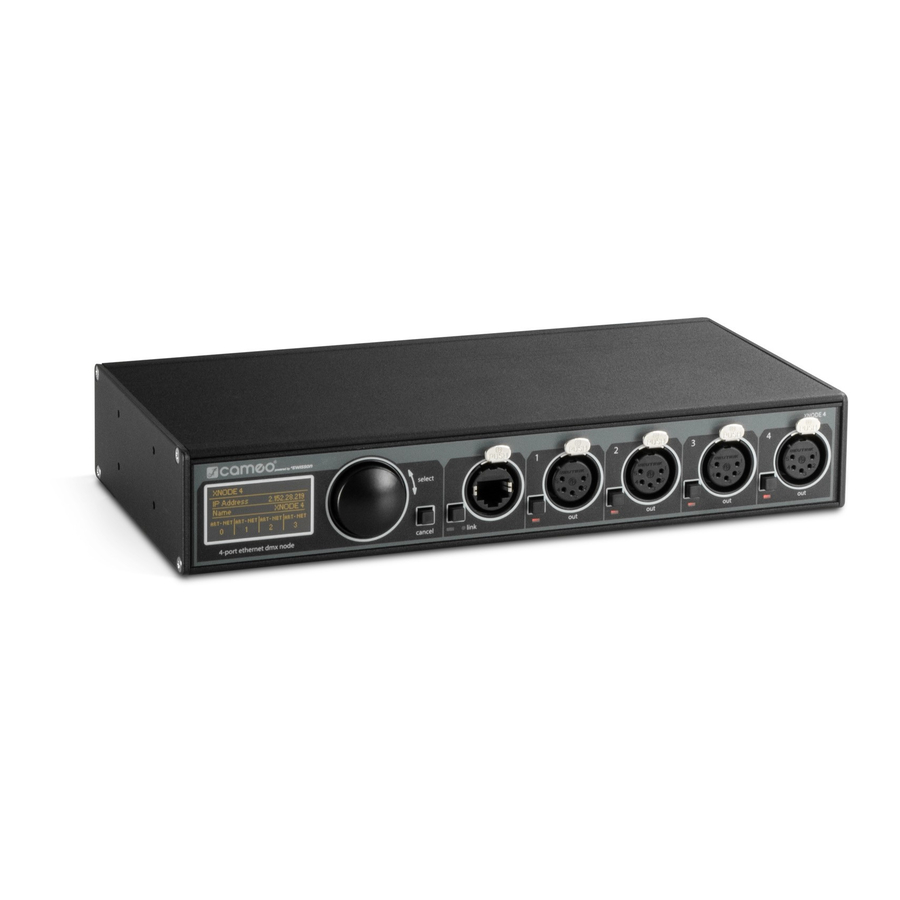
  • Page 1 USER´S MANUAL BEDIENUNGSANLEITUNG MANUEL D´UTILISATION MANUAL DE USUARIO INSTRUKCJA OBSŁUGI MANUALE D´USO XNODE 4 4 PORT ETHNET NODE CLXNODE4...
  • Page 2: Table Des Matières

    CONTENTS / INHALTSVERZEICHNIS / CONTENU / CONTENIDO / TREŚĆ / CONTENUTO ENGLISH ESPAÑOL SAFETY INFORMATION INFORMACIÓN DE SEGURIDAD INTRODUCTION INTRODUCCIÓN DEVICE OVERVIEW DESCRIPCIÓN GENERAL DEL DISPOSITIVO SETTINGS AND MENU AJUSTES Y MENÚ NETWORK SETTINGS CONFIGURACIÓN DE RED OUTPUT SETTINGS CONFIGURACIÓN DE SALIDAS FACTORY PRESETS PRESETS DE FÁBRICA DEVICE SETTINGS AND INFORMATION...
  • Page 3: English

    It is essential that you read and understand this manual before operating the device and that you follow the instructions given below closely when you set up, connect and use the XNODE 4. Do not use the device in any way or for any purpose not described in this user manual.
  • Page 4: Introduction

    In some cases, users may profit from already existing networking infrastructure. Furthermore, the XNODE 4 is also perfectly suited to send DMX data to your fixtures from a computer or even from a mobile device. Many light controller programs for PC or Mac support Art-Net output natively and with the help of XNODE 4’s DHCP capability, you can even let...
  • Page 5: Device Overview

    Consult a qualified electrician, if you have any doubts about the proper installation. A blue Neutrik powerCON NAC3FCA cable mount connector must be used to supply power at the XNODE 4’s power input socket. •...
  • Page 6 POWER OUTLET Warning! The total current load of all devices connected to the AC mains power outlet of the XNODE 4 must not exceed 19.8 amperes.
  • Page 7: Settings And Menu

    SETTINGS AND MENU GENERAL NAVIGATION The encoder wheel is the primary means for navigating through the menus. Most of the menus arrange items vertically. In those menus, turn the encoder clockwise to select the item below the currently selected item or turn the encoder counter clockwise to select the item above the currently selected item.
  • Page 8 HOME SCREEN Home Screen of an XNODE 4 running XNODE 4 Home Screen with ports XNODE 4 Home Screen with ports in Art-Net 4 mode, configured to a 1 -2 configured to output Art-Net and 1 - 2 configured to output Art-Net and custom IP address (192.168.10.125)
  • Page 9: Network Settings

    Navigate to Home > Menu > Network > DHCP in order to enable or disable DHCP (Dynamic Host Configuration Protocol). Choose Enable if you want to have your network configured by a DHCP server. This would typically be the case if you connect the XNODE 4 to a home or office network.
  • Page 10 In order to configure the netmask, use the same procedure as for configuring the IP address. The netmask is used internally to compute the network address from the IP address. XNODE 4 does this by computing the bitwise AND of each byte with the corresponding byte of the IP address.
  • Page 11 SET TO PRIMARY ART-NET IP After navigating to the menu item Home > Menu > Network > Static Settings > Set to primary Art-Net IP, a dialog as shown on the right will appear. Press [Cancel] to abort or press [OK] in order to apply the following settings: …...
  • Page 12 INDEPENDENT UNIVERSES This setting is only available with firmware versions that appeared before version 1.01. Newer firmware versions provide the same functionality when the Art-Net version is set to Art-Net 4. The main advantage of the Art-Net 4 support over the obsolete independent univer- ses functionality is that Art-Net 4 support allows an Art-Net 4 aware controller to properly understand and, if supported by the controller, configure the port address of each port whether the ports share a common net and sub-net address or not.
  • Page 13 Then push the [OK] button and select a character to add. Confirm your selection by pressing [OK]. Repeat the above steps for the remaining characters. Then, press [Cancel] to finish inserting characters. Press [Cancel] again to quit the editor. Press [OK] to store the changes or press [Cancel] to discard all changes. SHORT NAME The short name can be viewed and edited under Home >...
  • Page 14 PORT SETTINGS For each port, there is a settings menu under Home > Menu > Ports > Port [1-4]. E.g. the menu for port 1 is under Home > Menu > Ports > Port 1. The port settings menu contains the items described below. When opening this screen with a double tap to the port button (button [1] –...
  • Page 15: Output Settings

    On the left-hand side of the screen, the following information is displayed on three lines below the status label (see section Status Indication on page 10): Art-Net net, Art-Net sub-net and Art-Net sub-uni. The Art-Net sub-uni is computed from the sub-net and the universe of a port as 16 x sub-net + universe. Some controllers address the Art- Net universe as a single number in the range of 0 to 255.
  • Page 16: Factory Presets

    A bullet point is shown next to the currently active setting. Use the encoder wheel to select the desired setting and push [OK] to apply the setting. ART-NET RDM Under Art-Net RDM, RDM may be enabled or disabled for the output. Art-Net RDM can also be enabled for sACN ports. XNODE 4 discovers a maximum of 250 devices per output port.
  • Page 17: Device Settings And Information

     1,2: Art-Net – 3,4: sACN: • Art-Net RDM is enabled on all ports. • All ports are configured as outputs. • Ports 1 and 2 are configured to Art-Net. • Ports 3 and 4 are configured to sACN. • The ports are configured to consecutive universes (port addresses). The user is asked to choose a start universe. •...
  • Page 18 Choose the menu entry Settings > User Input Locking > Set Password to set a password. A dialog will show up that prompts for a password. Password editing works just like editing the device name. Once the password has been entered, XNODE 4 will ask you to enter the password a second time.
  • Page 19 The device will also be locked when the screen saver becomes active or after a power cycle if password locking has been enabled. DEVICE INFORMATION The following information about the device is available under Home > Menu > Device Settings > Device Information. MODEL The device model is reported as “XNODE 4” for all variants of the XNODE 4.
  • Page 20 Push [OK] to confirm or [Cancel] to abort. The default settings can also be restored from the Device Settings Page of the web interface. This function will restore all settings to the defaults:  Name: CAMEO XNODE 4  Short name: XNODE 4  Art-Net net: 0 ...
  • Page 21: Status Leds

    IDENTIFY The XNODE 4 can help the user to locate the device under certain conditions through the identify process. The node can be set in an identi- fied state, by means of communication, like Art-Net, RDM or the web interface. In the case of the XNODE 4 the identified device will light up all port status LEDs white, for 0.3 seconds every second, for as long as the device is set identified.
  • Page 22: Web Interface

    The web interface is accessed by typing the devices configu- red IP address in a web browser of a computer, that is connected to the same network as the XNODE 4.
  • Page 23 PORT SETTINGS PAGE On the port settings page each port can be configured individually, or changes can be applied to multiple ports at once. To configure the ports separately, select the number in the top menu first, after which changes can be made to the settings. Once the changes are made, they can be sent to the device by pressing the apply button.
  • Page 24 NETWORK SETTINGS PAGE The network settings page enables the user to change network settings and see relevant information concerning the Ethernet port status. Attention: Changes to the network settings could result in the device not being accessible via network! Use with caution!
  • Page 25 DEVICE SETTINGS PAGE This page allows the user to view and make changes to any relevant device information. Furthermore, the factory defaults can be restored from here. FIRMWARE UPDATE PAGE From this page firmware updates can be performed. To do so, simply select the desired firmware file and then upload it. Additionally, this page informs you about the currently loaded firmware and the hardware version.
  • Page 26: Technical Data

    TECHNICAL DATA Prduct number: CLXNODE4 Ambient temperature 30°C…55°C (-22°F…131°F) AC power 100 - 240 V nominal, 50/60 Hz Typical power consumption Ethernet 10BASE-T / 100BASE-TX, auto negotiating, auto MDI-X Network protocols Art-Net 1 - 4, sACN (ANSI E1.31), sACN draft version (v0.2) ANSI E1.11 ANSI E1.20 Electrical standard signal ports...
  • Page 27: Manufacturer´s Declarations

    MANUFACTURER´S DECLARATIONS MANUFACTURER‘S WARRANTY & LIMITATIONS OF LIABILITY You can find our current warranty conditions and limitations of liability at: https://cdn-shop.adamhall.com/media/pdf/MANUFACTURERS- DECLARATIONS_CAMEO.pdf. To request warranty service for a product, please contact Adam Hall GmbH, Adam-Hall-Str. 1, 61267 Neu Anspach / Email: Info@adamhall.com / +49 (0)6081 / 9419-0. CORRECT DISPOSAL OF THIS PRODUCT (valid in the European Union and other European countries with a differentiated waste collection system) This symbol on the product, or on its documents indicates that the device may not be treated as household waste.
  • Page 28: Appendix

    APPENDIX REPRESENTATIONS OF ART-NET PORT ADDRESSES According to the Art-Net 3 specification, the address of an Art-Net port consists of three parts: The Art-Net net, sub-net and universe number. The Art-Net universe and sub-net number both have a value between 0 and 15 (4 bits). Many controllers combine these values to the sub-uni number, resulting in a value between 0 and 255 (8 bits), with the sub-net part occupying the more significant digits.
  • Page 29: Deutsch

    Bitte lesen Sie diese Bedienungsanleitung unbedingt sorgfältig durch, bevor Sie das Gerät in Betrieb nehmen, und befolgen Sie die An- weisungen bei der Installation, Verkabelung und Nutzung des XNODE 4 genau. Verwenden Sie das Gerät nur in der vorgesehenen, in dieser Bedienungsanleitung beschriebenen Art und Weise.
  • Page 30: Einleitung

    Ausgang konfiguriert werden können. Da die meisten größeren Lichtstellpulte heute Art-Net-Daten übertragen können, brauchen Sie nur noch den XNODE 4, um die Netzwerkkapazitäten Ihrer Konsole optimal zu nutzen und eine hohe Anzahl an DMX-Universen über ein einziges Netzwerkkabel zu übertragen. In einigen Fällen werden Sie auf bereits vorhandener Netzwerkinfrastruktur aufbauen können.
  • Page 31: Übersicht

    Netzsteckdosen geeigneter Netzstecker installiert. Befolgen Sie dabei die Anweisungen des Netzstecker-Herstellers. Wenden Sie sich an einen ausgebildeten Elektriker, wenn Sie mit einer fachgerechten Installation nicht vertraut sind. Die Stromversorgung des XNODE 4 erfordert einen blauen Neutrik powerCON-Kabelsteckverbinder (Typ NAC3FCA), der an die Netzeingangs- buchse angeschlossen wird.
  • Page 32 Vorsicht! Die Gesamtstromlast aller an die Netzausgangsbuchse des XNODE 4 angeschlossenen Geräte darf 19,8 Ampere nicht überschreiten.  Der Anschluss des XNODE 4 an das Wechselstromnetz und die Anbindung weiterer Geräte über die Netzausgangsbuchse erfordert ein geeignetes Netzkabel, wie im Abschnitt Sicherheitshinweise in dieser Bedienungsanleitung erläutert.
  • Page 33: Einstellungen Und Menü

    ALLGEMEINE NAVIGATION Die Navigation durch die Menüs des XNODE 4 erfolgt in der Regel mithilfe des Encoder-Rads (Multifunktionsdrehgeber). Die meisten Menüs sind senkrecht angeordnet. In diesem Fall wird durch eine Drehung des Encoders nach rechts der jeweils folgende Menüeintrag (unterhalb des aktuell selektierten) ausgewählt.
  • Page 34 STARTBILDSCHIRM (HOME) Startbildschirm eines XNODE 4 im Startbildschirm eines XNODE 4; Kon- Startbildschirm eines XNODE 4; Kon- Art-Net 4-Modus; Konfiguration: indi- figuration: Ports 1 – 2 Datenausgabe figuration: Ports 1 – 2 Datenausgabe viduelle IP-Adresse (192.168.10.125) via Art-Net, Ports 3 – 4 Datenausgabe via Art-Net, Ports 3 –...
  • Page 35: Netzwerkeinstellungen

    Wählen Sie „Enable“, wenn Sie Ihr Netzwerk per DHCP-Server konfigurieren lassen möchten. Dies ist typischerweise der Fall, wenn der XNODE 4 in ein Heim- oder Firmennetzwerk eingebunden ist. Die jeweils aktive Einstellung ist durch einen Punkt neben dem entsprechenden Menüeintrag gekennzeichnet. Über das Encoder-Rad können Sie die gewünschte Einstellung auswählen und mit [OK] bestätigen.
  • Page 36 Die Konfiguration der Netzmaske (Netmask) erfolgt auf die gleiche Weise wie die Konfiguration der IP-Adresse. Die Netzmaske wird intern verwendet, um die Netzwerk-Adresse anhand der IP-Adresse zu berechnen. Der XNODE 4 berechnet die Adresse aus dem bitweisen UND jedes einzelnen Bytes und dem entsprechenden Byte der IP-Adresse. Das bitweise UND des ersten Bytes der IP-Adresse und das erste Byte der Netzmaske ergeben das erste Byte der Netzwerkadresse und so weiter.
  • Page 37 … Static Settings > IP Address entspricht der primären Art-Net-IP-Adresse (2.X.Y.Z). Die Werte X, Y und Z werden anhand der MAC-Adresse des Geräts berechnet. … Static Settings > Netmask ist 255.0.0.0. AUF SEKUNDÄRE ART-NET-IP-ADRESSE EINSTELLEN Wie „Set to Primary Art-Net IP“, für die Netzwerkeinstellungen werden jedoch die folgenden Werte verwendet: …...
  • Page 38 Bei dieser Betriebsart wird jedem Ausgangs-Port eine separate Port-Adresse (Bereich: 0 bis 32767) zugeordnet, die anhand der Werte für Art-Net Net, Sub-Net und Universe berechnet wird. Dies ermöglicht die Konfiguration des Nodes mit beliebig kombinierten Art-Net-Univers- en. Falls die Art-Net Net- oder Art-Net Sub-Net-Einstellungen geändert werden (per Fernzugriff oder über das Menü), wird allerdings jede Ausgangs-Port-Adresse neu berechnet.
  • Page 39 Bestätigen Sie die Auswahl mit [OK]. Wiederholen Sie die Schritte für die anderen Zeichen, und schließen Sie den Vorgang mit [Cancel] ab. Drücken Sie noch einmal die [Cancel]-Taste, um den Editor zu verlassen. Bestätigen Sie mit [OK], um die Änderungen zu speichern, oder drücken Sie [Cancel], um alle Änderungen zu verwerfen. KURZNAME Der Kurzname für das Gerät wird unter Home >...
  • Page 40 ART-NET (VERSION 4) Dieser Abschnitt beschreibt die Universe-Konfigurationsansicht der Art-Net-Ports, wenn die Art-Net-Version auf Art-Net 4 eingestellt ist. Die Port-Adresse ist die große Zahl unten im Display. Bei der Bearbeitung ist unter der jeweils editierbaren Ziffer ein blinkender Cursor zu sehen.
  • Page 41: Ausgangseinstellungen

    SACN Für Ports im sACN-Modus umfasst die Bildschirmansicht die Nummer des sACN-Universums und verschiedene Statusanzeigen. Die sACN-Universe-Nummer ist im Bereich von 1 – 63999 angesiedelt. Solange die Universe-Nummer (große Zahl unten im Display) editiert wird, aber noch nicht gespeichert ist, ist unter der jeweils editierbaren Ziffer ein langsam blinkender Cursor zu sehen. Per Encoder erhöhen oder verringern Sie die selektierte Ziffer.
  • Page 42: Werks-Presets

    Der Menüpunkt „Art-Net RDM“ ermöglicht die RDM-Aktivierung bzw. -Deaktivierung für den jeweiligen Ausgang. Art-Net RDM kann auch für sACN-Ports aktiviert werden. Der XNODE 4 erkennt maximal 250 Geräte pro Ausgangs-Port. Alle beschriebenen Einstellungen können auch über die Web-Oberfläche (Bereich „Port Settings“) bearbeitet werden.
  • Page 43: Geräteeinstellungen Und Informationen

     sACN, no RDM: • Identisch mit „sACN“, Art-Net RDM ist für alle Ports deaktiviert.  1,2: Art-Net – 3,4: sACN: • Art-Net RDM ist für alle Ports aktiviert. • Alle Ports sind als Ausgänge konfiguriert. • Ports 1 und 2 sind als Art-Net konfiguriert. •...
  • Page 44 WEB-OBERFLÄCHE Der Menüpunkt „Web Interface“ bietet die folgenden Optionen:  Enable: Die Web-Oberfläche ist aktiviert.  Disable: Die Web-Oberfläche ist deaktiviert. Die jeweils aktive Einstellung ist durch einen Punkt neben dem entsprechenden Menüeintrag gekennzeichnet. Über das Encoder-Rad kön- nen Sie die gewünschte Einstellung auswählen und mit [OK] bestätigen. Das Ändern dieser Einstellung erfordert einen Neustart des Nodes. Sie werden aufgefordert, den Neustart zu bestätigen.
  • Page 45 PASSWORT EINRICHTEN Wählen Sie den Menüeintrag Settings > User Input Locking > Set Password, um ein Passwort einzurichten. Sie werden aufgefordert, ein Passwort einzugeben. Die Eingabe/Bearbeitung eines Passworts funktioniert genauso wie beim Gerätename. Nachdem das Passwort eingegeben ist, werden Sie aufgefordert, das Passwort ein zweites Mal einzugeben. Sind beide eingegebenen Passwörter identisch, ist das Passwort konfiguriert.
  • Page 46 Menüeintrag „Lock User Input“ eingefügt. Wenn dieser Menüeintrag aktiviert wird, wird zunächst abgefragt, ob das Gerät gesperrt werden soll. Mit [OK] sperren Sie das Gerät, mit [Cancel] wird keine Gerätesperre eingerichtet. Der XNODE 4 wird auch gesperrt, wenn der Bildschirmschoner aktiviert wurde oder das Gerät aus- und wieder eingeschaltet wird, sofern die Passwort-Sperre eingerichtet wurde.
  • Page 47: Status-Leds

     Merge-Modus (alle Ausgänge): HTP  IP-Adresse: 2.X.Y.Z (primäre Art-Net-IP-Adresse)  Netzmaske: 255.0.0.0  Adressdarstellung:  Dezimal  LEDs: Mute nicht aktiviert  Bildschirmschoner: Aktiviert  Gerätesperre: Nicht aktiviert, kein Passwort  Web-Oberfläche: Aktiviert (verfügbar ab Firmware-Version 1.03) ETHERNET-PORT-STATUS-INFORMATION Diese Bildschirmansicht rufen Sie durch Drücken der Ethernet-Port-Taste [E] auf. Sie befindet sich direkt rechts neben dem Ethernet-Port. Das Display zeigt die folgenden Informationen zum Ethernet-Port-Status (vier Zeilen): ...
  • Page 48 Der XNODE 4 kann Sie unter bestimmten Umständen dabei unterstützen, das Gerät per „Identify“-Funktion zu lokalisieren. Diese Funktion kann via Art-Net, RDM oder die Web-Oberfläche aktiviert werden. Ist die Identifizierung erfolgt, leuchten beim XNODE 4 alle Port-Status- LEDs weiß (pro Sekunde für 0,3 Sekunden), solange sich das Gerät im „Identify“-Modus befindet.
  • Page 49: Web-Oberfläche

    WEB-OBERFLÄCHE Ab Firmware-Version 1.03 stellt der XNODE 4 zusätzlich ein Web-Interface bereit. Diese web-basierte Benutzeroberfläche ermöglicht die Überwachung des Gerätestatus, die Anpassung von Einstellungen und die Installation von Firmware-Updates. Der Zugriff auf die Web-Ober- fläche erfolgt durch Eingabe der für das Gerät konfigurierten IP-Adresse in den Web-Browser eines Computers, der sich in demselben Netzwerk befindet wie der XNODE 4.
  • Page 50 PORT SETTINGS – NETZWERKEINSTELLUNGEN In diesem Bereich können die Ports individuell konfiguriert werden. Außerdem besteht die Möglichkeit, geänderte Einstellungen auf mehrere Ports gleichzeitig anzuwenden. Wenn Sie einzelne Ports konfigurieren möchten, wählen Sie zunächst oben im Menü die Port-Nummer aus. Anschließend können Sie die gewünschten Einstellungen vornehmen. Ist die Konfiguration abgeschlossen, bestätigen Sie mit „Apply“, und die Daten werden in das Gerät übertragen.
  • Page 51 NETWORK SETTINGS – NETZWERKEINSTELLUNGEN In diesem Bereich können Sie die Netzwerkeinstellungen bearbeiten und entsprechende Informationen zum Ethernet-Port-Status abrufen. Achtung: Änderungen an den Netzwerkeinstellungen können dazu führen, dass im Netzwerk auf das Gerät nicht mehr zugegriffen werden kann! Gehen Sie vorsichtig vor, wenn Sie Änderungen vornehmen!
  • Page 52 DEVICE SETTINGS – GERÄTEEINSTELLUNGEN In diesem Bereich können Sie alle relevanten Geräteinformationen einsehen und bearbeiten. Außerdem haben Sie hier die Möglichkeit, die Konfiguration auf Werkszustand zurückzusetzen. FIRMWARE UPDATE In diesem Bereich können Sie Firmware-Updates vornehmen. Wählen Sie einfach die gewünschte Firmware-Datei aus, und laden Sie sie in das Gerät.
  • Page 53: Technische Daten

    TECHNISCHE DATEN Artikelnummer CLXNODE4 Umgebungstemperatur 30 °C … 55 °C Stromversorgung (Wechselstrom) 100 – 240 V nominal, 50/60 Hz Leistungsaufnahme, typisch Ethernet 10BASE-T / 100BASE-TX, Autonegotiation, Auto-MDI-X Netzwerkprotokolle Art-Net 1 – 4, sACN (ANSI E1.31), sACN-Draft-Version (v0.2) ANSI E1.11 ANSI E1.20 Elektrische Standard-Signalschnitt- EIA-485 stellen...
  • Page 54: Erklärungen Des Herstellers

    ERKLÄRUNGEN DES HERSTELLERS HERSTELLERGARANTIE & HAFTUNGSBESCHRÄNKUNG Unsere aktuellen Garantiebedingungen und Haftungsbeschränkungen finden Sie unter: https://cdn-shop.adamhall.com/media/pdf/MANU- FACTURERS-DECLARATIONS_CAMEO.pdf. Im Servicefall wenden Sie sich bitte an: Adam Hall GmbH, Adam-Hall-Str. 1, 61267 Neu Anspach / E-Mail: Info@adamhall.com / +49 (0)6081 / 9419-0. KORREKTE ENTSORGUNG DIESES PRODUKTS (Gültig in der Europäischen Union und anderen europäischen Ländern mit getrennter Abfallentsorgung) Dieses Symbol auf dem Produkt oder dazugehörigen Dokumenten weist darauf hin, dass das Gerät am Ende der Produktlebenszeit nicht zusammen mit dem normalen Hausmüll entsorgt werden darf, um Umwelt- oder Personenschäden durch unkontrollierte Abfall-...
  • Page 55: Anhang

    ANHANG DARSTELLUNG VON ART-NET-PORT-ADRESSEN Gemäß Art-Net 3-Spezifikation besteht die Adresse eines Art-Net-Ports aus drei Teilen: den Werten für Art-Net Net, Sub-Net und Universe. Art-Net Universe und Sub-Net weisen beide Werte zwischen 0 und 15 (4 Bit) auf. Viele Controller kombinieren diese Werte zu einem „Sub-Uni“-Wert zwischen 0 und 255 (8 Bit), wobei dem Sub-Net-Teil eine höhere Bedeutung zukommt.
  • Page 56: Français

    Il est essentiel que vous lisiez et compreniez ce manuel avant de faire fonctionner l'appareil et que vous suiviez rigoureusement les instruc- tions données ci-dessous lorsque vous configurez, raccordez et utilisez le XNODE 4. N'utilisez pas l'appareil d'une autre manière ou dans un autre but que ceux décrits dans le présent manuel d'utilisation.
  • Page 57: Introduction

    INTRODUCTION XNODE 4 est un convertisseur convivial d’Art-Net et sACN en DMX prenant en charge la distribution de quatre univers DMX via quatre ports DMX isolés optiquement de manière individuelle, chacun configurable de manière indépendante en tant qu’entrée ou sortie. Étant donné...
  • Page 58: Vue D'ensemble De L'appareil

    Consultez un électricien qualifié si vous avez des doutes au sujet de l’installation correcte. Un connecteur de montage de câble Neutrik powerCON NAC3FCA bleu doit être utilisé pour l’alimentation au niveau de la prise d’entrée d’alimentation du XNODE 4. •...
  • Page 59 XNODE 4 ne doit pas dépasser un total de 19,8 ampères. RACCORDEMENTS DMX Selon la version, le XNODE 4 est équipé de connecteurs XLR à 5 broches ou à 3 broches, ou de connecteurs Neutrik etherCON RJ45. CONNECTEURS XLR...
  • Page 60: Réglages Et Menu

    RÉGLAGES ET MENU NAVIGATION GÉNÉRALE La molette de sélection est le moyen principal pour naviguer à travers les menus. Dans la plupart des menus, les éléments sont disposés verticalement. Dans ces menus, tournez la molette dans le sens des aiguilles d’une montre pour sélectionner l’élément se trouvant sous l’élément actuellement sélectionné...
  • Page 61 ÉCRAN HOME (ACCUEIL) Écran Home d'un XNODE 4 fonction- Écran Home d'un XNODE 4 avec Écran Home d'un XNODE 4 avec les nant en mode Art-Net 4, configuré les ports 1 - 2 configurés sur une ports 1 - 2 configurés sur une sortie sur une adresse IP personnalisée...
  • Page 62: Network Settings (Réglages Réseau)

    Enable (Activer) si vous souhaitez que votre réseau soit configuré par un serveur DHCP. Cela serait généralement le cas si vous raccordez le XNODE 4 à un réseau domestique ou de bureau. Un point apparaît à côté du réglage actuellement actif. Utilisez la molette de sélection pour choisir le réglage souhaité et confirmez en appuyant sur [OK] afin de modifier le réglage.
  • Page 63 Pour configurer le masque de réseau, utilisez la même procédure que pour configurer l’adresse IP. Le masque de réseau est utilisé en interne pour calculer l’adresse réseau à partir de l’adresse IP. Pour ce faire, le XNODE 4 calcule le ET par bit de chaque octet avec l’octet correspondant de l’adresse IP.
  • Page 64 SET TO PRIMARY ART-NET IP (RÉGLER SUR L’ADRESSE IP ART-NET PRINCIPALE) Après avoir navigué jusqu’à l’élément de menu Home > Menu > Network > Static Settings > Set to primary Art-Net IP, une boîte de dialogue comme celle illustrée à droite apparaît. Appuyez sur [Cancel] pour annuler ou appuyez sur [OK] pour appliquer les réglages suivants : …...
  • Page 65 INDEPENDENT UNIVERSES (UNIVERS INDÉPENDANTS) Ce réglage est disponible uniquement avec les versions de firmware apparues avant la version 1.01. Les versions de firmware plus récentes offrent la même fonctionnalité lorsque la version Art-Net est réglée sur Art-Net 4. Le principal avantage de la prise en charge d’Art-Net 4 par rapport à...
  • Page 66 Appuyez ensuite sur le bouton [OK] et sélectionnez un caractère à ajouter. Confirmez votre sélection en appuyant sur [OK]. Répétez les étapes ci-dessus pour les caractères restants. Ensuite, appuyez sur [Cancel] pour terminer l’insertion de caractères. Appuyez à nouveau sur [Cancel] pour quitter l’éditeur. Appuyez sur [OK] pour enregistrer les modifications ou appuyez sur [Cancel] pour annuler toutes les modifications.
  • Page 67 UNIVERSE (UNIVERS) Pour ajuster l’univers du port X, naviguez jusqu’à Home > Menu > Ports > Port X > Universe. Cet écran est également accessible en appuy- ant une fois sur le bouton de port correspondant. Cet écran fournit des informations essentielles sur le port DMX et permet la modification de son univers Art-Net ou sACN. Pour plus d’infor- mations sur les indicateurs présents sur cet écran, voir la section Écran Port.
  • Page 68: Output Settings (Réglages De Sortie)

    SACN Les ports fonctionnant en mode sACN affichent le numéro d’univers sACN et des indicateurs d’état. Le numéro d’univers sACN peut être compris entre 1 et 63999. Lorsque l’univers (long numéro en bas) est en cours de modification, mais pas encore enregistré, un curseur clignotant lentement s’affiche sous le chiffre actuellement modifiable. Utilisez la molette de sélection pour augmenter ou diminuer ce chiffre.
  • Page 69: Factory Presets (Préréglages D'usine)

    ART-NET RDM Sous Art-Net RDM, RDM peut être activé ou désactivé pour la sortie. Art-Net RDM peut également être activé pour les ports sACN. XNODE 4 recherche un maximum de 250 appareils par port de sortie. Tous les réglages décrits précédemment peuvent être modifiés via l’interface Web à la page Port Settings.
  • Page 70: Device Settings (Réglages De L'appareil) Et Device Information (Informations Sur L'appareil)

    • Art-Net RDM est activé sur tous les ports. • Tous les ports sont configurés en tant que sorties. • Les ports 1 et 2 sont configurés sur Art-Net. • Les ports 3 et 4 sont configurés sur sACN. • Les ports sont configurés sur des univers consécutifs (adresses de port). L’utilisateur est invité à choisir un univers de départ. •...
  • Page 71 confirmation. Appuyez sur [OK] pour redémarrer maintenant ou sur [Cancel] pour annuler. Cette option des réglages de l’appareil n’est disponible qu’à partir de la version de firmware 1.03. SCREEN SAVER (ÉCONOMISEUR D’ÉCRAN) Sous Screen Saver, une liste de sélection est disponible avec les options suivantes : ...
  • Page 72 La modification du mot de passe fonctionne de la même manière que la modification du nom de l’appareil expliquée. Une fois que le mot de passe a été saisi, le XNODE 4 vous demande de saisir le mot de passe une deuxième fois. Si les deux textes saisis correspondent, le mot de passe est défini.
  • Page 73 Les informations suivantes au sujet de l’appareil sont disponibles sous Home > Menu > Device Settings > Device Information. MODEL (MODÈLE) Le modèle de l’appareil est indiqué en tant que « XNODE 4 » pour toutes les variantes du XNODE 4. BOOT SOFTWARE (LOGICIEL DE DÉMARRAGE) Le numéro de version complet du logiciel de démarrage.
  • Page 74: Led D'état

     Screen Saver : Activé  User Input Locking : Désactivé, mot de passe non défini  Web Interface : Activé (disponible avec la version de firmware 1.03) ETHERNET PORT STATUS INFORMATION (INFORMATIONS D’ÉTAT DU PORT ETHERNET) Cet écran est accessible en appuyant sur le bouton du port Ethernet [E], situé à droite du port Ethernet. Cet écran affiche les informations suivantes au sujet de l’état du port Ethernet sur quatre lignes : ...
  • Page 75 MISES À JOUR DU FIRMWARE Les mises à jour du firmware sont mises à disposition sur la page du produit du site Web de Cameo. Pour mettre à jour le firmware, un PC avec Windows (Vista ou ultérieur) et un câble USB A vers B (câble d’imprimante USB) est requis. Veuillez consulter la documentation séparée également mise à...
  • Page 76: Interface Web

    à jour du firmware. L’interface Web est accessible en saisissant l’adresse IP configurée de l’appareil dans le navigateur Web d’un ordinateur connecté au même réseau que le XNODE 4.
  • Page 77 PAGE PORT SETTINGS (RÉGLAGES DE PORT) Sur la page des réglages de port, chaque port peut être configuré individuellement ou des modifications peuvent être appliquées à plusieurs ports simultanément. Pour configurer les ports séparément, sélectionnez d’abord le numéro dans le menu supérieur, puis des modifications pourront être apportées aux réglages.
  • Page 78 PAGE NETWORK SETTINGS (RÉGLAGES RÉSEAU) La page des réglages réseau permet à l’utilisateur de modifier les réglages réseau et d’afficher des informations importantes au sujet de l’état du port Ethernet. Attention : les modifications apportées aux réglages réseau pourraient avoir pour effet l’inaccessibilité de l’appareil via le réseau ! À utiliser avec prudence !
  • Page 79 PAGE DEVICE SETTINGS (RÉGLAGES DE L’APPAREIL) Cette page permet à l’utilisateur d’afficher et d’apporter des modifications à n’importe quelle information importante au sujet de l’appareil. En outre, les valeurs d’usine par défaut peuvent être rétablies à partir de cette page. PAGE FIRMWARE UPDATE (MISE À...
  • Page 80: Données Techniques

    DONNÉES TECHNIQUES Numéro de produit : CLXNODE4 Température ambiante 30 °C…55 °C (-22 °F…131 °F) Alimentation CA 100 - 240 V nominale, 50/60 Hz Consommation électrique typique 7 W Ethernet 10BASE-T / 100BASE-TX, auto-négociation, auto-MDI-X Protocoles réseau Art-Net 1 - 4, sACN (ANSI E1.31), version provisoire sACN (v0.2) ANSI E1.11 ANSI E1.20 Norme électrique des ports de signaux...
  • Page 81: Déclarations Du Fabricant

    DÉCLARATIONS DU FABRICANT GARANTIE & LIMITATION DE RESPONSABILITÉ DU FABRICANT Nos conditions actuelles de garantie et de limitation de responsabilité sont disponibles à l'adresse suivante : https://cdn-shop.adamhall. com/media/pdf/MANUFACTURERS-DECLARATIONS_CAMEO.pdf. Pour demander un service de garantie pour un produit, veuillez contacter Adam Hall GmbH, Adam-Hall-Str. 1, 61267 Neu Anspach / e-mail : Info@adamhall.com / +49 (0)6081 / 9419-0. ÉLIMINATION CORRECTE DE CE PRODUIT (valide dans l'Union européenne et les autres pays européens disposant d'un système de collecte sélective des déchets) Ce symbole sur le produit ou sur ses documents indique que l'appareil ne doit pas être traité...
  • Page 82: Annexe

    ANNEXE REPRÉSENTATIONS DES ADRESSES DE PORT ART-NET Selon la spécification Art-Net 3, l’adresse d’un port Art-Net est composée de trois parties : les numéros de réseau, de sous-réseau et d’univ- ers Art-Net. Les numéros d’univers et de sous-réseau Art-Net sont tous les deux compris entre 0 et 15 (4 bits). De nombreux contrôleurs combinent ces valeurs en un numéro de sous-univers, engendrant une valeur comprise entre 0 et 255 (8 bits), avec la partie sous-réseau occupant les chiffres les plus importants.
  • Page 83: Español

    Lea estas instrucciones de uso detenidamente, de modo que pueda comenzar a utilizar su nuevo producto de Cameo Light con rapidez y de forma óptima. Encontrará más información acerca de Cameo Light en nuestro sitio web WWW.CAMEOLI- GHT.COM.
  • Page 84: Introducción

    INTRODUCCIÓN XNODE 4 es un conversor de Art-Net y sACN a DMX de fácil uso compatible con la distribución de cuatro universos de DMX a través de cu- atro puertos DMX aislados ópticamente de forma individual, cada uno de los cuales puede configurarse de forma independiente como una entrada o como una salida.
  • Page 85: Descripción General Del Dispositivo

    DESCRIPCIÓN GENERAL DEL DISPOSITIVO PANTALLA OLED MANDO GIRATORIO / BOTÓN [OK] El mando giratorio se utiliza principalmente para seleccionar opciones de menú girando la perilla. También funciona como un botón pulsa- dor. En este manual se denomina a este botón simplemente botón [OK] u [OK]. BOTÓN [CANCEL] BOTÓN DE PUERTO ETHERNET [E] PUERTO ETHERNET...
  • Page 86 ¡Advertencia! Para la protección contra descargas eléctricas peligrosas, el dispositivo debe estar conectado a tierra (puesto a tierra). La fuente de alimentación de CA local debe contar con protección contra sobrecargas y fallos a tierra (fuga a tierra). ¡Importante! Solo en situaciones de emergencia inserte o retire un conector Neutrik PowerCON mientras esté conectado a la red eléctrica para aplicar o cortar el suministro de energía, ya que al hacerlo puede causar un arco eléctrico en los termina- les que dañará...
  • Page 87: Ajustes Y Menú

    AJUSTES Y MENÚ NAVEGACIÓN GENERAL El mando giratorio es el medio principal para navegar por los menús. La mayoría de los menús muestran sus opciones de forma vertical. En esos menús, gire el mando en el sentido de las agujas del reloj para seleccionar la opción situada debajo de la opción que esté selecciona- da en ese momento o gire el mando en sentido contrario a las agujas del reloj para seleccionar la opción situada encima de la opción que esté...
  • Page 88 PANTALLA DE INICIO Pantalla de inicio de un XNODE 4 que Pantalla de inicio del XNODE 4 con Pantalla de inicio del XNODE 4 con opera en modo Art-Net 4, configurado los puertos 1 - 2 configurados para los puertos 1 - 2 configurados para para tener una dirección IP persona- la salida Art-Net y los puertos 3 - 4 la salida Art-Net y los puertos 3 - 4 lizada (192.168.10.125) y mostrar en...
  • Page 89: Configuración De Red

    INDICACIÓN DE ESTADO Hay varios indicadores y etiquetas en la pantalla de puerto que muestran el modo de funcionamiento actual y el estado del puerto seleccionado. Las siguientes etiquetas de estado que aparecen en la parte superior izquierda de la pantalla de puerto indican el estado de la señal DMX: Etiqueta Modo de puerto Descripción...
  • Page 90 AJUSTES ESTÁTICOS Todos los ajustes efectuados siguiendo la ruta Home > Menu > Network > Static Settings se aplican solo si el protocolo DHCP está inhabil- itado y se ignoran en caso contrario. En este menú, puede elegir la dirección IP, la máscara de red y la dirección de la puerta de enlace que se utilizará...
  • Page 91 ESTABLECER LA DIRECCIÓN IP SEGÚN LA IP ART-NET PRIMARIA Después de navegar hasta la opción de menú siguiendo la ruta Home > Menu > Network > Static Settings > Set to primary Art-Net IP, apare- cerá un cuadro de diálogo como el que se muestra a la derecha. Pulse [Cancel] para cancelar o pulse [OK] para aplicar los siguientes ajustes: …...
  • Page 92 UNIVERSOS INDEPENDIENTES Esta configuración solo está disponible con versiones de firmware anteriores a la 1.01. Las nuevas versiones de firmware proporcionan la misma funcionalidad si la versión de Art-Net está establecida en Art-Net 4. La principal ventaja del soporte de Art-Net 4 sobre la funcio- nalidad obsoleta de los universos independientes es que el soporte de Art-Net 4 permite a un controlador que funcione según Art-Net 4 comprender adecuadamente y, si esto es compatible con el controlador, configurar la dirección de puerto de cada puerto, tanto si los puertos comparten una dirección de red y subred común como si no.
  • Page 93 Luego pulse el botón [OK] y seleccione el carácter que desea añadir. Confirme su selección pulsando [OK]. Repita los pasos anteriores para el resto de los caracteres. A continuación, pulse [Cancel] para terminar de insertar caracteres. Pulse [Cancel] de nuevo para salir del editor. Pulse [OK] para guardar los cambios o pulse [Cancel] para descartar todos los cambios.
  • Page 94 UNIVERSO Para ajustar el universo del puerto X, siga esta ruta: Home > Menu > Ports > Port X > Universe. También se puede acceder a esta pantalla pulsando una vez el botón de puerto correspondiente. Esta pantalla proporciona información esencial sobre el puerto DMX y permite cambiar su universo Art-Net o sACN. Para más información sobre los indicadores de esta pantalla, véase la sección «Pantalla de puerto».
  • Page 95: Configuración De Salidas

    En el lado izquierdo de la pantalla, se muestra la siguiente información en tres líneas debajo de la etiqueta de estado (véase la sección «Indicación de estado» en la página 10): Red Art-Net, subred Art-Net y sub-uni Art-Net. El número sub-uni Art-Net se determina a partir de la subred y el universo de un puerto como 16 x subred + universo. Algunos controla- dores designan la dirección del universo Art-Net como un único número en el rango de 0 a 255.
  • Page 96: Presets De Fábrica

     Marca después de la ruptura: Aproximadamente 40 μS. El modo de salida DMX «Relaxed» (Relajado) tiene el siguiente comportamiento:  Frecuencia de refresco: Aproximadamente 30 Hz cuando se envían 512 canales, dependiendo de la cantidad de solicitudes RDM enviadas desde el controlador y que se reducen aún más durante la función de detección «Discovery» de RDM. ...
  • Page 97: Configuración E Información Del Dispositivo

    • Art-Net RDM está habilitado. • Los puertos 1 - 4 están configurados para funcionar con universos sACN consecutivos. Se le pide al usuario que seleccione un universo inicial.  sACN, no RDM: • Al igual que sACN, Art-Net RDM está inhabilitado en todos los puertos. ...
  • Page 98 INTERFAZ WEB En Interfaz web, al usuario se le presenta una lista de selección con las siguientes opciones:  Habilitar: Se habilita la interfaz web.  Inhabilitar: Se inhabilita la interfaz web. Se muestra un círculo negro a la izquierda del ajuste que esté activo en ese momento. Utilice el mando giratorio para seleccionar el ajuste deseado y pulse [OK] para aplicar el ajuste.
  • Page 99 ESTABLECER LA CONTRASEÑA Para establecer una contraseña, seleccione la opción de menú a la que se llega siguiendo esta ruta: Settings > User Input Locking > Set Password. Aparecerá un cuadro de diálogo pidiéndole una contraseña. La edición de la contraseña funciona igual que la edición del nombre del dispositivo.
  • Page 100 La configuración predeterminada también se puede restaurar desde la página de configuración del dispositivo de la interfaz web. Esta función restaurará todos los ajustes a los valores predeterminados:  Nombre: CAMEO XNODE 4  Nombre corto: XNODE 4  Red Art-Net: 0 ...
  • Page 101: Luces Led De Estado

     Salvapantallas: Habilitado  Bloqueo de entradas de usuario: Inhabilitado, sin contraseña establecida  Interfaz web: Habilitada (disponible con la versión de firmware 1.03) INFORMACIÓN SOBRE EL ESTADO DEL PUERTO ETHERNET Se llega a esta pantalla pulsando el botón de puerto Ethernet [E], que se encuentra a la derecha justo al lado del puerto Ethernet. Véase la «Descripción general del dispositivo»...
  • Page 102: Interfaz Web

    ACTUALIZACIONES DEL FIRMWARE Las actualizaciones del firmware se proporcionarán en la página del producto en el sitio web de Cameo. Para actualizar el firmware, se requiere un PC con Windows (versión Vista de Microsoft Windows o posterior) y un cable USB A a B (cable de impresora USB). Consulte la documentación separada que también se proporciona en la página web del producto para obtener detalles sobre el proceso de actual-...
  • Page 103 A partir de la versión de firmware 1.03, el XNODE 4 permite el uso de una interfaz web alojada en el dispositivo. A través de esta interfaz se puede observar el estado, se puede ajustar la configuración y se pueden realizar actualizaciones del firmware. Se accede a la interfaz web escribiendo la dirección IP configurada del dispositivo en un navegador web de un ordenador que esté...
  • Page 104 PÁGINA DE CONFIGURACIÓN DE PUERTOS En la página de configuración de puertos, cada puerto puede configurarse individualmente o se pueden aplicar cambios a varios puertos a la vez. Para configurar los puertos por separado, seleccione primero el número en el menú superior, después de lo cual se pueden hacer cambios en los ajustes.
  • Page 105 PÁGINA DE CONFIGURACIÓN DE LA RED La página de configuración de red le permite al usuario cambiar la configuración de la red y ver la información relevante sobre el estado del puerto Ethernet. Atención: ¡Los cambios en la configuración de la red podrían provocar que no se pueda acceder al dispositivo a través de la red! ¡Efectúe cualquier cambio con precaución!
  • Page 106 PÁGINA DE CONFIGURACIÓN DEL DISPOSITIVO Esta página permite al usuario ver y efectuar cambios en cualquier información relevante del dispositivo. Además, los valores predetermina- dos de fábrica pueden restaurarse desde esta página. PÁGINA DE ACTUALIZACIÓN DEL FIRMWARE Desde esta página se pueden realizar actualizaciones del firmware. Para ello, simplemente seleccione el archivo de firmware deseado y luego cárguelo.
  • Page 107: Datos Técnicos

    DATOS TÉCNICOS Número de producto: CLXNODE4 Temperatura ambiente -30 °C…55 °C (-22 °F…131 °F) Tensión de CA 100 - 240 V nominal, 50/60 Hz Consumo de energía típico 7 W Ethernet 10BASE-T / 100BASE-TX, con autonegociación, MDI-X automático Protocolos de red Art-Net 1 - 4, sACN (ANSI E1.31), sACN versión preliminar (v0.2) ANSI E1.11 ANSI E1.20 Puertos de señales eléctricas estándar...
  • Page 108: Declaraciones Del Fabricante

    DECLARACIONES DEL FABRICANTE GARANTÍA DEL FABRICANTE Y LIMITACIONES DE RESPONSABILIDAD Puede encontrar nuestras condiciones de garantía actuales y las limitaciones de responsabilidad en la siguiente dirección: https://cdn-shop. adamhall.com/media/pdf/MANUFACTURERS-DECLARATIONS_CAMEO.pdf. Para solicitar el servicio de garantía para un producto, contacte con Adam Hall GmbH, Adam-Hall-Str. 1, 61267 Neu Anspach / Correo electrónico: Info@adamhall.com / +49 (0)6081 / 9419-0. ELIMINACIÓN CORRECTA DE ESTE PRODUCTO (las indicaciones son válidas en la Unión Europea y otros países europeos que tengan un sistema de recogida diferenciada de residuos)
  • Page 109: Apéndice

    APÉNDICE REPRESENTACIONES DE DIRECCIONES DE PUERTOS ART-NET Según la especificación de Art-Net 3, la dirección de un puerto Art-Net consta de tres partes: El número de red, subred y universo de Art-Net. El universo Art-Net y el número de subred tienen un valor entre 0 y 15 (4 bits). Muchos controladores combinan estos valores con el número de sub-uni, lo que da como resultado un valor entre 0 y 255 (8 bits), en el que la parte de subred ocupa los dígitos más significa- tivos.
  • Page 110: Polski

    • Nie należy używać urządzenia, jeśli temperatura otoczenia przekracza 55°C (131°F). • Nie należy modyfikować urządzenia w jakikolwiek sposób nieopisany w tej instrukcji ani instalować części Cameo innych niż oryginalne. • Nie próbować wykonywać obejść bezpieczników. Uszkodzony bezpiecznik należy wymienić tylko na bezpiecznik określonego typu i kategorii.
  • Page 111: Wprowadzenie

    W niektórych przypadkach użytkownicy mogą wykorzystać już istniejącą infrastrukturę sieciową. Co więcej, XNODE 4 doskonale nadaje się również do wysyłania danych DMX do Twoich urządzeń z komputera lub nawet z urządzenia przenośnego. Wiele programów do sterowania oświetleniem dla komputerów PC lub Mac obsługuje wyjście Art-Net w trybie natywnym, a dzięki obsłudze DHCP przez XNODE 4 można nawet pozwolić...
  • Page 112: Przegląd Urządzenia

    W razie jakichkolwiek wątpliwości co do prawidłowej instalacji należy się skonsultować z wykwalifikowanym elektrykiem. Do zasilania gniazda wejściowego zasilania XNODE 4 należy użyć niebieskiego złącza Neutrik powerCON NAC3FCA. • Tryb wejściowy dostępny tylko na urządzeniach wyprodukowanych po 2017 roku (wersja sprzętu 1.0-b)
  • Page 113  Bez względu na to, jakie jest napięcie zasilania sieciowego AC, prąd pobierany przez wszystkie urządzenia pobierające zasilanie sieciowe AC z gniazda wyjściowego XNODE 4 nie może przekraczać łącznie 19,8 A. ZŁĄCZA DMX W zależności od wersji urządzenie XNODE 4 jest wyposażone w 5-pinowe lub 3-pinowe złącza XLR lub w złącza Neutrik etherCON RJ45. ZŁĄCZA XLR Złącze...
  • Page 114: Ustawienia I Menu

    USTAWIENIA I MENU OGÓLNE ZASADY NAWIGACJI Pokrętło enkodera jest podstawowym elementem służącym do poruszania się po menu. W większości menu opcje są ułożone pionowo. W tych menu należy obrócić pokrętło w prawo, aby wybrać element poniżej aktualnie wybranego elementu, lub obrócić pokrętło w lewo, aby wybrać...
  • Page 115 EKRAN GŁÓWNY Ekran główny XNODE 4 pracującego Ekran główny XNODE 4 z portami 1–2 Ekran główny XNODE 4 z portami 12 w trybie Art-Net 4, skonfigurowanego skonfigurowanymi do wyjścia Art-Net skonfigurowanymi do wyjścia Art-Net z niestandardowym adresem IP i portami 3–4 do wyjścia sACN.
  • Page 116: Ustawienia Sieciowe

    Wybrać kolejno Ekran główny > Menu > Sieć > DHCP, aby włączyć lub wyłączyć protokół DHCP (Dynamic Host Configuration Protocol). Wybrać opcję Włącz, jeśli sieć ma zostać skonfigurowana przez serwer DHCP. Zazwyczaj ma to miejsce w przypadku podłączenia XNODE 4 do sieci domowej lub biurowej.
  • Page 117 Aby skonfigurować maskę sieci, należy wykonać tę samą procedurę, co podczas konfigurowania adresu IP. Maska sieci jest używana wewnętrznie do obliczania adresu sieciowego na podstawie adresu IP. XNODE 4 wykonuje operację bitową AND na odpowiadających sobie bitach adresu IP. Najpierw operacja bitowa AND jest wykonywana na pierwszym bicie adresu IP i pierwszym bicie maski sieci, następnie na drugim itd.
  • Page 118 USTAW ADRES IP PODSTAWOWEJ SIECI ART-NET Po przejściu do pozycji menu Ekran główny > Menu > Sieć > Ustawienia statyczne > Ustaw adres główny IP sieci Art-Net zostanie wyświ- etlone okno dialogowe podobne do tego po prawej stronie. Nacisnąć przycisk [Anuluj], aby przerwać, lub przycisk [OK], aby zastosować następujące ustawienia: …...
  • Page 119 NIEZALEŻNE ŚRODOWISKA To ustawienie jest dostępne tylko dla wersji oprogramowania sprzętowego wcześniejszych niż 1.01. Nowsze wersje oprogramowania sprzętowego zapewniają tę samą funkcjonalność, co ustawienie wersji Art-Net na wartość Art-Net 4. Główną zaletą obsługi Art-Net 4 w porównaniu z przestarzałą funkcjonalnością niezależnych środowisk jest to, że obsługa Art-Net 4 umożliwia świadomemu kontrolerowi Art- Net 4 prawidłowe zrozumienie i, jeśli jest obsługiwana przez kontroler, skonfigurowanie adresu każdego z portów, niezależnie od tego, czy porty mają...
  • Page 120 Następnie nacisnąć przycisk [OK] i wybrać znak do dodania. Potwierdzić wybór, naciskając [OK]. Powtórzyć powyższe kroki dla pozostałych znaków. Następnie nacisnąć [Anuluj], aby zakończyć wstawianie znaków. Ponownie nacisnąć [Anuluj], aby zakończyć pracę edytora. Nacisnąć [OK], aby zapisać zmiany, lub [Anuluj], aby je odrzucić. KRÓTKA NAZWA Krótką...
  • Page 121 ŚRODOWISKO Aby dostosować środowisko portu X, należy wybrać kolejno pozycje Ekran główny > Menu > Porty > Port X > Środowisko. Ten ekran można również wyświetlić, naciskając jeden raz przycisk odpowiedniego portu. Zawiera on podstawowe informacje o porcie DMX i umożliwia zmianę jego środowiska Art-Net lub sACN. Więcej informacji o wskaźnikach na tym ekranie znajduje się...
  • Page 122: Ustawienia Wyjściowe

    SACN Dla portów działających w trybie sACN jest wyświetlany numer środowiska sACN i wskaźniki statusu. Numer środowiska sACN może być z zakresu 1–63999. Jeśli numer środowiska (duża liczba u dołu) jest edytowany, ale nie został jeszcze zapisany, pod edytowaną cyfrą wyświetlany jest powoli migający kursor. Można ją zwiększyć lub zmniejszyć za pomocą enkodera. Nacisnąć przycisk odpowiedniego portu, aby zmienić...
  • Page 123: Wstępne Ustawienia Fabryczne

    Po wybraniu opcji Art-Net RDM można włączyć lub wyłączyć RDM dla wyjścia. Art-Net RDM można włączyć również dla portów sACN. XNODE 4 wykrywa maksymalnie 250 urządzeń na port wyjściowy. Wszystkie powyższe ustawienia można również zmienić za pomocą interfejsu internetowego na stronie ustawień portu.
  • Page 124: Ustawienia Urządzenia I Informacje

    • Porty 3 i 4 są skonfigurowane dla sACN. • Porty są skonfigurowane dla kolejnych środowisk (adresy portów). Użytkownik jest proszony o wybranie środowiska początkowego. • W osobnym oknie dialogowym użytkownik jest proszony o wybranie, czy dostosować ustawienia sieciowe. Jeśli wybierze dostoso- wanie, adres IP jest ustawiany na adres podstawowej sieci Art-Net IP, a maska podsieci na wartość...
  • Page 125 Aby ustawić hasło, wybierz pozycje menu Ustawienia > Blokada wprowadzania danych przez użytkownika > Ustaw hasło. Pojawi się okno dialogowe z prośbą o podanie hasła. Edycja hasła działa tak samo jak edycja nazwy urządzenia. Po wprowadzeniu hasła XNODE 4 poprosi o jego powtórzenie.
  • Page 126 Jeśli dwa wprowadzone hasła będą zgodne, hasło zostanie ustawione. Na koniec, po pomyślnym zapisaniu hasła, użytkownik zostanie zapytany, czy chce włączyć blokadę za pomocą hasła, jeśli nie jest ona jeszcze włączona. Naciśnięcie przycisku [OK] włącza blokadę za pomocą hasła. Naciśnięcie przycisku [Anuluj] powoduje zamknięcie okna dialogowego i wyłączenie blokady za pomocą...
  • Page 127 MODEL Model urządzenia to „XNODE 4” dla wszystkich wariantów urządzenia XNODE 4. OPROGRAMOWANIE STARTOWE Pełna wersja oprogramowania startowego. OPROGRAMOWANIE SPRZĘTOWE Pełna wersja oprogramowania sprzętowego. SPRZĘT Wersja sprzętu. ADRES MAC Adres MAC interfejsu Ethernet węzła. IDENTYFIKATORY UID Identyfikatory UID (unikatowe identyfikatory) RDM czterech portów wyjściowych. Są to numery, które jednoznacznie identyfikują każde urządzenie RDM.
  • Page 128: Diody Led Statusu

    Ruch jest sygnalizowany krótkimi przerwami. IDENTYFIKACJA XNODE 4 może pomóc użytkownikowi w zlokalizowaniu urządzenia w określonych warunkach przez proces identyfikacji. Węzeł może być ustawiony w zidentyfikowanym stanie, za pomocą środków komunikacji, takich jak Art-Net, RDM lub interfejs WWW. W przypadku XNODE 4 zidentyfikowane urządzenie będzie zaświecać...
  • Page 129 Wygaszacz ekranu. AKTUALIZACJE OPROGRAMOWANIA SPRZĘTOWEGO Aktualizacje oprogramowania sprzętowego będą dostarczane na stronie produktu w witrynie internetowej Cameo. Do aktualizacji opro- gramowania sprzętowego wymagany jest komputer z systemem Windows (Vista lub nowszym) oraz kabel USB A do B (kabel USB drukarki).
  • Page 130: Interfejs Www

    INTERFEJS WWW Od wersji 1.03 oprogramowania sprzętowego XNODE 4 umożliwia korzystanie z interfejsu WWW hostowanego przez urządzenie. Za pomocą tego interfejsu można obserwować stan, regulować ustawienia i przeprowadzać aktualizacje oprogramowania sprzętowego. Dostęp do interfejsu internetowego uzyskuje się przez wpisanie skonfigurowanego adresu IP urządzenia w przeglądarce internetowej komputera podłączonego do tej samej sieci co XNODE 4.
  • Page 131 STRONA USTAWIEŃ PORTÓW Na stronie ustawień portów każdy z nich może być konfigurowany indywidualnie lub zmiany mogą być zastosowane do wielu portów jednocześnie. Aby skonfigurować porty oddzielnie, należy najpierw wybrać numer z górnego menu, po czym można dokonać zmian w ustawieniach.
  • Page 132 STRONA USTAWIEŃ SIECIOWYCH Strona ustawień sieciowych umożliwia użytkownikowi zmianę ustawień sieciowych i wyświetlenie odpowiednich informacji na temat stanu portu Ethernet. Uwaga: Zmiany w ustawieniach sieciowych mogą spowodować, że urządzenie nie będzie dostępne przez sieć! Należy ostrożnie używać tej funkcji!
  • Page 133 STRONA USTAWIEŃ URZĄDZENIA Na tej stronie użytkownik może przeglądać i wprowadzać zmiany dotyczące wszelkich istotnych informacji o urządzeniu. Co więcej, można z tego poziomu przywrócić domyślne ustawienia fabryczne. STRONA AKTUALIZACJI OPROGRAMOWANIA SPRZĘTOWEGO Na tej stronie mogą być przeprowadzane aktualizacje oprogramowania sprzętowego. W tym celu wystarczy wybrać żądany plik z oprogramowaniem sprzętowym, a następnie go przesłać.
  • Page 134: Dane Techniczne

    DANE TECHNICZNE Numer produktu: CLXNODE4 Temperatura zewnętrzna 30°C…55°C (-22°F…131°F) Zasilanie AC 100–240 V nominalne, 50/60 Hz Typowy pobór mocy Ethernet 10BASE-T / 100BASE-TX, autonegocjacja, auto MDI-X Protokoły sieciowe Art-Net 1–4, sACN (ANSI E1.31), sACN wersja robocza (v0.2) ANSI E1.11 ANSI E1.20 Norma elektryczna portów sygnałowych EIA-485 Wymiary modeli do montażu w stelażach...
  • Page 135: Deklaracja Producenta

    DEKLARACJA PRODUCENTA GWARANCJA PRODUCENTA I OGRANICZENIE ODPOWIEDZIALNOŚCI Nasze aktualne warunki gwarancji i ograniczenia odpowiedzialności można znaleźć na stronie: https://cdn-shop.adamhall.com/media/pdf/ MANUFACTURERS-DECLARATIONS_CAMEO.pdf. Aby zamówić serwis gwarancyjny dla danego produktu, prosimy o kontakt z firmą Adam Hall GmbH, Adam-Hall-Str. 1, 61267 Neu Anspach / E-mail: Info@adamhall.com / +49 (0)6081 / 9419-0. PRAWIDŁOWA UTYLIZACJA PRODUKTU (obowiązuje w Unii Europejskiej i innych państwach europejskich mających system segregacji odpadów) Ten symbol umieszczony na produkcie lub na jego dokumentach oznacza, że urządzenie nie może być...
  • Page 136: Załącznik

    ZAŁĄCZNIK REPREZENTACJA ADRESÓW PORTÓW SIECI ART-NET Zgodnie ze specyfikacją Art-Net 3, adres portu Art-Net składa się z trzech części: sieć Art-Net, podsieć i numer środowiska. Środowisko i numer podsieci Art-Net mają wartość od 0 do 15 (4 bity). Wiele kontrolerów łączy te wartości do numeru podrzędnego środowiska, co daje wartość...
  • Page 137: Italiano

    È essenziale leggere e comprendere il presente manuale prima di mettere in funzione il dispositivo e seguire attentamente le istruzioni riportate di seguito quando si configura, si collega e si utilizza XNODE 4. Non utilizzare il dispositivo in modi o per scopi non descritti in questo manuale d'uso.
  • Page 138: Introduzione

    Poiché la maggior parte delle principali console di illuminazione è in grado di trasmettere dati Art-Net, XNODE 4 è tutto ciò che serve per sfruttare la capacità di network- ing della console, consentendovi di trasmettere un vasto numero di universi su un unico cavo di rete. In alcuni casi, gli utenti possono trarre profitto da infrastrutture di rete già...
  • Page 139: Panoramica Del Dispositivo

    In caso di dubbi sulla corretta installazione, consultare un elettricista qualificato. Per alimentare la presa d’ingresso dell’alimentazione di XNODE 4 utilizzare un connettore Neutrik powerCON NAC3FCA blu montato su cavo. •...
  • Page 140 19,8 ampere.  Per collegare XNODE 4 alla rete elettrica AC e per collegare altri dispositivi alla presa di corrente è necessario utilizzare un cavo di alimentazione che soddisfi i requisiti specificati nella sezione delle istruzioni di sicurezza di questo manuale.
  • Page 141: Impostazioni E Menu

    IMPOSTAZIONI E MENU NAVIGAZIONE GENERALE La ruota encoder è il mezzo principale per navigare nei menu. La maggior parte dei menu dispone le voci in verticale. In questi menu, ruotare l’encoder in senso orario per selezionare la voce sotto quella attualmente selezionata o ruotare l’encoder in senso antiorario per selezionare la voce sopra quella attualmente selezionata.
  • Page 142 SCHERMATA INIZIALE Schermata iniziale di un XNODE 4 che Schermata iniziale di XNODE 4 con Schermata iniziale di XNODE 4 funziona in modalità Art-Net 4, confi- porte 1 - 2 configurate per l'uscita Ar- con porte 1 - 2 configurate per gurato su un indirizzo IP personalizza- t-Net e porte 3 - 4 per l'uscita sACN.
  • Page 143: Impostazioni Di Rete

    Navigare fino a Home > Menu > Rete > DHCP per abilitare o disabilitare il DHCP (Dynamic Host Configuration Protocol). Scegliere Abilita se si desidera che la rete sia configurata da un server DHCP. Questo è il tipico caso se si collega XNODE 4 a una rete domestica o aziendale.
  • Page 144 Per configurare la netmask, utilizzare la stessa procedura utilizzata per la configurazione dell’indirizzo IP. La netmask viene utilizzata internamente per calcolare l’indirizzo di rete dall’indirizzo IP. XNODE 4 lo fa calcolando il bitwise AND di ogni byte con il corrispondente byte dell’indirizzo IP. Il bitwise AND del primo byte dell’indirizzo IP e il primo byte della netmask è il primo byte dell’indirizzo di rete e così...
  • Page 145 IMPOSTA SU IP ART-NET PRIMARIO Dopo aver navigato fino alla voce di menu Home > Menu > Rete > Impostazioni statiche > Imposta su IP Art-Net primario, apparirà una finestra di dialogo come mostrato a destra. Premere [Annulla] per interrompere o premere [OK] per applicare le seguenti impostazioni: …...
  • Page 146 UNIVERSI INDIPENDENTI Questa impostazione è disponibile solo con versioni del firmware apparse prima della versione 1.01. Le versioni più recenti del firmware for- niscono le stesse funzionalità quando la versione Art-Net è impostata su Art-Net 4. Il vantaggio principale del supporto Art-Net 4 rispetto alle obsolete funzionalità...
  • Page 147 Premere quindi il pulsante [OK] e selezionare un carattere da aggiungere. Confermare la selezione premendo [OK]. Ripetere i passaggi precedenti per i caratteri rimanenti. Quindi, premere [Annulla] per terminare l’inserimento dei caratteri. Premere nuovamente [Annulla] per uscire dall’editor. Premere [OK] per memorizzare le modifiche o premere [Annulla] per annullare tutte le modifiche. NOME BREVE Il nome breve può...
  • Page 148 UNIVERSO Per regolare l’universo della porta X, navigare fino a Home > Menu > Porte > Porta X > Universo. Questa schermata è raggiungibile anche premendo una volta il corrispondente pulsante della porta. Questa schermata fornisce informazioni essenziali sulla porta DMX e permette di modificare il suo universo Art-Net o sACN. Per ulteriori informazioni sugli indicatori di questa schermata, vedere la sezione Schermata delle porte.
  • Page 149: Impostazioni Di Uscita

    SACN Le porte che funzionano in modalità sACN visualizzano il numero dell’universo sACN e gli indicatori di stato. Il numero dell’universo sACN può essere compreso tra 1 e 63999. Mentre l’universo (numero grande in basso) viene modificato, ma non è ancora stato salvato, viene visualizzato un cursore che lampeggia lentamente sotto la cifra attualmente modificabile.
  • Page 150: Preset Di Fabbrica

    Sotto Art-Net RDM, il protocollo RDM può essere abilitato o disabilitato per l’uscita. Art-Net RDM può essere abilitato anche per le porte sACN. XNODE 4 scopre un massimo di 250 dispositivi per porta di uscita. Tutte le impostazioni precedentemente descritte possono essere modificate tramite l’interfaccia web nella pagina delle impostazioni delle porte.
  • Page 151: Impostazioni E Informazioni Sul Dispositivo

     1,2: Art-Net – 3,4: sACN: • Art-Net RDM è abilitato su tutte le porte. • Tutte le porte sono configurate come uscite. • Le porte 1 e 2 sono configurate su Art-Net. • Le porte 3 e 4 sono configurate su sACN. •...
  • Page 152 desiderata e premere [OK] per applicarla. La modifica di questa impostazione richiede un riavvio del nodo. Un popup chiederà conferma. Premere [OK] per riavviare ora o [Annulla] per interrompere. Questa opzione delle impostazioni del dispositivo è disponibile solo a partire dalla versione firmware 1.03. SCREEN SAVER Sotto Screen saver viene presentata una lista di selezione con le seguenti opzioni: ...
  • Page 153 La modifica della password funziona proprio come la modifica del nome del dispositivo. Una volta inserita la password, XNODE 4 chiederà di inserirla una seconda volta. Se i due testi inseriti corrispondono, la password è impostata.
  • Page 154 Le seguenti informazioni sul dispositivo sono disponibili in Home > Menu > Impostazioni del dispositivo > Informazioni sul dispositivo. MODELLO Il modello del dispositivo viene segnalato come “XNODE 4” per tutte le varianti di XNODE 4. SOFTWARE DI AVVIO Il numero di versione completo del software di avvio.
  • Page 155: Led Di Stato

     Versione Art-Net: Art-Net 4 (disponibile solo con la versione firmware 1.01 e successive)  Tutte le uscite abilitate  Modalità di uscita DMX (tutte le porte): Min (versioni firmware 0.99 e 1.00: frequenza max. fotogrammi)  Uscita universo 1-4 Art-Net: 0-3 ...
  • Page 156 IDENTIFICARE XNODE 4 può aiutare l’utente a localizzare il dispositivo in determinate condizioni attraverso il processo di identificazione. Il nodo può essere impostato su identificato tramite strumenti di comunicazione, come Art-Net, RDM o l’interfaccia web. Nel caso di XNODE 4, il dispositivo identificato illuminerà...
  • Page 157: Interfaccia Web

    è possibile osservare lo stato, regolare le impostazioni e aggiornare il firmware. Si accede all’interfaccia web digitando l’indirizzo IP configurato del dispositivo in un browser web di un computer che è collegato alla stessa rete di XNODE 4. PAGINA DI STATO La pagina di stato è...
  • Page 158 PAGINA DELLE IMPOSTAZIONI DELLE PORTE Nella pagina delle impostazioni delle porte ogni porta può essere configurata singolarmente o le modifiche possono essere applicate a più porte contemporaneamente. Per configurare le porte separatamente, selezionare prima il numero nel menu in alto, dopodiché è possibile modificare le impostazioni.
  • Page 159 PAGINA DELLE IMPOSTAZIONI DI RETE La pagina delle impostazioni di rete consente all’utente di modificare le impostazioni di rete e di vedere le informazioni rilevanti relative allo stato della porta Ethernet. Attenzione: modificando le impostazioni di rete, il dispositivo potrebbe non essere accessibile via rete! Usare con cautela!
  • Page 160 PAGINA DELLE IMPOSTAZIONI DEL DISPOSITIVO Questa pagina consente all’utente di visualizzare e modificare le informazioni rilevanti del dispositivo. Inoltre, le impostazioni di fabbrica possono essere ripristinate da qui. PAGINA DEGLI AGGIORNAMENTI DEL FIRMWARE Da questa pagina è possibile eseguire gli aggiornamenti del firmware. Per farlo, è sufficiente selezionare il file del firmware desiderato e poi caricarlo.
  • Page 161: Dati Tecnici

    DATI TECNICI Codice prodotto: CLXNODE4 Temperatura ambiente 30°C…55°C (-22°F…131°F) Alimentazione AC 100 - 240 V nominale, 50/60 Hz Consumo energetico tipico Ethernet 10BASE-T / 100BASE-TX, negoziazione automatica, MDI-X automatico Protocolli di rete Art-Net 1 - 4, sACN (ANSI E1.31), versione bozza sACN (v0.2) ANSI E1.11 ANSI E1.20 Porte di segnale elettrico standard...
  • Page 162: Dichiarazioni Del Produttore

    DICHIARAZIONI DEL PRODUTTORE GARANZIA DEL PRODUTTORE E LIMITAZIONI DI RESPONSABILITÀ Le nostre attuali condizioni di garanzia e limitazioni di responsabilità sono disponibili su: https://cdn-shop.adamhall.com/media/pdf/MANU- FACTURERS-DECLARATIONS_CAMEO.pdf. Per richiedere il servizio di garanzia per un prodotto, contattare Adam Hall GmbH, Adam-Hall-Str. 1, 61267 Neu Anspach / E-mail: Info@adamhall.com / +49 (0)6081 / 9419-0. CORRETTO SMALTIMENTO DEL PRODOTTO (valido nell'Unione Europea e in altri paesi europei con un sistema di raccolta differenziata dei rifiuti) Questo simbolo sul prodotto o sui suoi documenti, indica che il dispositivo non può...
  • Page 163: Appendice

    APPENDICE RAPPRESENTAZIONI DEGLI INDIRIZZI DELLE PORTE ART-NET Secondo la specifica Art-Net 3, l’indirizzo di una porta Art-Net è composto da tre parti: il numero di rete, sottorete e universo Art-Net. Il numero dell’universo e della sottorete Art-Net hanno entrambi un valore compreso tra 0 e 15 (4 bit). Molti controller abbinano questi valori al numero del sottouniverso, ottenendo un valore compreso tra 0 e 255 (8 bit), con la parte della sottorete che occupa le cifre più...
  • Page 164 CAMEOLIGHT.COM Adam Hall GmbH | Adam-Hall-Str. 1 | 61267 Neu-Anspach | Germany Phone: +49 6081 9419-0 | adamhall.com REV: 01...

Ce manuel est également adapté pour:

Clxnode4

Table des Matières