Maytag W10761035B Instructions D'installation
Table des Matières
Les langues disponibles
Les langues disponibles
Liens rapides
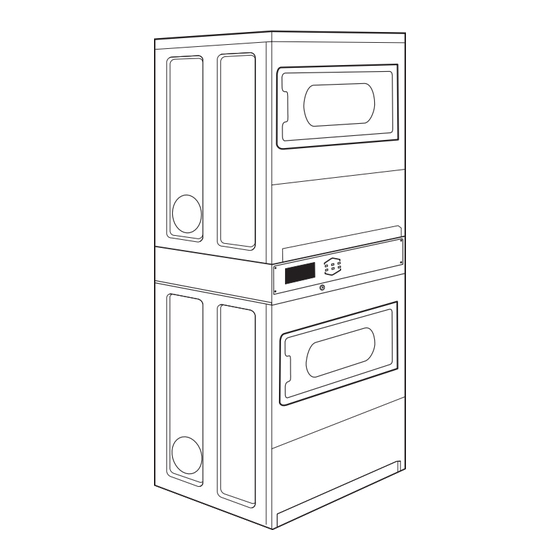
Actual unit may or may not contain doors
with windows, depending on model.
Selon le modèle, le présent appareil
n'offre peut-être pas de hublot de porte.
TABLE OF CONTENTS
Dryer Safety.......................................................................................................... 2
Tools & Parts ...................................................................................................... 5
Dimensions/Clearances ............................................................................. 6
Location Requirements ................................................................................ 7
Gas Dryer Electrical Requirements ....................................................... 8
Gas Requirements .......................................................................................... 9
Electric Dryer Electrical Requirements ............................................ 10
Dryer Venting Requirements .................................................................. 13
Gas Supply Connection ............................................................................ 15
Electric Dryer Electrical Connections ............................................... 17
Leveling .............................................................................................................. 21
Complete Installation .................................................................................. 22
Reversing Dryer Door Swing .................................................................. 23
Maintenance Instructions ......................................................................... 24
If You Need Assistance ............................................................................. 24
Electronic Control Setup Instructions ................................................ 25
Warranty ............................................................................................................ 30
W10761035B
W10761036B-SP
INSTALLATION
INSTRUCTIONS
Commercial Stacked Dryer
Gas (120-Volt, 60-Hz)
(120/240-Volt, 60-Hz)
INSTRUCTIONS
D'INSTALLATION
Sécheuse à usage
commercial superposée
à gaz (120 Volts, 60 Hz)
(120/240 Volts, 60 Hz)
TABLE DES MATIÈRES
Page
Sécurité de la sécheuse ............................................................................ 31
Outils et pièces ............................................................................................. 34
Dimensions/Distances de dégagement ......................................... 35
Exigences de l'emplacement .................................................................. 36
Exigences électriques pour la sécheuse à gaz ............................. 37
Exigences de gaz .......................................................................................... 38
Exigences électriques pour la sécheuse électrique ............... 39
Exigences concernant l'évacuation de la sécheuse ................. 40
Raccordement à la canalisation de gaz ............................................ 42
Nivellement .......................................................................................................44
Achever l'installation ....................................................................................45
Inversion du sens d'ouverture de la porte .......................................46
Instructions d'entretien ............................................................................... 47
Si vous avez besoin d'assistance ......................................................... 47
de commande électronique .....................................................................48
Garantie ............................................................................................................. 55
or Electric
ou électrique
www.maytagcommerciallaundry.com
Page
Table des Matières

Manuels Connexes pour Maytag W10761035B


Sommaire des Matières pour Maytag W10761035B
-
Page 31: Sécurité De La Sécheuse
SÉCURITÉ DE LA SÉCHEUSE On recommande que le propriétaire place les instructions à l’usage du client en un lieu bien visible, au cas où le client percevrait une ■ odeur de gaz. Ces renseignements doivent être obtenus auprès de votre fournisseur en gaz. Placer l’avertissement qui suit à... - Page 32 SÉCURITÉ DE LA SÉCHEUSE IMPORTANT : Pour mettre l’ancienne sécheuse au rebut ou pour la remiser, enlever la porte.
-
Page 33: Importantes Instructions De Sécurité
SÉCURITÉ DE LA SÉCHEUSE IMPORTANTES INSTRUCTIONS DE SÉCURITÉ AVERTISSEMENT : Pour réduire les risques d’incendie, de choc électrique ou de blessures lors de l’utilisation de la sécheuse, suivre les précautions fondamentales dont les suivantes : Lire toutes les instructions avant d’utiliser la sécheuse. Ne pas utiliser cette sécheuse si le filtre à... -
Page 34: Outils Et Pièces
OUTILS ET PIÈCES Outillage nécessaire : Clé à tuyau Clé à molette de 8" (200 mm) Tournevis à lame plate Tournevis Phillips de 8" (200 mm) ou 10" (250 mm) (ouverture ou 10" (250 mm) jusqu’à 1" [25 mm]) Tournevis isolé ou foret Clé... -
Page 35: Dimensions/Distances De Dégagement
DIMENSIONS/DISTANCES DE DÉGAGEMENT Dimensions Vue de face Vue latérale Vue arrière Électrique Distances de dégagement minimales Vue avant, encastrement Vue latérale, encastrée dans un placard... -
Page 36: Exigences De L'emplacement
EXIGENCES DE L’EMPLACEMENT Distances de dégagement pour l’installation pour la sécheuse L’emplacement doit être assez grand pour permettre d’ouvrir ■ complètement la porte de la sécheuse. Prévoir davantage d’espace pour faciliter l’installation ■ et l’entretien. La porte s’ouvre à plus de 180°. Un espace supplémentaire peut être requis pour les moulures ■... -
Page 37: Exigences Électriques Pour La Sécheuse À Gaz
EXIGENCES ÉLECTRIQUES POUR LA SÉCHEUSE À GAZ Mise à la terre de la sécheuse à gaz IMPORTANT : La sécheuse doit être reliée à la terre conformément aux codes et règlements locaux en vigueur, ou en l’absence de tels codes, avec la dernière édition du National Electrical Code, ANSI/NFPA 70, ou du Canadian Electrical Code, CSA C22.1. -
Page 38: Exigences De Gaz
EXIGENCES DE GAZ Alimentation en gaz IMPORTANT : Observer les dispositions de tous les codes et règlements en vigueur. L’installation doit satisfaire aux critères de tous les codes et règlements locaux. En l’absence de code local, l’installation doit satisfaire aux prescriptions de la norme American National Standard, National Fuel Gas Code ANSI Z223.1/NFPA 54 ou CAN/CSA B149. -
Page 39: Exigences Électriques Pour La Sécheuse Électrique
EXIGENCES ÉLECTRIQUES POUR LA SÉCHEUSE ÉLECTRIQUE Raccordement par câblage direct Pour le raccordement direct : Le câble d’alimentation doit correspondre à l’alimentation électrique (4 fils ou 3 fils) et être : Capable de supporter un courant nominal de 60 ampères ■... -
Page 40: Exigences Concernant L'évacuation De La Sécheuse
EXIGENCES CONCERNANT L’ÉVACUATION DE LA SÉCHEUSE REMARQUE : Lors de l’utilisation d’un système d’évacuation existant, nettoyer et éliminer la charpie sur toute la longueur du système, et veiller à ce que le clapet d’évacuation ne soit pas obstrué par de la charpie. Remplacer tout conduit de plastique ou en aluminium par un conduit métallique rigide ou souple. -
Page 41: Hottes D'extraction
EXIGENCES CONCERNANT L’ÉVACUATION DE LA SÉCHEUSE Hottes d’extraction Clapets d’évacuation – Diamètre de 4" (102 mm) Le clapet de décharge doit se trouver à au moins 12" (305 mm) au-dessus du sol ou de tout autre objet susceptible de se trouver sur le trajet de l’air humide rejeté... -
Page 42: Évacuation Pour Plusieurs Sécheuses
EXIGENCES CONCERNANT L’ÉVACUATION DE LA SÉCHEUSE Si on ne peut pas utiliser de clapet d’évacuation Évacuation pour plusieurs sécheuses L’extérieur du conduit d’évacuation principal doit comporter On peut utiliser un conduit principal pour assurer l’évacuation un conduit de déviation orienté vers le bas. d’un ensemble de sécheuses. - Page 43 RACCORDEMENT À LA CANALISATION DE GAZ Type de gaz Cette sécheuse est équipée pour une alimentation au gaz naturel. sur la plaque signalétique sans consulter le fournisseur de gaz Sa conception est homologuée par CSA International pour au préalable. L’opération de conversion doit être exécutée par un l’alimentation au gaz de pétrole liquéfié...
-
Page 44: Nivellement
NIVELLEMENT Le nivellement de la sécheuse permet le bruit et les vibrations 3. Si la sécheuse n’est pas d’aplomb, utiliser une clé plate ou une excessifs. clé à molette de 1" ou 25 mm pour tourner les contre-écrous dans le sens horaire (vue du dessus) sur les pieds jusqu’à ce qu’ils se trouvent à... -
Page 45: Achever L'installation
ACHEVER L’INSTALLATION 6. Contrôler le bon fonctionnement de la sécheuse. Fermer la porte 1. Consulter les spécifications électriques. Vérifier que la tension de la sécheuse. Sélectionner un programme. Faire fonctionner électrique disponible est correcte et que la prise de courant la sécheuse pendant au moins cinq minutes –... -
Page 46: Inversion Du Sens D'ouverture De La Porte
INVERSION DU SENS D’OUVERTURE DE LA PORTE (FACULTATIF) Le sens d’ouverture de la porte peut être changé du côté droit 7. Veiller à maintenir la cale d’espacement en carton centrée au côté gauche, si désiré. entre les portes. Fixer à nouveau le panneau de porte à la porte interne de façon à... -
Page 47: Instructions D'entretien
INSTRUCTIONS D’ENTRETIEN Nettoyer le filtre à charpie avant ou après chaque programme. Si la sécheuse ne fonctionne pas, contrôler ce qui suit : ■ Comment enlever la charpie accumulée : La prise de courant est correctement alimentée. ■ ■ À l’intérieur de la caisse de la sécheuse : Le disjoncteur ne s’est pas déclenché... -
Page 48: Instructions De Réglage Du Tableau De Commande Électronique
INSTRUCTIONS DE RÉGLAGE DU TABLEAU DE COMMANDE ÉLECTRONIQUE Tarif par accumulation IMPORTANT Si le prix est fixé à une pièce 1, le mode Accumulateur est en Circuits électroniques sensibles vigueur (on doit également sélectionner Programme fixe avec aux décharges électrostatiques l’option Top Off (addition de temps)). -
Page 49: Procédures De Paramétrage Des Commandes
INSTRUCTIONS DE RÉGLAGE DU TABLEAU DE COMMANDE ÉLECTRONIQUE Procédures de paramétrage des commandes Code de paramétrage IMPORTANT : Lire toutes les instructions avant la mise en marche. Le bouton PERM. PRESS (presse permanente) permet de ■ progresser d’un code au suivant. Les boutons de réglage du tissu, associés à... - Page 50 INSTRUCTIONS DE RÉGLAGE DU TABLEAU DE COMMANDE ÉLECTRONIQUE Code Explication Code Explication TYPE DE TARIF DE LA SÉCHEUSE 1. 00 OPTION DE COMPTAGE DE MONNAIE Cette option est soit non sélectionnée (“OFF”), Programme fixe avec appoint. Pour une description soit sélectionnée (“ON”). détaillée, consulter les “Informations générales d’utilisation”.
-
Page 51: Prix Du Programme Spécial
INSTRUCTIONS DE RÉGLAGE DU TABLEAU DE COMMANDE ÉLECTRONIQUE OPTIONS 3.XX – 9.XX À UTILISER EN CAS DE SÉLECTION Code Explication DE TARIF SPÉCIAL 8. 00 HEURE DE FIN DU TARIF SPÉCIAL Code Explication REMARQUE : Utilise le format sur 24 heures. 3.06 PRIX DU PROGRAMME SPÉCIAL 8. -
Page 52: Options Nombre De Pièces
INSTRUCTIONS DE RÉGLAGE DU TABLEAU DE COMMANDE ÉLECTRONIQUE Code Explication Code Explication b. 05 VALEUR DE LA PIÈCE 1 J. Cd MODE DE PAIEMENT (OPTION DE PIÈCES/DÉBIT) b. 05 Représente la valeur de la pièce 1 en nombre de pièces J. -
Page 53: Guide De Diagnostic
INSTRUCTIONS DE RÉGLAGE DU TABLEAU DE COMMANDE ÉLECTRONIQUE FIN des OPÉRATIONS DE PARAMÉTRAGE QUITTER LE MODE DE PARAMÉTRAGE Modèles superposées : Faire tourner de nouveau la clé du panneau de l’ouverture d’accès à la position initiale. GUIDE DE DIAGNOSTIC Si le mode de paramétrage est saisi et si l’une des situations suivantes s’est produite, le code de diagnostic correspondant est affiché. -
Page 55: Garantie Limitée (Pièces Uniquement - Mains-D'oeuvre Non Inclus)
EXONÉRATION DE RESPONSABILITÉ EN DEHORS DE LA GARANTIE Maytag ne prend aucun engagement quant à la qualité ou la durabilité de l’appareil, ou en cas de dépannage ou de réparation nécessaire sur cet appareil ménager à usage commercial, autre que les engagements énoncés dans la présente garantie. Si vous souhaitez une garantie prolongée ou plus complète que la garantie limitée fournie avec cet appareil ménager à... - Page 56 W10761035B ®/TM © 2015 Maytag. All rights reserved. 08/2015 ®/TM © 2015 Maytag. Tous droits réservés. W10761036B-SP...