Table des Matières
Publicité
Les langues disponibles
Les langues disponibles
Liens rapides
SC H IF 621 CPT B
English
English
English
English
English
GB
Operating Instructions
HOB
Contents
Operating Instructions,1
WARNING,2
Installation,10
Start-up and use,12
Precautions and tips,17
Care and maintenance,18
Technical description of the models,18
Français
FR
Mode d'emploi Manutenção e cuidados
TABLE DE CUISSON
Sommaire
Mode d'emploi,1
ATTENTION,2
Installation,19
Español
Español
Español
Español
Español
ES
Manual de instrucciones
ENCIMERA
Sumario
Manual de instrucciones,1
ATENCIÓN,3
Descripción del aparato-Panel de control,7
Instalación,28
Português
Português
Português
Português
Português
PT
Instruções para a utilização
Índice
Instruções para a utilização,1
ATENÇAO,3
Descriçao do aparelho-Painel de comandos,7
Instalação, 37
Deutsch
DE
Bedienungsanleitung
KOCHFELD
Inhaltsverzeichnis
Bedienungsanleitung,1
ZUR BEACHTUNG,4
Beschreibung des Gerätes- Bedienfeld,8
Installation, 46
Italiano
IT
Istruzioni per l'uso
Sommario
Istruzioni per l'uso,1
ATTENZIONE,4
Descrizione dell'apparecchio- Pannello di controllo,8
Installazione, 55
Nederland
NL
Gebruiksaanwijzing
KOOKPLAAT
Inhoud
Gebruiksaanwijzing,1
PAS OP,5
Beschrijving van het apparaat-Bedieningspaneel,9
Installatie, 64
Publicité
Table des Matières

Manuels Connexes pour SCHOLTES SCH IF 621 CPT B


Sommaire des Matières pour SCHOLTES SCH IF 621 CPT B
-
Page 1: Table Des Matières
SC H IF 621 CPT B English English English English English Deutsch Operating Instructions Bedienungsanleitung KOCHFELD Contents Inhaltsverzeichnis Operating Instructions,1 Bedienungsanleitung,1 WARNING,2 ZUR BEACHTUNG,4 Description of the appliance-Control Panel,6 Beschreibung des Gerätes- Bedienfeld,8 Installation,10 Installation, 46 Start-up and use,12 Inbetriebsetzung und Gebrauch,48 Precautions and tips,17 Vorsichtsmaßregeln und Hinweise, 53 Care and maintenance,18... -
Page 2: Warning
English Français WARNING! ATTENTION ! • ATTENTION : cet appareil ainsi • WARNING: The appliance and que ses parties accessibles its accessible parts become hot deviennent très chauds pendant leur during use. fonctionnement. • Care should be taken to avoid •... - Page 3 Español Español Português Português ATENCIÓN ! ATENÇÃO ! • ATENCIÓN: Este aparato y sus • ATENÇÃO: Este aparelho e as suas partes accesibles se calientan partes acessíveis aquecem muito mucho durante el uso. durante a utilização. • Por lo tanto, es importante evitar •...
- Page 4 Deutsch Italiano ZUR BEACHTUNG ! ATTENZIONE! • ZUR BEACHTUNG: Bei Gebrauch wird • ATTENZIONE: Questo apparecchio dieses Gerät und alle zugänglichen e le sue parti accessibili diventano Teile sehr heiß. molto caldi durante l’uso. • Es ist darauf zu achten, dass die •...
- Page 5 Nederland PAS OP ! • U moet NOOIT proberen een vlam/ • PAS OP: Dit apparaat en zijn brand te blussen met water. U dient bereikbare onderdelen worden daarentegen het apparaat uit te tijdens gebruik zeer heet. schakelen en de vlam te bedekken •...
-
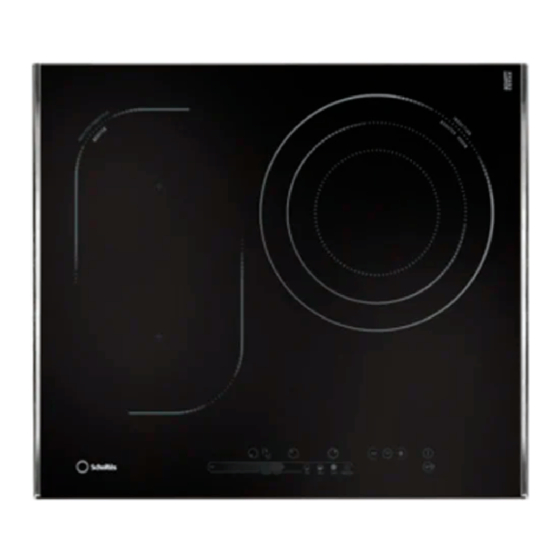
Page 6: Description Of The Appliance-Control Panel
20 19 Description of the appliance Description de l’appareil Control panel Tableau de bord The control panel described in this manual is only a representative Le tableau de bord qui est example: it may not exactly match the panelon your appliance. décrit n.a qu.une valeur d.exemple : il peut ne pas correspondre au modèle acheté... - Page 7 Descripción del aparato Descrição do aparelho Panel de control Painel de comandos O painel de comandos descrito a seguir está representado para El panel de control se describe a continuación a modo de ejemplo: puede no fins explicativos: pode não ser uma exacta ser una exacta reproducción del reprodução do modelo comprado.
- Page 8 Beschreibung des Gerätes Descrizione dell’apparecchio Bedienfeld Pannello di controllo Das hier beschriebene Bedienfeld dient nur als Beispiel, es handelt sich Il pannello di controllo che qui viene descritto è nicht unbedingt um eine genaue rappresentato a fini esemplificativi: può non essere una Widergabe des von Ihnen erworbenen Modells.
- Page 9 Beschrijving van het apparaat Bedieningspaneel Het bedieningspaneel dat hier wordt beschreven en afgebeeld geldt alleen als voorbeeld: het is mogelijk dat het niet exact overeenkomt met het door u aangeschafte model. 1 ZONE „SCHUIFREGELAAR”- om de kookplaat aan- of uit te zetten of de Stroomsterkte te regelen (Zie Starten en gebruik) 2 Aanwijzing KOOKZONE, geeft de overeenkomende...
- Page 10 Installation Before operating your new appliance please read this instruction booklet carefully. It contains important information concerning the safe operation, installation and maintenance of the appliance. min. 20 mm Please keep these operating instructions for future reference. Pass them on to any new owners of the COMPARTMENT appliance.
- Page 11 Fixing • 220-240V 3 ~ 50 Hz on a perfectly level The appliance must be installed • 400V 3 - N ~ 50 Hz supporting surface. • 400V - 2+2N ~ 50 Hz Any deformities caused by improper fixing could affect Separate the wires and connect them in accordance the features and operation of the hob.
- Page 12 Start-up and use The glue applied on the gaskets leaves traces of it towards the right to increase the power level, or grease on the glass. Before using the appliance, we towards the left to decrease the power level. recommend you remove these with a special non- The min/med/max buttons can also be pressed directly abrasive cleaning product.
- Page 13 2. Adjust the power level of the cooking zone. 2. Set the desired duration using the buttons. 3. Press the programming button. The indicator light corresponding to the selected zone will start 3. Confirm by pressing the button. flashing. The timer begins counting down immediately. When the time has elapsed, a buzzer will sound (for one 4.
- Page 14 Overheating protection Practical advice on using the appliance If the electronic elements overheat, the hob switches off ! Use cookware made from materials which are automatically and appears on the display, followed by compatible with the induction principle (ferromagnetic a flashing number. When the temperature has reached material).
- Page 15 ! Accessories To exit this mode, follow the procedure described above. For optimal EXTENSO TECHNOLOGY performance, The display will show the text DE and OF and the hob will we recommend the use of pans with an elliptical be switched off. When it is next switched on, the hob will or elongated base and a major diameter of at least function normally.
- Page 16 Practical cooking advice Frying Pressure cooking Pressure cooker Grilling Boiling Crêpes Cooking on a high flame and browning (roasts, steaks, escalopes, fish fillets, fried eggs) Fast thickening (liquid juices) Boiling water (pasta, rice, vegetables) Milk Slow thickening (dense juices) Bain-marie cooking Pressure cooking after whistle Low-flame cooking (stews) Reheating dishes...
- Page 17 Precautions and tips This appliance has been designed and manufactured • When unplugging the appliance, always pull the in compliance with international safety standards. The plug from the mains socket; do not pull on the cable. following warnings are provided for safety reasons and •...
- Page 18 Care and maintenance 7 7 7 Switching the appliance off • Once it is clean, the hob may be treated with a special protective maintenance product: the invisible film left by this product protects the surface Disconnect your appliance from the electricity supply from drips during cooking.
-
Page 19: Installation
Installation Conserver ce mode d’emploi pour pouvoir le consulter à tout moment. En cas de vente, de cession ou de déménagement, veiller à ce qu’il suive l’appareil pour informer le nouveau propriétaire min. 20 mm sur son fonctionnement et lui fournir les conseils correspondants. - Page 20 Fixation Tension type et fréquence réseau l’encastrement de l’appareil sur Il est impératif d’assurer • 400V - 2+N ~ 50 Hz un plan d’appui parfaitement plat. • 220-240V 3 ~ 50 Hz Les déformations provoquées par une mauvaise • 400V 3 - N ~ 50 Hz fixation risquent d’altérer les caractéristiques de la table •...
-
Page 21: Mise En Marche Et Utilisation
Mise en marche et utilisation Allumage des foyers La colle utilisée pour les joints laisse des traces de graisse sur le verre. Nous conseillons de les Pour mettre en marche un foyer, sélectionner la touche éliminer avant d’utiliser l’appareil à l’aide d’un produit du foyer souhaité... - Page 22 Pour mettre la table de cuisson sous tension, appuyer sur 1. Appuyer sur la touche de programmation . Jusqu’à la touche pendant une seconde environ. ce que le voyant minuteur s’allume 2. Sélectionner la durée désirée à l’aide des touches 2.
- Page 23 Pour quitter ce mode de fonctionnement, suivre la Surchauffe En cas de surchauffe de ses composants électroniques, procédure décrite plus haut. Il y a affichage de DE et de OF et la table s’éteint. Au rallumage successif, la table fonctionnera normalement. la table s’éteint automatiquement et l’afficheur indique suivi d’un chiffre clignotant.
- Page 24 Mode EXTENSO TECHNOLOGY !Accessoires Pour un bon fonctionnement de la zone de cuisson EXTENSO TECHNOLOGY, nous conseillons d’utiliser La zone EXTENSO TECHNOLOGY permet de régler le des cocottes à fond elliptique ou allongé et ayant même niveau de puissance sur deux plaques „ reliées au moins 250 mm de dimension principale, en cas „...
- Page 25 Conseils utiles pour la cuisson Friture Mise en pression Autocuisser Grillade Ebullition Crepes Saise et coloration (Rotis, Steack, Escalope, Filets de poisson, Oeufs au plat) Réduction rapide (Sauce liquides) Eau Frémissante (Pates, Riz, Légumes) Lait Réduction lente (Sauce épaisses) Cuisson au bain-marie Cuisson Autocuiseur après chuchotement Mijotage (Ragouts) Réchauffage des préparations...
-
Page 26: Précautions Et Conseils
Précautions et conseils ! Cet appareil a été conçu et fabriqué conformément • N’effectuer aucune opération de nettoyage ou d’entretien sans avoir auparavant débranché la fiche aux normes internationales de sécurité. Ces consignes de la prise de courant. de sécurité sont très importantes et doivent être lues attentivement. -
Page 27: Nettoyage Et Entretien
Nettoyage et entretien Mise hors tension • Une fois que la table est propre, elle peut être traitée Avant toute opération de nettoyage ou d’entretien avec un produit d’entretien et de protection spécial : couper l’alimentation électrique de l’appareil. celui-ci forme un film invisible qui protège la surface en cas de débordement accidentel. -
Page 28: Instalación
Instalación Es importante conservar este manual para poder consultarlo en todo momento. En el caso de venta, de cesión o de mudanza, verifique que permanezca junto al aparato para informar al nuevo propietario min. 20 mm sobre su funcionamiento y sobre las advertencias correspondientes. - Page 29 • 400V - 2+N ~ 50 Hz Fijación • 220-240V 3 ~ 50 Hz sobre una La instalación del aparato se debe realizar • 400V 3 - N ~ 50 Hz superficie de apoyo perfectamente plana. • 400V - 2+2N ~ 50 Hz Las deformaciones que se podrían provocar por una Separe los cables y realice la conexión de acuerdo mala fijación, pueden alterar las características y las...
-
Page 30: Puesta En Funcionamiento Y Uso
Puesta en funcionamiento y uso La cola aplicada sobre las juntas deja algunas trazas Encendido de las zonas de cocción de grasa en el vidrio. Antes de utilizar el aparato, se recomienda eliminarlas con un producto específico Para poner en funcionamiento una zona de para el mantenimiento, no abrasivo. - Page 31 Para cancelar una programación, realice las Programación de la duración de una operaciones indicadas. En el punto 2 presione el botón cocción : la duración disminuye progresivamente hasta el La presión prolongada de los mandos 0. La programación se anula y la pantalla sale de la modalidad programación.
- Page 32 • Presione y mantenga presionados simultáneamente los • Verifique que el fondo de las ollas esté siempre perfectamente seco y limpio para garantizar una botones durante 6 segundos. Cumplidos los correcta adherencia y mayor duración, no sólo de las 6 segundos, el piloto ON/OFF y el piloto BLOQUEO zonas de cocción, sino también de las ollas.
- Page 33 Es posible regular un temporizador para la zona EXTENSO TECHNOLOGY que se visualiza en la Nivel de potencia Límite de duración de funcionamento en horas pantalla con el encendido de los dos leds de las placas conectadas. Cuando se presiona la tecla „temporizador”...
- Page 34 Consejos prácticos para la cocción Freído Cocción a presión Olla a presión Asado Ebullición Crêpes Cocción a fuego fuerte y dorado (Asados, Bistec, Escalopes, Filetes de pescado, Huevo frito) Espesamiento rápido (Salsas líquidas) Agua hirviendo (Pasta, arroz, Verduras) Leche Espesamiento lento (Salsas consistentes) Cocción a Baño María Cocción olla a presión después del silbido Cocción a fuego bajo...
-
Page 35: Precauciones Y Consejos
Precauciones y consejos El aparato ha sido proyectado y fabricado en • No desconecte el aparato de la toma de corriente conformidad con las normas internacionales sobre tirando del cable sino sujetando el enchufe. seguridad. Estas advertencias se suministran por •... -
Page 36: Mantenimiento Y Cuidados
Mantenimiento y cuidados Interrumpir el suministro de corriente • Una vez limpia, la encimera se puede tratar con eléctrica un producto específico para el mantenimiento y la protección: la película invisible que deja este producto Antes de realizar cualquier operación, desconecte el aparato protege la superficie en caso de escurrimientos durante la de la red de alimentación eléctrica. -
Page 37: Plano
Instalação É importante guardar este folheto para poder consultá-lo a qualquer momento. No caso de venda, cessão ou mudança, assegure-se que o mesmo permanece com o aparelho para informar o novo min. 20 mm proprietário sobre o funcionamento e sobre as respectivas advertências. - Page 38 Outros tipos de ligações Fixação A instalação do aparelho deve ser realizada sobre uma Se o sistema eléctrico corresponder à uma dessas superfície de apoio perfeitamente plana. características: As deformações eventualmente provocadas por uma Tensão tipo e frequência de rede fi...
-
Page 39: Início E Utilização
Início e utilização Acender as zonas de cozedura A cola aplicada nas guarnições deixa alguns traços de graxa no vidro. Antes de utilizar o aparelho, é Para activar uma zona de cozedura, seleccionar a tecla recomendável eliminá-la com um produto não abrasivo da zona de cozedura desejadae confi... - Page 40 duração descerá progressivamente até desligar-se Programar a duração de uma cozedura no 0. A programação irá zerar-se e o display sairá da modalidade de programação. A pressão prolongada dos botões consente o avanço rápido dos minutos do timer. O contador de minutos O plano de cozedura deve estar aceso.
- Page 41 • pressionar e manter pressionados contemporaneamente aderência certa e uma longa durabilidade não somente das zonas de cozedura, mas também das próprias os botões por 6 segundos. Quando vencer panelas. o tempo de 6 segundos o indicador ON/OFF e o •...
- Page 42 Sinal acústico EXTENSO TECHNOLOGY). Algumas anomalias, nomeadamente: ! Uma vez activada, é possível programar também • um objecto (panela, talher etc.) foi deixado mais de 10 a zona EXTENSO TECHNOLOGY com a mesma segundos na área de comandos; modalidade descrita para as chapas unitárias. •...
- Page 43 Conselhos práticos para a cozedura Frituras Cozedura à pressão Panela de pressão Assado Ebulição Crêpe Cozedura em fogo alto e doiramento (Assados, Bifes, Escalopes, Filés de peixe, Ovos fritos) Adensamento rápido (molhos líquidos) Água fervente (Massas, Arroz, Verduras) Leite Adensamento lento (molhos consistentes) Cozedura em banho-maria Cozedura Panela de pressão após o síbilo Cozedura em fogo brando...
-
Page 44: Precauções E Conselhos
Precauções e conselhos • Não realize limpeza nem manutenção sem antes ter Este aparelho foi projectado e fabricado em desligado a fi cha da rede eléctrica. conformidade com as normas internacionais de • Não é previsto que este aparelho seja utilizado segurança. -
Page 45: Manutenção E Cuidados
Manutenção e cuidados Desligar a corrente eléctrica • Depois de limpo, o plano poderá ser tratado com um produto específi co para a manutenção e a protecção: a película invisível deixada por este Antes de realizar qualquer operação, desligue o produto protegerá... -
Page 46: Installation
Installation ! Bewahren Sie diese Bedienungsanleitung bitte sorgfältig auf, damit Sie sie jederzeit zu Rate ziehen können. Sorgen Sie dafür, dass sie im Falle eines Verkaufs, eines Umzugs oder einer Übergabe an min. 20 mm einen anderen Benutzer das Gerät stets begleitet, damit auch der Nachbesitzer die Möglichkeit hat, darin nachschlagen zu können. - Page 47 vom Rand der Kochmulde von mindestens 450 mm Andere Anschlussarten Sollte die Elektroanlage einer der nachfolgenden aufweisen. Eigenschaften entsprechen: Netzspannung und -frequenz Befestigung • 400V - 2+N ~ 50 Hz perfekt ebenen Stütz- bzw. Das Kochfeld muss auf einer • 220-240V 3 ~ 50 Hz Auflagefläche installiert werden.
-
Page 48: Inbetriebsetzung Und Gebrauch
Inbetriebsetzung und Gebrauch Leistungsstärken auszuwählen oder auszuschalten: MIN Der auf die Dichtungen aufgetragene Leim (1)/MED (8)/MAX (16). könnte Fettspuren auf dem Glas hinterlassen. Wir empfehlen Ihnen, diese vor Einsatz des Gerätes mit Funktionen MAX/MED/MIN einem herkömmlichen Reinigungsmittel (eine nicht scheuernde Poliercreme) zu entfernen. Während der ersten Betriebsstunden könnte ein Geruch verbrannten Bei Betätigung der Taste MED schaltet sich die Kochzone Gummis zu vernehmen sein. - Page 49 Die Minutenuhr drücken und mit dem Finger nach rechts oder nach links gleiten, um die Leistung zu erhöhen bzw. zu Das Kochfeld muss eingeschaltet sein. verringern. Mit dem Minutenzähler kann ein Zeitraum bis 99 Es ist auch möglich, direkt auf die Tasten MID/MED/ Minuten eingestellt werden.
- Page 50 hohe Hitzekonzentration der Gasbrenner könnte die Lassen Sie die Tasten los und drücken Topfböden leicht verformen und demnach die korrekte Sie die Taste Auflage beeinträchtigen. • Auf dem Display erscheint abwechselnd die Sicherheitsvorrichtungen Anzeige DE und MO und das Kochfeld schaltet sich aus: Topferkennung •...
- Page 51 ! Zubehör Mode EXTENSO TECHNOLOGY Damit die KochzoneEXTENSO TECHNOLOGY korrekt funktioniert, wird der Einsatz von Töpfen Die EXTENSO TECHNOLOGY ermöglicht bei beiden mit elliptischem oder länglichem Boden und mit miteinander „verbundenen” Platten die Einstellung einer Abmessung von mindestens 250 Millimetern derselben Leistungsstufe.
- Page 52 Praktische Back-/Brathinweise Fritieren Schnellgaren Schnellkochtopf Grillen Kochen Crêpes Stark garen und bräunen (Braten, Koteletts, Schnitzel, Fischfilets, Spiegeleier) Schnell eindicken (flüssige Soßen) Kochendes Wasser (Nudeln, Reis, Gemüse) Milch Langsam eindicken (dickflüssige Soßen) Wasserbad Garen im Schnellkochtopf nach dem Dampfaustritt Sehr sanft Garen Aufwärmen von Speisen Schokoladensoße Warmhalten...
-
Page 53: Vorsichtsmaßregeln Und Hinweise
Vorsichtsmaßregeln und Hinweise • Ziehen Sie den Netzstecker nicht am Netzkabel aus Das Gerät wurde entsprechend den strengsten der Steckdose, sondern nur am Netzstecker selbst. internationalen Sicherheitsvorschriften entworfen • Ziehen Sie vor der Reinigung oder vor und gebaut. Nachstehende Hinweise werden aus Wartungsmaßnahmen stets den Netzstecker aus der Sicherheitsgründen geliefert und sollten aufmerksam Steckdose. -
Page 54: Reinigung Und Pflege
Reinigung und Pflege Abschalten Ihres Gerätes vom Stromnetz die Oberfläche vor eventuell überkochenden Speisen. Es Vor jeder Reinigung und Pflege ist das Gerät vom Stromnetz empfiehlt sich, diese Nachbehandlung bei lauwarmem zu trennen. oder abgekühltem Gerät vorzunehmen. • Achten Sie darauf, das Kochfeld nach der Reinigung Reinigung des Gerätes stets mit klarem Wasser abzuspülen und anschließend Der Einsatz von Scheuermitteln oder scharfen oder... -
Page 55: Piano Cottura
Installazione ! È importante conservare questo libretto per poterlo consultare in ogni momento. In caso di vendita, di cessione o di trasloco, assicurarsi che resti insieme all’apparecchio per informare il nuovo proprietario sul min. 20 mm funzionamento e sui relativi avvertimenti. ! Leggere attentamente le istruzioni: ci sono importanti informazioni sull’installazione, sull’uso e sulla sicurezza. - Page 56 Fissaggio Altri tipi di collegamento L’installazione dell’apparecchio deve essere effettuata su un piano d’appoggio perfettamente piano. Se l’impianto elettrico corrisponde a una delle seguenti Le eventuali deformazioni provocate da un errato caratteristiche: fissaggio potrebbero alterare le caratteristiche e Tensione tipo e frequenza di rete le prestazioni del piano cottura.
-
Page 57: Avvio E Utilizzo
Avvio e utilizzo La colla applicata sulle guarnizioni lascia alcune Accensione delle zone di cottura tracce di grasso sul vetro. Prima di utilizzare l’apparecchio, si raccomanda di eliminarle con un Per mettere in funzione una zona di cottura selezionare prodotto specifico per la manutenzione non abrasivo. il tasto della zona desiderata ed impostare la potenza Durante le prime ore di funzionamento è... - Page 58 Programmazione della durata di una cottura ll contaminuti Il piano di cottura deve essere acceso. Il contaminuti permette di impostare una durata fino a 99 La pressione prolungata dei tasti consente minuti. l’avanzamento veloce dei minuti del timer. 1. Premere il tasto di programamzione .
- Page 59 Modalità EXTENSO TECHNOLOGY !Accessori. La zona EXTENSO TECHNOLOGY permette di regolare Per il corretto funzionamento della zona cottura lo stesso livello di potenza su due piastre “collegate” EXTENSO TECHNOLOGY, si consiglia l’utilizzo di tra loro. E’ attivabile se le due piastre si trovano in stato pentole con fondo ellittico o allungato e dimensione di OFF, premendo il tasto EXTENSO TECHNOLOGY principale di almeno 250mm, se si utilizzano pentole...
- Page 60 Consigli pratici per l’uso dell’apparecchio Surriscaldamento In caso di surriscaldamento dei componenti elettronici, il ! Adoperare recipienti di cottura il cui materiale piano cottura si spegne automaticamente e sul display di fabbricazione sia compatibile con il principio dell’induzione (materiale ferromagnetico). Si appare seguito da un numero lampeggiante.
- Page 61 Consigli pratici per la cottura Frittura Cottura a Pressione Pentola a Pressione Grigliata Ebollizione Crêpe Cottura a fuoco vivo e doratura (Arrosti, Bistecche, Scaloppine, Filetti di pesce, Uova al tegamino) Addensamento rapido (Sughi liquidi) Acqua bollente (Pasta, Riso, Verdure) Latte Addensamento lento (Sughi consistenti) Cottura a bagnomaria Cottura Pentola a pressione dopo il sibilo...
-
Page 62: Precauzioni E Consigli
Precauzioni e consigli L’apparecchio è stato progettato e costruito • Non staccare la spina dalla presa della corrente in conformità alle norme internazionali di sicurezza. Queste tirando il cavo, bensì afferrando la spina. avvertenze sono fornite per ragioni di sicurezza e devono •... -
Page 63: Manutenzione E Cura
Manutenzione e cura Escludere la corrente elettrica Telaio in acciaio inox (solo nei modelli con cornice) L’acciaio inossidabile può macchiarsi per effetto di un’acqua molto calcarea lasciata per un periodo Prima di ogni operazione isolare l’apparecchio dalla di tempo prolungato a contatto dello stesso oppure a rete di alimentazione elettrica. -
Page 64: Installatie
Installatie Bewaar dit instructieboekje zorgvuldig voor eventuele raadpleging in de toekomst. Wanneer u het product weggeeft, verkoopt, of wanneer u verhuist, dient u dit boekje bij het apparaat te bewaren zodat min. 20 mm waarschuwingen en informatie betreffende werking voorhanden blijven. Lees de instructies aandachtig door: u vindt er LADE belangrijke informatie betreffende installatie, gebruik... - Page 65 Bevestigen Scheid de kabels en voer de draadverbinding uit zoals absoluut horizontaal oppervlak Het apparaat moet op een aangegeven in de volgende tabel en tekeningen: worden geïnstalleerd. Eventuele door onjuiste installatie veroorzaakte vervormingen kunnen de eigenschappen en de prestaties van de kookplaat Spanningstype Elektrische kabel Draadverbinding...
-
Page 66: Starten En Gebruik
Starten en gebruik Inschakelen kookzones De lijm die gebruikt is voor de afdichtingen laat wat Om een kookzone in werking te stellen, de toets vetvlekjes achter op het glas. Voordat u het apparaat van de gewenste zone selecterenen de gewenste gebruikt raden wij u aan de vlekken te verwijderen met een speciaal niet-schurend schoonmaakmiddel. - Page 67 Programmering kookduur De timer Als u lang op de toetsen drukt kunt u de De kookplaat moet aan zijn. minuten van de timer snel laten toenemen. Met de timer kunt u een duur tot aan 99 minuten instellen. ! Alle kookgedeeltes kunnen tegelijkertijd 1.
- Page 68 Veiligheidssystemen Laat de toetsen los en druk op de toets Pannensensor Ieder kookgedeelte is voorzien van een systeem dat • het display toont om de beurt de tekst DE en MO en het waarneemt of er een pan op staat. De plaat straalt alleen kookvlak gaat uit;...
- Page 69 • gemors op het bedieningspaneel, ! Zodra hij geactiveerd is, is het ook mogelijk de • een lange druk op een toets, kunnen een geluidssignaal EXTENSO TECHNOLOGY te programmeren met veroorzaken. Verwijder de oorzaak van de storing en dezelfde modus die is beschreven voor de enkele het geluidssignaal houdt op.
- Page 70 Praktische kooktips Frituren Koken met een snelkookpan Snelkookpan Grillen Koken Crêpes Koken op hoog vuur en bruin bakken (Braadstukken, biefstukken, kalfslappen, visfilets, gebakken eieren) Snel indikken (vloeibare sauzen) Koken van water (pasta, rijst, groente) Melk Langzaam indikken (gebonden sauzen) Au bain-marie koken Koken met snelkookpan, na het sissen Koken op laag vuur Opwarmen van gerechten...
-
Page 71: Voorzorgsmaatregelen En Advies
Voorzorgsmaatregelen en advies Dit apparaat is ontwikkeld en gefabriceerd volgens de • Trek nooit de stekker aan het snoer uit het geldende internationale veiligheidsvoorschriften. Deze stopcontact, maar pak altijd de stekker direct beet. aanwijzingen zijn geschreven voor uw veiligheid en u dient •... -
Page 72: Onderhoud En Verzorging
Onderhoud en verzorging 02/2014 - 195119458.00 XEROX FABRIANO De elektrische stroom afsluiten Spoel en droog de kookplaat altijd goed af nadat u hem heeft schoongemaakt. Droog gemorst water altijd Sluit altijd eerst de stroom af voordat u tot enige meteen goed af. handeling overgaat.