Frigidaire Gallery Série Instructions D'utilisation
Masquer les pouces
Voir aussi pour Gallery Série:
- Instructions d'installation (72 pages) ,
- Instructions d'utilisation (44 pages) ,
- Guide du propriétaire (44 pages)
Table des Matières
Publicité
Les langues disponibles
Les langues disponibles
Liens rapides
WARMER DRAWER INSTALLATION INSTRUCTIONS
Canada
IMPORTANT: SAVE FOR LOCAL ELECTRICAL INSPECTOR'S USE.
READ AND SAVE THESE INSTRUCTIONS FOR FUTURE REFERENCE.
flammable vapors and liquids in the vicinity of this or any other appliance.
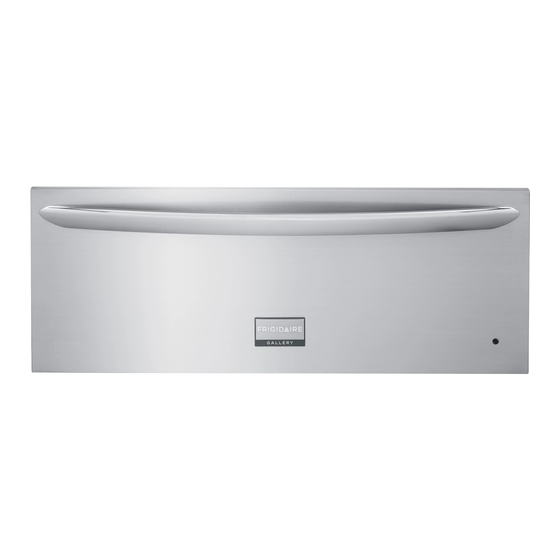
GENERAL INFORMATION - The Warmer Drawer can
be used as a stand alone appliance or as a combination
Warmer Drawer with a built-in oven mounted above.
NOTE: A 60" (152,4 cm) long cable is supplied with
the Warmer Drawer.
Stand Alone Installation
C
B
F
D
E
Minimum distance to
floor 4½" (11,4 cm)
FLOOR
A. HEIGHT
27" Models
11 ¼" (28,6 cm)
30" Models
11 ¼" (28,6 cm)
D. CUTOUT
HEIGHT
27" Models - Min.
9
/
" (25,1 cm)
7
8
Max.
10 ¼" (26 cm)
30" Models - Min.
9
/
" (25,1 cm)
7
8
Max.
10 ¼" (26 cm)
* Note: It is also possible to install this warmer drawer in a height opening
of 9¼" (23,5 cm). Please refer to page 3 for complete instructions.
Printed in United States
INSTALLATION AND SERVICE MUST BE PERFORMED
BY A QUALIFIED INSTALLER.
WARNING
FOR YOUR SAFETY: Do not store or use gasoline or other
Warmer Drawer Dimensions
60" (152,4 cm)
Cord
Warmer Drawer
A
Warmer Drawer
Cutout
B. WIDTH
C. DEPTH
27" (68,6 cm)
23
/
" (59,4 cm)
3
8
30" (76,2 cm)
23
/
" (59,4 cm)
3
8
E. CUTOUT
F. CUTOUT
WIDTH
DEPTH
25 ½" (64,8 cm)
23
/
" (60 cm)
5
8
25 ¾" (65,4 cm)
24" (61 cm)
28 ½" (72,4 cm)
23
/
" (60 cm)
5
8
28 ¾" (73 cm)
24" (61 cm)
IMPORTANT: The warmer drawer must be installed on a
surface leveled from left to right, rear to front and the surface
must be capable of supporting 100 pounds (45,4 Kg).
IMPORTANT: The Warmer Drawer runs off a single
phase three-wire 120 volt, 60 hertz, AC only electrical
supply with ground.
Combination Warmer Drawer / 27" (68,6 cm) or
30" (76,2 cm) Built-in Oven Installation
Caution: Two 3" (7,6 cm) wide X
¾" (1,9 cm) thick planks have to be
installed and they should be able to
support 200 pounds (90,7 Kg).
29
/
"
1
16
(73,8 cm)
H* =11
/
" (30,2 cm) Min. is the space between the
7
8
bottom of the drawer cutout and the bottom of the
oven cutout. This is a critical dimension and must be provided.
J** = 3" (7,6 cm) Max. Electrical Junction Box for wall oven can be
lower than warmer drawer cutout.
A. HEIGHT
27" Models 11 ¼" (28,6 cm)
30" Models 11 ¼" (28,6 cm)
D. CUTOUT
HEIGHT
27" - Min.
9
/
" (25,1 cm)
25 ½" (64,8 cm)
7
8
Max.
10 ¼" (26 cm)
25 ¾" (65.4 cm)
30" - Min.
9
/
" (25,1 cm)
28 ½" (72,4 cm)
7
8
Max.
10 ¼" (26 cm)
1
United States
B. WIDTH
C. DEPTH
27" (68,6 cm)
23
/
" (59,4 cm)
3
8
30" (76,2 cm)
23
/
" (59,4 cm)
3
8
E. CUTOUT
F. CUTOUT
G. HEIGHT
WIDTH
DEPTH
23
/
" (60 cm)
5
8
24" (61 cm)
Depends on critical
23
/
" (60 cm)
5
8
28 ¾" (73 cm)
24" (61 cm)
Depends on critical
P/N 318201822 (0901) Rev. A
English – pages 1-4
Español – páginas 5-8
Français – pages 9-12
2" (5,1 cm)
dimension H
2" (5,1 cm)
dimension H
Publicité
Table des Matières

Manuels Connexes pour Frigidaire Gallery Série


Sommaire des Matières pour Frigidaire Gallery Série
- Page 4 WARMER DRAWER INSTALLATION INSTRUCTIONS Notes...
-
Page 9: Dimensions
INSTRUCTIONS D’INSTALLATION POUR LE TIROIR-RÉCHAUD UN INSTALLATEUR QUALIFIÉ DOIT EFFECTUER Canada United States L’INSTALLATION ET LE SERVICE. IMPORTANT: CONSERVEZ CES INSTRUCTIONS POUR LES INSPECTEURS LOCAUX. LISEZ CES INSTRUCTIONS ET CONSERVEZ-LES POUR RÉFÉRENCES ULTÉRIEURES. POUR VOTRE SÉCURITÉ: N’entreposez et n’utilisez pas d’essence ou d’autres produits inflammables à... -
Page 10: Instructions De Sécurité Importantes
INSTRUCTIONS D’INSTALLATION POUR LE TIROIR-RÉCHAUD Notes importantes à l’installateur 1. Lisez toutes les instructions d’installation avant de procéder à l’installation de cet appareil. 2. Retirez tout le matériel d’emballage de l’appareil avant de brancher l’alimentation électrique. 3. Observez tous les règlements et codes locaux applicables. 4. -
Page 11: Emplacement Des Numéros De Modèle Et De Série
INSTRUCTIONS D’INSTALLATION POUR LE TIROIR-RÉCHAUD Emplacement des numéros de modèle et de Installation combinée tiroir-réchaud / table série de cuisson La plaque signalétique est située tel que montré plus bas. Lors d’une commande de pièces ou pour toute demande Découpage de renseignements au sujet de votre tiroir réchaud, de la table assurez-vous de toujours inclure les numéros de modèle... - Page 12 INSTRUCTIONS D’INSTALLATION POUR LE TIROIR-RÉCHAUD Notes...