Télécharger Imprimer la page
Masquer les pouces Voir aussi pour netwin:

Publicité

Les langues disponibles
  • FR

Les langues disponibles

  • FRANÇAIS, page 12

Liens rapides

netwin
Bedienungsanleitung
Instructions for use
Mode d'emploi
Gebruiksaanwijzing
Istruzioni per l'uso
Instrucciones de uso
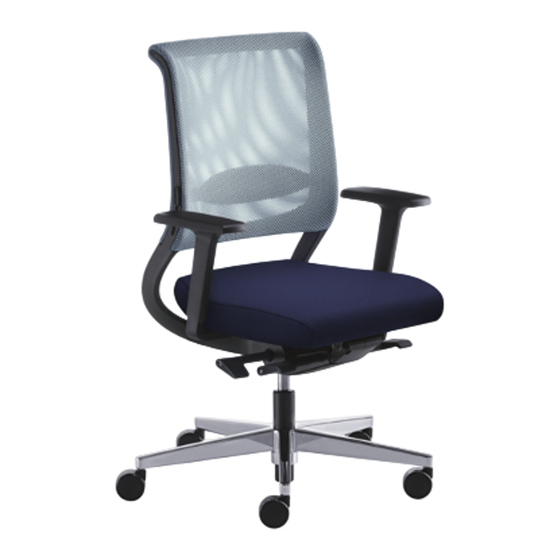
Herzlichen Glückwunsch! Sie haben sich für ein Qualitätsprodukt von Sedus
entschieden. Wir wünschen Ihnen viel Freude mit dem Bürodrehstuhl netwin.
Congratulations! You have chosen a high-quality Sedus product. We hope
you enjoy your netwin office swivel chair.
Toutes nos félicitations. Vous avez opté pour un produit de qualité. Nous vous
souhaitons de profiter pleinement de votre nouveau siège tournant netwin.
Gefeliciteerd! U heeft gekozen voor een kwaliteitsproduct van Sedus.
Wij wensen u veel plezier met de bureaustoel netwin.
Congratulazioni per aver scelto un prodotto di qualità Sedus! Le auguriamo
buon divertimento con il sedile operativo netwin.
¡Enhorabuena! Ha optado Ud. por adquirir un producto de calidad de Sedus.
Le deseamos que disfrute con la silla giratoria para oficina netwin.
Sedus
Deutschland: Sedus Stoll Aktiengesellschaft, Christof-Stoll-Straße 1, D-79804 Dogern
Telefon +49 7751 84-0, Telefax +49 7751 84-310, sedus@sedus.de, www.sedus.de
Belgique: B-9320 Erembodegem-Aalst, Telefoon +32 9 369 9614, www.sedus.be
España: E-28830 San Fernando de Henares, Teléfono +34 91 597 0176, www.sedus.es
France : F-75009 Paris, Téléphone +33 1.53.77.20.50, www.sedus.fr
Great Britain: London EC1V 4JR, Telephone +44 20 7566 3990, www.sedus.co.uk
Italia: I-22071 Cadorago (CO), Telefono +39 031 494 111, www.sedus.it
Nederland: NL-2718 SZ Zoetermeer, Telefoon +31 79 363 1590, www.sedus.nl
Österreich: A-1150 Wien, Telefon +43 1 9 82 94 170, www.sedus.at
Schweiz: CH-4613 Rickenbach, Telefon +41 62 211 0088, www.sedus.ch
75.0438.900
02.2019

Publicité

loading

Sommaire des Matières pour Sedus netwin

  • Page 1 Congratulazioni per aver scelto un prodotto di qualità Sedus! Le auguriamo buon divertimento con il sedile operativo netwin. ¡Enhorabuena! Ha optado Ud. por adquirir un producto de calidad de Sedus. Le deseamos que disfrute con la silla giratoria para oficina netwin.
  • Page 2 Otras informaciones Consulte informaciones sobre el montaje o la sustitución de los reposabrazos, así como la limpieza de los componentes de plástico y los tapizados en Internet en el sitio www.sedus.com...
  • Page 3 Deutsch ® Seite 1 - 2 English ® Page 3 - 4 Français ® Page 5 - 6 Nederlands ® Pagina 7 - 8 Italiano ® Pagina 9 - 10 Español ® Página 11 - 12...
  • Page 4 Deutsch Bitte beachten Sie die nachfolgenden Informationen für die richtige Einstellung, damit Sie alle ergonomischen Vorteile nutzen können. A Höhe des Sitzes Sitz tiefer stellen: Sitz belasten Taste nach oben ziehen ® (Sitz senkt sich langsam) Taste in gewünschter Sitzhöhe loslassen = arretieren Sitz höher stellen: Sitz entlasten...
  • Page 5 C Neigung der Rückenlehne Rückenlehne dynamisch einstellen: Taste nach oben ziehen, ® loslassen Rückenlehne belasten Arretierung löst sich auto- matisch Rückenlehne arretieren: anlehnen bis gewünschte Lehnenneigung ® erreicht ist Taste nach unten drücken, loslassen = arretieren Lehnenarretierung lösen, wenn der Stuhl nicht benutzt wird ®...
  • Page 6 F Neigung der Sitzfläche (optional) Sitz entlasten Hebel nach hinten schwenken und einrasten ® (Sitz neigt sich um 4° nach vorne) oder nach unten schwenken und einrasten (Sitz neigt sich wieder in die Ausgangsposition) G Verstellung der Basis-Armlehnen (optional) Höhe: Taste unter der Armauflage drücken, Armlehne anheben ®...
  • Page 7 Rollenwechsel: z. B. nach einem Umzug oder nach Austauschen des Bodenbelags – Rollen einfach herausziehen bzw. einstecken. Weitere Informationen Informationen über das Montieren oder Austauschen von Armlehnen sowie die Reinigung von Kunststoffteilen und Polstern erhalten Sie im Internet unter www.sedus.com...
  • Page 8 English Please read the following information on adjusting the chair properly so that you can enjoy all the ergonomic advantages netwin has to offer. A Height of the seat Lowering the seat: Sit down on the seat Pull the lever upwards ®...
  • Page 9 C Angle of the backrest Adjusting the backrest dynamically: Pull the lever upwards and ® release it Lean against the backrest The backrest is free-flowing Locking the backrest into position: Lean back until the backrest ® reaches the desired angle Press the lever down and release it to lock the backrest into position Release the backrest lock when the chair is not in use...
  • Page 10 F Seat angle (optional) Stand up Swivel the lever backwards and lock into place (chair tilts ® 4° forwards) or swivel downwards and lock into place (seat moves back into its original position) G Adjusting the basic armrests (optional) Height: Press the button underneath the armrest, lift or lower the ®...
  • Page 11 – simply pull out the castors and push new ones in. Further information Information on fitting and exchanging armrests as well as on cleaning plastic parts and upholstery can be found on the internet at www.sedus.com...
  • Page 12 Français Veuillez suivre les instructions ci-dessous pour régler votre siège correctement, afin de pouvoir tirer profit de tous ses avantages ergonomiques. A Hauteur d’assise Abaisser l’assise : S’asseoir sur le siège. Tirer le bouton vers le ® haut (l’assise descend lentement). Relâcher le bouton à...
  • Page 13 C Inclinaison du dossier Régler le dossier en position dynamique : Tirer le bouton vers le haut, ® le relâcher. S’adosser. Le blocage se libère automatiquement. Bloquer le dossier : S’appuyer contre le dossier jusqu’à ce que ® l’inclinaison souhaitée soit atteinte. Pousser le bouton vers le bas, le relâcher = blocage.
  • Page 14 F Inclinaison de l'assise (en option) Soulager l'assise. Pivoter le levier vers l'arrière, puis l'enclencher ® ou bien le pivoter vers le bas, puis l'enclencher. G Réglage des accoudoirs standard (en option) Hauteur : Appuyer sur le bouton situé sous la manchette ; relever ®...
  • Page 15 Autres informations Vous trouverez sur Internet sous www.sedus.com des conseils pour le montage ou le remplacement des accoudoirs, ainsi que pour le nettoyage des parties polypropylène et des capitonnages.
  • Page 16 Nederlands Neem a.u.b. goed nota van de navolgende informatie voor de juiste instelling, zodat u alle ergonomische voordelen kunt benutten. A Hoogte van de zitting Zitting lager zetten: Zitting belasten Knop naar boven trekken ® (zitting gaat langzaam omlaag) Knop op gewenste zithoogte loslaten = vergrendelen Zitting hoger zetten: Zitting ontlasten...
  • Page 17 C Neiging van de rugleuning Rugleuning dynamisch instellen: Knop naar boven trekken, loslaten ® Rugleuning belasten Vergrendeling laat automatisch los Rugleuning vergrendelen: Ertegen leunen tot de gewenste ® neiging van de leuning bereikt is Knop naar beneden drukken, loslaten = vergrendelen Rugleuning ontgrendelen wanneer de stoel niet gebruikt wordt ®...
  • Page 18 F Neiging van het zitvlak (optioneel) Ontlast de zitting Zwenk de hendel naar achteren en klik deze vast ® (zitting neigt 4° naar voren) of zwenk de hendel naar onderen en klik deze vast (zitting keert terug naar de uitgangspositie) G Verstelling van de basisarmleuningen (optioneel) Hoogte: Druk op de knop onder het opdekje, til de armleuning op...
  • Page 19 (standaard), zachte wielen voor alle niet-zachte ondergrond. Verwisselen van wielen: wielen gewoon eruit trekken resp. erin steken. Meer informatie Informatie over het monteren of vervangen van armleuningen alsmede het schoon-maken van kunststof delen en stoffering vindt u op Internet onder www.sedus.com...
  • Page 20 Italiano Per una regolazione ottimale e per sfruttare appieno le caratteristiche ergonomiche del prodotto La preghiamo di prestare attenzione alle seguenti informazioni. A Altezza del sedile Abbassamento del sedile: A sedile carico Sollevare la leva ® (il sedile si abbassa lentamente) Rilasciare la leva all’altezza desiderata del sedile = bloccaggio Regolazione dell’altezza:...
  • Page 21 C Inclinazione dello schienale Regolazione dinamica dello schienale: Sollevare la leva e quindi ® rilasciarla Appoggiarsi allo schienale Il dispositivo di bloccaggio scatta automaticamente Bloccaggio dello schienale: Appoggiarsi fino a raggiungere ® l’inclinazione desiderata dello schienale Abbassare la leva e quindi rilasciarla = bloccare Se la sedia non viene utilizzata, lasciare lo schienale sbloccato ®...
  • Page 22 F Inclinazione della superficie del sedile (optional) A sedile scarico Ruotare all'indietro la leva e fare scattare in ® posizione (inclin. anteriore 4°) oppure ruotare la leva verso il basso e fare scattare in posizione (posizione iniziale) G Regolazione dei braccioli standard (optional) Altezza: Premere il pulsante sotto il poggiabraccia e sollevare o ®...
  • Page 23 Sostituzione delle rotelle: estrarre o inserire semplicemente le rotelle. Ulteriori informazioni Informazioni sul montaggio o sulla sostituzione dei braccioli e sulla pulizia delle parti in plastica e dell’imbottitura sono disponibili in Internet all’indirizzo www.sedus.com...
  • Page 24 Español Por favor, observe las informaciones siguientes referentes a un ajuste correcto para que pueda sacar provecho de todas las ventajas ergonómicas. A Altura del asiento Bajar el asiento: Estando sentado. Tire de la palanca hacia arriba ® (el asiento baja lentamente). Cuando suelte la palanca a la altura deseada, el asiento queda fijado.
  • Page 25 C Inclinación del respaldo Ajuste dinámico del respaldo: Tire de la palanca hacia arriba, ® suéltela. Apoye la espalda. El bloqueo se libera automáticamente. Bloquear el respaldo: Apóyese hasta alcanzar la inclinación deseada ® del respaldo. Pulse la palanca hacia abajo, suéltela; el respaldo queda fijado.
  • Page 26 F Inclinación de la superficie de asiento (opcional) Sin sentarse. Gire la palanca hacia atrás (el asiento se inclina ® 4º hacia delante) o hacia abajo (el asiento vuelve a su posición inicial). G Regulación de los reposabrazos básicos (opcional) Altura: Presione el botón;...