Publicité
Les langues disponibles
Les langues disponibles
Liens rapides
CH-Import & Distribution exklusiv durch:
Jumbo-Markt AG
Industriestrasse 34, 8305 Dietlikon , Tel. +41 848 11 33 11
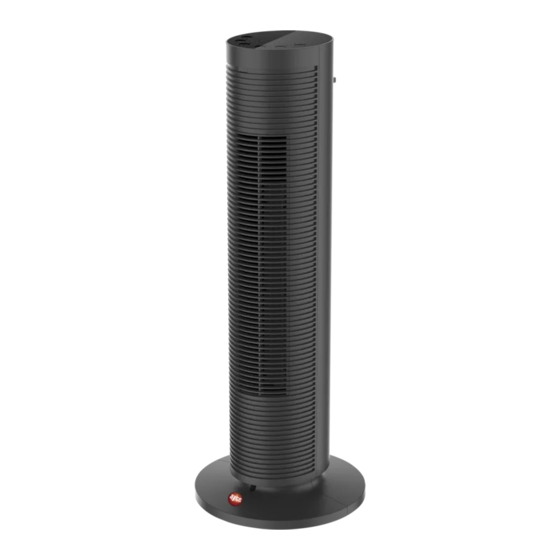
KERAMIKHEIZLÜFTER TOWER
CHAUFFAGE SOUFFLANT CÉRAMIQUE TOWER
TERMOVENTILATORE IN CERAMICO TOWER
CERAMIC HEATER TOWER
Dieses Produkt ist nur für gut isolierte Räume oder gelegentlichen Gebrauch geeignet.
Ce produit convient uniquement pour des espaces bien isolés ou pour une utilisation occasionnelle.
Questo prodotto è adatto solo a spazi ben isolati o ad uno uso occasionale.
This product is only suitable for well insulated spaces or occasional use.
GEBRAUCHSANWEISUNG I MANUEL D'UTILISATION
MANUALE D'ISTRUZIONI I ORIGINAL INSTRUCTIONS
V190412
Publicité

Manuels Connexes pour Jumbo ayce DF-HT5810P

Sommaire des Matières pour Jumbo ayce DF-HT5810P
- Page 1 This product is only suitable for well insulated spaces or occasional use. CH-Import & Distribution exklusiv durch: GEBRAUCHSANWEISUNG I MANUEL D'UTILISATION Jumbo-Markt AG MANUALE D'ISTRUZIONI I ORIGINAL INSTRUCTIONS Industriestrasse 34, 8305 Dietlikon , Tel. +41 848 11 33 11 V190412...
- Page 2 02 | 03 ERLÄUTERUNG DER SYMBOLE WICHTIGE SICHERHEITSANWEISUNGEN: Lesen Sie bitte alle Anweisungen aufmerksam durch, bevor Sie das Beachten Sie vor jeder Verwendung den entsprechenden Abschnitt Produkt benutzen. in dieser Bedienungsanleitung. Dieses Produkt kann von Kindern ab einem Alter von 8 Jahren ●...
- Page 3 04 | 05 der regelmässig vom Stromversorger ein- und ausgeschaltet Stellen Sie stets sicher, dass Ihre Hände trocken sind, bevor Sie ● wird. die Schalter am Produkt, den Stecker oder die Steckdose Wenn die Netzanschlussleitung dieses Produktes beschädigt berühren. ● wird, muss sie durch den Hersteller oder seinen Kundendienst Lassen Sie das Produkt nicht unbeaufsichtigt, wenn es in ●...
- Page 4 06 | 07 VORGEHEN BEIM AUFSTELLEN PRODUKTBESCHREIBUNG 1. Nehmen Sie das Gerät aus der Verpackung. 2. Die Verpackung enthält 1 x Hauptgerät, 1 x Basis 1 x Fernbedienung (Der Sockel des Gerätes ist abnehmbar und muss wie in Abb.2 dargestellt montiert werden.) 3.
- Page 5 08 | 09 Tastenfunktionen – Einführung gewählten Timer-Einstellung auf. Aber wenn Sie 4h am Timer eingestellt haben, ist zu Beim ersten Anschliessen des Geräts an die Stromversorgung sind alle Anzeigen aus. dem Zeitpunkt, an dem der Timer-Countdown 2h erreicht hat, erlischt die LED_4h aus Drücken Sie den Netzschalter in Position “I”, der Summer ertönt zweimal und die und die LED 2h leuchtet.
- Page 6 10 | 11 HINWEIS: 2. Wenn das Gerät ohne Timer arbeitet, schaltet es sich 12 Stunden nach dem letzten Bedienvorgang auf dem Bedienfeld automatisch ab. 1. Bei längerer Zeit der Nichtverwendung entnehmen Sie bitte die Batterien. 3. Tastentöne: Beim Betätigen des Ein-/Ausschalters entweder auf dem Bedienfeld 2.
- Page 7 Sonstige Regelungsoptionen (Mehrfachnennungen möglich) Raumtemperaturkontrolle mit NEIN Präsenzerkennung Raumtemperaturkontrolle mit NEIN Erkennung offener Fenster Mit Fernbedienungsoption NEIN Mit adaptiver Regelung des Heizbeginns NEIN Mit Betriebszeitbegrenzung NEIN Mit Schwarzkugelsensor NEIN Kontaktangaben Jumbo-Markt AG, Industriestrasse 34, 8305 Dietlikon Tel. +41 848 11 33 11...
- Page 8 Zusatzhinweis Servicestelle: Während der Garantiezeit können mängelaufweisende Geräte in jeder Jumbo Filiale zurückgebracht werden. Nach Ablauf der Garantiefrist werden die GO ON Produkte in jeder Jumbo Filiale angenommen, damit das Produkt entsprechend geprüft werden kann. CH-Import & Distribution exklusiv durch: Jumbo-Markt AG, Industriestrasse 34, 8305 Dietlikon, Tel.
- Page 9 16 | 17 NOTIZEN...
- Page 10 18 | 19 TECHNISCHE ZEICHNUNG ERSATZTEILLISTE TEILEBEZEICHNUNG TEILEBEZEICHNUNG Frontgehäuse Auslassgitter Empfängerfenster für Fernbedienung Schraube Empfängerplatine Kippschutzschalter Stromplatine Motor Sicherungssatz NTC-Platine Ventilatorradhalterung Schraube Steuerungsplatine Silikonschlaufe Schraube Deckel Anzeigefeld Lager Einstelltaste Verschleissfester Ring LED-Abdeckung Standfuss Schraube Kabelklemme Ventilatorradabdeckung Stromkabel Schraube Schraube Schraube Stange Filter Flügelmutter...
- Page 11 20 | 21 DESCRIPTION DES SYMBOLES CONSIGNES GÉNÉRALES DE SÉCURITÉ Lire attentivement ce manuel avant d’utiliser l’appareil. Avant toute utilisation, reportez-vous à la section correspondante Cet appareil peut être utilisé par des enfants âgés d'au moins 8 dans ce manuel. ●...
- Page 12 22 | 23 Si le câble d’alimentation est endommagé, il doit être remplacé Ne laissez pas cet appareil sans surveillance lorsqu’il est en ● ● par le fabricant, son service après-vente ou des personnes de fonctionnement. qualification similaire afin d’éviter undanger. La cause principale de surchauffe est due aux dépôts de pous- ●...
- Page 13 24 | 25 DESCRIPTION DE L’APPAREIL MÉTHODE D’INSTALLATION 1. Sortez l’appareil de son emballage. 2. L’emballage contient l’appareil principal et sa télécommande (la base de l’appareil est inamovible). 3. Avant d’utiliser l’appareil, vérifiez qu’il ne montre aucun signe de détérioration. ASSEMBLAGE Assemblez les 2 bases semi-circulaires pour former un support, puis montez le support sur la partie inférieure de l’appareil en serrant 2 vis.
- Page 14 26 | 27 Fonctionnement des boutons Minuterie Lorsque l’unité est connectée à l’alimentation pour la première fois, tous les témoins sont Appuyez sur la touche pour sélectionner le temps de minuterie de votre choix. Chaque éteints. Mettez l’interrupteur d’alimentation en position « I ». L’avertisseur retentit deux pression conduit à...
- Page 15 28 | 29 TÉLÉCOMMANDE0 resteront inchangés, à l’exception de la minuterie. Par exemple, si le chauffage fonctionnait à puissance élevée avant l’arrêt de l’appareil, après une nouvelle pression sur la touche en mode veille, il fonctionnera d’abord pendant 10 secondes à basse Bouton d'alimentation électrique ECO Bouton puissance...
- Page 16 Contrôle de la température de la pièce, avec détecteur de fenêtre ouverte Option contrôle à distance Contrôle adaptatif de l'activation Limitation de la durée d'activation Capteur à globe noir Coordonnées de contact : Jumbo-Markt AG, Industriestrasse 34, 8305 Dietlikon Tel. +41 848 11 33 11...
- Page 17 Indications complémentaires service après-vente : Pendant la période de garantie, les appareils Go On défectueux peuvent être rapportés dans tous les magasins jumbo. A l’expiration de la période de garantie, les produits seront repris dans tous les magasins Jumbo pour contrôle.
- Page 18 34 | 35 NOTE...
- Page 19 36 | 37 SCHÉMA TECHNIQUE LISTE DES PIECES DE RECHANGE DÉNOMINATION DÉNOMINATION Boîtier avant Grille de sortie Fenêtre de capteur de télécommande Carte de capteur à circuits imprimés Interrupteur de protection contre le basculement Carte d’alimentation à circuits imprimés Moteur Ensemble FUSIBLES Carte NTC à...
- Page 20 38 | 39 IMPORTANTI ISTRUZIONI DI SICUREZZA DESCRIZIONE DEI SIMBOLI: Leggere attentamente le istruzioni prima dell’uso. Prima di ogni utilizzo, consultare la sezione corrispondente in Il presente apparecchio può essere utilizzato dai bambini a questo manuale d’uso. ● partire dagli 8 anni e da persone con ridotte capacità fisiche, sensoriali o mentali oppure con mancanza di esperienza e di conoscenza se si trovano sotto adeguata sorveglianza oppure se sono stati istruiti circa l’uso dell’apparecchio in modo sicuro e...
- Page 21 40 | 41 Se il cavo di alimentazione è danneggiato, esso deve essere Za causa più comune di surriscaldamento è il deposito di ● ● sostituito dal costruttore o dal suo Servizio Assistenza Tecnica o polvere o agglomerati di polvere nell’apparecchio. Rimuovere comunque da una persona con qualifica similare, in modo da regolarmente tali depositi con l’aiuto di un aspirapolvere dopo prevenire ogni rischio.
- Page 22 42 | 43 DESCRIZIONE DEL PRODOTTO METODO D’INSTALLAZIONE 1. Estrarre l’apparecchio dalla scatola. 2. La scatola contiene 1 dispositivo master e 1 telecomando (la base del dispositivo non è smontabile) 3. Controllare che l’apparecchio non mostri segni di danneggiamento prima dell’uso. Montaggio Unire le due parti semicircolari per formare la base;...
- Page 23 44 | 45 Introduzione alle funzioni dei pulsanti Timer Quando l’apparecchio viene collegato alla rete elettrica per la prima volta, tutti gli indica- Premere più volte il pulsante TIMER per attivare, in sequenza, le impostazioni 1 h, 2 h, 4 h, tori sono spenti.
- Page 24 46 | 47 NOTA: Ad esempio, se questo è stato spento in modalità di riscaldamento ad alta potenza, esso funzionerà inizialmente per 10 secondi a bassa potenza , poi di nuovo ad alta 1. Durante lunghi tempi di mancato utilizzo, rimuovere le batterie. potenza con il LED acceso alla successiva pressione del pulsante in modalità...
- Page 25 Con opzione di controllo a distanza Con controllo di avviamento adattabile Con limitazione del tempo di funzionamento Con termometro a globo nero Contatti Jumbo-Markt AG, Industriestrasse 34, 8305 Dietlikon Tel. +41 848 11 33 11...
- Page 26 Congratulazioni per avere acquistato questo prodotto di alta qualità. Il nostro impegno Nome Cognome per la qualità include anche l'assistenza. Jumbo dispone di un eccellente servizio di riparazione, per tutti e prodotti ayce. Via/Num. Telefono Qualora si riscontrino difetti relativi ai materiali o alla fabbricazione entro CINQUE ANNI dalla data di acquisto del prodotto, l'utente potrà...
- Page 27 52 | 53 NOTA...
- Page 28 54 | 55 SCHEMA TECNICO LISTA DELLE COMPONENTI DESCRIZIONE DESCRIZIONE Parte anteriore corpo esterno Griglia d’uscita Finestrella ricezione telecomando Vite Circuito stampato ricevitore Interruttore protezione anti-ribaltamento Circuito stampato potenza Motore Set FUSIBILI Circuito stampato NTC Staffa girante Vite Circuito stampato controllo Anello in silicone Vite Copertura...
- Page 29 56 | 57 DESCRIPTION OF THE SYMBOLS GENERAL SAFETY INFORMATION Before any use, refer to the corresponding section in this user Please read all instructions carefully before using. manual. This appliance can be used by children aged from 8 years and ●...
- Page 30 58 | 59 Keep the appliance and cable away from sources of heat, sharp PRODUCT DESCRIPTION ● objects or anything that may cause damage. Ensure the appliance is switched off before connecting to the mains ● power supply. To disconnect the appliance, switch it “OFF”, and then remove the ●...
- Page 31 60 | 61 Function of buttons introduction INSTALLATION METHOD When the unit connects the power supply first, all the indicators are off. 1. Take the appliance out of the package. Press the power switch to position “I”, the buzzer beeps twice and the power indicator 2.
- Page 32 62 | 63 REMOTE CONTROL to 2h, the Led_4h will be off and Led_2h on instead; while the timer countdown to 1h, then the Led_2h will be off and Led_1h on instead. When all timer Led is off at last, the device will turn off at once, and enter into standby state.
- Page 33 Room temperature control, with open window detection With distance control option With adaptive start control With working time limitation With black bulb sensor Contact details : Jumbo-Markt AG, Industriestrasse 34, 8305 Dietlikon Tel. +41 848 11 33 11...
- Page 34 Additional note service center: Defect products can be returned to every jumbo store during the warranty period. After the warranty period, the ayce products are accepted in any jumbo store, so the product may be tested in accordance. CH-Import & Distribution exklusiv durch: Jumbo-Markt AG, Industriestrasse 34, 8305 Dietlikon, Tel.
- Page 35 68 | 69 NOTE...
- Page 36 70 | 71 TECHNICAL DRAWING SPARE PARTS LIST PART PART Front enclosure Outlet grating Remote receiver window Screw Receiver PCB Tip-over protection switch Power PCB Motor FUSE set NTC PCB Fan support Screw Control PCB Silicone loop Screw Cover Display panel Bearing Setting key Wear proof ring...