Renkforce RF-TB500WW Notice D'emploi

Renkforce RF-TB500WW Notice D'emploi

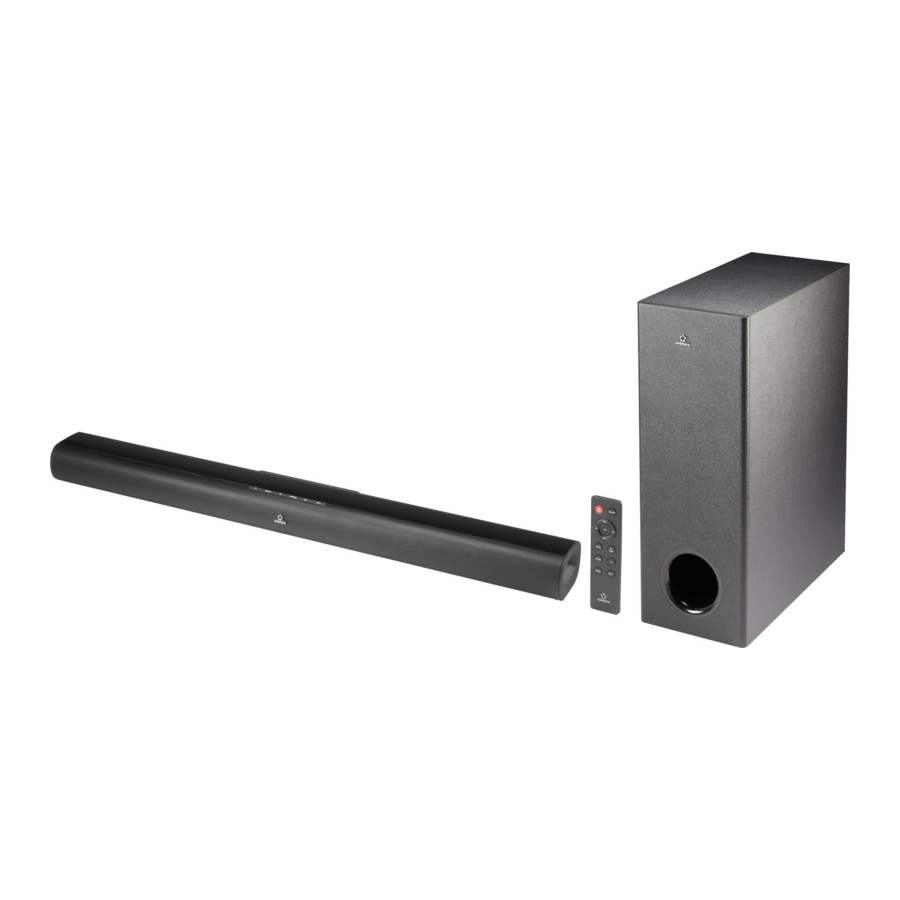
Barre de son hdmi avec subwoofer
Table des Matières

Publicité

Les langues disponibles

Les langues disponibles

Liens rapides

Bedienungsanleitung
RF-TB500WW HDMI Soundbar mit
Subwoofer
Best.-Nr. 1561698
Operating Instructions
RF-TB500WW HDMI soundbar with
subwoofer
Item No. 1561698
Notice d'emploi
RF-TB500WW Barre de son HDMI
avec subwoofer
N° de commande 1561698
Gebruiksaanwijzing
RF-TB500WW HDMI soundbar met
subwoofer
Bestelnr. 1561698
Seite 2 - 23
Page 24 - 45
Page 46 - 67
Pagina 68 - 89

Publicité

Table des Matières
loading

Sommaire des Matières pour Renkforce RF-TB500WW

  • Page 1 Seite 2 - 23 Operating Instructions RF-TB500WW HDMI soundbar with subwoofer Item No. 1561698 Page 24 - 45 Notice d’emploi RF-TB500WW Barre de son HDMI avec subwoofer N° de commande 1561698 Page 46 - 67 Gebruiksaanwijzing RF-TB500WW HDMI soundbar met subwoofer Bestelnr.
  • Page 2: Table Des Matières

    Inhaltsverzeichnis Seite Einführung ................................4 Symbol-Erklärung ..............................4 Bestimmungsgemäße Verwendung ........................5 Lieferumfang ................................5 Merkmale und Funktionen ...........................6 Sicherheitshinweise .............................6 a) Allgemein ...............................6 b) Batterie (Fernbedienung) ..........................8 Bedienelemente ..............................9 a) Soundbar ...............................9 b) Subwoofer ..............................10 c) Fernbedienung ............................10 Fernbedienung ..............................11 a) Vor der ersten Verwendung ......................... 11 b) Batterie ersetzen ............................
  • Page 3 14. Konformitätserklärung (DOC) ..........................22 15. Entsorgung ................................22 a) Produkt ................................22 b) Batterien/Akkus ............................22 16. Technische Daten ..............................23 a) Allgemein ..............................23 b) Soundbar ..............................23 c) Subwoofer ..............................23 d) Netzteil .................................23 e) Fernbedienung ............................23...
  • Page 4: Einführung

    1. Einführung Sehr geehrte Kundin, sehr geehrter Kunde, wir bedanken uns für den Kauf dieses Produkts. Dieses Produkt entspricht den gesetzlichen, nationalen und europäischen Anforderungen. Um diesen Zustand zu erhalten und einen gefahrlosen Betrieb sicherzustellen, müssen Sie als Anwender diese Bedienungsanleitung beachten! Diese Bedienungsanleitung gehört zu diesem Produkt.
  • Page 5: Bestimmungsgemäße Verwendung

    3. Bestimmungsgemäße Verwendung Das Produkt dient dazu, Audiosignale zu verstärken und in hörbare Schallwellen umzuwandeln. Die Audioeingänge dürfen nur an entsprechende Audioausgänge von Audiogeräten angeschlossen werden. Die Spannungsversorgung erfolgt über eine haushaltsübliche Netzsteckdose. Eine Verwendung ist nur in geschlossenen Räumen, also nicht im Freien erlaubt. Der Kontakt mit Feuchtigkeit, z.B. im Badezimmer u.ä.
  • Page 6: Merkmale Und Funktionen

    5. Merkmale und Funktionen • Drahtlose Verbindung via Bluetooth • NFC-Funktion • Ausgangsleistung: 2 x 50 W + 120 W (RMS) • Optischer Eingang • AUX-Eingang • Koaxial-Eingang • HDMI ARC-Eingang • Soundbar mit zwei integrierten Lautsprechern • Kabelloser Subwoofer (Funkübertragung von der Soundbar an den Subwoofer) •...
  • Page 7 • Gehen Sie vorsichtig mit dem Produkt um. Durch Stöße, Schläge oder dem Fall aus bereits geringer Höhe wird es beschädigt. • Beachten Sie auch die Sicherheitshinweise und Bedienungsanleitungen der übrigen Geräte, an die das Produkt angeschlossen wird. • Berühren Sie das Produkt niemals mit nassen oder feuchten Händen. •...
  • Page 8: Batterie (Fernbedienung)

    • Stellen Sie das Produkt nicht in der Nähe von magnetischen Feldern (z. B. Lautsprecher, Mikrowelle) auf. • Stellen Sie das Produkt nicht direkt auf einen Verstärker oder Receiver. • Stellen Sie keine offenen Brandquellen wie brennende Kerzen auf dem Produkt oder in dessen direkter Nähe ab.
  • Page 9: Bedienelemente

    7. Bedienelemente a) Soundbar 1 Ein-/Ausschalter 2 Taste SOURCE 3 Taste EQ 4 Taste PAIR / Wiedergabe / Pause 5 Lautstärkeregler 6 NFC-Sensorbereich 7 Schrauben für Wandbefestigung 10 11 12 13 14 8 Status-LEDs 9 IR-Empfänger 10 DC-Buchse 11 Koaxial-Eingang 12 Optischer Eingang 13 Service-Buchse 14 AUX-Eingang...
  • Page 10: Subwoofer

    b) Subwoofer 16 Netzkabelanschluss 17 Taste PAIR 18 Kopplungs-Kontrollleuchte 17 18 c) Fernbedienung 19 Taste SOURCE 20 Vorheriger/nächster Titel 21 Wiedergabe/Pause 22 Taste BT PAIR 23 Equalizer-Tasten 24 Taste MUTE 25 Lautstärkeregler 26 Ein-/Ausschalter...
  • Page 11: Fernbedienung

    8. Fernbedienung a) Vor der ersten Verwendung • Bei Anlieferung ist bereits eine Knopfzelle in das Batteriefach eingelegt. • Ziehen Sie vor der ersten Verwendung den Kunststoff-Schutzstreifen aus dem Batteriefach heraus. Der Schutzstreifen dient dazu, eine vorzeitige Entladung der Batterie zu verhindern. b) Batterie ersetzen Wechseln Sie die Batterie, sobald das Produkt nicht mehr auf die Befehle der Fernbedienung reagiert.
  • Page 12: Aufstellen / Wandmontage

    9. Aufstellen / Wandmontage Vermeiden Sie Orte, an denen Erschütterungen, Vibrationen, Staub, Hitze, Kälte und Feuchtigkeit vorkommen. Außerdem dürfen sich keine starken Transformatoren oder Motoren in der Nähe des Produkts befinden. Decken Sie das Produkt nicht mit Tischdecken oder ähnlichen Gegenständen ab. Das Produkt kann sich während des Betriebs dadurch zu stark erhitzen.
  • Page 13 • Beide Wandhalterungen müssen mit jeweils 2 Schrauben an der Wand befestigt werden. • Verwenden Sie eine Wandhalterung als Schablone und markieren Sie die Position der Bohrlöcher an der Wand. • Bohren Sie die Löcher in die Wand. • Stecken Sie die beiliegenden Dübel in die Bohrlöcher. •...
  • Page 14: Anschlüsse

    10. Anschlüsse Das Produkt selbst und alle anzuschließenden Geräte müssen ausgeschaltet sein, bevor Sie die Kabel verbinden. a) HDMI (ARC) Verbinden Sie den HDMI-Eingang (15) über ein separat erhältliches HDMI-Kabel (Spezifikation HDMI 1.4) mit dem HDMI-Ausgang des Fernsehers. Die ARC-Funktion (ARC = Audio Return Channel) ermöglicht es, das Audiosignal eines ARC-kompatiblen Fernsehers über eine einzelne HDMI-Verbindung an die Soundbar zu übertragen. Der Fernseher muss ARC und HDMI-CEC unterstützen.
  • Page 15: Koaxial

    c) Koaxial Verbinden Sie den Koaxial-Eingang (11) über ein separat erhältliches Koaxial-Kabel mit dem Koaxial-Ausgang des Fernsehers (oder eines geeigneten Audiogerätes). d) AUX Um Verzerrungen oder Fehlanpassungen zu vermeiden, die zur Beschädigung des Produkts oder des angeschlossenen Gerätes führen können, dürfen an den AUX-Eingang (14) nur Geräte mit einem Cinch- bzw.
  • Page 16: Netzanschluss

    e) Netzanschluss Soundbar • Verbinden Sie den DC-Stecker des Netzteils mit der DC-Buchse (10). • Verbinden Sie den Kleingerätestecker des Netzkabels mit dem Netzteil. • Verbinden Sie den Netzstecker mit einer haushaltsüblichen Netzsteckdose. Subwoofer • Verbinden Sie den Kleingerätestecker mit dem Netzkabelanschluss (16). •...
  • Page 17: Inbetriebnahme

    11. Inbetriebnahme a) Subwoofer mit Soundbar koppeln Automatisch • Subwoofer und Soundbar koppeln sich nach dem Einschalten automatisch. Der Abstand zwischen Subwoofer und Soundbar darf 6 Meter nicht überschreiten. • Während des Koppelns blinkt die Kopplungs-Kontrollleuchte (18). • Sobald das Koppeln abgeschlossen und die Verbindung hergestellt ist, leuchtet die Kopplungs-Kontrollleuchte stetig.
  • Page 18: Einschalten Und Standby-Modus

    b) Einschalten und Standby-Modus • Nach der Verbindung mit dem Stromnetz befindet sich die Soundbar im Standby-Modus. Die Standby-Anzeige (8) leuchtet rot auf. • Drücken Sie den Ein-/Ausschalter (1, 26), um das Gerät einzuschalten. Die LED des zuvor ausgewählten Modus leuchtet oder blinkt. • Drücken Sie den Ein-/Ausschalter erneut, um das Gerät wieder in den Standby-Modus zu schalten. •...
  • Page 19: Equalizer

    Meldung „Pairing“ (Verbindung wird hergestellt) aus und die Bluetooth-Anzeige blinkt schnell. • Wählen Sie „renkforce TB500WW“ aus, um die Geräte zu koppeln. Die Soundbar gibt die akustische Meldung „Paired“ (Verbindung erfolgreich hergestellt) als Bestätigung aus und die Bluetooth-Anzeige leuchtet stetig.
  • Page 20: Nfc-Modus

    Musikwiedergabe vom Bluetooth-Gerät • Folgende Profile werden von der Soundbar im Bluetooth-Modus unterstützt: A2DP (Advanced Audio Distribution Profile) Audiowiedergabe Musiksteuerung über die Fernbedienung der Soundbar AVRCP (Audio Video Remote Control Profile) und Audiowiedergabe • Wenn Ihr Mobilgerät AVRCP unterstützt, können Sie mit der Fernbedienung zum nächsten oder vorigen Titel wechseln sowie die Wiedergabe starten oder unterbrechen. Mit der Taste PAIR (4) auf der Soundbar können Sie die Wiedergabe starten oder unterbrechen. Wählen Sie eine der folgenden Möglichkeiten, um die Bluetooth-Verbindung zu trennen: •...
  • Page 21: Problembehebung

    12. Problembehebung Keine Stromversorgung. • Stellen Sie sicher, dass das Netzkabel ordnungsgemäß verbunden ist. • Überprüfen Sie, ob die Steckdose defekt ist. Die Fernbedienung funktioniert nicht. • Verwenden Sie die Fernbedienung innerhalb des Erfassungsbereichs. • Richten Sie die Fernbedienung auf den IR-Empfänger. •...
  • Page 22: Konformitätserklärung (Doc)

    14. Konformitätserklärung (DOC) Hiermit erklärt Conrad Electronic SE, Klaus-Conrad-Straße 1, D-92240 Hirschau, dass dieses Produkt der Richtlinie 2014/53/EU entspricht. Der vollständige Text der EU-Konformitätserklärung ist unter der folgenden Internetadresse verfügbar: www.conrad.com/downloads Wählen Sie eine Sprache durch Anklicken eines Flaggensymbols aus und geben Sie die Bestellnummer des Produkts in das Suchfeld ein;...
  • Page 23: Technische Daten

    16. Technische Daten a) Allgemein Bluetooth-Version ..........3.0 Betriebsbedingungen ........0 bis +40 °C, 40 – 85 % rF Lagerbedingungen ..........-20 bis +60 °C, 40 – 85 % rF b) Soundbar Eingangsspannung/-strom ........21 V/DC, 3 A Ausgangsleistung ..........2 x 50 W (RMS) Funkfrequenz ............2402 –...
  • Page 24 Table of contents Page Introduction ................................26 Explanation of symbols ............................26 Intended use ..............................27 Delivery content ..............................27 Features and functions ............................28 Safety instructions .............................28 a) General information .............................28 b) Battery (remote control) ..........................30 Product overview ...............................31 a) Soundbar ..............................31 b) Subwoofer ..............................32 c) Remote control ............................32 Remote control ..............................33 a) Before first use ............................33...
  • Page 25 14. Declaration of Conformity (DOC) ........................44 15. Disposal ................................44 a) Product ................................44 b) (Rechargeable) batteries ..........................44 16. Technical data ..............................45 a) General information .............................45 b) Soundbar ..............................45 c) Subwoofer ..............................45 d) Mains adapter ..............................45 e) Remote control ............................45...
  • Page 26: Introduction

    1. Introduction Dear customer, Thank you for purchasing this product. This product complies with statutory national and European requirements. For safety reasons, always follow the instructions in this manual. These operating instructions are part of this product. They contain important information on setting up and using the product.
  • Page 27: Intended Use

    3. Intended use The product is used to amplify audio signals and to convert them to audible sound waves. The audio inputs may only be connected to suitable audio outputs on audio devices. Power is supplied via a normal household mains socket. This product is intended for indoor use only.
  • Page 28: Features And Functions

    5. Features and functions • Wireless connection via Bluetooth • NFC function • Output power: 2 x 50 W + 120 W (RMS) • Optical input • AUX input • Coaxial input • HDMI ARC input • Soundbar with two integrated speakers •...
  • Page 29 • Always handle the product carefully. Jolts, impacts or a fall even from a low height may damage the product. • Always observe the safety and operating instructions of any other devices which are connected to the product. • Never touch the product with wet or damp hands. •...
  • Page 30: Battery (Remote Control)

    • Do not place the product in the vicinity of magnetic fields (e.g. speakers, microwave oven). • Do not place the product directly on an amplifier or receiver. • Do not place open sources of fire such as burning candles on or directly next to the product. • Do not listen to music at an excessive volume for prolonged periods. This may damage your hearing. • The device must not be used near bath tubs, showers, swimming pools or washbasins. The product must not get wet.
  • Page 31: Product Overview

    7. Product overview a) Soundbar 1 On/off switch 2 SOURCE button 3 EQ button 4 PAIR / play / pause button 5 Volume control 6 NFC sensor area 7 Screws for wall mounting 10 11 12 13 14 8 Status LEDs 9 IR receiver 10 DC jack 11 Coaxial input...
  • Page 32: Subwoofer

    b) Subwoofer 16 Mains cable connector 17 PAIR button 18 Pairing indicator 17 18 c) Remote control 19 SOURCE button 20 Previous/next track 21 Playback/pause 22 BT PAIR button 23 Equalizer buttons 24 MUTE button 25 Volume control 26 On/off switch...
  • Page 33: Remote Control

    8. Remote control a) Before first use • A button cell is inserted in the battery compartment on delivery. • Pull out the plastic isolating strip from the battery compartment before you use the product for the first time. The isolating strip prevents the battery from discharging prematurely. b) Replacing the battery Replace the battery as soon as the product no longer respond to commands from the remote control. •...
  • Page 34: Setting Up / Wall Mounting

    9. Setting up / wall mounting Avoid places where shocks, vibrations, dust, heat, cold and moisture occur. In addition, no powerful transformers or motors should be used close to the device. Do not cover the product with a tablecloth or similar objects. This could cause the product to heat up strongly during operation. This constitutes a fire hazard! Ensure that there is sufficient ventilation. Maintain a sufficient distance to other devices and walls. Do not place the product in the direct proximity of heat sources.
  • Page 35 • Both wall mounts need to be fixed to the wall with 2 screws each. • Use a wall mount as a template and mark the position of the drill holes on the wall. • Drill the holes in the wall. • Insert the included dowels into the drilled holes. • Screw the wall mounts tightly to the wall. •...
  • Page 36: Connections

    10. Connections The product itself and all units must be switched off before you connect the cables. a) HDMI (ARC) Connect the HDMI input (15) via a separately available HDMI cable (HDMI specification 1.4) with the HDMI output of the TV set. The ARC function (ARC = Audio Return Channel) allows the signal of an ARC-compatible TV to be transmitted to the soundbar via a single HDMI connection.
  • Page 37: Coaxial

    c) Coaxial Connect the coaxial input (11) via a separately available coaxial cable with the coaxial output of the TV (or a suitable audio device). d) AUX To avoid distortion or mismatching that may damage the product or the connected device, you may only connect devices with a cinch or headphone output to the AUX input (14).
  • Page 38: Mains Connection

    e) Mains connection Soundbar • Connect the DC plug of the mains adapter to the DC jack (10). • Connect the appliance coupler of the mains cable to the mains adapter. • Connect the mains plug to a standard mains socket. Subwoofer •...
  • Page 39: Operation

    11. Operation a) Pairing the subwoofer and soundbar Automatic • The subwoofer and soundbar will pair automatically after turning on. The distance between the subwoofer and the soundbar must not exceed 6 meters in open space. • During pairing, the pairing indicator lamp (18) flashes. • As soon as the pairing process is completed and the connection is established, the pairing indicator is lit solid. Do not press the PAIR (17) button during automatic pairing.
  • Page 40: Turn On And Standby Mode

    b) Turn on and standby mode • After connecting to the mains grid, the soundbar switches to standby mode. The standby indicator (8) is lit red. • Press the on/off button (1, 26) to switch on the device. The LED of the previously selected mode is lit or flashes. • Press the on/off button again to switch the device back to standby mode. •...
  • Page 41: Equalizer

    PAIR (4) button on the soundbar. The soundbar emits the audible message “Pairing” (establishing a connection) and the Bluetooth indicator flashes quickly. • Select “renkforce TB500WW” to pair the devices. The soundbar emits the audible message “Paired” (connection established) in confirmation and the Bluetooth indicator is lit solid. • You can now start playback on your mobile device.
  • Page 42: Nfc Mode

    Music playback from your Bluetooth device • The soundbar supports the following profiles in Bluetooth mode: A2DP (Advanced Audio Distribution Profile) Audio playback Music control via the remote control of the soundbar AVRCP (Audio/Video Remote Control Profile) and audio playback • If your mobile device supports AVRCP, you can use the remote control to jump to the next or previous track as well as start or pause playback.
  • Page 43: Troubleshooting

    12. Troubleshooting No power supplied. • Make sure that the mains cord is properly connected. • Verify that the mains outlet is in working order. The remote control does not work. • Use the remote control within range. • Aim the remote control at the IR receiver. •...
  • Page 44: Declaration Of Conformity (Doc)

    14. Declaration of Conformity (DOC) Conrad Electronic SE, Klaus-Conrad-Straße 1, D-92240 Hirschau, hereby declares that this product conforms to the 2014/53/EU directive. Click on the following link to read the full text of the EU declaration of conformity: www.conrad.com/downloads Select a language by clicking on a flag symbol, and then enter the product order number in the search box. The EU Declaration of Conformity is available for download in PDF format.
  • Page 45: Technical Data

    16. Technical data a) General information Bluetooth version ..........3.0 Operating conditions .........0 to +40 °C, 40 – 85 % RH Storage conditions ..........-20 to +60 °C, 40 – 85 % RH b) Soundbar Input voltage/current .........21 V/DC, 3 A Output power ............2 x 50 W (RMS) Radio frequency ..........2402 –...
  • Page 46 Table des matières Page Introduction ................................48 Explication des symboles ..........................48 Utilisation prévue ...............................49 Contenu d'emballage ............................49 Caractéristiques et fonctions ..........................50 Consignes de sécurité ............................50 a) Généralités ..............................50 b) Pile (télécommande) ............................52 Éléments de fonctionnement ..........................53 a) Barre de son ..............................53 b) Subwoofer ..............................54 c) Télécommande ............................54 Télécommande ..............................55...
  • Page 47 14. Déclaration de conformité (DOC) ........................66 15. Élimination des déchets .............................66 a) Produit .................................66 b) Piles/accumulateurs ............................66 16. Données techniques ............................67 a) Généralités ..............................67 b) Barre de son ..............................67 c) Subwoofer ..............................67 d) Bloc d'alimentation ............................67 e) Télécommande ............................67...
  • Page 48: Introduction

    1. Introduction Chère cliente, cher client, Nous vous remercions de l'achat du présent produit. Le produit est conforme aux exigences des normes européennes et nationales en vigueur. Afin de maintenir l'appareil en bon état et d'en assurer un fonctionnement sans danger, l'utilisateur doit impérativement respecter le présent mode d'emploi ! Le présent mode d'emploi fait partie intégrante du produit. Il contient des consignes importantes pour la mise en service et la manipulation du produit.
  • Page 49: Utilisation Prévue

    3. Utilisation prévue Le produit sert à renforcer les signaux audio et à transformer en ondes sonores audibles. Les entrées audio doivent être connectées à des sorties audio compatibles d'appareils audio. L’alimentation en énergie électrique est fournie via une prise de courant domestique classique. L'utilisation est uniquement autorisée en intérieur, dans les locaux fermés ;...
  • Page 50: Caractéristiques Et Fonctions

    5. Caractéristiques et fonctions • Connexion sans fil via Bluetooth • Fonction NFC • Puissance de sortie : 2 x 50 W + 120 W (RMS) • Entrée optique • Entrée AUX • Entrée coaxiale • Entrée ARC HDMI • Barre de son avec deux haut-parleurs intégrés •...
  • Page 51 • Maniez le produit avec précaution. Les chocs, les coups et les chutes, même d’une faible hauteur, suffisent pour endommager l’appareil. • Respectez également les informations concernant la sécurité et le mode d'emploi pour les autres appareils connectés à cet appareil. • Ne touchez jamais le produit avec les mains mouillées ou humides. •...
  • Page 52: Pile (Télécommande)

    • Ne placez pas le produit à proximité directe de sources de chaleur (p. ex. chauffage, poêle, plaque électrique, amplificateur). • Ne placez pas le produit à proximité de champs magnétiques (p. ex. haut-parleur, micro-ondes). • Ne placez pas directement le produit sur un amplificateur ou un récepteur. • Ne placez pas de flammes qui pourraient déclenchées un incendie comme p. ex. des bougies allumées sur ou à proximité du produit ! •...
  • Page 53: Éléments De Fonctionnement

    7. Éléments de fonctionnement a) Barre de son 1 Interrupteur de marche/d'arrêt 2 Touche SOURCE 3 Touche EQ 4 Touche PAIR / Lecture / Pause 5 Réglage du volume 6 Zone du capteur NFC 7 Vis pour fixation murale 10 11 12 13 14 8 Voyants à...
  • Page 54: Subwoofer

    b) Subwoofer 16 Raccordement du cordon d’alimentation 17 Touche PAIR 18 Voyant de contrôle de couplage 17 18 c) Télécommande 19 Touche SOURCE 20 Titre précédent/suivant 21 Lecture/pause 22 Touche BT PAIR 23 Touches d'égaliseur 24 Touche MUTE 25 Réglage du volume 26 Interrupteur de marche/d'arrêt...
  • Page 55: Télécommande

    8. Télécommande a) Avant la première utilisation • À la livraison, une pile-bouton est déjà insérée dans le compartiment de la pile. • Avant la première mise en service, tirez d'abord sur la languette de protection en plastique placée dans le compartiment de la pile.
  • Page 56: Installation/Montage Mural

    9. Installation/montage mural Évitez les endroits où des chocs, des vibrations peuvent se produire ainsi que ceux où de la poussière, de la chaleur, du froid et de l'humidité sont présents. De plus, aucun transformateur puissant ou moteur ne doit se trouver à...
  • Page 57 • Les deux supports muraux doivent être fixés sur le mur avec chacun 2 vis. • Utilisez un support mural comme gabarit et marquez la position des trous à percer sur le mur. • Percez les trous dans le mur. • Insérez les chevilles fournies dans les trous percés. • Vissez bien les supports muraux sur le mur. •...
  • Page 58: Connexions

    10. Connexions Le produit en lui-même et tous les appareils à raccorder doivent être éteints avant d'effectuer tous les branchements des câbles. a) HDMI (ARC) Reliez l'entrée HDMI (15) à la sortie HDMI du téléviseur en utilisant un câble HDMI disponible en option (spécification HDMI 1.4). La fonction ARC (ARC pour Audio Return Channel) permet que le signal audio d'un téléviseur ayant un canal de retour audio soit transmis via une seule connexion HDMI à...
  • Page 59: Coaxial

    c) Coaxial Raccordez l'entrée coaxiale (11) via un câble coaxial disponible en option à la sortie coaxiale du téléviseur (ou un appareil audio compatible). d) AUX Pour éviter les distorsions ou des désadaptations qui peuvent provoquer des dégâts au produit ou à l'appareil raccordé, seulement des appareils avec une sortie casque ou RCA doivent être branchés sur l'entrée AUX (14).
  • Page 60: Branchement Au Secteur

    e) Branchement au secteur Barre de son • Branchez la fiche CC du bloc d'alimentation sur la prise CC (10). • Raccordez la petite fiche du cordon d'alimentation au bloc d'alimentation. • Branchez la fiche de secteur sur une prise électrique courante. Subwoofer • Raccordez la petite fiche au raccordement du cordon d’alimentation (16). • Branchez la fiche de secteur sur une prise électrique courante.
  • Page 61: Mise En Service

    11. Mise en service a) Couplage du subwoofer à la barre de son Automatique • Le subwoofer et la barre de son se couplent automatiquement après la mise sous tension. La distance entre le subwoofer et la barre de son ne doit pas dépasser 6 mètres. •...
  • Page 62: Mise En Marche Et Mode Veille

    b) Mise en marche et mode veille • Après la connexion au réseau électrique, la barre de son se trouve en mode veille. Le voyant du mode veille (8) s'allume rouge. • Appuyez sur l'interrupteur marche/arrêt (1, 26) pour allumer le produit. La diode LED du mode qui a été choisi préalablement s'allume ou clignote.
  • Page 63: Équaliseur

    • Activez Bluetooth sur votre appareil portable (p. ex. smartphone) et démarrez la recherche d'appareils Bluetooth. La barre de son apparaît sur l'écran de votre appareil portable avec son nom « renkforce TB500WW ». Si le nom de la barre de son ne se trouve pas sur votre appareil portable, appuyez sur la touche BT PAIR (22) de la télécommande ou maintenez enfoncée la touche PAIR (4) sur la barre de son.
  • Page 64: Mode Nfc

    Lecture de musique de l'appareil Bluetooth • Les profils suivants sont compatibles avec la barre de son en mode Bluetooth : A2DP (Advanced Audio Distribution Profile) Reproduction audio Commande de la musique via la télécommande de la AVRCP (Audio Video Remote Control Profile) barre de son et lecture audio • Si votre appareil portable supporte l'AVRCP, vous pouvez utiliser la télécommande pour passer au titre suivant ou revenir au titre précédent et démarrer ou arrêter la lecture.
  • Page 65: Guide De Dépannage

    12. Guide de dépannage Pas d'alimentation en électricité • Assurez-vous que le cordon d'alimentation soit correctement branché. • Réexaminez si la prise de courant n'est pas défectueuse. La télécommande ne fonctionne pas. • Utilisez la télécommande dans le champ de réception. •...
  • Page 66: Déclaration De Conformité (Doc)

    14. Déclaration de conformité (DOC) Conrad Electronic SE, Klaus-Conrad-Straße 1, D-92240 Hirschau, déclare par la présente que ce produit est conforme à la directive 2014/53/UE. Le texte intégral de la déclaration de conformité UE est disponible au lien suivant : www.conrad.com/downloads Sélectionnez une langue en cliquant sur le drapeau correspondant puis saisissez le numéro de commande du produit dans le champ de recherche pour pouvoir télécharger la déclaration de conformité...
  • Page 67: Données Techniques

    16. Données techniques a) Généralités Version Bluetooth ..........3.0 Conditions de service ........de 0 à +40 °C, 40 – 85 % HR Conditions de stockage ........de -20 à +60 °C, 40 – 85 % HR b) Barre de son Tension/courant d’entrée ........21 V/CC, 3 A Puissance de sortie ..........2 x 50 W (RMS) Fréquence radio ..........2402 –...
  • Page 68 Inhoudsopgave Pagina Inleiding ................................70 Verklaring van de symbolen ..........................70 Doelmatig gebruik ..............................71 Omvang van de levering ............................71 Eigenschappen en functies ..........................72 Veiligheidsinstructies ............................72 a) Algemeen ..............................72 b) Batterij (afstandsbediening) .........................74 Bedieningselementen ............................75 a) Soundbar ..............................75 b) Subwoofer ..............................76 c) Afstandsbediening ............................76 Afstandsbediening .............................77 a) Voor het eerste gebruik ..........................77 b) De batterij vervangen ..........................77...
  • Page 69 14. Conformiteitsverklaring (DOC) ...........................88 15. Afvoer ................................88 a) Product ................................88 b) Batterijen/accu’s ............................88 16. Technische gegevens ............................89 a) Algemeen ..............................89 b) Soundbar ..............................89 c) Subwoofer ..............................89 d) Netvoedingadapter ............................89 e) Afstandsbediening ............................89...
  • Page 70: Inleiding

    1. Inleiding Zeer geachte klant, Wij danken u voor de aankoop van dit product. Het product voldoet aan alle wettelijke, nationale en Europese normen. Om dit zo te houden en een veilig gebruik te garanderen, dient u als gebruiker deze gebruiksaanwijzing in acht te nemen! Deze gebruiksaanwijzing behoort bij dit product.
  • Page 71: Doelmatig Gebruik

    3. Doelmatig gebruik Het product dient ervoor om audiosignalen te versterken en in hoorbare geluidsgolven om te zetten. De audio- ingangen mogen alleen aan daarvoor geschikte audio-uitgangen van audioapparatuur aangesloten worden. De stroomvoorziening verloopt via een normaal stopcontact in de woning. Het product is alleen bedoeld voor gebruik in gesloten ruimtes dus gebruik buitenshuis is niet toegestaan.
  • Page 72: Eigenschappen En Functies

    5. Eigenschappen en functies • Draadloze verbinding via Bluetooth • NFC-functie • Uitgangsvermogen: 2 x 50 W + 120 W (RMS) • Optische ingang • AUX-ingang • Coaxiale ingang • HDMI ARC-ingang • Soundbar met twee geïntegreerde luidsprekers • Draadloze subwoofer (signaaloverdracht van de Soundbar naar de subwoofer) •...
  • Page 73 • Behandel het product met zorg. Schokken, stoten of zelfs vallen vanaf een geringe hoogte kunnen het product beschadigen. • Neem ook de veiligheids- en gebruiksaanwijzingen van alle andere apparaten in acht die op het product zijn aangesloten. • Raak het product nooit met natte of vochtige handen aan. •...
  • Page 74: Batterij (Afstandsbediening)

    • Plaats het product niet in de buurt van magneetvelden (bijv. luidsprekers, magnetrons, etc.). • Zet het product niet direct op een versterker of ontvanger neer. • Plaats geen open vuur zoals brandende kaarsen op het product of in de directe omgeving ervan. •...
  • Page 75: Bedieningselementen

    7. Bedieningselementen a) Soundbar 1 Aan-/uitschakelaar 2 Toets SOURCE 3 Toets EQ 4 Toets PAIR / weergave, pauze 5 Volumeregelaar 6 NFC-sensorbereik 7 Schroeven voor bevestiging aan de wand 10 11 12 13 14 8 Status-LED's 9 IR-ontvanger 10 DC-aansluitbus 11 Coaxiale ingang 12 Optische ingang 13 Servicebus...
  • Page 76: Subwoofer

    b) Subwoofer 16 Aansluiting elektrisch snoer 17 Toets PAIR 18 Koppelingscontrolelampje 17 18 c) Afstandsbediening 19 Toets SOURCE 20 Vorig/volgend nummer 21 Weergave/pauze 22 Toets BT PAIR 23 Equalizer-toetsen 24 Toets MUTE 25 Volumeregelaar 26 Aan-/uitschakelaar...
  • Page 77: Afstandsbediening

    8. Afstandsbediening a) Voor het eerste gebruik • Bij levering bevindt er zich al een knoopcel in het batterijvak. • Trek voor het eerste gebruik de kunststoffen beschermstrip uit het batterijvak. De beschermende strip dient ervoor om te verhinderen dat de batterij voortijdig leegloopt. b) De batterij vervangen Vervang de batterij zodra het product niet meer op het signaal van de afstandsbediening reageert.
  • Page 78: Opstellen / Wandmontage

    9. Opstellen / wandmontage Vermijd plaatsen waar schokken, trillingen, stof, hitte, kou en vocht voorkomen. Zorg er tevens voor dat er zich geen krachtige transformatoren of motoren in de buurt van het apparaat bevinden. Dek het product niet af met een tafelkleed of soortgelijke voorwerpen. Het product kan daardoor tijdens gebruik te heet worden.
  • Page 79 • Beide wandhouders moeten elk met 2 schroeven aan de wand worden bevestigd. • Gebruik een wandhouder als sjabloon en markeer de positie van de boorgaten op de wand. • Boor de gaten in de wand. • Steek de meegeleverde pluggen in de boorgaten. •...
  • Page 80: Aansluitingen

    10. Aansluitingen Het product zelf en alle aan te sluiten apparaten moeten uitgeschakeld zijn voordat u de kabel aansluit. a) HDMI (ARC) Sluit de HDMI-ingang (15) via een afzonderlijk verkrijgbare HDMI-kabel (specificatie HDMI 1.4) aan op de HDMI- uitgang van de televisie. De ARC-functie (ARC = Audio Return Channel) maakt het mogelijk om het audiosignaal van een ARC- compatibele televisie via een enkele HDMI-verbinding naar de Soundbar over te dragen.
  • Page 81: Coax

    c) Coax Verbind de coaxiale ingang (11) via een afzonderlijk verkrijgbare coaxiale kabel met de coaxiale uitgang van de televisie (of een geschikt audio-apparaat). d) AUX Om vervormingen of foutieve aanpassingen te voorkomen, die kunnen leiden tot beschadiging van het product of van het aangesloten apparaat, mogen op de AUX-ingang (14) alleen apparaten met een cinch- of een koptelefoonaansluiting aangesloten worden.
  • Page 82: Netstroomaansluiting

    e) Netstroomaansluiting Soundbar • Verbind de DC-stekker van de netvoedingsadapter met de DC-aansluitbus (10). • Verbind de kleine apparaatstekker van het netsnoer met de netvoedingsadapter. • Steek de netstekker in een in het huishouden gewoon stopcontact. Subwoofer • Verbind de kleine apparaatstekker met de aansluiting voor het netsnoer (16). •...
  • Page 83: Ingebruikname

    11. Ingebruikname a) Subwoofer verbinden met de Soundbar Automatisch • Na het inschakelen worden de subwoofer en Soundbar automatisch met elkaar verbonden. De afstand tussen de subwoofer en de Soundbar mag niet groter zijn dan 6 meter. • Tijdens het koppelen knippert het koppelingscontrolelampje (18). •...
  • Page 84: Inschakelen En Standby-Modus

    b) Inschakelen en standby-modus • Na te zijn verbonden met het elektriciteitsnet staat de Soundbar in de standby-modus. Het standby-indicatielampje (8) brandt rood. • Druk op de aan-/uitschakelaar (1, 26) om het apparaat aan te zetten. De LED van de eerder gekozen modus brandt of knippert.
  • Page 85: Equalizer

    PAIR (22) op de afstandsbediening of houdt u de toets PAIR (4) op de Soundbar ingedrukt. De Soundbar geeft het geluidssignaal “Pairing” (Bezig met verbinden) en het Bluetooth-indicatielampje knippert snel. • Kies “renkforce TB500WW” om de apparaten aan elkaar te koppelen. De Soundbar laat als bevestiging het geluidssignaal “Paired” (Gekoppeld) horen en het Bluetooth-indicatielampje brandt continu.
  • Page 86: Nfc-Modus

    Muziekweergave van het Bluetooth-apparaat • De volgende profielen worden door de Soundbar in de Bluetooth-modus ondersteund: A2DP (Advanced Audio Distribution Profile) Audioweergave Muziekregeling via de afstandsbediening van de AVRCP (Audio Video Remote Control Profile) Soundbar en audioweergave • Als uw mobiele apparaat AVRCP ondersteunt, kunt u met de afstandsbediening naar het volgende of vorige nummer wisselen en de weergave starten of onderbreken. Met de knop PAIR (4) op de Soundbar kunt u de weergave starten of onderbreken.
  • Page 87: Probleemoplossing

    12. Probleemoplossing Geen stroom beschikbaar. • Zorg ervoor dat het netsnoer goed aangesloten is. • Controleer of het stopcontact defect is. De afstandsbediening werkt niet. • Gebruik de afstandsbediening alleen binnen zijn detectiebereik. • Richt de afstandsbediening op de IR-ontvanger. •...
  • Page 88: Conformiteitsverklaring (Doc)

    14. Conformiteitsverklaring (DOC) Hiermee verklaart Conrad Electronic SE, Klaus-Conrad-Straße 1, D-92240 Hirschau dat het product voldoet aan richtlijn 2014/53/EU. De volledige tekst van de EU-conformiteitsverklaring is als download via het volgende internetadres beschikbaar: www.conrad.com/downloads Kies een taal door op een vlagsymbool te klikken en voer het bestelnummer van het product in het zoekveld in;...
  • Page 89: Technische Gegevens

    16. Technische gegevens a) Algemeen Bluetooth-versie ..........3.0 Bedrijfscondities ..........0 tot +40 ºC, 40 – 85 % RV Opslagcondities ..........-20 tot +60 ºC, 40 – 85 % RV b) Soundbar Ingangsspanning/-stroom .........21 V/DC, 3 A Uitgangsvermogen ...........2 x 50 W (RMS) Radiofrequentie ..........2402 –...
  • Page 92 Dies ist eine Publikation der Conrad Electronic SE, Klaus-Conrad-Str. 1, D-92240 Hirschau (www.conrad.com). Alle Rechte einschließlich Übersetzung vorbehalten. Reproduktionen jeder Art, z. B. Fotokopie, Mikroverfilmung, oder die Erfassung in elektronischen Datenverarbeitungsanlagen, bedürfen der schriftlichen Genehmigung des Herausgebers. Nachdruck, auch auszugsweise, verboten. Die Publikation entspricht dem technischen Stand bei Drucklegung. Copyright 2017 by Conrad Electronic SE.

Table des Matières