Publicité
Les langues disponibles
Les langues disponibles
Liens rapides
6014 Adattatore a vite con 2 viti
1/4" e blocco filetto
Istruzioni di smaltimento
Kaiser Fototechnik si riserva di apporre
modifiche tecniche senza preavviso.
Le specifiche possono essere appros-
simative.
Kaiser Fototechnik GmbH & Co. KG
Im Krötenteich 2 · 74722 Buchen · Germany
www.kaiser-fototechnik.de
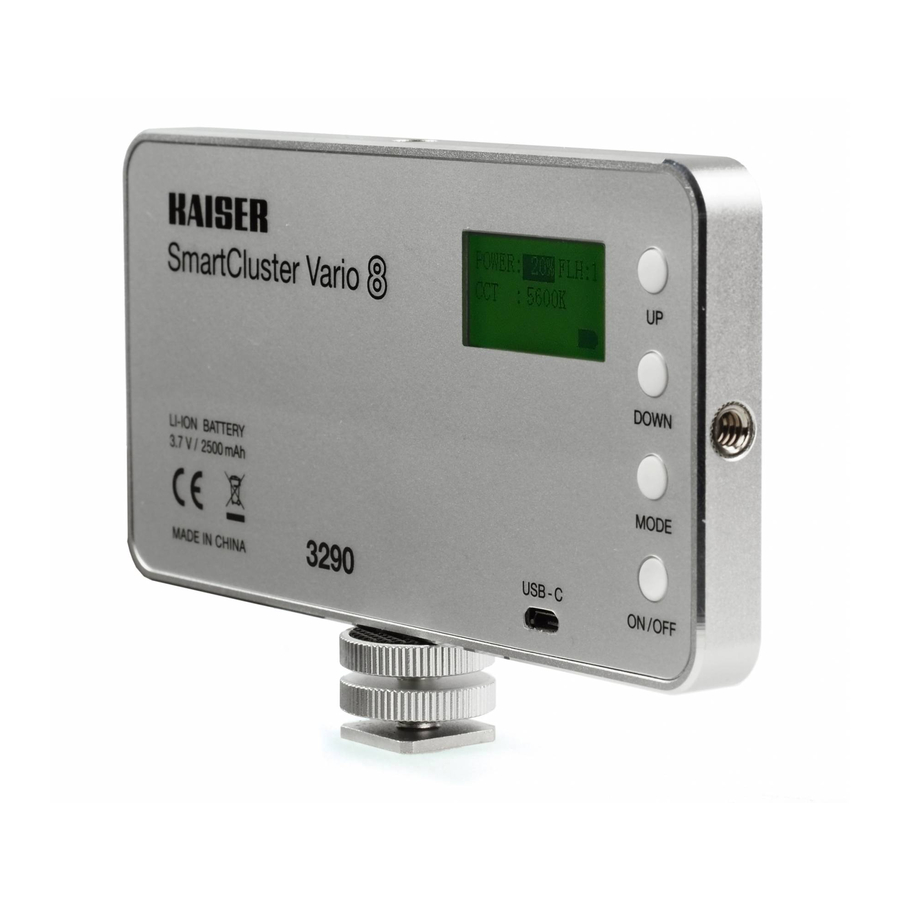
A fine vita del prodotto
smaltitelo nel rispetto
delle norme locali.
Kaiser
SmartCluster
Vario
LED-Kameraleuchte
LED Camera Light
Torche LED
Luz LED
Illuminatore LED
3290
Bedienungsanleitung
Operating instructions
Mode d´emploi
Instrucciones de uso
Istruzioni per l´uso
Publicité

Manuels Connexes pour Kaiser Fototechnik SmartCluster Vario 8

Sommaire des Matières pour Kaiser Fototechnik SmartCluster Vario 8
- Page 1 Operating instructions Istruzioni di smaltimento SmartCluster Vario Mode d´emploi A fine vita del prodotto Kaiser Fototechnik si riserva di apporre Instrucciones de uso smaltitelo nel rispetto modifiche tecniche senza preavviso. delle norme locali. Istruzioni per l´uso Le specifiche possono essere appros- LED-Kameraleuchte simative.
- Page 2 12 12 1 © Copyright Kaiser Fototechnik GmbH & Co. KG...
- Page 3 DEUTSCH (8) Info-Display: Zum Anzeigen der Anzeige auf Info-Display (Abb. C) entsprechenden Informationen (14) POWER: Helligkeit Lieferumfang (Abb. A) (9) + (10) Tasten UP und DOWN: (15) CCT: Farbtemperatur (1) Leuchte mit integriertem Zum Ändern der Helligkeit und Lithium-Ionen-Akku (16) FLH: Beleuchtungseffekt der Farbtemperatur bzw.
- Page 4 Gebrauch nehmen. Bewahren Sie kein Kinderspielzeug. von Kindern gelangen. die Bedienungsanleitung anschlie- Kaiser Fototechnik übernimmt keine Sehen Sie nicht direkt in die Leuchte, ßend gut auf, damit sie Ihnen jederzeit Haftung für Schäden, die durch nicht wenn diese eingeschaltet ist.
- Page 5 Achten Sie darauf, dass die Leuchte nachgeladen und die Leuchte an einem Display (8)) mittels des mitgelieferten während des Betriebes nicht abge- trockenen, kühlen Platz (15-18° C) auf- USB-Kabels (6) mit einem geeigneten, deckt wird. bewahrt werden. mit dem Stromnetz verbundenen USB- Ladeadapter, einer Power Bank oder Wenn die Leuchte an einer Kamera 3.
- Page 6 kann damit auf einem geeigneten Sta- kunden lang gedrückt halten. Die einstellen. Bei einmaligem Drücken Leuchte arbeitet nach dem Einschal- tiv, Kugelkopf, Gelenkarm, usw. be- verändert sich der Wert um einen ten mit 60 % Helligkeit und einer Farb- festigt werden. Schritt, bei länger gedrückter Taste temperatur von 5600 Kelvin.
- Page 7 4 TV Bei gemeinsamer Verwendung von Dif- nuten mit der verringerten Helligkeit be- fusorscheibe und Wabenvorsatz müs- trieben werden. Wenn sie dann nicht 5 Blitzlichtgewitter sen sich an einer Längsseite der ausgeschaltet wird, schaltet sie sich selbstständig aus, um eine Tiefentla- Leuchte vier und an der anderen Längs- Wenn Sie die Taste MODE (11) erneut seite zwei Klemmlaschen befinden,...
- Page 8 8. Technische Daten 9. Zubehör Entsorgungshinweise Lichtquelle: 104 SMD-LEDs 3272 Handgriff Farbtemperatur: ca. 3200-6500 K 6040 Tischfuß mit Zubehörschuh Entsorgen Sie das Pro- dukt am Ende seiner Le - Leuchtfläche: 12,8 x 5,8 cm 6043 Tischstativ, Höhe 8,5 - 25,5 cm bens dauer entsprechend Betriebsspannung: 3,7 V 6049 Mini-Stativ und Handgriff...
- Page 9 ENGLISH (8) Info screen: Shows relevant infor- Display on info screen (fig. C) mation (14) POWER: Brightness Scope of supply (fig. A) (9) + (10) UP and DOWN buttons: (15) CCT: Color temperature (1) Camera light with build-in lithium For changing brightness and (16) FLH: Lighting effect ion battery color temperature and lighting...
- Page 10 1. Intended use Keep the light away from water and WARNING! other liquids and from combustible The “SmartCluster Vario 8” LED camera Do not put the light and the USB cable materials. light is intended to be used for the il- into operation, if they are damaged.
- Page 11 Switch off the light and let it cool 4. Charging the battery 5. Attaching the light down before boxing it. The light has a built-in lithium-ion bat- The light is equipped with a 1/4" tri- tery. Charge the battery before initial To avoid deep discharge of the bat- pod thread (7) at each narrow side operation.
- Page 12 6. Operating the light light / warm white) via 5600 Kelvin 4 TV simulation (daylight / neutral white) to 6500 Kelvin 5 Popping-up flashbulbs Prior to initial operation remove the (daylight / cold white) by pressing the protective foils from the front side and UP (9) and DOWN (10) buttons.
- Page 13 light, there have to be four clips on 7. Maintenance and care Operating voltage: 3.7 V one long side of the light and two clips If you do not use the light for a longer Illumination: 300 lux (at 1 m / on the other long side.
- Page 14 6043 Table tripod, height 8.5 to 25.5 cm (3.3 to 10 in.) Disposal instructions 6049 „SwingGrip 2-in-1“ combined Dispose an unservice- mini tripod and hand grip able product in accor- 6015 Smartphone mount dance of the relevant 6016 Smartphone stand statutory regulations.
- Page 15 FRANÇAIS (8) Écran d’information: Affiche les Affichage sur l’écran d’information différents paramètres & informa - (fig. C) Contenu de la boîte (fig. A) tions (14) POWER: Luminosité (1) Éclairage LED avec batterie (9) + (10) Boutons UP (haut) et (15) CCT: Température de couleur DOWN (bas): Pour ajuster re- lithium-ion intégrée spectivement la luminosité, la...
- Page 16 éclairage n’est pas un jouet. Ne regardez pas directement l’éclai- dans un endroit sûr, afin de les avoir Kaiser Fototechnik décline toute res - rage en face, si celui-ci est allumé. toujours à portée de main en cas de ponsabilité pour les dommages causés besoin.
- Page 17 Assurez-vous que l’éclairage n’est moins une fois tous les 6 mois et charger avant la première utilisation. pas recouvert lors de son utilisation. l’éclairage doit être stocké dans un Pour cela, utilisez le câble USB (6) endroit propre, sec et à température pour connecter le port micro USB (13) Lorsqu’il est fixé...
- Page 18 5. Fixation de l’éclairage Mettez l’éclairage sous tension en ap- / blanc neutre) et jusqu’à 6500 Kelvin puyant sur le bouton ON/OFF (12) (blanc froid) en appuyant sur les bou- L’éclairage est équipé d'un filetage fe- pendant environ 1.5 secondes. tons UP (9) et DOWN (10).
- Page 19 4 Simulation écran TV Si vous souhaitez fixer les deux ac- à utiliser l’éclairage à puissance ré- cessoires en même temps, vous duite pendant quelques minutes, mais 5 Simulation open flash devrez utiliser 4 pinces sur une si vous ne l’éteignez pas manuelle- Appuyez longuement sur le bouton longueur et deux pinces sur l’autre ment, l’éclairage finira par se couper...
- Page 20 Batterie Kaiser Fototechnik se réserve le ou de tout autre solvant ou produit net- lithium-ion: 3,7 V, 2500 mAh droit d’apporter des modifications toyant. techniques à la présente notice. Dimensions (LxHxP): 143 x 73 x 12 mm Toutes les caractéristiques sont ap-...
- Page 21 ESPAÑOL (8) Pantalla de información: Se muestra en la pantalla de infor- Muestra información relevante mación (fig. C) Se suministra (fig. A) (9) + (10) Botones UP (arriba) y (14) POWER: Brillo DOWN (abajo): (1) Luz para cámara con batería (15) CCT: Temperatura de color Para cambiar el brillo, la tempera- de litio ion integrada...
- Page 22 No mirar directamente a la luz cuando guras para tenerlas a mano en cual- esté conectada. Kaiser Fototechnik no asume ninguna quier momento. Si traspasa la luz LED responsabilidad por un uso no pre- No desmontar o modificar la luz. Las para cámara a alguna otra persona,...
- Page 23 Al montarla sobre la cámara, siempre 3. Comprobar el producto su- corriente, a un power bank o a otro sostener la cámara y la luz juntas, puerto USB con alimentación con una ministrado y sus accesorios nunca solo por la luz. con una salida de 5 V.
- Page 24 El montaje de la luz en la zapata de la Ahora es posible ajustar el brillo verá automáticamente al panel de cámara requiere el uso del pie de (POWER) (14) en pasos del 5 % control de brillo. montaje (5). Alinear la luz en la cámara desde 10 % a 100 % pulsando los Para visualizar el panel de control de y apretar los anillos de bloqueo (18) y...
- Page 25 conectarán los efectos de ilumina- Desconectar la luz cuando no se use se debe recargar cada 6 meses y la ción. pulsando el botón ON/OFF (12) du- luz se debe mantener en un lugar rante aproximadamente 1,5 segundos. seco y fresco (15 - 18° C). Debe usar la pantalla difusora (3) La salida de luz estabilizada electró- Asegúrese de que la pantalla frontal...
- Page 26 Iluminación: 300 lux (a 1 m) 6049 „SwingGrip 2-in-1“, combi - nación empuñadura - mini Instrucciones de eliminación Ángulo de cobertura: 110° trípode Al quedar fuera de servi- Autonomía: aprox. 1 hora a 6015 Montura smartphone cio, debe eliminar este potencia com- 6016 Soporte smartphone producto de acuerdo con...
- Page 27 ITALIANO (9) + (10) Pulsanti UP (su) e DOWN (17) Indicatore di carica batteria: (giù): Per variare luminosità, tem- Livello di carica Contenuto confezione (fig. A) perature colore ed effetti di luce Prima di utilizzare l’illuminatore si rac- (11) Pulsante MODE: Per passare (1) Illuminatore con batteria comanda di leggere attentamente le dalla funzione luminosità...
- Page 28 Non smontate e non manipolate l’illu- usare l’illuminatore come impugna- Kaiser Fototechnik non è responsabile minatore. Interventi di riparazione de- tura. di danni causati da usi impropri. vono essere fatti da personale quali- Non utilizzate o conservate l’illumina-...
- Page 29 3. Verifica del contenuto riferiche con una erogazione di 5 V. zoccolo (5). Allineate la slitta sul con- La sorgente deve essere di 2 A. Il ter- tatto caldo e, dopo averlo inserito, fis- Quando aprite la confezione per la mine del processo di carica è...
- Page 30 Ora potrete modificare la luminosità Nota bene: Dopo 5 secondi di inatti- Per ottenere una illuminazione parti- (POWER) (14) con incrementi del 5 % vità nella modalità di controllo della colarmente morbida adatta al video dal 10 % fino al 100 % premendo i temperatura colore il pannello tornerà...