Table des Matières
Publicité
Les langues disponibles
Les langues disponibles
Liens rapides
Installation and operating instructions
Notice de montage et de mise en service
Instrucciones de montaje y uso
EA-Nr.:
7612982102257
FAR-Best.-Nr.: 5526 11 24-F
AQRE432
EA-Nr.:
7612982102264
FAR-Best.-Nr.: 5526 12 24-F
AQRE433
Franke Aquarotter GmbH, Germany
18-05.306e_Exp.fm/13.10.11
Istruzioni per il montaggio e l'uso
Montage- en bedrijfsinstructies
Montaż i instrukcja obsługi
Publicité
Chapitres
Table des Matières

Manuels Connexes pour Franke AQRE432 5526 11 24-F


Sommaire des Matières pour Franke AQRE432 5526 11 24-F
- Page 1 Istruzioni per il montaggio e l’uso Notice de montage et de mise en service Montage- en bedrijfsinstructies Instrucciones de montaje y uso Montaż i instrukcja obsługi EA-Nr.: 7612982102257 FAR-Best.-Nr.: 5526 11 24-F AQRE432 EA-Nr.: 7612982102264 FAR-Best.-Nr.: 5526 12 24-F AQRE433 Franke Aquarotter GmbH, Germany 18-05.306e_Exp.fm/13.10.11...
- Page 2 ...............3 Please refer to the graphics in the German Instal- lation and Operating Instructions..............12 Les graphiques sont disponibles dans la notice de montage et de mise en service allemande..............21 Por favor, consulte los gráficos en las instruc- ciones alemanas de montaje y uso..............30 Per le grafiche fare riferimento alle Istruzioni per il montaggio e l’uso in tedesco.
-
Page 3: Table Des Matières
0English PROTRONIC Urinal Flush Valve, Complete Installation Kit 7612982102257 ..230 V AC 7612982102264 ..24 V DC Please refer to the graphics in the German Installation and Operating Instructions. Table of Contents Abbreviations and Units ....... . 4 Key . -
Page 4: Abbreviations And Units
Earth leakage circuit breaker Drinking water Hot drinking-water EA-Nr. European Article Number FAR-Best.-Nr. Franke Aquarotter Order Number Conversion 1 mm = 0.03937 inches 1 inch = 25.4 mm All length specifications in the graphics are in mm. Warning! Failure to observe can result in injury or even death. -
Page 5: Important Notes
Important Notes • Installation, commissioning and maintenance are to be performed only by a qualified technician according to the instructions provided and in accordance with legal requirements and acknowledged rules of technology. • All technical connection regulations specified by the local water and electricity supply utility companies must be complied with. -
Page 6: Scope Of Delivery
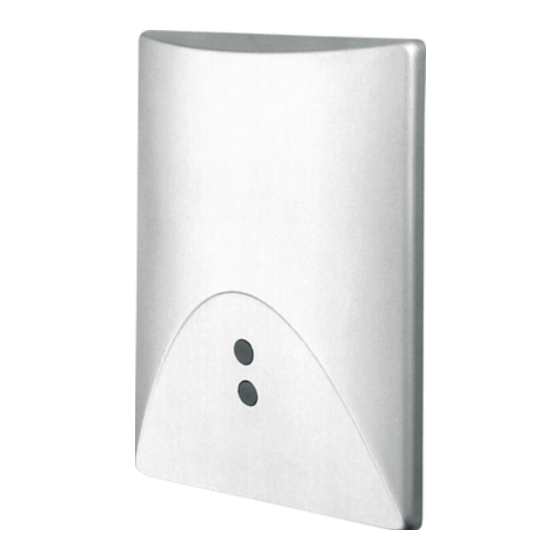
Scope of Delivery Item Description Cover plate with control electronics and sensor Self-closing solenoid valve cartridge Connection terminal with coupling (supplied only for 24V DC model) Transformer with connection terminal (supplied only for 230 V AC model) Mounting frame (fastened in cover plate) Extra items: Cylinder head screws, plain washers, seal with screw Installation and Operating Instructions... -
Page 7: Assembly Instructions For 24 V Dc Electrics
☞ Important! • Carefully tighten the solenoid valve cartridge. • Keep the flush-plugs in the flush-mounting cabinet to enable removal of the solenoid valve cartridge at a later date. 11.7 Close the flow volume regulator (c) with a screwdriver, 8 mm head width. ☞... -
Page 8: Assembly Instructions For 230 V Ac Electrics
13. Assembly Instructions for 230 V AC Electrics 13.1 Loosen the screws (a) and remove the cover (b) of the connector terminal. Caution! Connect only 230 V AC, 50/60 Hz to the connector terminal. 13.2 From the 3 x 1.5 mm² lead-in cable (c), connect cores L1 and N to the corresponding clamps. -
Page 9: Adjusting The Flush-Volume
15. Adjusting the Flush-Volume 15.1 Remove the cover plate. 15.2 Set the flow volume regulator to "fully opened" (see Chapter 11.7). 15.3 Disconnect the mains voltage supply for min. 60 seconds. The flush-volume setting is activated. 15.4 Reconnect the voltage supply. 15.5 Wait for the confirmation flashing (1x long 3x short). -
Page 10: Setting The Range
17. Setting the Range 17.1 The sensor-detection range can be adjusted using the optional remote control (FAR Order No. 5179 0000). 18. Maintenance and Servicing Depending on the quality of the water, the local conditions and the rules and regulations applicable on site, the fitting must be maintained and serviced at regular intervals. -
Page 11: Fault Correction
21. Fault Correction Fault Cause Remedy ➯ Restore it Water does not flow – Water supply interrupted ➯ Open it – Water flow regulator closed ➯ Restore it – Voltage supply interrupted ➯ Replace it – Solenoid valve faulty ➯ Replace it –... - Page 12 0Français Robinetterie de chasse d'eau pour urinoirs PROTRONIC, set pour construction finie 7612982102257 ..230 V AC 7612982102264 ..24 V DC Les graphiques sont disponibles dans la notice de montage et de mise en service allemande. Table des matières Abréviations et unités .
-
Page 13: Abréviations Et Unités
Eau potable Eau potable chaude EA-Nr. Numéro d’article européen FAR-Best.-Nr. Numéro de commande Franke Aquarotter Conversion 1 mm = 0,03937 pouce 1 pouce = 25,4 mm Dans les graphiques, les longueurs sont indiquées en mm. Explication des symboles Avertissement ! Le non-respect des consignes est susceptible d'induire un danger de mort ou de provoquer des blessures corporelles. -
Page 14: Remarques Importantes
Remarques importantes • Seul un spécialiste est habilité à effectuer le montage, la mise en service et l’entretien de l’installation, ces opérations étant effectuées selon les instructions fournies, conformément aux prescriptions légales et aux règles techniques reconnues. • Il convient de respecter les conditions techniques de raccordement des entreprises locales de distribution d’eau et d’énergie. -
Page 15: Contenu De La Livraison
Contenu de la livraison Pos. Désignation Plaque de recouvrement avec électronique de commande et détecteur Cartouche d’électrovanne à fermeture automatique Borne de raccordement avec coupleur (uniquement comprise dans le contenu de livraison du modèle 24 V Transformateur avec borne de raccordement (uniquement compris dans le contenu de livraison du modèle 230 V AC) Cadre de support (fixé... -
Page 16: Montage Modèle Électrique 24 V Dc
11.5 Visser la cartouche de l’électrovanne (e). 11.6 Utiliser le bouchon de rinçage comme clé de montage pour visser la cartouche de l’électrovanne. ☞ Important ! • Serrer la cartouche de l’électrovanne avec précaution. • Conserver le bouchon de rinçage dans le boîtier à montage mural pour, le cas échéant, démonter la cartouche de l’électrovanne. -
Page 17: Montage Modèle Électrique 230 V Ac
13. Montage modèle électrique 230 V AC 13.1 Dévisser les vis (a) et retirer le couvercle (b) de la borne de raccordement. Attention ! Ne raccorder que 230 V AC, 50/60 Hz à la borne de raccordement. 13.2 Fixer les brins L 1 et N de la conduite d'amenée 3 x 1,5 mm² (c) sur la borne de raccordement. -
Page 18: Réglage Du Débit De Rinçage
15. Réglage du débit de rinçage 15.1 Retirer la plaque de recouvrement. 15.2 Régler la régulation du débit d’eau sur la position « complètement ouverte » (voir Chapitre 11.7). 15.3 Couper l’alimentation en tension du secteur pendant au moins 60 secondes. Le réglage du débit de rinçage est activé. -
Page 19: Réglage De La Portée
17. Réglage de la portée 17.1 La portée peut être réglée avec la télécommande disponible en option (N° FAR 5179 0000). 18. Maintenance et entretien En fonction de la qualité de l’eau ainsi que des conditions et des dispositions locales, il convient de contrôler et d’entretenir la robinetterie à intervalles réguliers. Utiliser de manière correcte des produits de nettoyage qui n’attaquent pas la robinetterie ;... -
Page 20: Elimination De Pannes
21. Elimination de pannes Panne Cause Elimination ➯ Rétablir L’eau ne coule pas – Alimentation en eau interrompue ➯ Ouvrir – Régulation du débit d’eau fermée – Alimentation en tension interrompue ➯ Rétablir ➯ Changer – Electrovanne défectueuse ➯ Changer –... - Page 21 0Español PROTRONIC grifería para el enjuague de urinarios, set prefabricado 7612982102257 ..230 V AC 7612982102264 ..24 V DC Por favor, consulte los gráficos en las instrucciones alemanas de montaje y servicio. Índice Abreviaciones y unidades........22 Aclaración gráfica .
-
Page 22: Abreviaciones Y Unidades
Agua potable Agua potable caliente EA-Nr. Número de artículo europeo FAR-Best.-Nr. Núm. de pedido Franke Aquarotter Conversión 1 mm. = 0,03937 pulgadas 1 pulgada = 25,4 mm. En los gráficos se especifican todas las longitudes en mm. Aclaración gráfica ¡Aviso! -
Page 23: Advertencias Importantes
Advertencias importantes • El montaje, la puesta en servicio y el mantenimiento, solamente deben ser llevados a cabo por un técnico especializado según las instrucciones adjuntas y observando las prescripciones legales y las reglas técnicas generalmente reconocidas. • Se han de cumplir las condiciones técnicas de conexión de las empresas locales de suministro de agua y energía. -
Page 24: Volumen De Suministro
Volumen de suministro Pos. Denominación Placa de cubierta con electrónica de control y sensor Cartucho de electroválvula con cierre automático Borne de conexión con acoplamiento (volumen de suministro sólo para el modelo de 24 V CC) Transformador con borne de conexión (volumen de suministro sólo para el modelo de 230 V CA) Bastidor de sujeción (fijado en la placa de cubierta) Adicionalmente con:... -
Page 25: Montaje Del Modelo Eléctrico De 24 V Cc
• Atornille cuidadosamente el cartucho de electroválvula. • Guarde el tapón de enjuague en la cisterna empotrada para desmontar el cartucho de electroválvula, si fuera necesario. 11.7 Abrir el regulador de cantidad de agua (c) con un destornillador de 8 mm de ancho. ☞... -
Page 26: Montaje Del Modelo - Eléctrico De 230 V Ca
13. Montaje del modelo - eléctrico de 230 V CA 13.1 Soltar los tornillos (a) y quitar la tapa (b) del borne de conexión. ¡Atención! Conectar sólo 230 V CA, 50/60 Hz al borne de conexión. 13.2 Desde la conexión 3 x 1,5 mm (c) una los conductores L1 y N al borne de conexión. El borne intermedio permanece libre. -
Page 27: Ajustar La Cantidad De Agua Para El Enjuague
15. Ajustar la cantidad de agua para el enjuague 15.1 Quitar la placa de cubierta. 15.2 Posicionar el regulador de caudal a "completamente abierto" (véase el capítulo 11.7). 15.3 Desconectar el suministro de tensión por cable durante 60 segundos, como mínimo. El ajuste de la cantidad de agua de enjuague está... -
Page 28: Ajustar El Alcance
17. Ajustar el alcance 17.1 El alcance se puede ajustar con el mando a distancia opcional (Núm. de pedido FAR 5179 0000). 18. Mantenimiento y limpieza En función de la calidad del agua, las condiciones locales y las prescripciones locales vigentes ha de comprobarse y hacerse el mantenimiento de la grifería a intervalos regulares. -
Page 29: Reparación De Averías
21. Reparación de averías Avería Causa Reparación El agua no fluye – Interrupción de la alimentación de agua Restablecer – Regulador de cantidad de agua cerrado Abrir – Interrupción de la alimentación de tensión Restablecer – Válvula electromagnética defectuosa Sustituir –... - Page 30 0Italiano PROTRONIC Rubinetteria di risciacquo per urinali, kit per costruzione finita 7612982102257 ..230 V AC 7612982102264 ..24 V DC Per le grafiche fare riferimento alle istruzioni per il montaggio e l’uso in tedesco. Sommario Abbreviazioni e unità ........31 Spiegazione dei simboli .
-
Page 31: Abbreviazioni E Unità
Acqua sanitaria Acqua calda sanitaria EA-Nr. Codice articolo europeo FAR-Best.-Nr. Numero d'ordine Franke-Aquarotter Fattore di conversione 1 mm = 0,03937 pollici 1 pollice = 25,4 mm Tutte le quote nelle grafiche sono espresse in millimetri. Spiegazione dei simboli Avvertenza! La mancata osservanza può... -
Page 32: Avvertenze Importanti
Avvertenze importanti • Montaggio, messa in esercizio e manutenzione solo da parte di un tecnico specializzato secondo le presenti istruzioni, nel rispetto delle prescrizioni di legge e delle regole riconosciute della tecnica. • Rispettare le condizioni tecniche di allacciamento delle società locali di erogazione di energia elettrica e di approvvigionamento idrico. -
Page 33: Stato Di Fornitura
Stato di fornitura Pos. Denominazione Piastra di copertura con elettronica di controllo e sensore Valvola elettromagnetica a cartuccia a chiusura automatica Morsetto con innesto (compresi solo nella fornitura del modello a 24 V DC ) Trasformatore con morsetto (compresi solo nella fornitura del modello a 230 V AC) Telaio di supporto (fissato nella piastra di copertura) Accessori:... -
Page 34: Allacciamento Elettrico - Modello A 24 V Dc
11.5 Avvitare la valvola elettromagnetica a cartuccia (e). 11.6 Utilizzare il tappo di sciacquo come chiave di montaggio per serrare la valvola elettromagnetica a cartuccia. ☞ Importante! • Serrare con precauzione la valvola elettromagnetica a cartuccia. • Conservare il tappo di sciacquo nella scatola ad incasso per smontare, se necessario, la valvola elettromagnetica a cartuccia. -
Page 35: Allacciamento Elettrico - Modello 230 V Ac
13. Allacciamento elettrico – modello 230 V AC 13.1 Svitare le viti (a) e rimuovere il coperchio (b) del morsetto. Attenzione! Nel morsetto connettere solo 230 V AC, 50/60 Hz. 13.2 Dal cavetto di alimentazione 3 x 1,5 mm (c) bloccare i conduttori L1 e N nel morsetto. -
Page 36: Regolazione Della Quantità D'acqua Di Risciacquo
15. Regolazione della quantità d’acqua di risciacquo 15.1 Rimuovere la piastra di copertura. 15.2 Posizionare la regolazione della portata d’acqua su “completamente aperta“ (vedi capitolo 11.7). 15.3 Sconnettere l’alimentazione di rete per almeno 60 secondi. L’impostazione della quantità d’acqua di risciacquo è attivata. 15.4 Ripristinare l’alimentazione di tensione. -
Page 37: Impostazione Della Portata
17. Impostazione della portata 17.1 La portata può essere impostata con il telecomando opzionale (n. d’ordine 5179 0000). 18. Manutenzione e cura Controllare ed eseguire la manutenzione della rubinetteria ad intervalli regolari, in funzione della qualità dell’acqua, delle condizioni locali e delle prescrizioni vigenti. Utilizzare detergenti appropriati, che non corrodono la rubinetteria, e risciacquare con acqua dopo l’uso. -
Page 38: Eliminazione Dei Guasti
21. Eliminazione dei guasti Guasto Causa Rimedio L’acqua non scorre – L’alimentazione dell’acqua è interrotta Ripristinare – Regolazione della portata d’acqua chiusa Aprire – L’alimentazione di tensione è interrotta Ripristinare – Valvola elettromagnetica guasta Sostituire – Sensore guasto Sostituire – Impostazione errata della portata Impostare L’acqua scorre –... - Page 39 0Nederlands PROTRONIC urinoirspoelarmatuur, afwerkset 7612982102257 ..230 V AC 7612982102264 ..24 V DC De tekeningen kunt u in de Duitse montage- en bedrijfsinstructies vinden. Inhoudsopgave Afkortingen en eenheden ....... 40 Verklaring van de symbolen .
-
Page 40: Afkortingen En Eenheden
Residual Current Protective Device, aardlekschakelaar Drinkwater Drinkwater warm EA-Nr. Europees artikelnummer FAR-Best.-Nr. Franke Aquarotter-bestelnummer Omrekening 1 mm = 0,03937 inch 1 inch = 25,4 mm Alle lengtegegevens in tekeningen zijn in mm aangegeven. Verklaring van de symbolen Waarschuwing! Het niet in acht nemen van de instructie kan tot levensgevaar of lichamelijk letsel leiden. -
Page 41: Belangrijke Aanwijzingen
Belangrijke aanwijzingen • Montage, inbedrijfstelling en onderhoud mogen alleen door de vakman volgens de meegeleverde instructies en volgens de wettelijke voorschriften en erkende regels van de techniek worden uitgevoerd. • De technische voorwaarden voor aansluiting van de plaatselijke water- en energiemaatschappijen moeten in acht worden genomen. -
Page 42: Omvang Van De Levering
Omvang van de levering Pos. Omschrijving Afdekplaat met stuurelektronica en sensor Zelfsluitende magneetventielpatroon Aansluitklem met koppeling (omvang van de levering alleen voor 24 V DC uitvoering) Transformator met aansluitklem (omvang van de levering alleen voor 230 V AC uitvoering) Bevestigingsframe (in de afdekplaat bevestigd) Meegeleverd: cilinderkopschroeven, onderlegringen, afdichting met schroef... -
Page 43: Montage Elektro-Uitvoering 24 V Dc
☞ Belangrijk! • De magneetventielpatroon voorzichtig vastdraaien. • De spoelstop in de inbouwdoos bewaren om de magneetventielpatroon evt. te demonteren. 11.7 De waterhoeveelheidregulering (c) met een schroevendraaier klingbreedte 8 mm openen. ☞ Waterhoeveelheidregulering tot de aanslag draaien. ☞ Belangrijk! Borgring niet verwijderen. 11.8 Bevestigingsframe door losdraaien van de schroefdraadpen uit de afdekplaat verwijderen. -
Page 44: Montage Elektro - Uitvoering 230 V Ac
13. Montage elektro – uitvoering 230 V AC 13.1 De schroeven (a) losdraaien en het deksel (b) van de aansluitklem verwijderen. Attentie! Alleen 230 V AC, 50/60 Hz op de aansluitklem aansluiten. 13.2 Van de voedingsleiding 3 x 1,5 mm (c) de aders L1 en N op de aansluitklem klemmen. -
Page 45: Spoelhoeveelheid Instellen
15. Spoelhoeveelheid instellen 15.1 De afdekplaat verwijderen. 15.2 De waterhoeveelheidregulering op „volledig geopend“ zetten (zie hoofdstuk 11.7). 15.3 De netvoedingsspanning gedurende min. 60 seconden onderbreken. De instelling spoelhoeveelheid is geactiveerd. 15.4 De voedingsspanning is weer tot stand gebracht. 15.5 Wachten op het knipperen ter bevestiging (1x lang 3x kort). 15.6 De afdekplaat inhaken. -
Page 46: Actieradius Instellen
17. Actieradius instellen 17.1 De actieradius kan met de optionele afstandbediening (FAR-bestelnr. 5179 0000) worden ingesteld. 18. Onderhoud en verzorging Afhankelijk van de waterkwaliteit, de plaatselijke omstandigheden en de plaatselijke voorschriften de armatuur regelmatig controleren en onderhouden. Er dienen reinigingsmiddelen te worden gebruikt die geschikt zijn voor de armatuur en deze niet aantasten. -
Page 47: Verhelpen Van Storingen
21. Verhelpen van storingen Storing Oorzaak Verhelpen Water stroomt niet – Watertoevoer onderbroken Weer tot stand brengen – Waterhoeveelheidregulering Openen gesloten – Voedingsspanning onderbroken Weer tot stand brengen – Magneetventiel defect Vervangen – Sensor defect Vervangen – Actieradius onjuist ingesteld Instellen Water stroomt –... - Page 48 0Polski Armatura spłukująca do pisuaru PROTRONIC, gotowy zestaw 7612982102257 ... 230 V AC 7612982102264 ... 24 V DC Prosimy przyjąć rysunki z niemieckiej instrukcji montażu i obsługi. Spis treści Skróty i jednostki ......... 49 Legenda.
-
Page 49: Skróty I Jednostki
Residual Current Protective Device, wyłącznik ochronny różnicowy Woda pitna Woda pitna ciepła EA-Nr. Europejski numer artykułu FAR-Best.-Nr. Numer zamówienia Franke Aquarotter Przeliczanie jednostek 1 mm = 0,03937 cala 1 cal = 25,4 mm Wszystkie długości na rysunkach podano w mm. Legenda Ostrzeżenie! Nieprzestrzeganie może spowodować... -
Page 50: Ważne Uwagi
Ważne uwagi • Montaż, uruchamianie i konserwacja muszą być przeprowadzane przez specjalistę zgodnie z dostarczoną instrukcją, regulacjami prawnymi i ogólnie przyjętymi normami technicznymi. • Należy przestrzegać technicznych warunków podłączenia lokalnych zakładów wodociągowych i energetycznych. 5526 11 24-F: • Należy wykonać przyłącze elektryczne z wyłącznikiem różnicowoprądowym (RCD). -
Page 51: Zakres Dostawy
Zakres dostawy Poz. Opis Pokrywa z elektronicznym sterownikiem i czujnikiem Wkład do samozamykającego zaworu elektromagnetycznego Zacisk przyłączeniowy z łącznikiem wtykowym (zakres dostawy tylko do wersji 24 V DC) Transformator z zaciskiem przyłączeniowym (zakres dostawy tylko do wersji 230 V AC) Rama nośna (przymocowana do pokrywy) Dodatkowe opakowanie z: śrubami z łbem walcowym, podkładami, uszczelką... -
Page 52: Montaż Elektroniki - Wersja 24 V Dc
11.6 Użyć zatyczki spłukiwania jako klucza montażowego do dokręcenia wkładu zaworu elektromagnetycznego. ☞ Ważne! • Ostrożnie dokręcić wkład zaworu elektromagnetycznego. • Zatyczkę spłukiwania przechowywać w skrzynce naściennej w celu ewentualnego demontażu wkładu zaworu elektromagnetycznego. 11.7 Otworzyć regulator ilości wody (c) przy pomocy śrubokręta z końcówką 8 mm. ☞... -
Page 53: Montaż Elektroniki - Wersja 230 V Ac
13. Montaż elektroniki – wersja 230 V AC 13.1 Odkręcić śruby (a) i zdjąć pokrywę (b) z zacisku przyłączeniowego. Uwaga! Podłączać tylko 230 V AC, 50/60 Hz do zacisku przyłączeniowego. 13.2 Z przewodów doprowadzających 3 x 1,5 mm (c) połączyć żyły L1 i N do zacisku przyłączeniowego. -
Page 54: Ustawianie Wielkości Spłukiwania
15. Ustawianie wielkości spłukiwania 15.1 Zdjąć pokrywę. 15.2 Przestawić regulator ilości wody w położenie „w pełni otwarty“ (zob. rozdział 11.7). 15.3 Odłączyć zasilanie sieciowe na min. 60 sekund. Ustawienie ilości spłukiwania jest aktywne. 15.4 Ponownie podłączyć zasilanie elektryczne. 15.5 Poczekać na mignięcia potwierdzające (1x długie 3x krótkie). 15.6 Zawiesić... -
Page 55: Ustawienie Zasięgu
17. Ustawienie zasięgu 17.1 Zasięg można ustawić przy pomocy opcjonalnego pilota (nr zamów. FAR 5179 0000) . 18. Konserwacja i pielęgnacja Armaturę należy kontrolować w regularnych odstępach czasowych, uzależnionych od jakości wody, miejscowych warunków oraz lokalnych regulacji i przepisów. Używać odpowiedniego, bezpiecznego dla armatury środka czyszczącego, stosując go zgodnie z zaleceniami i wypłukując wodą... -
Page 56: Usuwanie Usterek
21. Usuwanie usterek Usterka Przyczyna Środek zaradczy Woda nie wypływa – Odcięty dopływ wody Naprawić – Zamknięty regulator ilości wody Otworzyć – Odłączone zasilanie elektryczne Naprawić – Uszkodzony zawór Wymienić elektromagnetyczny – Uszkodzony czujnik Wymienić – Nieprawidłowo ustawiony zakres Wyregulować Ciągły wypływ wody –... - Page 57 Notizen...
- Page 58 Notizen...
- Page 59 Notizen...
- Page 60 : +216-(0)71-702-272 e: info@handassagroup.com.tn Franke Kitchen Systems Egypt S.A.E. Franke N.V. 1st Industrial Zone Ring 10, PB 117 Franke Mutfak ve Banyo Sistemleri San. ve 6th October City, Cairo / Egypt 9400 Ninove / Belgium Tic. A.S t: +20-(0)2-828-0000 t: +31-(0)88-0027-368 Gebze Organize Sanayi Bölgesi...