LaserLiner AutoCross-Laser 3C Mode D'emploi
Masquer les pouces
Voir aussi pour AutoCross-Laser 3C:
- Mode d'emploi (92 pages) ,
- Mode d'emploi (13 pages)

Manuels Connexes pour LaserLiner AutoCross-Laser 3C


Sommaire des Matières pour LaserLiner AutoCross-Laser 3C
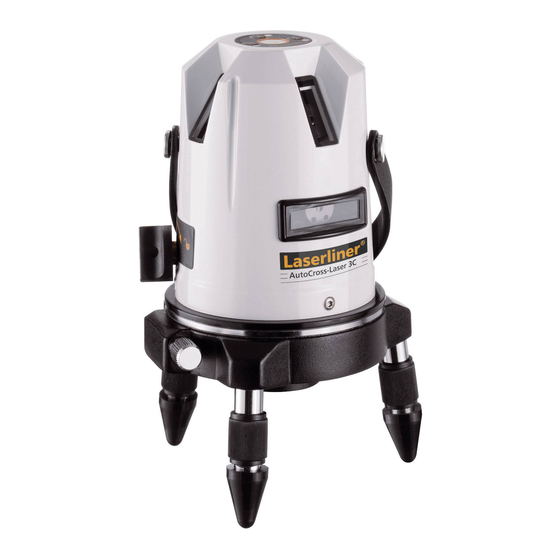
- Page 1 AutoCross-Laser 3C 1H 2V 1D Laser 635 nm...
-
Page 2: Allgemeine Sicherheitshinweise
Lesen Sie die Bedienungsanleitung, das beiliegende Heft „Garantie- und Zusatzhinweise“ sowie die aktuellen Informationen und Hinweise im Internet-Link am Ende dieser Anleitung vollständig durch. Befolgen Sie die darin enthaltenen Anweisungen. Diese Unterlage ist aufzubewahren und bei Weitergabe der Lasereinrichtung mitzugeben. Funktion / Verwendungszweck Kreuzlinien-Laser zum vertikalen und horizontalen Ausrichten –... -
Page 3: Besondere Produkteigenschaften
AutoCross-Laser 3C – Betrachten Sie den Laserstrahl oder die Reflektionen niemals mit optischen Geräten (Lupe, Mikroskop, Fernglas, ...). – Verwenden Sie den Laser nicht auf Augenhöhe (1,40 ... 1,90 m). – Gut reflektierende, spiegelnde oder glänzende Flächen sind während des Betriebes von Lasereinrichtungen abzudecken. -
Page 4: Einlegen Der Batterien
Anzahl und Anordnung der Laser H = horizontale Laser V = vertikale Laser 1H 2V 1D D = Lotlaser (downpoint) Einlegen der Batterien Batteriefach (9) öffnen und Batterien gemäß den Installationssymbolen einlegen. Dabei auf korrekte Polarität achten. Laseraustrittsfenster AN- / AUS-Schalter; Transportsicherung Seitenfeinantrieb 5/8”... - Page 5 AutoCross-Laser 3C AutoCross-Laser 3C Horizontales und vertikales Nivellieren Die Transportsicherung (2) nach rechts drehen und die Pendelarretierung lösen. Jetzt werden die Laser durch das Pendelsystem automatisch ausgerichtet und der horizontale Laser leuchtet konstant. Die Laser lassen sich einzeln mit den Tasten H und V ein- bzw.
- Page 6 Die Differenz zwischen A2 u. A3 ist die Toleranz. Wenn A2 und A3 mehr als 0,2 mm / m auseinander liegen, ist eine Justierung erforderlich. Setzen Sie sich mit Ihrem Fachhändler in Verbindung oder wenden Sie sich an die Serviceabteilung von UMAREX-LASERLINER.
- Page 7 AutoCross-Laser 3C AutoCross-Laser 3C Überprüfung der vertikalen Linie: Gerät ca. 5 m von einer Wand aufstellen. An der Wand ein Lot mit einer 2,5 m langen Schnur befestigen, das Lot sollte dabei frei pendeln. Gerät einschalten und den vertikalen Laser auf die Lotschnur richten. Die Genauigkeit liegt inner- halb der Toleranz, wenn die Abweichung zwischen Laserlinie und Lotschnur nicht mehr als ±...
-
Page 8: Technische Daten
Das Gerät erfüllt alle erforderlichen Normen für den freien Warenverkehr innerhalb der EU. Dieses Produkt ist ein Elektrogerät und muss nach der europäischen Richtlinie für Elektro- und Elektronik- Altgeräte getrennt gesammelt und entsorgt werden. Weitere Sicherheits- und Zusatzhinweise unter: http://laserliner.com/info?an=acl3c... -
Page 9: General Safety Instructions
AutoCross-Laser 3C Completely read through the operating instructions, the „Warranty and Additional Information“ booklet as well as the latest information under the internet link at the end of these instructions. Follow the instructions they contain.This document must be kept in a safe place and if the laser device is passed on, this document must be passed on with it. -
Page 10: Special Product Features
– Under no circumstances should optical instruments (magnifying glass, microscope, binoculars) be used to look at the laser beam or reflections. – Do not use the laser at eye level (1.40 ... 1.90 m) – Reflective, specular or shiny surfaces must be covered whilst laser devices are in operation. -
Page 11: Inserting The Batteries
AutoCross-Laser 3C Number and direction of the lasers H = horizontal laser V = vertical laser 1H 2V 1D D = downpoint Inserting the batteries Open the battery compartment (9) and insert the batteries in accordance with the installa- tion symbols, ensuring the correct polarity. - Page 12 Horizontal and vertical levelling Turn the transport fastener (2) clockwise and release the pendulum lock. The lasers are now automatically aligned by the pendulum system and the horizontal laser lights constantly. The lasers can be switched on and off individually with the H and V buttons. It is now ready for levelling in the horizontal or vertical plane.
- Page 13 AutoCross-Laser 3C Preparing the calibration check: It is possible for you to check the calibration of the laser. To do this, position the device midway between 2 walls, which must be at least 5 metres apart. Do this by turning the unit on, thus releasing the transport restraint (cross laser on).
- Page 14 Checking the vertical line: Position the device about 5 m from a wall. Fix a plumb bob with a line of 2.5 m length on the wall, making sure that the bob can swing freely. Switch on the device and align the vertical laser to the plumb line. The precision is within the specified tolerance if the deviation between the laser line and the plumb line is not greater than ±...
- Page 15 AutoCross-Laser 3C Technical data (Subject to technical alterations. 10.2017) Self-levelling range ± 2,5° Precision ± 0,2 mm / m Laser wavelength linelaser / plumb laser 635 nm / 650 nm Laser class 2 / < 1 mW Power supply 3 x 1,5V AA Operating time approx.
-
Page 16: Algemene Veiligheidsaanwijzingen
Lees de handleiding, de bijgevoegde brochure ‚Garantie- en aanvullende aanwijzingen‘ evenals de actuele informatie en aanwijzingen in de internet-link aan het einde van deze handleiding volledig door. Volg de daarin beschreven aanwijzingen op. Bewaar deze documentatie en geef ze door als u de laserinrichting doorgeeft. Functie / toepassing Kruislijnlaser voor verticaal en horizontaal uitlijnen –... - Page 17 AutoCross-Laser 3C – Bekijk de laserstraal of de reflecties nooit met behulp van optische apparaten (loep, microscoop, verrekijker, …). – Gebruik de laser niet op ooghoogte (1,40 ... 1,90 m). – Goed reflecterende, spiegelende of glanzende oppervlakken moeten tijdens het gebruik van laserinrichtingen worden afgedekt.
-
Page 18: Plaatsen Van De Batterijen
Aantal en richting van de laser H = horizontale laser V = verticale laser 1H 2V 1D D = loodlaser (downpoint) Plaatsen van de batterijen Batterijvak (9) openen en de batterijen volgens de installatiesymbolen inleggen. Let daarbij op de correcte polarisatie 1 Laseruitlaat 2 AAN- / UIT-schakelaar;... - Page 19 AutoCross-Laser 3C Horizontaal en verticaal nivelleren Draai de transportbeveiliging (2) naar rechts en ontgrendel de pendelvergren- deling. Nu worden de lasers automatisch uitgelijnd door het pendelsysteem en de horizontale laser brandt constant. De lasers kunnen afzonderlijk met de toetsen H en V in- en uitgeschakeld worden. Daarna kunt u horizontaal resp.
- Page 20 A2 en A3 moet binnen de tolerantie van de nauwkeurigheid liggen. Wanneer het verschil tussen punt A2 en A3 groter is dan de aangegeven tolerantie, nl. 0,2 mm / m, is een kalibratie nodig. Neem hiervoor contact op met uw vakhandelaar of met de serviceafdeling van UMAREX-LASERLINER.
- Page 21 AutoCross-Laser 3C Controleren van de verticale lijn: Apparaat op ca. 5 meter van de wand opstellen, aan de wand een lood met ongeveer 2 meter draad bevestigen, de draad moet vrij kunnen pendelen, apparaat instellen in de verticale positie en wanneer u de draad nadert, mag het verschil niet meer zijn dan ±...
-
Page 22: Technische Gegevens
Het apparaat voldoet aan alle van toepassing zijnde normen voor het vrije goederenverkeer binnen de EU. Dit product is een elektrisch apparaat en moet volgens de Europese richtlijn voor oude elektrische en elektronische apparatuur gescheiden verzameld en afgevoerd worden. Verdere veiligheids- en aanvullende instructies onder: http://laserliner.com/info?an=acl3c... -
Page 23: Sikkerhedshenvisninger
AutoCross-Laser 3C Du bedes venligst læse betjeningsvejledningen, det vedlagte hæfte „Garanti- og supplerende anvisninger“ samt de aktuelle oplysninger og henvisninger på internet-linket i slutning af denne vejledning fuldstændigt igennem. Følg de heri indeholdte instrukser. Dette dokument skal opbevares og følge med laserenheden, hvis denne overdrages til en ny bruger. -
Page 24: Særlige Produktegenskaber
– Hvis laserstråling i klasse 2 rammer en person i øjnene, skal ved-kommende bevidst lukke øjnene og straks fjerne hovedet fra strålen. – Laserstrålen eller dens refleksioner må aldrig betragtes gennem optisk udstyr (lup, mikroskop, kikkert, ...). – Undlad at anvende laseren i øjenhøjde (1,40 ... 1,90 m). –... -
Page 25: Isætning Af Batterier
AutoCross-Laser 3C Antal og placering af lasere H = horisontal laser V = vertikal laser 1H 2V 1D D = lodlaser (downpoint) Isætning af batterier Batterihuset (9) åbnes og batterierne sættes i som angivet ved symbolerne. Låget lukkes omhyggeligt. 1 Laserudgangsvindue 2 Tænd-/sluk kontakt;... - Page 26 Horisontal og vertikal nivellering Transportsikringen (2) drejes til højre, og pendullåsen løsnes. Nu indjusteres laserne automatisk af pendulsystemet, og den horisontale laser lyser konstant. Laserne kan tændes og slukkes enkeltvis med knapperne H og V. Nu kan der nivelleres horisontalt eller vertikalt. Hvis laseren står for skråt (udenfor selvnivelleringsområdet på...
- Page 27 AutoCross-Laser 3C Forberedelse til kontrol af retvisning: Man kan kontrollere kalibreringen af laseren. Opstil apparatet midt mellem 2 vægge, som er mindst 5 m fra hinanden. Slå transport - sikringen fra og tænd for instrumentet (laserkrydset aktiveres). Brug hertil et stativ.
- Page 28 Kontrol af lodret laserlinie: Laseren opstilles ca. 5 m fra en væg. På væggen ophænges et snorelod med 2,5 m snor, således at det hænger frit. Den lodrette laserstråle tændes, laseren sigtes ind, så den lodrette laserstråle flugter med snoren, og det kontrolleres, at linien ikke afviger mere end ±...
- Page 29 AutoCross-Laser 3C Tekniske data (Forbehold for tekniske ændringer. 10.2017) Selvnivelleringsområde ± 2,5° Nøjagtighed ± 0,2 mm / m Laserbølgelængde linjelaser / lodlaser 635 nm / 650 nm Laserklasse 2 / < 1 mW Strømforsyning 3 x 1,5V AA Driftstid ca. 16 timer 0 ...
-
Page 30: Fonction / Emploi Prévu
Lisez entièrement le mode d‘emploi, le carnet ci-joint « Remarques supplémentaires et concernant la garantie » et les renseignements et consignes présentés sur le lien Internet précisé à la fin de ces instructions. Suivez les instructions mentionnées ici. Conservez ces informations et les donner à la personne à laquelle vous remettez le dispositif laser. -
Page 31: Caractéristiques Du Produit Spécial
AutoCross-Laser 3C – Ne jamais regarder le faisceau laser ni les réflexions à l’aide d’instruments optiques (loupe, microscope, jumelles, etc.). – Ne pas utiliser le laser à hauteur des yeux (entre 1,40 et 1,90 m). – Couvrir les surfaces brillantes, spéculaires et bien réfléchissantes pendant le fonctionnement des dispositifs laser. -
Page 32: Quantité Et Direction Des Lasers
Quantité et direction des lasers H = Laser horizontal V = Laser vertical 1H 2V 1D D = Laser à l’aplomb (downpoint) Mise en place des piles Ouvrir le compartiment à piles (9) et mettre en place les piles conformément aux symboles explicatifs. -
Page 33: Nivellements Horizontal Et Vertical
AutoCross-Laser 3C Nivellements horizontal et vertical Tournez le blocage pour le transport (2) vers la droite et desserrez le blocage du pendule. Les lasers sont alors automatiquement orientés par le système pendulaire et le laser horizontal est constamment allumé. Il est possible d‘activer et de désactiver individuellement les lasers en appuyant sur les... -
Page 34: Préliminaires Au Contrôle Du Calibrage
A2 et A3 est la tolérance. Quand A2 et A3 sont distants de plus de 0,2 mm / m l‘un de l‘autre, un réglage de l‘appareil est nécessaire. Prenez contact avec votre revendeur ou appelez le service après-vente de UMAREX-LASERLINER. -
Page 35: Vérification De La Ligne Verticale
AutoCross-Laser 3C Vérification de la ligne verticale : Placez l‘appareil à env. 5 m d‘un mur. Fixez sur le mur un fil d‘aplomb avec une corde de 2,5 m de longueur. Le fil d‘aplomb doit alors pendre librement. Allumez l‘appareil et aligner le laser vertical sur le fil d‘aplomb. La tolérance de précision est respectée lorsque l‘écart différence entre la ligne laser et le fil... -
Page 36: Données Techniques
Ce produit est un appareil électrique et doit donc faire l‘objet d‘une collecte et d‘une mise au rebut sélectives conformément à la directive européenne sur les anciens appareils électriques et électroniques (directive DEEE). Autres remarques complémentaires et consignes de sécurité sur http://laserliner.com/info?an=acl3c... -
Page 37: Funcionamiento Y Uso
AutoCross-Laser 3C Lea atentamente las instrucciones y el libro adjunto de «Garantía e in- formación complementaria», así como toda la información e indicaciones en el enlace de Internet indicado al final de estas instrucciones. Siga las instrucciones indicadas en ellas. Conserve esta documentación y entréguela con el dispositivo si cambia de manos. -
Page 38: Características Especiales
– No mire nunca el rayo láser o las reflexiones con aparatos ópticos (lupa, microscopio, prismáticos, ...). – No utilice el láser a la altura de los ojos (1,40 ... 1,90 m). – Durante el uso de un equipo láser hay que cubrir necesariamente todas las superficies reflectantes, especulares o brillantes. -
Page 39: Insertar Las Pilas
AutoCross-Laser 3C Número y disposición de los láseres H = láser horizontal V = láser vertical 1H 2V 1D D = láser de plomada (downpoint) Insertar las pilas Abra la caja para pilas (9) e insierte las pilas según los símbolos de Instalación. - Page 40 Nivelación horizontal y vertical Gire el seguro para el transporte (2) hacia la derecha y suelte el péndulo. A continuación el láser se alinea automáticamente con el sistema de péndulo y la luz del láser horizontal es constante. Con los botones H y V se puede activar o desactivar los láseres por separado.
- Page 41 4. Gire el aparato 180° y marque el punto A3. La diferencia entre A2 y A3 es la tolerancia. Si A2 y A3 se encuentran a más de 0,2 mm / m entre sí, será necesaria un ajuste. Póngase en contacto con su distribuidor especializado o diríjase al Servicio Técnico de UMAREX-LASERLINER.
- Page 42 Control de la línea vertical: Coloque el aparato a unos 5 m de una pared. Fije una plomada con una cuerda de 2,5 m en la pared, la plomada debe poderse mover libremente. Conecte el aparato y oriente el láser vertical según la cuerda de plomada. La precisión se encuentra dentro de la tolerancia si la desviación entre la línea de láser y la cuerda de plomada no supera los ±...
- Page 43 AutoCross-Laser 3C Datos técnicos (Sujeto a modificaciones técnicas. 10.2017) Margen de auto-nivelado ± 2,5° Precisión ± 0,2 mm / m Longitud de onda del láser 635 nm / 650 nm Láser de líneas / láser de plomada Láser de líneas 2 / <...
-
Page 44: Indicazioni Generali Di Sicurezza
Leggere attentamente le istruzioni per l‘uso, l’opuscolo allegato "Ulteriori informazioni e indicazioni garanzia", nonché le informazioni e le indicazioni più recenti raggiungibili con il link riportato al termine di queste istruzioni. Questo documento deve essere conservato e fornito insieme all‘apparecchio laser in caso questo venga inoltrato a terzi. Funzione / scopo Laser a linee intersecantisi per il puntamento verticale e orizzontale –... -
Page 45: Caratteristiche Particolari Del Prodotto
AutoCross-Laser 3C – Non osservare in nessun caso il raggio laser o i riflessi con strumenti ottici (lenti d‘ingrandimento, microscopi, binocoli, ecc.). – Non utilizzare il laser all‘altezza degli occhi (1,40 ... 1,90 m). – Le superfici riflettenti, a specchio o lucenti devono essere coperte durante il funzionamento di apparecchi laser. -
Page 46: Inserimento Delle Batterie
Numero e disposizione dei laser H = laser orizzontale V = laser verticale 1H 2V 1D D = laser a piombo (downpoint) Inserimento delle batterie Aprire il coperchio del vano batterie (9) e introdurre le batterie come indicato dai simboli di installazione, facendo attenzione alla corretta polarità. - Page 47 AutoCross-Laser 3C Livellamento orizzontale e verticale Girare la sicura di trasporto (2) verso destra e allentare il bloccaggio del pendolo. I raggi laser vengono ora orientati automaticamente dal sistema a pendolo e il laser orizzontale rimane acceso. I raggi laser possono essere accesi o spenti singolarmente con i tasti H e V.
- Page 48 4. Ruotate l‘apparecchio di 180° e marcate il punto A3. La differenza tra A2 e A3 rappresenta la tolleranza. Se la distanza tra A2 e A3 è superiore a 0,2 mm / m, si rende necessaria una regolazione. Contattate il vostro rivenditore specializzato o rivolgetevi al Servizio Assistenza di UMAREX-LASERLINER.
- Page 49 AutoCross-Laser 3C Verifica della linea verticale: Collocare l‘apparecchio a circa 5 m da una parete. Fissare alla parete un filo a piombo lungo 2,5 m; il piombo deve poter oscillare liberamente. Accendere l‘apparecchio e puntare il laser verticale sul filo a piombo. La precisione rientra nella tolleranza se lo scostamento tra la linea laser ed il filo a piombo non è...
- Page 50 Questo prodotto è un apparecchio elettrico e deve pertanto essere raccolto e smaltito separatamente in conformità con la direttiva europea sulle apparecchiature elettriche ed elettroniche usate. Per ulteriori informazioni e indicazioni di sicurezza: http://laserliner.com/info?an=acl3c...
-
Page 51: Ogólne Zasady Bezpieczeństwa
AutoCross-Laser 3C Należy przeczytać w całości instrukcję obsługi, dołączoną broszurę „Zasady gwarancyjne i dodatkowe” oraz aktualne informacje i wskazówki dostępne przez łącze internetowe na końcu niniejszej instrukcji. Postępować zgodnie z zawartymi w nich instrukcjami. Niniejszy dokument należy zachować, a w przypadku przekazania urządzenia laserowego załączyć... - Page 52 – Nigdy nie patrzeć w promień lasera lub jego odbicia za pomocą instrumentów optycznych (lupy, mikroskopu, lornetki, ...). – Nie używać lasera na wysokości oczu (1,40 ... 1,90 m). – Podczas eksploatacji urządzeń laserowych należy przykryć wszelkie powierzchnie dobrze odbijające promienie, błyszczące oraz lustrzane. –...
-
Page 53: Wkładanie Baterii
AutoCross-Laser 3C Liczba i rozmieszczenie laserów H = lasery poziome V = lasery pionowe 1H 2V 1D D = laser pionujący (downpoint) Wkładanie baterii Otworzyć komorę baterii (9) i włożyć baterie zgodnie z symbolami instalacyjnymi. Zwrócić przy tym uwagę na prawidłową... - Page 54 Niwelowanie poziome i pionowe Obrócić zabezpieczenie transportowe (2) w prawo i zwolnić blokadę wahadła. Teraz lasery są automatycznie ustawiane za pomocą wahadła, a laser poziomy świeci. Lasery można włączać i wyłączać pojedynczo przyciskami H i V. Teraz możliwe jest niwelowanie poziome i pionowe. Jeżeli laser ustawiono zbyt pochyło (>...
- Page 55 AutoCross-Laser 3C Kontrola kalibracji - przygotowanie: Można w każdej chwili sprawdzić kalibrację. Stawiamy niwelator w środku pomiędzy dwiema łatami (ścianami), które są oddalone o co najmniej 5 m. Włączyć urządzenie, zwalniając w tym celu zabezpieczenie do transportu (krzyż laserowy włączony). Dla najlepszego skontrolowania używamy statywu.
- Page 56 Sprawdzanie linii pionowej: Instrument ustawić ok. 5 m od jednej ze ścian. Na ścianie zawiesić pion o długości sznurka 2,5 m. Pion powinien być luźno zawieszony. Włączyć instrument i naprowadzić pionowy laser na sznurek pionu. Instrument spełnia wymagania tolerancji, jeżeli odchylenie linii lasera od sznurka jest mniejsze niż...
- Page 57 AutoCross-Laser 3C Dane techniczne (Zmiany zastrzeżone. 10.2017) Zakres samopoziomowania ± 2,5° Dokładność ± 0,2 mm / m Długość fali lasera liniowego / pionującego 635 nm / 650 nm Klasa lasera 2 / < 1 mW Pobór mocy 3 x 1,5V AA Czas pracy ok.
-
Page 58: Yleiset Turvallisuusohjeet
Lue käyttöohje, oheinen lisälehti ”Takuu- ja muut ohjeet” sekä tämän käyttöohjeen lopussa olevan linkin kautta löytyvät ohjeet ja tiedot kokonaan. Noudata annettuja ohjeita. Säilytä nämä ohjeet ja anna ne mukaan laserlaitteen seuraavalle käyttäjälle. Toiminnot / käyttötarkoitus Ristiviivalaser vaaka- ja pystylinjaukseen –... - Page 59 AutoCross-Laser 3C – Älä katso lasersäteeseen tai sen heijastumaan optisella laitteella (esim. luuppi, mikroskooppi tai kaukoputki). – Älä käytä laseria silmien korkeudella (1,40 - 1,90 m). – Peitä heijastavat ja kiiltävät sekä peilipinnat, kun käytät laserlaitetta. – Yleisellä kulkuväylällä työskennellessäsi rajaa lasersäde suluilla ja seinäkkeillä...
-
Page 60: Paristojen Asennus
Laserien määrä ja järjestys H = vaakalaser V = pystylaser 1H 2V 1D D = luotilaser (downpoint) Paristojen asennus Avaa paristokotelon kansi (9) ja aseta paristot merkintöjen mukaisesti paikoilleen. Tarkista, että navat asettuvat oikein. 1 Laserviivan lähtöikkunat 2 Käynnistys / Pysäytys; Kuljetuslukitus 3 Hienosäätöpyörä... - Page 61 AutoCross-Laser 3C Vaaka- ja pystytasaus Käännä kuljetuslukitus (2) oikealle ja avaa heilurin lukitus. Heilurijärjestelmä tasaa laserin automaattisesti. Vaakasuora laserviiva palaa jatkuvasti. Laserviivat voi kytkeä erikseen päälle/pois näppäimistä H ja V. Nyt voit linjata vaakatai pystysuoraan. Laserien vilkkuminen on merkkinä siitä, että laite on liian vinossa asennossa (yli 2,5°).
- Page 62 4. Käännä laitetta 180° ja merkitse piste A3. Pisteiden A2 ja A3 välinen erotus toleranssi. Jos A2 ja A3 ovat toisistaan etäämmällä kuin 0,2 mm / m, on säätö tarpeen. Ota yhteys paikalliseen laitetoimittajaan tai UMAREX-LASERLINER huolto-osastoon.
- Page 63 AutoCross-Laser 3C Pystyviivan tarkistus: Aseta laite n. 5 m:n etäisyydelle seinästä. Kiinnitä mittaluoti seinään 2,5 m:n pituisella langalla siten, että luoti pääsee vapaasti heilumaan. Käynnistä laite ja suuntaa pystysäde luotilangan kanssa. Tarkkuus on toleranssin rajoissa, kun laserviivan ja luotilangan välinen poikkeama on enintään ± 1 mm.
-
Page 64: Tekniset Tiedot
120 x 190 x 120 mm EY-määräykset ja hävittäminen Laite täyttää kaikki EY:n sisällä tapahtuvaa vapaata tavaravaihtoa koskevat standardit. Tämä tuote on sähkölaite. Se on kierrätettävä tai hävitettävä vanhoja sähkö- ja elektroniikkalaitteita koskevan EY-direktiivin mukaan. Lisätietoja, turvallisuus- yms. ohjeita: http://laserliner.com/info?an=acl3c... - Page 65 AutoCross-Laser 3C...
- Page 67 AutoCross-Laser 3C...
- Page 68 AutoCross-Laser 3C SERVICE Umarex GmbH & Co. KG – Laserliner – Möhnestraße 149, 59755 Arnsberg, Germany Tel.: +49 2932 638-300, Fax: +49 2932 638-333 info@laserliner.com Umarex GmbH & Co. KG Donnerfeld 2 59757 Arnsberg, Germany Tel.: +49 2932 638-300, Fax: -333...