Brink 4980 Instructions De Montage
Citroën nemo 2008-actuel; fiat fiorino 2008-actuel; peugeot bipper 2008-actuel
Liens rapides
Fitting instructions
Make:
Citroën/Fiat/Peugeot
Nemo/Fiorino (Qubo)/Bipper
Type:
; 2008->
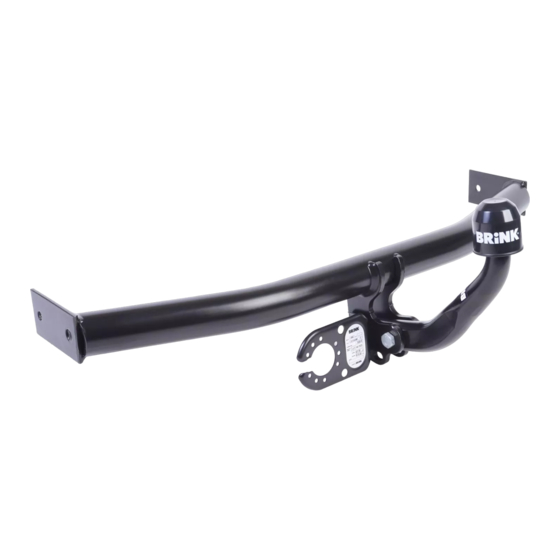
4980
Montagehandleiding
Fitting instructions
Montageanleitung
Instructions de montage
Monteringsanvisningar
Montagevejledning
Instrucciones de montaje
Istruzioni per il montaggio
Instrukcja montażu
Asennusohjeet
Pokyny k montáži
Szerelési útmutató
Руководство для монтажа
Your perfect fit
brink.eu

Manuels Connexes pour Brink 4980


Sommaire des Matières pour Brink 4980
- Page 1 Fitting instructions Make: Citroën/Fiat/Peugeot Nemo/Fiorino (Qubo)/Bipper ; 2008-> Type: 4980 Montagehandleiding Fitting instructions Montageanleitung Instructions de montage Monteringsanvisningar Montagevejledning Instrucciones de montaje Istruzioni per il montaggio Instrukcja montażu Asennusohjeet Pokyny k montáži Szerelési útmutató Руководство для монтажа Your perfect fit...
- Page 2 1000km Couplingsclass: A50-X euro Approved tested 94/20/EC e11 00-7023 Max. mass trailer : 1300 Max. vertical load : RAYMOND D-Value: 7,5 kN 10.9 © 498070/02-08-2010/1...
- Page 3 M10x100 (10.9) 65Nm ø18x11 L=67mm 4980/3 40x5 L=40mm M10x30 (10.9) 65Nm M10x30 (10.9) 45Nm 4980/80 9520064 4980/4 4980/1 ø18x11 L=67mm 9530904 M10x100 (10.9) 65Nm M12x65 (10.9) 110Nm 40x5 L=40mm M10x30 (10.9) 65Nm M10x30 (10.9) 45Nm © 498070/02-08-2010/2...
- Page 4 M10x100 (10.9) 62Nm ø18x11 L=67mm 4980/2 40x5 L=40mm M10x30 (10.9) 65Nm M10x30 (10.9) 45Nm 498080 9520064 4980/3 4980/1 ø18x11 L=67mm 9530904 M12x65 (10.9) M10x100 (10.9) 95Nm 62Nm 40x5 L=40mm M10x30 (10.9) 65Nm M10x30 (10.9) 45Nm © 498070/02-08-2010/3...
-
Page 5: Fitting Instructions
MUST be obtained by the installation engineer of the customer’s * Indien op de bevestigingspunten een bitumen of anti-dreunlaag aanwe- acceptance prior to completion. Brink Towing Systems do not accept res- zig is, dient deze verwijderd te worden. ponsibility for any matters arising as a result of this miscommunication. - Page 6 * Consult your dealer for the maximum tolerated pull weight and ball hitch HINWEISE: pressure of your vehicle. * Für (eine) eventuell erforderliche Anpassung(en) "des Fahrzeugs" ist * Do not drill through electrical-, brake- or fuellines. der Händler zu Rate zu ziehen. * Remove (if present) the plastic caps from the spot welding nuts.
- Page 7 monter l’ensemble sans serrer. 6. Förstora hålen A. till 18 mm. (se fig. 2b). 10. Monter la barre de la rotule y compris la prise électrique. 7. Placera motbrickorna och distansbussningarna och placera det hela i 11. Serrer tous les boulons et écrous conformément au schéma. de nyss borrade hålen.
- Page 8 tilstedeværende kit eller voks. la fig. 1). 5. Bor hullerne A 11 mm op og helt igennem (Jævnfør fig. 2a). 4. Retirar a la altura de las superficies de contacto del gancho de remol- 6. Forstør hullerne A til 18 mm (Jævnfør fig. 2b). que con el vehículo el pegamento o la cera existentes.
-
Page 9: Istruzioni Per Il Montaggio
* Questa istruzione di montaggio deve essere allegata ai documenti del ISTRUZIONI PER IL MONTAGGIO: veicolo dopo l'installazione del gancio. Prima di iniziare il montaggio verificare la terghetta per determinare quale disegno, presente nelle istruzioni, è applicabile. INSTRUKCJA MONTAŻU: 1. Fare scendere la ruota di scorta. Przed rozpoczęciem montażu należy sprawdzić... - Page 10 - Wszystkie ubytki powłoki lakierniczej zabezpieczyć przed korozją. TÄRKEÄÄ: - Należy wyjąć ewentualne plastikowe zaślepki w punktach przyspawa- * "Ajoneuvoa" koskevasta mahdollisesta tarpeellisesta nych nakrętek. sovellutuksesta/sovellutuksista on kysyttävä neuvoa jälleenmyyjältä. - Stosować nakrętki oraz śruby gatunkowe dostarczone w komplecie. * Mikäli kiinnityskohdissa on bitumi- tai tärinänestokerros, se on poistet- - Utrzymywać...
-
Page 11: Szerelési Útmutató
11. Szorítsa be az összes anyát és csavart a rajzon feltüntetett csavaróny- omatékig. příručku. 12. Helyezze vissza az eltávolított elemet. Montážní pokyny a metoda připevnění dle náčr tu. DŮLEŽITÉ A szétszerelés és a jármű alkatrészek összeillesztése érdekében, lásd a * Pokud je potřeba provést na voze úpravy, obraťte se na svého pro- munkahelyi kézikönyvet. - Page 12 все детали в только что просверленные отверстия. 8. Закрепить кронштейны B на балках шасси, слегка затянув гайки. 9. Установить поперечный брус E между опорами B в точках D, затянув крепежный материал не до конца. 10. Установить крюк с шаром, вместе со штепсельной платой. 11.
- Page 13 Fig.1 © 498070/02-08-2010/12...
- Page 14 ø11mm Fig.2a © 498070/02-08-2010/13...
- Page 15 ø18mm Fig.2b © 498070/02-08-2010/14...