Table des Matières
Publicité
Les langues disponibles
Les langues disponibles
Liens rapides
This product is suitable for use below electric or gas built-in ovens. This product is not suitable for use below cooktops.
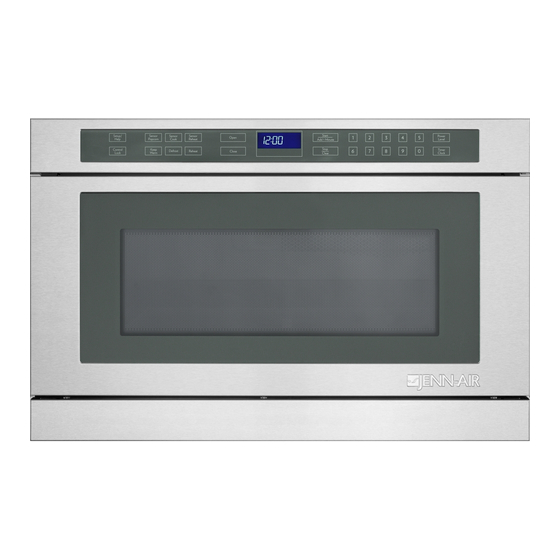
These installation instructions cover different models. The appearance of your particular model may differ slightly from the illustrations
in these Installation Instructions.
Ce produit convient à une utilisation au-dessous de fours encastrés électriques ou à gaz. Ce produit ne convient pas à une utilisation
au-dessous de tables de cuisson.
Ces instructions d'installation sont valables pour plusieurs modèles. Il se peut que l'apparence de votre propre modèle soit légèrement
différente de celle illustrée dans ces Instructions d'installation.
BUILT-IN MICROWAVE OVEN SAFETY ................................. 1
INSTALLATION REQUIREMENTS........................................... 2
Tools and Parts ...................................................................... 2
Location Requirements .......................................................... 2
Minimum Dimensions............................................................. 2
Product Dimensions............................................................... 3
Electrical Requirements ......................................................... 4
INSTALLATION INSTRUCTIONS............................................. 4
Install the Anti-Tip Block ........................................................ 4
Install the Microwave Oven.................................................... 5
Complete Installation ............................................................. 5
ASSISTANCE............................................................................. 5
We have provided many important safety messages in this manual and on your appliance. Always read and obey all safety
messages.
This is the safety alert symbol.
This symbol alerts you to potential hazards that can kill or hurt you and others.
All safety messages will follow the safety alert symbol and either the word "DANGER" or "WARNING."
These words mean:
WARNING
All safety messages will tell you what the potential hazard is, tell you how to reduce the chance of injury, and tell you what can
happen if the instructions are not followed.
W10306037A
BUILT-IN MICROWAVE OVEN
INSTALLATION INSTRUCTIONS
FOUR À MICRO-ONDES ENCASTRÉ
INSTRUCTIONS D'INSTALLATION
Table of Contents / Table des matières
BUILT-IN MICROWAVE OVEN SAFETY
Your safety and the safety of others are very important.
DANGER
24" (61.0 cm)
24" (61,0 cm)
SÉCURITÉ DU FOUR À MICRO-ONDES ENCASTRÉ ......................6
EXIGENCES D'INSTALLATION...........................................................6
Outillage et pièces.............................................................................6
Exigences d'emplacement................................................................6
Dimensions minimales ......................................................................7
Dimensions du produit ......................................................................8
Spécifications électriques .................................................................8
INSTRUCTIONS D'INSTALLATION ....................................................9
Installation de la cale antibasculement .............................................9
Installation du four à micro-ondes ....................................................9
Achever l'installation........................................................................10
ASSISTANCE......................................................................................10
You can be killed or seriously injured if you don't immediately
follow instructions.
You can be killed or seriously injured if you don't follow
instructions.
Publicité
Table des Matières

Manuels Connexes pour Jenn-Air JMD2124WS


Sommaire des Matières pour Jenn-Air JMD2124WS
-
Page 1: Table Des Matières
BUILT-IN MICROWAVE OVEN INSTALLATION INSTRUCTIONS 24" (61.0 cm) This product is suitable for use below electric or gas built-in ovens. This product is not suitable for use below cooktops. These installation instructions cover different models. The appearance of your particular model may differ slightly from the illustrations in these Installation Instructions. -
Page 2: Installation Requirements
INSTALLATION REQUIREMENTS Tools and Parts Location Requirements The microwave oven may be located in a cabinet or below the Tools Needed counter, and/or below a built-in oven. Check the opening where the microwave oven will be installed. The location must provide: Gather the required tools and parts before starting installation. -
Page 3: Product Dimensions
Minimum Cutout Dimensions Product Dimensions ¹⁹⁄₃₂ " ¹⁄₂ " (59.72 cm)* (54.9 cm) ²³⁄₃₂ 28" (71.1 cm)** " (4.4 cm) 4¹¹⁄₁₆ " (11.9 cm) ¹³⁄₃₂ ¹⁹⁄₃₂ " " ¹⁄₈ " (56.2 cm) (39.1 cm) (37.1 cm) ¹³⁄₁₆ " (37.6 cm) ⁹⁄₁₆... -
Page 4: Electrical Requirements
Electrical Requirements Recommended: WARNING ■ A time-delay fuse or time-delay circuit breaker. ■ A separate circuit serving only this microwave oven. GROUNDING INSTRUCTIONS ■ For all cord connected appliances: The microwave oven must be grounded. In the event of Electrical Shock Hazard an electrical short circuit, grounding reduces the risk of Plug into a grounded 3 prong outlet. -
Page 5: Install The Microwave Oven
8. Reinsert microwave oven into the opening, open the drawer, and align holes in mounting flange with pilot holes in the Install the Microwave Oven cabinet. WARNING Excessive Weight Hazard Use two or more people to move and install microwave oven. Failure to do so can result in back or other injury. -
Page 6: Sécurité Du Four À Micro-Ondes Encastré
SÉCURITÉ DU FOUR À MICRO-ONDES ENCASTRÉ Votre sécurité et celle des autres est très importante. Nous donnons de nombreux messages de sécurité importants dans ce manuel et sur votre appareil ménager. Assurez-vous de toujours lire tous les messages de sécurité et de vous y conformer. Voici le symbole d’alerte de sécurité. -
Page 7: Dimensions Minimales
Dimensions minimales Distances de dégagement minimales d’installation Pour une installation correcte, les distances de dégagement minimales suivantes doivent être respectées au-dessus et en dessous de l’ouverture à découper. 2" (5,1 cm) 2" (5,1 cm) 36" (91,4 cm) 2" (5,1 cm) 2"... -
Page 8: Dimensions Du Produit
Dimensions du produit Spécifications électriques AVERTISSEMENT ¹⁹⁄₃₂ " (54,9 cm) ²³⁄₃₂ " (4,4 cm) 4¹¹⁄₁₆ " (11,9 cm) ¹³⁄₃₂ " ¹⁹⁄₃₂ " (39,1 cm) (37,1 cm) Risque de choc électrique Brancher sur une prise à 3 alvéoles reliée à la terre. Ne pas enlever la broche de liaison à... -
Page 9: Instructions D'installation
INSTRUCTIONS D’INSTALLATION Installation de la cale antibasculement Installation du four à micro-ondes REMARQUES : AVERTISSEMENT ■ C’est une étape facultative. ■ La cale antibasculement (si installée) doit être fournie par Risque du poids excessif l'installateur. Utiliser deux ou plus de personnes pour déplacer et Dimensions de la cale antibasculement recommandées installer le four à... -
Page 10: Achever L'installation
8. Réinsérer le four à micro-ondes dans l'ouverture, ouvrir le tiroir et aligner les trous du rebord de montage avec les avant-trous Achever l'installation du placard. 1. Contrôler le fonctionnement du four à micro-ondes : placer dans le four à micro-ondes 1 récipient contenant 1 tasse (250 mL) d’eau et programmer une période de chauffage de 1 minute à... - Page 11 Notes...
- Page 12 W10306037A © 2009. All rights reserved. TINSKB125MRR1 Tous droits réservés. 12/09...