Telecom Behnke myintercom Mode D'emploi
Masquer les pouces
Voir aussi pour myintercom:
- Mode d'emploi (32 pages) ,
- Mode d'emploi (90 pages) ,
- Manuel (136 pages)

Manuels Connexes pour Telecom Behnke myintercom


Sommaire des Matières pour Telecom Behnke myintercom
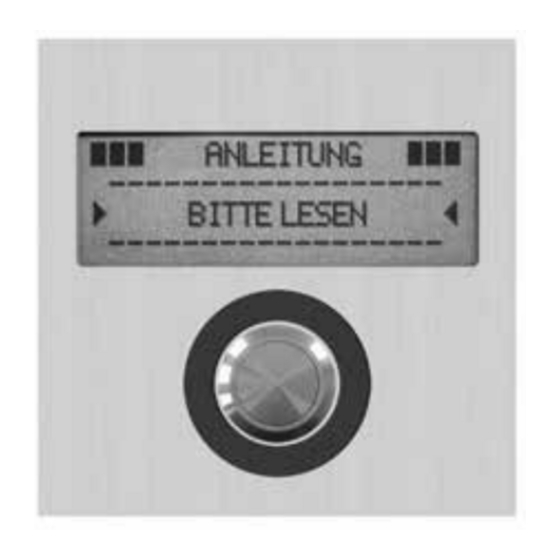
- Page 1 D ▸ Seite 2 GB ▸ Page 25 ▸ Page 49 E ▸ Página 73 Anleitung Instructions Mode d’emploi Instrucciones...
-
Page 2: Wichtige Hinweise
Anleitung myintercom Wichtige Hinweise Wichtige Hinweise – bitte beachten! 1. Die Installation und die Wartung der 2. Trennen Sie die Geräte vor Wartungs- und Behnke Telefone und ihrer Zubehörteile Reparaturarbeiten vom Stromnetz (Stecker- dürfen nur durch eine Elektrofachkraft erfol- netzteil) und vom Netzwerk. -
Page 3: Table Des Matières
▸ Systemvoraussetzungen 1.3. Die myintercom Video-Türstation 1.4. Empfohlene Montage-Position 1.5. Lichtverhältnisse 1.6. Beschriftungsfeld wechseln 1.7. Video-Türstation anbringen 1.8. Einsatzszenarien ▸ Lokal ▸ Global 1.9. Anschließen der myintercom Video-Türstation ▸ LAN-Anschluss ▸ Stromversorgung ▸ Schaltausgang ▸ Ausgang 12 V ~ 1 A ▸ Schaltausgang ▸ Netzteil Türöffner bauseits nicht vorhanden ▸... -
Page 4: Einleitung
Beiblatt „Einrichtung“ mit Kamerabild und Uhrzeit in der Türstation gespeichert. 1.2. Allgemeines Systemvoraussetzungen Leistungsmerkmale Um die myintercom Video-Türstation nutzen zu Bei der myintercom Video-Türstation handelt es können, müssen folgende Voraussetzungen sich um ein Kompaktgerät mit integrierter Ka- gegeben sein: ▸ mera, Lautsprecher und Mikrofon sowie einer Stromversorgung an der Tür... -
Page 5: Die Myintercom Video-Türstation
Google Play Konto zum Download der kostenfreien App Achtung: Bitte bewahren Sie das Beiblatt „Einrichtung“ sorgfältig auf. Ohne die darauf abgedruckten Zugangsdaten ist eine spätere Änderung der Konfiguration nicht möglich. 1.3. Die myintercom Video-Türstation Kamera Beleuchtungsring Lautsprecher Ruftaste Beschriftungsfeld... -
Page 6: Empfohlene Montage-Position
Anleitung myintercom Einleitung 1.4. Empfohlene Montage-Position 1.6. Beschriftungsfeld wechseln Für einen optimalen Blickwinkel der Kamera, empfehlen wir eine Installationshöhe von 155 cm Weitere Einzelheiten entnehmen Sie bitte der Abbildung. Beschriftungsfeld mit Hilfe eines Schraubendrehers 1.5. lichtverhältnisse aus der Video-Türstation hebeln. Um eine bessere Bildqualität bei schlechten Lichtverhältnissen oder nachts zu erhalten,... -
Page 7: Video-Türstation Anbringen
Anleitung myintercom Einleitung 1.7. Video-Türstation anbringen Gehäuse für Kabelzuführung vorbereiten AP-Gehäuse anbringen und Gerät anschließen Gerät ins Gehäuse einsetzen. Zierkappenring auf Schraube stecken und das Gerät mit dem Gehäuse verschrauben. Zierkappe aufschrauben – fertig! Das Beispiel zeigt die Montage der Aufputz- variante. -
Page 8: Einsatzszenarien
Anleitung myintercom Inbetriebnahme 1.8. Einsatzszenarien Lokal Die Grafik zeigt die Verwendung innerhalb eines Wohn- oder Bürogebäudes Büro-Etage Tablet / Smartphone WlAN myintercom Video-Türstation Foyer mit Kamera WlAN DSl-Router / Switch Türöffner Ethernet... -
Page 9: Global
Anleitung myintercom Inbetriebnahme Global Die Grafik zeigt die Verwendung außerhalb eines Wohn- oder Bürogebäudes INTERNET Büro-Etage WlAN / 3G / lTE myintercom Video-Türstation Foyer WlAN / 3G / lTE, mit Kamera Sprache, Bild DSl-Router / Switch Türöffner Ethernet... -
Page 10: Anschließen Der Myintercom Video-Türstation
Ext. Türöffner Netzteil max. 24 V, 2 A Pin-Nummer des RJ-45 Steckers / der RJ-45 Dose. Stromversorgung Anschluss externer Gong: Die Stromversorgung der myintercom Video- Türstation erfolgt über das Behnke 15 V Netz- Gong teil. Die Verwendung eines anderen Netzteils (bauseits) ist unzulässig. -
Page 11: Konfiguration Und Inbetriebnahme
2.1. Vorbereitung ▸ Verbindung der myintercom Video-Türsta- tion mit einem 100 Mbit Ethernet LAN ▸ Stromversorgung mit Behnke 15 V Netzteil Verbindung über Ethernet Die myintercom Video-Türstation ist im Stan- dard als DHCP-Client konfiguriert, bezieht ihre IP-Adresse also von einem DHCP-Server. -
Page 12: Starten Der App
Anleitung myintercom Inbetriebnahme Die myintercom App wird laufend um neue Features und Funktionen erweitert, das neuste Handbuch kann über die Webseite www.myintercom.de angefordert werden. 2.2. Starten der App 2.3. Übersicht Laden Sie die myintercom App je nach Typ Nachfolgend sind die drei wichtigsten Bild- des Smartphones oder Tablet aus dem Apple schirme der myintercom App dargestellt. -
Page 13: Historie
Anleitung myintercom Inbetriebnahme Historie Administration Auf dieser Seite können Sie die letzten Anrufe Auf dieser Seite nehmen Sie die Einrichtung von der Tür mit Uhrzeit und Bild einsehen. Die der Video-Türstation und der App vor. Sprache wird nicht aufgezeichnet. Pro Video- Türstation wird eine Historie von 20 Besuchern... -
Page 14: Administration Der Video-Türstation
Anleitung myintercom Inbetriebnahme 2.4. Administration der Video-Türstation Wählen Sie hier „Administration “ aus, um die Video-Türstation zu verwalten. Vorher Alle für das myintercom-System notwendigen werden Benutzername und Passwort Einstellungen können mit Hilfe der App auf abgefragt: dem Smartphone oder Tablet vorgenommen werden. - Page 15 Anleitung myintercom Inbetriebnahme Im Administrationsbereich können Sie ▸ Benutzer hinzufügen ▸ Benutzer verwalten ▸ Entscheiden, ob das Licht der Video-Tür- station beim Rufaufbau automatisch akti- viert wird ▸ Den NTP-Server einrichten (Somit wird im Anrufprotokoll immer die korrekte Uhr- zeit angezeigt)
-
Page 16: Benutzer Verwalten
Anleitung myintercom Inbetriebnahme Benutzer verwalten Drücken Sie „Speichern“, um den Benutzer auf der Video-Türstation hinzuzufügen. „Löschen Drücken Sie „Hinzufügen“, um einen neuen “ löscht den Benutzer von der Video-Tür- Benutzer anzulegen oder auf einen Benut- station. Dieser gelöschte Benutzer hat danach zernamen, um die Benutzereinstellungen zu keinen Zugriff mehr auf die Video-Türstation. -
Page 17: Verwalten Von Video-Türstationen
Anleitung myintercom Inbetriebnahme 2.5. Verwalten von Video-Türstationen Tragen Sie die Daten des unter „Administra-tion“ angelegten Benutzers hier ein. Unter „Türsta- Drücken Sie auf dem Startbildschirm auf „Ein- tion “ können Sie eine Beschreibung für den stellungen“, der Einstellungs-Bildschirm wird Eingang eingeben. Der Bezug zur Video-Türsta- angezeigt. - Page 18 Anleitung myintercom Inbetriebnahme Drücken Sie auf „Impressum “, um weitere Informationen zum Hersteller der App zu erhalten. Drücken Sie „Feedback “, um unser Feedback-Formular aufzurufen. Nutzen Sie bitte dieses Feedback Formular auch, wenn Sie technische Unterstützung benötigen. Die Feedback-Mail enthält Informationen zur...
-
Page 19: Bedienung Der App
Anleitung myintercom Inbetriebnahme 2.6. Bedienung der App In der unteren Liste sehen Sie die auf diesem Smartphone konfigurierten Video- Die App gliedert sich in zwei Teile: Live-Video Türstationen. Der Punkt vor dem Namen und Historie. Der Benutzer kann jederzeit auf zeigt die Erreichbarkeit der Video-Türstation das Live-Bild der Video-Türstation zugreifen. -
Page 20: Historie
Anleitung myintercom Inbetriebnahme Historie Mit Hilfe der Historien Funktion können Sie später nachvollziehen, wer während Ihrer Abwesenheit geklingelt hat. In der Oberen Leiste wird der Zeitpunkt des Türrufes ange- zeigt . Mittels Wischen oder der Pfeil- Knöpfe in der oberen Leiste können Sie die bis zu 20 Einträge abrufen. -
Page 21: Anhang
Anleitung myintercom Anhang 3. ANHANG ▸ Verschlußzeit 1/24500s bis 1/6s 3.1. Technische Daten Video Ausstattung ▸ Motion-JPEG, H.264 Kompression ▸ ▸ Stromversorgung mittels 15 V / 500 mA HDTV Bildsensor von Axis Communications Netzteil ▸ Proprietäre Videoübertragung zur ▸ Beleuchtungs-Ring mit weißen LEDs myintercom App ▸... - Page 22 Anleitung myintercom Anhang Frontblende Hinterer Gehäuseteil 12,5 AP-Gehäuse UP-Gehäuse Ø 4...
-
Page 23: Maße In Mm
Anleitung myintercom Rechtliche Hinweise 3.2. Maße in mm und technischen Skizzen) übernehmen wir keine Haftung. 4. RECHTlICHE HINWEISE Infos zum Produkthaftungsgesetz: 1. AXIS ist ein registriertes Warenzeichen von 1. Alle Produkte aus dieser Anleitung dürfen nur Axis AB. für den angegebenen Zweck verwendet werden. - Page 24 Anleitung myintercom Notizen...
- Page 25 D ▸ Seite 2 GB ▸ Page 25 ▸ Page 49 E ▸ Página 73 Instructions...
-
Page 26: Service-Hotline
Instructions for myintercom Important information Important information – please note! 1. Installation and maintenance of Behnke 2. Before commencing any installation or repair telephones and accessory components must work, disconnect devices from the mains supply be performed by a qualified electrical service (wall-plug power supply) and the network. - Page 27 1.4. Recommended installation position 1.5. Light conditions 1.6. Changing the name plate 1.7. Installing the video door intercom 1.8. User scenarios ▸ Local ▸ Global 1.9. Connecting the myintercom video door intercom ▸ LAN connection ▸ Power supply ▸ Switch output ▸ 12V ~ 1A output ▸...
-
Page 28: Introduction
1.2. General Required Performance features The following requirements must be complied with to use the myintercom video door intercom The myintercom video door intercom is a com- unit: ▸ pact device with integrated camera, loudspeaker Mains supply available near door ▸... -
Page 29: The Myintercom Video Door Intercom
Setup instructions in a safe place. Without the login data given in these instructions, it will not be possible to perform any modifica- tions to the configuration at a later date. 1.3. The myintercom video door intercom Camera Luminous ring Loudspeaker... -
Page 30: Recommended Installation Position
1.4. Recommended installation position 1.6. Changing the name plate Since the camera has a restricted angle of view, the position at which the myintercom video door intercom is installed is of decisive importance. Accordingly, the camera should be mounted at a height of approximately 155cm, depending on the local conditions. -
Page 31: Installing The Video Door Intercom
Instructions for myintercom Introduction 1.7. Installing the video door intercom Prepare casing for cable feed Attach surface-mount casing and connect device Place device in casing Place decorative ring cap over screw and screw device to casing. Screw on decorative cap The example is for surface-mounting installa- tion. -
Page 32: User Scenarios
Instructions for myintercom Operation 1.8. User scenarios Local The illustration shows the unit in use in a residential or office building. Office floor Tablet or smartphone WlAN myintercom video door intercom Foyer With camera WlAN Broadband router / switch Door opener Ethernet... -
Page 33: Global
Operation Global The illustration shows the unit in use outside of a residential or office building. INTERNET Office floor WlAN / 3G / lTE myintercom video door intercom Foyer WlAN / 3G / lTE, With camera Voice, Video Broadband router / switch... -
Page 34: Connecting The Myintercom Video Door Intercom
RJ-45 plug or socket. TÖ = Door opener Ext. door open button Power supply (on site) Power is supplied to the myintercom video TÖ door intercom via the Behnke 15V power Ext. door opener power supply, Max. 24V, 2A supply. -
Page 35: Configuration And Operation
Instructions for myintercom Operation 2. CONFIGURATION AND OPERATION 2.1. Preparation ▸ Connect the myintercom video door inter- com with a 100 Mbit Ethernet LAN ▸ Connect the Behnke 15V power supply Ethernet connection The default configuration for the myintercom video door intercom is as a DHCP client; it therefore obtains its IP-address from a DHCP server. -
Page 36: Running The App
Instructions for myintercom Operation The myintercom App is continuously updated with new features and functionality, the latest manual can be requested via the website www.myintercom.de 2.2. Running the App 2.3. Overview Download the myintercom App either from The following shows the three main screens of the Apple AppStore or the Google Play Store, the myintercom App. -
Page 37: History
Instructions for myintercom Operation History Administration This page shows the most recent calls, This is the page in which you set up the video together with the time and camera image. No door intercom and the App. voice recording is made. Each video intercom... -
Page 38: Administration Of The Video Door Intercom
All the settings that are necessary for the myintercom system can be made with the App on your smartphone or tablet computer. You do not require a separate computer to do this. Administration of the video door intercom is... - Page 39 Instructions for myintercom Operation You can perform the following in the Adminis- tration area ▸ Add a user ▸ Manage users ▸ Determine whether the light of the video door intercom should be automatically activated when a call is made ▸...
-
Page 40: Managing Users
Instructions for myintercom Operation Managing users Press Change to change the user’s pass- word. A new random password is generated and Press Add to add a new user or a user name to saved in the camera. This new password is sub- change the settings for this user. -
Page 41: Managing Video Door Intercom Units
App. With the „Internet “ button you can check whether the Internet-function of your door station is acti- vated or not, see www.myintercom.de/activate. Press Add to add a new video door intercom on this smartphone or press a previously... - Page 42 Instructions for myintercom Operation Click on „Imprint “ for more information about the developer of the App. Click on „Feedback “ to access our feed- back form. Please use this feedback form when you need technical assistance. The feedback email contains information about...
-
Page 43: Using The App
Instructions for myintercom Operation 2.6. Using the App The list at the bottom shows the video door intercoms configured on this smart- The App is divided into two sections: live video phone. The dot before the name indicates the and history. The user can access the live video accessibility of the video door intercom. -
Page 44: History
Instructions for myintercom Operation History The history function allows you to determine who has rung your doorbell while you have been away. The time of the call is shown in the bar at the top. You can display up to 20... -
Page 45: Appendix
Instructions for myintercom Appendix 3. APPENDIx 3.1. Technichal specifications Video Technical features ▸ Motion JPEG, H.264 compression ▸ ▸ 15 V / 500 mA power supply HDTV-Image sensor from Axis Communications ▸ Luminous ring comprising white LEDs ▸ Proprietary video transmission to ▸... -
Page 46: Dimensions In Mm
Instructions for myintercom Appendix 3.2. Dimensions in mm Front panel Rear section of casing 12,5 Surface-mounted casing Flush-mounted casing Ø 4... -
Page 47: Legal Information
Instructions for myintercom Legal information 4. lEGAl INFORMATION Information about the Product Liability Law: 1. AXIS is a registered trademark of Axis AB. 1. All products referred to in this manual may only be used for the stated purpose. If in any 2. - Page 48 Instructions for myintercom Notes...
- Page 49 D ▸ Seite 2 GB ▸ Page 25 ▸ Page 49 E ▸ Página 73 Mode d’emploi...
-
Page 50: Information Importante
Mode d’emploi de myintercom Information importante Information importante – SVP veuillez noter! 2. Avant de poursuivre l’installation ou répa- ration, veuillez déconnecter les appareils de 1. L’installation et l’entretien des téléphones et la source d’alimentation principale (source accessoires Behnke doivent être réalisés par un d’alimentation avec prise murale) et du réseau. - Page 51 Mode d’emploi de myintercom Table de matières 1. Introduction 1.1. Contenu de la boîte 1.2. Général ▸ Performances ▸ Spécifications du système 1.3. Le visiophone myintercom 1.4. Position recommandée pour l’installation 1.5. Conditions de luminosité 1.6. Changement de la plaque nominative 1.7. Installation du visiophone 1.8. Scénarios d’utilisateur ▸...
-
Page 52: Introduction
1. INTRODUCTION 1.2. Général 1.1. Contenu de la boîte Performances ▸ Boîtier visiophone myintercom Le visiophone myintercom est un appareil com- ▸ Mode d’emploi pact avec caméra, haut-parleur et microphone ▸ Instructions supplémentaires: Configuration intégrés, en plus d’un bouton d’appel avec une plaque nominative éclairée. -
Page 53: Spécifications Du Système
Plaque nominative ▸ Port réseau disponible sur le commutateur ou Microphone le routeur Cache-vis ▸ Application myintercom sur Apple AppStore ou Google Play Store ▸ WLAN ▸ Serveur DHCP fournissant une adresse IP, un masque sous-réseau, une passerelle et un serveur DNS (standard) ▸... -
Page 54: Position Recommandée Pour L'installation
Puisque la caméra a un angle de vue restreint, la position du visiophone myintercom est décisive. Ainsi, la caméra doit être installée à une hauteur d’à peu près 155 cm, en fonction des conditions sur place. Pour plus de détails, Détacher la plaque nominative de la surface du... -
Page 55: Installation Du Visiophone
Mode d’emploi de myintercom Introduction 1.7. Installation du visiophone Préparer le chemin de câbles Fixer le chemin de câbles sur la surface et connecter l’appareil Placer l’appareil dans le boîtier Introduire le capuchon décoratif sur le rebord et visser l’appareil dans le boîtier Fixer le capuchon décoratif... -
Page 56: Fonctionnement
Mode d’emploi de myintercom Fonctionnement 1.8. Scénarios d’utilisateur Local L’illustration suivante montre le visiophone utilisé dans un immeuble de logements ou de bureaux. Étage de bureau Tablette tactile ou Smartphone WlAN Visiophone myintercom Accueil Avec caméra WlAN Routeur/ Commutateur à haut débit Mécanisme... -
Page 57: Global
Mode d’emploi de myintercom Fonctionnement Global L’illustration suivante montre le visiophone utilisé en dehors d’un logement ou immeuble de bureaux. INTERNET Étage de bureau WlAN / 3G / lTE Visiophone myintercom Accueil WlAN / 3G / lTE, Avec caméra Voix, Vidéo... -
Page 58: Connexion Du Visiophone Myintercom
Bouton externe pour l’ouver- Source d’alimentation d’ouverture de ture de porte (sur place) porte Le courant est fourni au visiophone myintercom TÖ via la prise murale de 15V (Telecom Behnke). Source d’alimentation externe du mécanisme d’ouverture de L’utilisation de toute autre prise n’est pas porte , Max. -
Page 59: Configuration Et Fonctionnement
Connecter le visiophone myintercom à un réseau LAN Ethernet 100 Mbit ▸ Connecter la source d’alimentation de 15V Connexion Ethernet La configuration par défaut du visiophone myintercom est en tant que client DHCP; l’adresse IP est donc fournie par un serveur DHCP. -
Page 60: Démarrage De L'application
Mode d’emploi de myintercom Fonctionnement L’application myintercom est continuellement élargie avec de nouvelles fonctionnalités, la dernière manuel peut être demandé via le site web www.myintercom.de 2.2. Démarrage de l’application 2.3. Résumé Vous pouvez télécharger l’application Les captures d’image suivantes sont les trois myintercom soit sur l’Apple AppStore, soit... -
Page 61: Historique
Mode d’emploi de myintercom Fonctionnement Historique Administration Cette page montre les derniers appels (image et Voici la page pour configurer le visiophone et heure). Pas d’enregistrement de d’appel. Chaque l’application. visiophone enregistre les 20 derniers appels. -
Page 62: Administration Du Visiophone
Il vous sera demandé votre nom Tous les paramètres nécessaires pour le sys- d’utilisateur et mot de passe tème myintercom peuvent être configurés avec l’application sur votre Smartphone ou tablette tactile. Vous n’avez pas besoin d’un autre ordinateur. L’administration du visiophone est possible depuis tout appareil cible, même si... - Page 63 Mode d’emploi de myintercom Fonctionnement Les commandes suivantes peuvent être réali- sées dans l’espace « Administration » : ▸ Ajouter un utilisateur ▸ Gérer les utilisateurs ▸ Déterminer si l’éclairage du visiophone s’enclenche automatiquement à chaque appel ▸ Configurer le serveur NTP (dans ce cas, le temps exact sera toujours affiché...
-
Page 64: Gestion D'utilisateurs
Mode d’emploi de myintercom Fonctionnement Gestion d’utilisateurs l’utilisateur du visiophone. Une fois sup- primé, l’utilisateur ne pourra plus accéder au Cliquez sur « Ajouter » pour ajouter un nouvel visiophone. Cliquez sur « Modifier » pour utilisateur ou modifier le profil de l’utilisateur. -
Page 65: Gestion Des Visiophones
Mode d’emploi de myintercom Fonctionnement 2.5. Gestion des visiophones Introduisez les données pour l’utilisateur crées sur « Administration ». Introduisez une Dans l’écran d’accueil, cliquez sur « Paramètres description de l’entrée sur « Système de visio- » pour afficher l’écran de paramètres. - Page 66 Mode d’emploi de myintercom Fonctionnement Cliquez sur „Mentions légales “ pour obtenir plus d’information sur le développeur de l’application. Cliquez sur „Feedback “ pour accéder à notre formulaire de feedback. Veuillez utiliser ce formulaire au cas où vous auriez besoin d’assistance technique.
-
Page 67: Utilisation De L'application
Mode d’emploi de myintercom Fonctionnement 2.6. Utilisation de l’application La liste en bas de l’écran indique les visiophones configurés sur ce Smartphone. Le L’application est divisée en deux sections: signal avant le nom indique la disponibilité du vidéo en direct et historique. L’utilisateur peut visiophone. -
Page 68: Historique
Mode d’emploi de myintercom Fonctionnement Historique La fonction d’historique vous permet de déter- miner qui a sonné à votre interphone pendant votre absence. L’heure d’appel est affiché dans la barre en haut de la page. Vous pouvez afficher jusqu’à 20 entrées en glissant ou en utilisant les flèches dans la barre supéri-... -
Page 69: Annexe
▸ Haut-parleur et microphone intégrés ▸ Protocole propriétaire de transmission ▸ 1 bouton d’appel et plaque nominative vidéo pour l’application de myintercom. ▸ rétroéclairée La résolution, les images par seconde et la ▸ Sortie 1A ~ 12V pour alimentation du qualité... -
Page 70: Dimensions En Mm
Mode d’emploi de myintercom Annexe 3.2. Dimensions en mm Panneau frontal Panneau arrière du boîtier 12,5 Boîtier pour fixation sur paroi Boîtier encastrable Ø 4... -
Page 71: Informations Légales
Mode d’emploi de myintercom Informations légales 4. INFORMATIONS lÉGAlES Information sur le droit relatif à la responsa- bilité du fait des produits : 1. AXIS est une marque déposée d’Axis AB. 1. Tous les produits visés au présent manuel ne 2. - Page 72 Mode d’emploi de myintercom Notes...
- Page 73 D ▸ Seite 2 GB ▸ Page 25 ▸ Page 49 E ▸ Página 73 Instrucciones...
- Page 74 Instrucciones de myintercom Información importante Información importante – ¡tome nota! 1. La instalación y el mantenimiento de teléfo- 2. Antes de empezar cualquier instalación o nos y accesorios Behnke debe realizarse por un reparación, desconecte los aparatos de la fuente operario técnico calificado en servicio eléctrico.
- Page 75 Contenidos 1. Introducción 1.1. Contenidos del paquete 1.2. General ▸ Prestaciones ▸ Requisitos del sistema 1.3. Intercomunicador con cámara integrada myintercom 1.4. Posición de instalación recomendada 1.5. Condiciones de iluminación 1.6. Modificación de la placa de identificación 1.7. Instalación del intercomunicador 1.8. Posibilidades de uso ▸ Local ▸...
-
Page 76: Introducción
El sistema myintercom le permite utilizar su ya existente infraestructura técnica para comunica- ción por audio y video. Con myintercom, la señal del intercomunicador se transmite directamente a su smartphone o tableta como estación remota. -
Page 77: Requisitos Del Sistema
▸ Puerto de red disponible en conmutador Micrófono o router Tuerca decorativa para tapar los tornillos. ▸ Aplicación myintercom de la Apple AppStore o Google Play Store ▸ WLAN ▸ Servidor DHCP que proporciona una dirección IP, máscara de subred, pasarela y servidor DNS (estándar) -
Page 78: Posición De Instalación Recomendada
Instrucciones de myintercom Introducción 1.4. Posición de instalación 1.6. Modificación de la placa de recomendada identificación Dado que la cámara tiene un ángulo de visión restringido, la posición en la que se instala el intercomunicador es de suma importancia. Así pues, la cámara debería instalarse a una altura aproximada de 155cm, en función de las... -
Page 79: Instalación Del Intercomunicador
Instrucciones de myintercom Introducción 1.7. Instalación del intercomunicador Preparar la caja para la alimentación por cable Fijar la caja a la superficie, conectar el intercomunicador atornillar sobre el rebestimiento Atornillar las tuercas decorativas El siguiente ejemplo es el modelo para mon- taje en superficie. -
Page 80: Posibilidades De Uso
Instrucciones de myintercom Funcionamiento 1.8. Posibilidades de uso Local La ilustración muestra el intercomunicador usado en un edificio residencial o de ofici- nas.. Planta de oficina Tableta gráfica o smartphone WlAN Intercomunicador myintercom Recibidor Con cámara WlAN Router/ Conmutador de banda ancha... -
Page 81: Global
Instrucciones de myintercom Funcionamiento Global La siguiente ilustración muestra el dispositivo en su uso fuera de un edificio residencial o de oficinas. INTERNET Planta de oficina WlAN / 3G / lTE Intercomunicador myintercom Recibidor WlAN / 3G / lTE, Con cámara Voz, Vídeo... -
Page 82: Conexión Del Intercomunicador Myintercom
Fuente de alimentación (in situ) La corriente eléctrica del intercomunicador TÖ myintercom se obtiene vía la fuente de alimenta- Fuente de alimentación externa para la cerradura de ción de 15V de Telecom Behnke para enchufe de la puerta, Máx. 24V, 2A pared. -
Page 83: Configuración Y Funcionamiento
LAN Ethernet de 100 Mbit ▸ Conecte la fuente de alimentación de 15V ▸ Conexión Ethernet La configuración por defecto del intercomu- nicador myintercom es como cliente DHCP. Por tanto, el intercomunicador obtiene la dirección IP desde un servidor DHCP. -
Page 84: Puesta En Marcha De La Aplicación
Instrucciones de myintercom Funcionamiento La aplicación myintercom se mejora continuamente con nuevas características y funcionali- dades. El último manual se puede obtener a través de la página web www.myintercom.de 2.2. Puesta en marcha de la aplicación 2.3. Resumen Puede descargar la aplicación de myintercom... -
Page 85: Historial
Instrucciones de myintercom Funcionamiento Historial Administración Esta página muestra las llamadas más reci- Esta es la página donde se configura el inter- entes (con hora e imagen de la cámara). No comunicador y las aplicaciónes. hay grabación de voz. Cada intercomunicador... -
Page 86: Administración Del Intercomunicador
Todos los ajustes necesarios para el funcio- nombre de usuario y contraseña. namiento del sistema myintercom se pueden Puede encontrar sus datos de conexión en las configurar con la aplicación desde su smart- phone o tableta. No necesita otro ordenador para hacerlo. - Page 87 Instrucciones de myintercom Funcionamiento Puede hacer las siguientes operaciones desde el area de Administración: ▸ Añadir un usuario ▸ Gestionar usuarios ▸ Determinar si la luz del intercomunicador debe encenderse automáticamente al recibir una llamada ▸ Configurar el servidor NTP (en cuyo caso la hora exacta aparecerá...
-
Page 88: Gestión De Usuarios
Instrucciones de myintercom Funcionamiento Gestión de usuarios borrar el usuario del intercomunicador. Una vez eliminado, el usuario ya no podrá acceder al Pulse “Añadir” para añadir un nuevo usuario o intercomunicador. Pulse “Modificar ” para nombre de usuario a fin de modificar los ajus- cambiar la contraseña de usuario. -
Page 89: Gestión De Los Intercomunicadores Con Vídeo
Instrucciones de myintercom Funcionamiento 2.5. Gestión de los intercomunicadores con vídeo En la pantalla de inicio, pulse “Ajustes” para Introduzca los datos para el usuario creado visualizar la pantalla de ajustes. según este apartado de “Administración”. Introduzca una descripción de la entrada en “Sistema del intercomunicador”. - Page 90 Instrucciones de myintercom Funcionamiento Haga clic en “Aviso legal “ para obtener más información acerca del desarrollador de la aplicación. Haga clic en „Feedback “ para acceder a nuestro formulario de feedback. Utilice este formulario si necesita asistencia técnica. El correo de feedback contiene información acerca de la versión de la aplicación, la ver-...
-
Page 91: Utilización De La Aplicación De App
Instrucciones de myintercom Funcionamiento 2.6. Utilización de la aplicación de App La lista en la parte inferior de la pantalla muestra los intercomunicadores configurados La aplicación se divide en dos secciones: video en el smartphone. El punto delante del nombre en directo e historial. El usuario puede acceder a indica la disponibilidad del intercomunicador. -
Page 92: Historial
Instrucciones de myintercom Funcionamiento Historial La función de historial le permite saber quién ha llamado a su puerta durante su ausencia. La hora de la llamada aparece en la barra en la parte superior de la pantalla. Puede visua- lizar hasta 20 llamadas deslizando el dedo o utilizando la flecha en la pantalla. -
Page 93: Anexo
Altavoz y micrófonos integrados ▸ Protocolo propietario de transmisión de ▸ 1 botón de llamada y placa identificadora video para la aplicación de myintercom. ▸ iluminada La resolución, las imágenes por segundo ▸ Salida 1A ~ 12V para alimentación de la y la calidad se adaptan dinámicamente a la... -
Page 94: Dimensiones En Mm
Instrucciones de myintercom Anexo 3.2. Dimensiones en mm Panel frontal Sección trasera de la caja 12,5 Caja de montaje en superficie Caja de montaje empotrada Ø 4... -
Page 95: Información Legal
Instrucciones de myintercom Información legal 4. INFORMACIóN lEGAl Información acerca de la normativa sobre la 1. AXIS es una marca registrada de Axis AB. responsabilidad por productos: 2. Apple, el logo Apple, Mac, Mac OS, Macin tosh, iPad, Multi-Touch, iPhone y iPod touch 1. - Page 96 Instrucciones de myintercom Nota...
- Page 97 Instrucciones de myintercom Nota...
- Page 98 Instrucciones de myintercom Nota...
- Page 99 Instrucciones de myintercom Nota...
- Page 100 Version: 2.1 Januar 2013 Telecom Behnke GmbH Gewerbepark „An der Autobahn“ Robert-Jungk-Straße 3 66459 Kirkel Deutschland/Germany Info-Hotline: +49 (0) 68 41/81 77-700 Service-Hotline: +49 (0) 68 41/81 77-777 Telefax: +49 (0) 68 41/81 77-750 Internet: www.behnke-online.de E-Mail: info@behnke-online.de...