Table des Matières
Publicité
Les langues disponibles
Les langues disponibles
Liens rapides
Bedienungsanleitung...................................................... 5
DE
Operating Instructions.................................................... 17
EN
Mode d'emploi ................................................................. 29
FR
Istruzioni per l'uso .......................................................... 41
IT
07.05
Andreas Hettich GmbH & Co. KG
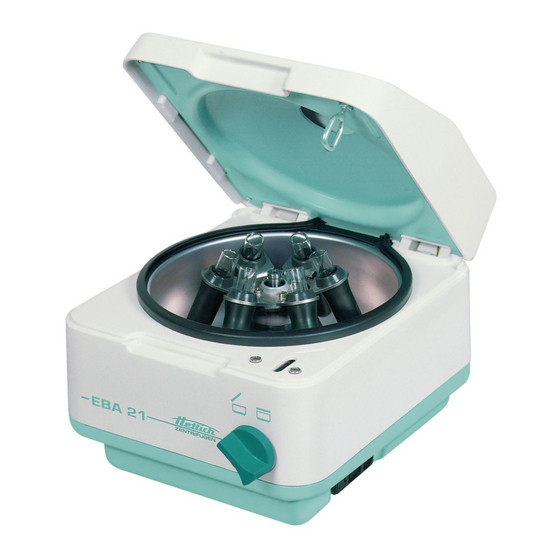
EBA 21
AB1004DEENFRIT
Publicité
Chapitres
Table des Matières

Manuels Connexes pour Hettich EBA 21


Sommaire des Matières pour Hettich EBA 21
- Page 1 EBA 21 Bedienungsanleitung............5 Operating Instructions............ 17 Mode d'emploi ..............29 Istruzioni per l'uso ............41 07.05 Andreas Hettich GmbH & Co. KG AB1004DEENFRIT...
- Page 2 Fig. 1 >RCF< t / min:s PROG IMPULS START STOP PROG Fig. 2 EBA 21 2/58...
-
Page 3: Laborzentrifuge, Laboratory Centrifuge, Centrifugeuse De Laboratoire, Centrifuga Da Laboratorio
Déclaration de conformité CE Dichiarazione di conformità alle norme CEE Andreas Hettich GmbH & Co. KG • Föhrenstraße 12 • D-78532 Tuttlingen • Germany Das bezeichnete Gerät entspricht den aufgeführten EG-Richtlinien und Normen. The named device complies with specified EC guidelines and standards. - Page 4 (07461) 705-125 info@hettichlab.com, service@hettichlab.com www.hettichlab.com © 2003 by Andreas Hettich GmbH & Co. KG All rights reserved. No part of this publication may be reproduced without the written prior permission of the copyright owner. Änderungen vorbehalten! , Modifications reserved! , Sous réserve de modifications ! , Con riserva di modifiche! AB1004DEENFRIT / 07.05...
-
Page 5: Table Des Matières
Inhaltsverzeichnis Bestimmungsgemäße Verwendung ........................7 Restrisiken ................................7 Sicherheitshinweise ..............................7 Symbol- und Hinweiserklärungen ...........................8 Verwendetes Symbol an der Maschine ......................8 Verwendete Symbole in der Bedienungsanleitung ..................8 Lieferumfang................................8 Inbetriebnahme...............................9 Deckel öffnen und schließen...........................9 Deckel öffnen..............................9 Deckel schließen .............................9 Ein- und Ausbau des Rotors ...........................9 Beladen des Rotors ..............................10 Winkelrotoren aerosoldicht verschließen .......................10 Bedien- und Anzeigeelemente........................10... - Page 6 Reparaturannahme von Zentrifugen......................16 Anhang / Appendix ............................52 26.1 Technische Daten / Technical specification ....................52 26.2 Rotoren und Zubehör / Rotors and accessories..................53 6/58...
-
Page 7: Bestimmungsgemäße Verwendung
Dichte von max. 1,2 kg/dm³ konzipiert wurde und somit auch nur für diesen Verwendungszweck bestimmt ist. Eine andere oder darüber hinausgehende Benutzung gilt als nicht bestimmungsgemäß. Für hieraus entstehende Schäden haftet die Firma Andreas Hettich GmbH & Co. KG nicht. Zur bestimmungsgemäßen Verwendung gehört auch das Beachten aller Hinweise aus der Bedienungsanleitung und die Einhaltung der Inspektions- und Wartungsarbeiten. -
Page 8: Symbol- Und Hinweiserklärungen
Zentrifugation verwendet werden. • Reparaturen dürfen nur von einer vom Hersteller autorisierten Person ausgeführt werden. • Es dürfen nur Originalersatzteile und zugelassenes Originalzubehör der Firma Hettich verwendet werden. • Die Zentrifuge ist ein Gerät der Gruppe 3 der Medizinischen Geräteverordnung MedGV. •... -
Page 9: Inbetriebnahme
Inbetriebnahme • Gemäß der Laborgerätenorm EN 61010-2-020 muss in der Hausinstallation ein Notausschalter zur Trennung der Netzversorgung im Fehlerfall angebracht sein. Dieser Schalter muss abseits der Zentrifuge angebracht sein, vorzugsweise außerhalb des Raumes, in dem sich die Zentrifuge befindet, oder neben dem Ausgang dieses Raumes. •... -
Page 10: Beladen Des Rotors
Beladen des Rotors • Bei Ausschwingrotoren müssen alle Rotorplätze mit gleichen Gehängen besetzt sein. Bestimmte Gehänge sind mit der Nummer des Rotorplatzes gekennzeichnet. Diese Gehänge dürfen nur in den entsprechenden Rotorplatz eingesetzt werden. • Die Rotoren und Gehänge dürfen nur symmetrisch beladen werden. Zugelassene Kombinationen siehe Kapitel "Anhang/Appendix, Rotoren und Zubehör/Rotors and accessories". -
Page 11: Einstellmöglichkeiten
11.3 Einstellmöglichkeiten t/min Einstellbar von 1 - 99 min, in 1 min-Schritten. t/sec Einstellbar von 1 - 59 s, in 1 Sekunden-Schritten. ∞ Dauerlauf. Drehzahl. Einstellbar ist ein Zahlenwert von 500 RPM bis zur maximalen Drehzahl des Rotors. Maximale Drehzahl des Rotors siehe Kapitel "Anhang/Appendix, Rotoren und Zubehör/Rotors and accessories“. Einstellbar von 500 RPM bis 10000 RPM in 10er Schritten und ab 10000 RPM bis zur maximalen Drehzahl in 100er Schritten. -
Page 12: Zentrifugation
Zentrifugation Wird der zulässige Gewichtsunterschied innerhalb der Beladung des Rotors überschritten, schaltet der Antrieb während des Anlaufs ab, die Unwuchtanzeige leuchtet auf und IMBALANCE wird angezeigt. Ist die Drehzahl im angewählten Programm höher als die maximale Drehzahl des Rotors, kann kein Zentrifugationslauf gestartet werden. -
Page 13: Akustisches Signal
Akustisches Signal Das akustische Signal ertönt: • bei Auftreten einer Störung im 2 s-Intervall. • nach Beendigung des Zentrifugationslaufes und Stillstand des Rotors im 30 s-Intervall. Durch Öffnen des Deckels oder Drücken einer beliebigen Taste wird das akustische Signal beendet. Das Signal nach Beendigung des Zentrifugationslaufes kann, bei Stillstand des Rotors, folgendermaßen aktiviert oder deaktiviert werden: •... -
Page 14: Notentriegelung
Notentriegelung Bei einem Stromausfall kann der Deckel nicht geöffnet werden. Es muss eine Notentriegelung von Hand durchgeführt werden. Zur Notentriegelung die Zentrifuge vom Netz trennen. Den Deckel nur bei Stillstand des Rotors öffnen. Bitte die Rückseite des Deckblattes aufschlagen. • Die Zentrifuge auf dem Tisch so weit nach vorne stellen, dass die Bohrung (Fig. -
Page 15: Zentrifugiergefäße
Handelt es sich um infektiöses Material so ist umgehend eine Desinfektion durchzuführen. Störungen Lässt sich der Fehler laut Störungstabelle nicht beheben, so ist der Hettich-Kundendienst zu benachrichtigen. Bitte den Zentrifugentyp und die Werknummer angeben. Beide Werte sind auf dem Typenschild der Zentrifuge ersichtlich. - Page 16 Reparaturannahme von Zentrifugen Wird die Zentrifuge zur Reparatur an den Hersteller zurückgesandt, so muss diese, zum Schutz von Personen, Umwelt und Material, vor dem Versand dekontaminiert und gereinigt werden. Eine Annahme von kontaminierten Zentrifugen behalten wir uns vor. Anfallende Kosten für Reinigungs- und Desinfektionsmaßnahmen werden dem Kunden in Rechnung gestellt. Wir bitten dafür um Ihr Verständnis.
- Page 17 Contents Use according to specification ..........................19 Residual risks ...............................19 Notes on safety..............................19 Explanations of symbols and references ......................20 Symbol used on the machine ........................20 Symbols used in the operating instructions ....................20 Delivery checklist ..............................20 Initial operation ..............................21 Opening and closing the lid...........................21 Opening the lid ..............................21 Closing the lid ..............................21 Installation and removal of the rotor........................21...
- Page 18 Acceptance of the centrifuges for repair ......................28 Anhang / Appendix ............................52 26.1 Technische Daten / Technical specification ....................52 26.2 Rotoren und Zubehör / Rotors and accessories..................53 18/58...
-
Page 19: Use According To Specification
The company Andreas Hettich GmbH & Co. KG undertakes no liability for damages resulting therefrom. Belonging to the application according to specification is also the observance of all references contained in the Instruction Manual and compliance with the inspection and maintenance works. -
Page 20: Explanations Of Symbols And References
Repairs must only be carried out by personnel authorised to do so by the manufacturer. • Only original spare parts and original accessories licensed by the Hettich company are allowed to be utilised. • This centrifuge is classified in Germany as a Group 3 device according to the Medizinische Geräteverordnung MedGV (the regulations on medical equipment). -
Page 21: Initial Operation
Initial operation • According to the laboratory instrument standards EN 61010-2-020 an emergency switch to separate power supply in the event of a failure must be installed in the building electrical system. This switch has to be placed remote from the centrifuge, prefered outside of the room in which the centrifuge is installed or near by the exit of this room. -
Page 22: Loading The Rotor
Loading the rotor • With swing-out rotors all rotor positions must be lined with identical hangers. Certain hangers are marked with the number of the rotor position. These hangers may only be used in the respective rotor position. • The rotors and hangers may only be loaded symmetrically. For authorised combinations see Chapter "Anhang/Appendix, Rotoren und Zubehör/Rotors and accessories". -
Page 23: Adjustment Possibilities
11.3 Adjustment possibilities t/min Adjustable from 1 - 99 min. in 1-min. intervals. t/sec Adjustable from 1 - 59 sec. in 1-sec. intervals. ∞ Continuous run. Revolutions per minute. A numerical value from 500 RPM up to the maximum speed of the rotor can be set. Maximum speed of the rotor, see Chapter "Anhang/Appendix, Rotoren und Zubehör/Rotors and accessories". -
Page 24: Centrifugation
Centrifugation If the permissible weight difference within the rotor loading has been exceeded, the drive shuts down during the start-up, the unbalance display lights up, and IMBALANCE is displayed. If the speed in the selected program is higher than the maximum speed of the rotor, it will not be possible to start a centrifugation run. -
Page 25: Acoustic Signal
Acoustic Signal The acoustic signal sounds: • Upon the appearance of a disturbance in 2 second intervals. • After completion of a centrifugation run and rotor standstill in 30 second intervals. The acoustic signal is stopped by opening the lid or pressing any key. The signal after completion of the centrifugation run can be activated or deactivated in the following manner, if the rotor is at standstill: •... -
Page 26: Rotor Identification
Rotor Identification After every start of a centrifugation run the rotor utilised is identified. After a change of rotor the drive switches off and the rotor code (R xx) as well as the maximum rotational speed (n-max=xxxxx) of the rotor are displayed. A further operation of the centrifuge is only possible after a single opening of the lid. -
Page 27: Autoclaving
If this concerns infectious material, a disinfection process is to be executed immediately. Faults If the fault cannot be rectified according to the faults table, Hettich customer services must be informed. Please state the type of centrifuge and the factory serial number. Both values are visible on the centrifuge type plate. - Page 28 Acceptance of the centrifuges for repair If the centrifuge is returned to the manufacturer for repair, it must be decontaminated and cleaned to protect persons, environment and material. We reserve the right to accept contaminated centrifuges. Costs incurred for cleaning and disinfection are to be charged to the customer. We ask for your understanding in this matter.
- Page 29 Table des matières Uso previsto................................43 Rischi residui ..............................43 Indicazioni inerenti la sicurezza ..........................43 Spiegazione dei simboli e delle avvertenze ......................44 Simbolo utilizzato sulla macchina ........................44 Simboli utilizzati nelle istruzioni d’uso ......................44 Contenuto della fornitura............................44 Messa in funzione ..............................44 Apertura e chiusura del coperchio ........................45 Apertura del coperchio...........................45 Chiusura del coperchio ..........................45 Installazione e disinstallazione del rotore......................45...
- Page 30 Guasti ................................51 Sostituzione fusibili entrata rete........................51 Accettazione di centrifughe da riparare ......................51 Anhang / Appendix ............................52 26.1 Technische Daten / Technical specification ....................52 26.2 Rotoren und Zubehör / Rotors and accessories..................53 30/58...
-
Page 31: Risques Résiduels
1,2 kg/dm³ et uniquement destinée à cet usage. Tout usage autre ou dépassant ce contexte est considéré comme non-conforme. La société Firma Andreas Hettich GmbH & Co. KG décline toute responsabilités pour les dégâts causés par un usage non-conforme. -
Page 32: Symbole Appliqué Sur La Machine
Les réparations ne peuvent être effectuées que par une personne autorisée à cet effet par le fabricant. • Utiliser uniquement les pièces de rechange originales et les accessoires d'origine homologués par les Etablissements Hettich. • La centrifugeuse est un appareil du Groupe 3 mentionné dans le décret allemand relatif aux appareils médicaux (MedGV). -
Page 33: Ouvrir Le Couvercle
Mise en service • Aux termes de la norme EN sur les laboratoires EN 61010-2-020, l'installation locale doit être équipée d'un interrupteur d'arrêt d'urgence pour sectionner l'alimentation du secteur en cas de défaut. Cet interrupteur doit être éloigné de la centrifugeuse, de préférence hors de la pièce dans laquelle est la centrifugeuse ou près de la porte. -
Page 34: Icônes De La Console De Commande
Chargement du rotor • Dans le cas de rotors à balanciers, toutes les positions de rotor doivent être équipées de mêmes balanciers. Certains balanciers sont désignés avec le numéro de la place du rotor. Ces balanciers doivent exclusivement être installés dans la place de rotor correspondante. •... -
Page 35: Possibilités De Réglage T/Min
11.3 Possibilités de réglage t/min Réglage de 1 à 99 min, par in incréments de 1 min. t/sec Réglage de 1 à 59 s, par incréments de 1 seconde. ∞ Fonctionnement continu. Vitesse. Il est possible de régler une valeur numérique comprise entre 500 RPM et la vitesse de rotation maximale du rotor. -
Page 36: Centrifugation Avec Sélection De Temps Préalable
Centrifugation L'entraînement est stoppé en phase de montée en puissance si la différence de tare admissible a été dépassée pendant le chargement du rotor, l'indicateur de déséquilibre s'allume et la mention IMBALANCE est affichée. Si la vitesse de rotation du programme sélectionné est supérieure à la vitesse de rotation maximale du rotor, aucun processus de centrifugation ne peut être lancé. - Page 37 Signal sonore Le signal sonore retentit : • en présence d'un défaut à un intervalle de 2 s. • au terme de la centrifugation et après immobilisation du rotor, à un intervalle de 30 s. Le signal sonore cesse après ouverture du couvercle, en appuyant sur une touche quelconque. Pour activer / désactiver le signal sonore après la centrifugation, alors que le rotor est immobilisé, procéder comme suit : •...
-
Page 38: Déverrouillage D'urgence
Déverrouillage d'urgence En cas de panne de courant, il est impossible d'ouvrir le couvercle. Il est nécessaire d'exécuter un déverrouillage manuel. Avant d'exécuter le déverrouillage manuel, retirer la fiche de l'alimentation. Attendre que le rotor est à l'arrêt pour ouvrir le couvercle. Ouvrir la partie arrière de la plaque de recouvrement. -
Page 39: Réservoirs De Centrifugation
Défauts Si l'erreur ne peut pas être corrigée selon le tableau des dérangements, faire appel au service consommateurs de Hettich. Vous aurez l'obligeance de mentionner le modèle de centrifugeuse et le numéro d'usine. Les deux sont marqués sur la plaque signalétique de la centrifugeuse. - Page 40 Changer les fusibles d'entrée de secteur Amener le commutateur principal en position arrêt et sectionner la centrifugeuse du secteur ! Le porte-fusible (A) avec les fusibles d'entrée de secteur se trouve à côté de l'interrupteur secteur. • Retirer le câble de raccordement de la prise d'appareil. •...
- Page 41 Indice Uso previsto................................43 Rischi residui ..............................43 Indicazioni inerenti la sicurezza ..........................43 Spiegazione dei simboli e delle avvertenze ......................44 Simbolo utilizzato sulla macchina ........................44 Simboli utilizzati nelle istruzioni d’uso ......................44 Contenuto della fornitura............................44 Messa in funzione ..............................44 Apertura e chiusura del coperchio ........................45 Apertura del coperchio...........................45 Chiusura del coperchio ..........................45 Installazione e disinstallazione del rotore......................45...
- Page 42 Accettazione di centrifughe da riparare ......................51 Anhang / Appendix ............................52 26.1 Technische Daten / Technical specification ....................52 26.2 Rotoren und Zubehör / Rotors and accessories..................53 42/58...
-
Page 43: Uso Previsto
1,2 kg/dm³ e destinata pertanto unicamente a questo impiego. Qualsiasi altro tipo di utilizzo è improprio. La ditta Andreas Hettich GmbH & Co. KG non risponde dei danni che ne conseguono. L’uso previsto comporta anche il rispetto di tutte le avvertenze delle istruzioni d’uso e l’esecuzione dei lavori di ispezione e manutenzione stabiliti. -
Page 44: Spiegazione Dei Simboli E Delle Avvertenze
• Devono essere impiegati solo ed esclusivamente pezzi di ricambio originali ed accessori autorizzati della ditta Hettich. • La centrifuga è un'apparecchiatura del gruppo 3 della Disposizione medica sulle apparecchiature MedGV. • Norme di sicurezza in conformità con IEC 61010-1, IEC 61010-2-020. -
Page 45: Apertura E Chiusura Del Coperchio
Apertura e chiusura del coperchio Apertura del coperchio • Far girare verso sinistra la manopola sulla parte frontale. Il LED si spegne. • Aprire il coperchio. E' possibile aprire il coperchio solo se la centrifuga è accesa ed il rotore è fermo. Se non dovesse essere possibile, vedi capitolo "Sblocco di emergenza". -
Page 46: Elementi Di Operazione E Visualizzazione
Elementi di operazione e visualizzazione Aprire il retro della copertina Fig. 2: Display 11.1 Simboli del display Indicazione di squilibrio. L‘indicazione di squilibrio si illumina nel caso in cui la differenza di peso permissibile nel carico del rotore sia stata superata. Indicazione di rotazione. -
Page 47: Inserire I Parametri Di Centrifugazione
Inserire i parametri di centrifugazione Nel caso in cui, dopo aver selezionato oppure durante l‘inserimento di parametri, non venga premuto per 8 secondi alcun tasto, vengono indicati i valori precedenti. L’inserimento dei parametri deve essere poi eseguita nuovamente. • Con il tasto selezionare l‘indicazione RPM oppure RCF. -
Page 48: Corsa Continua
14.2 Corsa continua • Impostazione il simbolo ∞ oppure richiamare il programma di corsa continua (vedere capitolo "Inserire i parametri di centrifugazione" oppure "Richiamo del programma“). • Premere il tasto . L‘indicazione di rotazione illuminaa fino a che il rotore gira. Il conteggio del tempo START inizia da 00:00. -
Page 49: Accelerazione Centrifuga Relativa (Rcf)
Accelerazione centrifuga relativa (RCF) L’accelerazione centrifuga relativa (RCF) è indicata come un multiplo dell’accelerazione terrestre (g). È un valore numerico privo di unità e funge per paragonare le prestazioni di separazione de sedimentazione. Il calcolo viene eseguito in base alla formula: ... -
Page 50: Pulizia E Manutenzione
Pulizia e manutenzione Prima della pulizia, staccare la presa di corrente. Prima di iniziare un procedimento di pulizia e decontaminazione diverso da quello consigliato dal produttore, l’utilizzatore deve accertarsi presso il produttore che tale procedimento previsto non rechi danno all’apparecchio. •... -
Page 51: Guasti
Guasti Se non è possibile rimuovere il guasto sulla base della tabella dei disturbi è necessario informare il Servizio Clienti Hettich. Pregasi comunicare il tipo di centrifuga ed il numero di fabbricazione che sono riportati nella targhetta con i dati caratteristici della centrifuga. -
Page 52: Anhang / Appendix
Anhang / Appendix 26.1 Technische Daten / Technical specification Hettich Zentrifugen Hersteller / Manufacturer D-78532 Tuttlingen Typenbezeichnung / Model EBA 21 Verkaufs-Nr. / Product no. 1004 1004-01 1004-31 Netzspannung / Mains voltage ( ± 10%) 220 – 240 V 1~ 110 –... -
Page 53: Rotoren Und Zubehör / Rotors And Accessories
26.2 Rotoren und Zubehör / Rotors and accessories 1116 Reduzierung / adapter Winkelrotor 6-fach / Angle rotor 6-times 1634 1633 1635 1631 1632 Röhrchen / tubes 0521 0546 0519 0545 0507 Sarstedt 0509 0578 35° Kapazität / capacity Maße / dimensions ∅ x L 34 x 100 29 x 107 24 x 100... - Page 54 1416 Reduzierung / adapter Winkelrotor 12-fach / Angle rotor 12-times 1056 1054 Röhrchen / tubes 0507 0509 Vacutainer Vacutainer 35° 1,6 – 5,0 4 - 7 Kapazität / capacity Maße / dimensions ∅ x L 17 x 100 13 x 75 17 x 120 13 x 75 13 x 100...
- Page 55 1095 Reduzierung / adapter 2031 2023 2024 Winkelrotor 24-fach / Angle rotor 24-times Röhrchen / tube 45° aerosoldicht / aerosol proof Kapazität / capacity Maße / dimensions ∅ x L 11 x 38 11 x 38 8 x 45 8 x 30 6 x 45 6 x 18 Anzahl p.
- Page 56 1450 Reduzierung / adapter 1118 Winkelrotor 12-fach / Hämatokritrotor 24-fach / (mit Dekantierhilfe) Haematocrite rotor 24-times Angle rotor 12-times with decanter aid Röhrchen / tube Röhrchen / tube 0578 Kapillar- röhrchen 35° Kapillar- Tubes Kapazität / capacity Kapazität / capacity Maße / dimensions ∅...
- Page 57 1114 1122 1127 Ausschwingrotor 8-fach / Swing out rotor 8-times Röhrchen / tube 2079 Sarstedt Vacutainer Sarstedt Sarstedt 55° Kapazität / capacity Maße / dimensions ∅ x L 17 x 70 16 x 75 13 x 75 13 x 75 13 x 65 11 x 66 Anzahl p.
- Page 58 1126 1127 Ausschwingrotor 12-fach / Swing out rotor 12-times Röhrchen / tube Vacutainer Sarstedt Sarstedt 70° 2 - 5 Kapazität / capacity Maße / dimensions ∅ x L 13 x 75 13 x 75 13 x 65 11 x 66 Anzahl p.