Publicité

Les langues disponibles

Les langues disponibles

Liens rapides

User Manual
Benutzerhandbuch
Manuel Utilisateur
Manuale d'uso
LINDY No. 32400
LINDY No. 32402
LINDY No. 32343
LINDY No. 32345
© LINDY ELECTRONICS LIMITED & LINDY-ELEKTRONIK GMBH - FIRST EDITION (Dec 2004)
CPU Switch Smart Audio
4 Port Version VGA & PS/2
2 Port Version VGA & PS/2
4 Port Version DVI & PS/2
2 Port Version DVI & PS/2
www.lindy.com
English
Deutsch
Français
Italiano

Publicité

Table des Matières
loading

Sommaire des Matières pour Lindy 32400

  • Page 1 LINDY No. 32402 2 Port Version VGA & PS/2 LINDY No. 32343 4 Port Version DVI & PS/2 LINDY No. 32345 2 Port Version DVI & PS/2 www.lindy.com © LINDY ELECTRONICS LIMITED & LINDY-ELEKTRONIK GMBH - FIRST EDITION (Dec 2004)
  • Page 2 User Manual....Page 2 Benutzerhandbuch..Page 10 Manuel Utilisateur..Page 18 Manuale d’uso.....Page 26...
  • Page 3: User Manual

    User Manual English Quick Installation 1. Make sure all the devices you are connecting to the CPU Switch Smart Audio are turned off 2. Connect the computers, keyboard, monitor, mouse, speakers and microphone to the CPU Switch 3. Switch the monitor on first, then the computers 4.
  • Page 4 English Introduction Thank you for purchasing the LINDY CPU Switch Smart Audio. This KVM Switch allows you to access several computers using a single keyboard, mouse and monitor console. This switch supports PS/2 keyboard/mouse connections. It also offers audio support for switching a microphone and stereo speakers between the connected computers.
  • Page 5: Package Contents

    User Manual English Package Contents CPU Switch Smart Audio (2 or 4 port depending on model) 2m KVM+Audio cables (2 or 4 depending on model). Please note these cables are specially designed KVM+Audio cables that carry the speaker and microphone signals via the PS/2 connectors.
  • Page 6 User Manual English Installation Note: Make sure all of your computers are switched OFF before connecting them to the switch! 1. Connect the KVM+Audio cables to the keyboard, video, mouse, speaker out and microphone in ports on each computer. 2. Connect the KVM+Audio cables to the computer connection ports on the switch. 3.
  • Page 7: Upgrading The Firmware

    1. The upgrade program must be run from a Windows PC connected to Port 1 on the CPU Switch Smart Audio 2. Please contact LINDY Technical Support to obtain the upgrade program. The upgrade software consists of the files illustrated below –...
  • Page 8 User Manual English 5. When the computer has restarted, click START > PROGRAMS > KVMDLOAD to launch the upgrade application. 6. A window will appear. Click Browse and select the location of the software. The upgrade file will end in the extension .hex. 7.
  • Page 9 4. Avoid moving the mouse or pressing the buttons when switching ports 5. For non-standard PS/2 mice and mice which are not fully Microsoft compatible, contact LINDY to obtain an updated version of the firmware which may support these products.
  • Page 10: Optional Accessories

    – Scroll Scroll = hot-plug computer Lock Lock Optional Accessories UK Power Supply LINDY No. 70238 Euro Power Supply LINDY No. 70237 US Power Supply LINDY No. 70239 KVM+Audio Cables: VGA Model DVI Model Length (LINDY No.)
  • Page 11: Benutzerhandbuch

    Möglichkeiten im folgenden Teil des Handbuches Einführung Herzlichen Dank für den Kauf des LINDY CPU Switch Smart Audio. Wir sind überzeugt, dass Sie eine gute Wahl getroffen haben und mit diesem Gerät zufrieden sein werden. Es gehört am Markt zu den KVM-Umschaltern mit der umfangreichsten und besten Unterstützung für eine Vielzahl von Maus- und Tasturtypen mit Ihren vielfältigen Sonderfunktionen.
  • Page 12 Benutzerhandbuch Deutsch Dieser KVM-Umschalter unterstützt PS/2 Maus- und Tasturanschlüsse. Bei LINDY finden Sie ebenfalls Modelle mit Unterstützung für USB Anschlüsse. Er unterstützt darüber hinaus das Umschalten auch von Stereo-Lautsprechern sowie von Mikrofonen. Der Umschalter ist kompatibel mit den meisten am Markt weit verbreiteten Mäusen und Tastaturen, einschließlich von 3D/4D/5D Mäusen mit bis zu zwei Scrollrädern und 5 oder mehr Tasten.
  • Page 13: Lieferumfang

    Benutzerhandbuch Deutsch Lieferumfang CPU Switch Smart Audio (2 oder 4 Port, VGA oder DVI,) 2m KVM+Audiokabel (2 oder 4 Stück, modellabhängig) Bitte beachten Sie, dass dies speziell designte KVM+Audiokabel sind, die auf der CPU Switch Seite die Signale für Lautsprecher und Mikrofon durch die PS/2-Stecker mit durchführen.
  • Page 14 Benutzerhandbuch Deutsch Installation Hinweis: Schalten Sie alle Rechner aus bevor Sie die Kabel anschließen! 1. Verbinden Sie die beiliegenden KVM+Audiokabel mit den Computeranschlüssen für Maus, Tastatur sowie Monitor und bei Bedarf für Lautsprecher und Mikrofon an jedem anzuschließenden Computer. 2. Schließen Sie die KVM+Audiokabel an die Computerports am Switch an. 3.
  • Page 15 1. Das Updateprogramm muss von einem Windows PC an Port 1 gestartet werden. 2. Bitte kontaktieren Sie den Techniksupport von LINDY via Email (info@lindy.com) um ggf. eine neuere Firmware zu erhalten. Erwägen Sie dies nur wenn Sie Probleme mit dem Switch haben und der LINDY Techniksupport Ihnen zum Update der Firmware rät.
  • Page 16 Benutzerhandbuch Deutsch 4. Das folgende Fenster wird geöffnet. Klicken Sie OK und booten Sie den Rechner neu 5. Wenn Ihr Rechner wieder hochgefahren ist, klicken Sie START > PROGRAMME > KVMDLOAD um das Upgrade-Programm zu starten. 6. Ein Fenster öffnet sich und fragt nach dm Speicherort der neuen Firmware. Klicken Sie auf Browse/Durchsuchen und wählen Sie das Verzeichnis des Firmware Files.
  • Page 17: Hilfe Bei Problemen

    Tipps und Tastatur-Hotkeys. 5. Lässt sich das Problem auch dadurch nicht lösen so kontaktieren Sie bitte Ihren Händler oder den LINDY-Support. Die Computer booten korrekt aber die Tastatur funktioniert nicht: 1. Stellen Sie sicher, dass nicht die PS/2 Stecker von Maus und Tastatur untereinander am Rechner und am CPU Switch vertauscht sind! 2.
  • Page 18: Optionales Zubehör

    Adapter, es gibt viele verschiedene Adaptermodelle am Markt! 4. Wegen der Unterstützung für nicht standardkonforme PS/2 Mäuse sowie nicht voll Microsoft kompatible Mäuse kontaktieren Sie bitte LINDY ob eine Firmware Update zur Unterstützung dieser Funktionen vorliegt. Falls Ihre 3/4/5 Tasten-Maus nur wie eine 2 Tasten-Maus funktioniert: Versuchen die vollen Mausfunktionen über folgenden Tastaturhotkey zu aktivieren:...
  • Page 19: Manuel Utilisateur

    Manuel Utilisateur Français Installation Rapide 1. Assurez-vous que tous les périphériques que vous connectez au KVM Switch Smart Audio sont éteints 2. Connectez les ordinateurs, claviers, moniteurs, souris, enceintes et microphones au KVM Switch 3. Allumez d’abord le moniteur, puis les ordinateurs 4.
  • Page 20: Caractéristiques

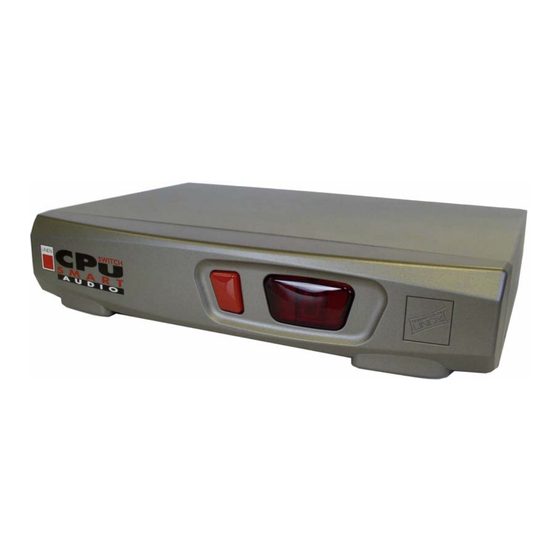
    Français Introduction Merci pour votre achat du commutateur LINDY KVM Switch Smart Audio. Ce commutateur KVM vous permet d’accéder à plusieurs ordinateurs à partir d’un seul clavier, souris et écran. Ce commutateur supporte les connexions PS/2 clavier/souris. Il offre également un support audio pour le microphone et des enceintes stéréo des ordinateurs.
  • Page 21: Contenu De L'emballage

    Manuel Utilisateur Français Contenu de l’emballage KVM Switch Smart Audio (2 ou 4 ports dépendant du modèle) Câbles KVM+Audio 2m (2 ou 4 ports dépendant du modèle) Veuillez remarquer que ces câbles sont spécialement conçus pour transporter le signal Audio du microphone et des enceintes.
  • Page 22: Utilisation Du Kvm Switch Smart Audio

    Manuel Utilisateur Français Installation Remarque: Assurez-vous que tous les ordinateurs soient éteints avant de les connecter au commutateur! 1. Connectez les câbles KVM+Audio aux ports clavier, vidéo, souris, enceintes et microphone de chaque ordinateur. 2. Connectez les câbles KVM+Audio aux ports ordinateurs du commutateur. 3.
  • Page 23: Mise À Jour Du Bios Flash

    1. Le programme de mise à jour doit être lancé depuis un PC Windows connecté au Port 1 du KVM Switch Smart Audio 2. Veuillez contacter le service technique LINDY pour obtenir une éventuelle mise à jour et le programme de mise à jour. Le programme de mise à jour se présente comme suit : 3.
  • Page 24 Manuel Utilisateur Français 5. Lorsque l’ordinateur a redémarré, cliquez sur DEMARRER > PROGRAMMES > KVMDLOAD pour lancer le programme de mise à jour. 6. Une fenêtre va apparaître. Cliquez sur Browse et sélectionnez l’emplacement du logiciel. Le fichier de mise à jour se termine par l’extension hex. 7.
  • Page 25: Problèmes Rencontrés

    4. Evitez de déplacer la souris lors de la commutation des ports 5. Pour des souris non standards PS/2 n’étant pas totalement compatible Microsoft, contactez LINDY pour obtenir une mise à jour du BIOS du KVM pour le support de ces produits.
  • Page 26: Accessoires Optionnels

    Si vous rencontrez des problèmes, essayez la combinaison de touches suivantes – Arrêt Arrêt =hot-plug ordinateur Défil Défil Accessoires Optionnels Alimentation UK LINDY No. 70238 Alimentation Euro LINDY No. 70237 Alimentation US LINDY No. 70239 Câbles KVM+Audio: Modèle VGA Modèle DVI Longueur (LINDY No.)
  • Page 27: Manuale D'uso

    Manuale d’uso Italiano Installazione rapida 1. Assicuratevi che tutti I dispositivi a cui dovete collegare il CPU Switch siano spenti. 2. Connettete mouse, tastiera, monitor, microfono e casse/cuffie al CPU Switch. Procedete poi al collegamento di tutti i PC. 3. Accendete il monitor e poi tutti i PC. 4.
  • Page 28 Manuale d’uso Italiano Introduzione Grazie per aver acquistato il LINDY CPU Switch Smart Audio. Questo KVM Switch vi permetterà di controllare più computer da una singola postazione di lavoro composta da un monitor, un mouse, una tastiera, una coppia di casse o cuffie e un microfono.
  • Page 29: Contenuto Della Confezione

    Manuale d’uso Italiano Contenuto della confezione CPU Switch Smart Audio (2 o 4 porte a seconda del modello) Cavi KVM+Audio da 2m (2 o 4 a seconda del modello). Notate che questi cavi sono specifici per questo modello in quanto veicola i segnali audio attraverso i connettori PS/2.
  • Page 30 Manuale d’uso Italiano Installazione Nota: Assicuratevi che tutti i computer siano spenti prima di connetterli allo switch! 1. Collegate i cavi KVM+Audio alle porte tastiera, video, audio out e microfono di ogni PC. 2. Collegate i cavi KVM+Audio alle porte per i pc sullo switch. 3.
  • Page 31: Aggiornamento Del Firmware

    1. Il programma di aggiornamento deve essere avviato da un computer con Sistema Operativo Windows collegato alla porta 1 del CPU Switch Smart Audio 2. Contattate il supporto tecnico LINDY per ottenere la versione aggiornata del firmware. Il software di upgrade è composto dai seguenti file: –...
  • Page 32 Manuale d’uso Italiano 5. Quando il computer si sarà riavviato fate click su START > PROGRAMS > KVMDLOAD per avviare l’applicazione. 6. Apparirà una finestra. Fate Click su Browse e selezionate la cartella dove avete posizionato il software. Il file di upgrade ha estensione .hex. 7.
  • Page 33: Risoluzione Dei Problemi

    Manuale d’uso Italiano Risoluzione dei problemi Per favore assicuratevi che tutti i cavi siano collegati correttamente alle corrispondenti porte. Potete eventualmente etichettare ogni cavo per facilitarne il riconoscimento. Nota: Quando un computer è spento o in modalità sleep o stand-by lo Switch non invierà alcun segnale al monitor (questo non è...
  • Page 34: Accessori Opzionali

    Evitate di muovere il mouse e premere i pulsanti mentre commutate fra i vari PC. Per mouse PS/2 non standard PS/2 non completamente compatibili con lo standard Microsoft, contattate il supporto LINDY per ottenere la versione aggiornata del firmware che potrebbe supportare il vostro modello.
  • Page 35: Fcc Statement

    You are cautioned that changes or modifications not expressly approved by the party responsible for compliance could void your authority to operate the equipment. LINDY No. 32400, 32402, 32343, 32345 For Home and Office Use Tested to comply with FCC Standards © LINDY ELECTRONICS LIMITED & LINDY-ELEKTRONIK GMBH - FIRST EDITION (Dec 2004)

Ce manuel est également adapté pour:

324023234332345

Table des Matières