Table des Matières
Publicité
Les langues disponibles
Les langues disponibles
Liens rapides
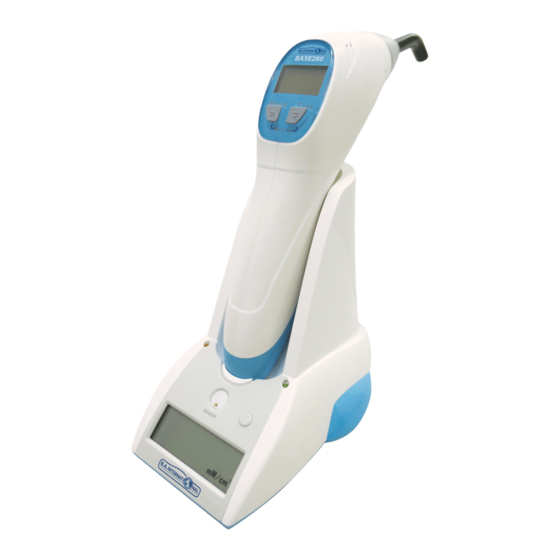
Ultimate BASE280
LED Curing Light
INSTRUCTIONS FOR USE
Lámpara LED de fotocurado
MODO DE EMPLEO
Lampe à Polymériser LEDED
MANUEL D'UTILISATION
LED-Polymerisationslampe
GEBRAUCHSANWEISUNG
Lampada polimerizzante a LED
ISTRUZIONI PER L'USO
Led-uithardingslampmp
GEBRUIKSAANWIJZING
MADE IN TAIWAN
Fabricado en Taiwan
Fabriqué en Taiwan
Hergestellt in Taiwan
Prodotto in Taiwan
Gemaakt in Taiwan
MODEL: BASE280
P/N: BA110150
B.A. INTERNATIONAL LTD.
Unit 9, Kingsthorpe Business
Centre Studland Road,
Northampton - NN2 6NE,
U.K.
Rev. 2019/04
BA110150
9795064
Publicité
Chapitres
Table des Matières
Dépannage

Manuels Connexes pour B.A. International Ultimate BASE280


Sommaire des Matières pour B.A. International Ultimate BASE280
- Page 1 BA110150 9795064 Ultimate BASE280 LED Curing Light INSTRUCTIONS FOR USE MODEL: BASE280 Lámpara LED de fotocurado P/N: BA110150 MODO DE EMPLEO Lampe à Polymériser LEDED MANUEL D’UTILISATION LED-Polymerisationslampe GEBRAUCHSANWEISUNG Lampada polimerizzante a LED ISTRUZIONI PER L’USO Led-uithardingslampmp GEBRUIKSAANWIJZING B.A. INTERNATIONAL LTD.
-
Page 2: Table Des Matières
Disclaimer: 1. First of all, we would like to thank you for purchasing BA Ultimate BASE280 LED Curing Light. Please carefully read the user manual and operate the device accordingly. Please keep this user manual well preserved for future reference. 2. BA International shall not assume any responsibility if any malfunction, damage, or accident resulting in bodily injury caused by improper removal, modification, maintenance, or repair of the product conducted by unauthorized personnel. -
Page 3: Intended Use
Intended Use: This “Ultimate BASE280 LED Curing Light” is a dental curing unit utilizing visible light programmed for the polymerization of light curing materials in the wavelength range of 360-420nm (UV Light) and 420-490nm (Blue Light) by dental professionals. Safety Precautions: Please follow the instructions in this manual for correct and safe operation of the device. -
Page 4: Explanation Of Graphical Symbols
Explanation of Graphical Symbols : IEC 60601-1 : Applied part classification - Complies with standards protecting against electric shock for type B equipment Class II equipment ISO 7000-1641 : Follow operating instructions or consult instructions for use IEC 60417-5009 : STAND-BY IEC 60417-5031 : Direct current. - Page 5 Sterilization of Fiber-Optic Probe : After each treatment, the fiber-optic probe should be disinfected or sterilized. Wrap completely in an autoclave sterilization pouch, then autoclave at 132°C or 134°C/75 psi for 4 minutes by using a pre-vacuum sterilizer to get maximum results.
-
Page 6: Parts & Functions
Parts & Functions: PART A The LED Main Unit (1) Fiber-Optic Probe (2) Display Panel (3) Mode Button (▲) (4) Time Button (▼) (5) Li-Ion Battery (6) Charging Port /Set Button (8) Charging Indicator (9) Ready Indicator (12) (10) Built-in Sensor (10) (11) Display Panel (11) -
Page 7: Installation
Installation: Please carefully follow the instructions below to ensure proper function of the device. Fiber-Optic Probe Installation / Replacement 1. Insert the fiber-optic probe into the handpiece until the base of the probe is completely matched to the handpiece and listen for a “click” that signifies the probe has been securely fastened. -
Page 8: Panel Operation
Panel Operations: (A) Power On Press the “ /Set” button to turn on the display panel. Press the “ /Set” button again to begin curing. Press again to stop the device from emitting in the middle of a curing cycle. Note: The unit will automatically snooze after 30 seconds of idle time to preserve battery power. - Page 9 WARNING : Heat development (burn hazard) As it is the case with all high-performance lights, the high light intensity results in a certain heat development. Pro-longed exposure of areas near the pulp and soft tissues may result in irreversible or reversible damage. Therefore, this high-performance curing light must only be operated by trained professionals.
-
Page 10: Charger Signals
Charger Signals: Place the charger stand on a flat stable surface. Connect the power cable to the charger stand and plug into an electricity outlet, the green ready light will light up. Ready Indicator Charging Port Charging Status Light Color (Green) Charging Orange... -
Page 11: Troubleshooting
Troubleshooting: DESCRIPTIONS FAILURE CAUSE SOLUTION The battery is not Check if the battery has charged been fully charged Device doesn’t power on Defective battery or Return to BA/ approved power PC board dealer for repair LED lamp is unable Return to BA/ approved Defective LED module to emit dealer for repair... -
Page 12: Specifications
Specifications: Model number BASE280 LED lamp Light intensity M1: 2,000 mW/cm and up M2: 1,600 mW/cm and up M3: 1,600 mW/cm (strong intensity) and up 600 mW/cm ( weak intensity) and up Wavelength range Blue Light: 420 ~ 490 nm (peaks at 455 ~ 465 nm) UV Light: 360 ~ 420 nm (peaks at 400 ~ 410 nm) Handpiece dimensions... -
Page 13: Emc Tables
EMC Tables: Guidance and manufacturer's declaration – electromagnetic emissions The model BASE280 is intended for use in the electromagnetic environment specified below. The customer or the user of the model BASE280 should assure that it is used in such an environment. Electromagnetic environment –... - Page 14 Guidance and manufacturer's declaration – electromagnetic immunity The model BASE280 is intended for use in the electromagnetic environment specified below. The customer or the user of the model BASE280 should assure that it is used in such an environment. Electromagnetic environment – Immunity test IEC 60601 Compliance level...
- Page 15 Guidance and manufacturer's declaration – electromagnetic immunity The model BASE280 is intended for use in the electromagnetic environment specified below. The customer or the user of the model BASE280 should assure that it is used in such an environment. Electromagnetic environment – Immunity test IEC 60601test Compliance...
-
Page 16: Descargo De Responsabilidad
ULTIMATE BASE280 Descargo de Responsabilidad: 1. Antes que nada, queremos agradecerle por comprar Ultimate BASE280, la lámpara LED de fotocurado definitiva de BA. Lea atentamente el manual del usuario y utilice el aparato según las instrucciones. Conserve este manual para futura referencia. -
Page 17: Uso Previsto
Uso Previsto: La unidad “Ultimate BASE280 la lámpara LED de fotocurado” está diseñado para la polimerización de los materiales de curado dentro del rango de 360-420 nm (Luz ultravioleta) y de 420-490nm (Luz azul). Precauciones de Seguridad: Siga las instrucciones de este manual para una utilización correcta y segura del dispositivo. -
Page 18: Explicación De Los Símbolos Gráficos
Explicación de los símbolos gráficos: Clasificación de parte aplicada: Tip B Equipamiento eléctrico clase ii. ISO 7000-1641 : siga las instrucciones de uso o consulte las instrucciones para la utilización. IEC 60417-5009 : ESPERA. IEC 60417-5031 : corriente continua. Fecha de fabricación Fabricante Temperatura de almacenamiento: -20 °... - Page 19 Esterilización de la sonda de fibra óptica: Despúes de cada tartamiento, la sonda de fibra óptica debe ser desinfectada o esterilizada. Envuelva completamente la sonda de fibra óptica en la bolsa de esterilización, la esterilice por autoclave a 132°C/75 psi durante 4 minutos por utilizando un esterilizador de prevacío para obtener los máximos resultados.
-
Page 20: Piezas Y Funciones
Piezas y Funciones: PARTE A Pieza de mano LED: Sonda de fibra óptica (2) Panel de visualización (3) Botón de modo (▲) (4) Botón de ajuste de tiempo (▼) (5) Batería de iones de litio (6) Contacto de carga / Botón de ajuste (8) Indicador de carga (9) Indicador de listo (12) -
Page 21: Instalación
Instalación: Siga detenidamente las instrucciones que se detallan a continuación para garantizar un funcionamiento correcto del dispositivo. Instalación/reemplazo de la sonda de fibra óptica 1. Inserte sonda de fibra óptica dentro del cono de punta hasta que al hacer clic quede firmemente colocada en su posición. 2. -
Page 22: Operaciones Del Panel
Operaciones del Panel: (A) Encendido Presione el botón “ / ajuste” para activar el panel de visualización. Vuelva a presionar el botón para iniciar el curado. Presione el botón “ / ajuste” otra vez para terminar el curado. Nota: La unidad ingresará automáticamente en el modo de espera después de 30 segundos de inactividad para ahorrar energía de la batería. - Page 23 ADVERTENCIA : Desarrollo de calor (peligro de quemaduras) Como es el caso con todas las luces de alto rendimiento, la alta intensidad de luz produce un cierto desarrollo de calor. Exposición prolongado de áreas cerca de la pulpa y los tejidos blandos pueden provocar daño irreversible o reversible.
-
Page 24: Señales Cargador
Señales cargador : Coloque la base del cargador sobre una superficie estable y plana. Conecte el cable de alimentación a la base del cargador y enchúfelo a un tomacorriente eléstrico. La luz verde se enciende. Indicador de listo Puerto de carga Estado de carga Color de la luz (Verde) Cargando... -
Page 25: Soluciones De Problemas
Soluciones de Problemas: DESCRIPCIONES FALLA CAUSA SOLUCIÓN La batería no está Compruebe si la batería cargada está totalmente cargada El dispositivo no enciende Retorne al distribuidor o Batería de iones de litio defectuosa fabricante para su reparación La lámpara LED no Retorne al distribuidor o Defecto en el módulo LED enciende... -
Page 26: Especificaciones
Especificaciones: Número de modelo BASE280 Lámpara LED Intensidad de la luz M1: 2,000 mW/cm y superior M2: 1,600 mW/cm y superior M3: 1,600 mW/cm (intensidad alta) y superior 600 mW/cm (intensidad baja) y superior Rango de longitud de onda Luz azul: 420 ~ 490 nm (picos a 455 ~ 465 nm) Luz UV: 360 ~ 420 nm (picos a 400 ~ 410 nm) Dimensiones de la pieza de mano 250(Largo) x 40(Ancho) x 90(Alto) mm... -
Page 27: Limitation De Responsabilité
Limitation de Responsabilité: 1. Nous voulons tout d’abord vous remercier d’avoir acheté la lampe a polymériser LED Ultimate BASE280 de BA International. Veuillez lire attentivement le manuel de l’utilisateur et utiliser le dispositif selon les instructions données. Veuillez conservez ce manuel de l’utilisateur dans un endroit sûr pour future référence. -
Page 28: Utilisation Prévue
Utilisation Prévue: Destinée aux dentistes, la « lampe à polymériser à LED Ultimate BASE280 » est un appareil de polymérisation dentaire qui fait appel à une lumière visible programmée pour faire sécher des matériaux photopolymérisables dans la gamme de longueurs d’onde de 360-420 nm (lumière UV) et de 420-490 nm (lumière bleue). -
Page 29: Explication Des Symboles Graphiques
Explication des symboles graphiques : CEI 60601-1 : Classification des parties appliquées - Conforme aux normes de protection contre les chocs électriques pour l’équipement de type B Équipement de Classe II ISO 7000-1641 : Suivre ou consulter les instructions d’utilisation CEI 60417-5009 : MARCHE (SOUS TENSION) CEI 60417-5031 : Courant continu Date de fabrication... -
Page 30: Stérilisation Du Guide Optique
Stérilisation du guide optique : Le guide optique doit être désinfecté ou stérilisé après chaque traitement. Enveloppez complètement le guide dans une pochette de stérilisation par autoclave, puis traitez en autoclave à 132°C/75 psi (5,17 bars) pendant 4 minutes en utilisant un stérilisateur avec pré-vide pour un résultat optimal. Laissez le guide optique sécher à... -
Page 31: Composants Et Fonctions
Composants et Fonctions: PARTE A Unité principale : Guide optique (2) Écran (3) Bouton Mode (▲) (4) Bouton Time (▼) (5) Batterie lithium-ion (6) Port de charge / Bouton Set (8) Voyant de charge (9) Voyant Prêt (12) (10) Capteur intégré (10) (11) Écran (11) -
Page 32: Installation
Installation: InstalaciónInstallation:: Veuillez suivre avec attention les instructions ci-dessous pour garantir le bon fonctionnement de l’appareil. Installation/remplacement du guide optique 1. Insérez le guide optique dans la pièce à main jusqu’à ce que la base du guide soit complètement enfoncée dans la pièce à main. Un « clic » indique que le guide est correctement fixé. -
Page 33: Fonctions De L'écran
Fonctions de L'écran: (A)Mise sous tension Appuyez sur le bouton « /Set » pour allumer l’écran. Appuyez à nouveau sur le bouton « /Set » pour lancer la polymérisation. Appuyez à nouveau pour interrompre l’émission de lumière au milieu d’un cycle de polymérisation. -
Page 34: (D) Utilisation Du Radiomètre Intégré
AVERTISSEMENT : Échauffement (risque de brûlure) Comme avec toutes les lampes à haute performance, l’intensité lumineuse élevée entraîne un certain échauffement. Une exposition prolongée des zones situées à côté des chairs et tissus mous peut provoquer des lésions irréversibles ou réversibles. Par conséquent, cette lampe à... -
Page 35: Signaux Du Chargeur
Signaux du Chargeur : Placez le socle de charge sur une surface plate et stable. Branchez le câble électrique au socle de charge et branchez l’autre extrémité à une prise électrique. Le voyant Prêt vert s’allume. Couleur du Port de charge Voyant Prêt (vert) État de la charge voyant... -
Page 36: Dépannage
Dépannage: DESCRIPTIONS PANNE CAUSE SOLUTION Vérifier si la batterie La batterie n’est pas est complètement chargée L’appareil ne chargée s’allume pas Retourner chez BA/ Batterie ou carte distributeurs officiels pour électronique d’alimentation réparation défectueuse La lampe à LED Retourner chez BA/ Module LED défectueux ne peut pas distributeurs officiels pour... -
Page 37: Spéifications
Spéifications: Référence Lampe BASE280 à LED Intensité lumineuse M1: 2,000 mW/cm et plus M2: 1,600 mW/cm et plus M3: 1,600 mW/cm (intensité élevée) et plus 600 mW/cm (faible intensité) et plus Lumière Gamme de longueurs d’onde bleue : 420 - 490 nm (pics à 455 ~ 465 nm) Lumière UV : 360 - 420 nm (pics à... - Page 38 Disclaimer: 1. Vielen Dank, dass Sie sich für den Kauf der Polymerisationslampe BA Ultimate BASE280 LED entschieden haben. Bitte lesen Sie sich die Gebrauchsanweisung sorgfältig durch und beachten Sie bei der Bedienung des Geräts die darin enthaltenen Vorschriften. Bitte bewahren Sie die Gebrauchsanweisung zur späteren Verwendung sorgfältig auf.
-
Page 39: Vorgesehener Einsatzzweck
Vorgesehener Einsatzzweck: Diese „LED-Polymerisationslampe Ultimate BASE280“ ist eine zahnärztliche Polymerisationslampe, bei der sichtbares Licht verwendet wird und die für die Polymerisation von lichthärtenden Materialien im Wellenlängenbereich von 360-420 nm (UV-Licht) und 420-490 nm (Blaulicht) durch Zahnärzte programmiert ist. Sicherheitsmassnahmen: Befolgen Sie bitte die Anweisungen in diesem Handbuch, um einen richtigen und sicheren Betrieb des Geräts zu gewährleisten. -
Page 40: Erläuterung Der Grafischen Symbole
Erläuterung der grafischen Symbole : IEC 60601-1 : Angewendete Komponentenklassifikation - gemäß den Normen gegen Stromschlag für Geräte des Typs B Geräte der Kategorie II ISO 7000-1641: Befolgen Sie die Bedienungsanleitung. IEC 60417-5009: STANDBY IEC 60417-5031 : Gleichstrom Herstellungsdatum Hersteller Lagerbedingungen: -20°C bis 65°C Kühlsystem : >>... - Page 41 Sterilisierung von faseroptischen Sonden : Nach jeder Behandlung muss die faseroptische Sonde desinfiziert oder sterilisiert werden. Wickeln Sie sie vollständig in einen Autoklav- Sterilisisationsbeutel und autoklavieren Sie sie für 4 Minuten bei 132°/75 psi, indem Sie ein Vorvakuum-Sterilisiationsgerät verwenden, um ein optimales Ergebnis zu erzielen.
-
Page 42: Komponenten Und Funktionen
Komponenten und Funktionen: TEIL A Die LED-Haupteinheit (1) Faseroptische Sonde (2) Anzeigefeld (3) Mode-Taste (▲) (4) Zeittaste (▼) (5)Lithium-Ionen-Akku (6) Ladeanschluss / Einstelltaste (8) Ladestandsanzeige (9) Bereit-Anzeige (10) Integrierter Sensor (10) (12) (11) Anzeigefeld (11) (12) °C/°F-Schalter TEIL B Zubehör : (2) Adapter - EU&UK&AUS&US (1) Ladesockel Schutzschild... -
Page 43: Installation
Installation: Befolgen Sie bitte sorgfältig nachstehende Anweisungen, um ein ordnungsgemäßes Funktionieren des Geräts zu gewährleisten. Einsetzen/Tauschen der faseroptischen Sonde 1. Führen Sie die faseroptische Sonde in das Handgerät ein, bis der Boden der Sonde vollständig auf dem Handgerät aufliegt. Ein Klick-Geräusch signalisiert, dass die Sonde ordungsgemäß... -
Page 44: Verwendung Des
Verwendung Des: (A) Einschalten Drücken Sie auf die Taste „ /Set“, um das Anzeigefeld einzuschalten. Drücken Sie erneut die Taste „ /Set”, um mit dem Härten zu beginnen. Drücken Sie erneut auf die Taste, um die Lichtemissionen des Geräts während eines Härtungszyklus zu stoppen. - Page 45 WARNUNG: Wärmeentwicklung (Verbrennungsgefahr) Wie es bei allen Hochleistungslampen der Fall ist, bewirkt die hohe Lichtintensität eine gewisse Wärmeentwicklung. Werden Bereiche in der Nähe des Zahnfleischs und des Weichgewebes länger dem Licht der Polymerisationslampe ausgesetzt, kann dies zu unwiderruflichen Schäden führen.Daher darf dieses Hochleistungs-Härtungslicht nur von geschulten Fachkräften verwendet werden.
-
Page 46: Signale Des
Signale Des: Stellen Sie den Ladesockel auf eine flache, stabile Unterlage. Schließen Sie das Stromkabel an den Ladesockel an und verbinden Sie es mit einer Netzsteckdose. Das grüne „Bereit“-Lämpchen leuchtet nun. „Bereit“- Ladeanschluss Lichtfarbe Ladestand Lämpchen (grün) Ladevorgang Orange Ladestandsanzeig e (orange) vollständig grün... -
Page 47: Problembehebung
Problembehebung: BESCHREIBUNG STÖRUNG URSACHE LÖSUNG Überprüfen Sie, ob der Der Akku ist nicht Akku vollständig geladen ist geladen Gerät lässt sich nicht Schicken Sie Ihr Gerät zu Defekter Akku oder einschalten BA/einem genehmigten defekte Platine Händler zur Reparatur Schicken Sie Ihr Gerät zu LED-Lampe kann Defektes LED-Modul BA/einem genehmigten... -
Page 48: Spezifikationen
Spezifikationen: Modell-Nummer BASE280 LED-Lampe Lichtintensität M1: 2,000 mW/cm und mehr M2: 1,600 mW/cm und mehr M3: 1,600 mW/cm (hohe Intensität) und mehr 600 mW/cm (schwache Intensität) und mehr Wellenlängenbereich Blaulicht: 420 ~ 490 nm (Spitzenwerte bei 455 ~ 465 nm) nm (Spitzenwerte bei 400 - 410 nm) UV-Licht: 360 ~ 420 Abmessungen Handgerät... -
Page 49: Esonero Di Responsabilità
ULTIMATE BASE280 Esonero di responsabilità: 1. In primo luogo, desideriamo ringraziarla per aver acquistato la lampada polimerizzante a LED BASE280 BA Ultimate. La invitiamo a leggere con attenzione il manuale per l’utente e a utilizzare il dispositivo secondo le istruzioni in esso riportate. Conservi questo manuale per l’utente per poterlo consultare in futuro. -
Page 50: Destinazione D'uso
Destinazione D'uso: La “Lampada polimerizzante LED Ultimate ”.è un’unità polimerizzante dentistica che utilizza una luce visibile programmata per la polimerizzazione di materiali fotopolimerizzabili nella lunghezza d’onda compresa tra 360 e 420 nm (luce UV) e 420 e 490 nm (luce blu), eseguita da professionisti dell'igiene orale. Precauzioni di Sicurezza: Si prega di osservare le istruzioni contenute in questo manuale, al fine di garantire il funzionamento corretto e sicuro del dispositivo. -
Page 51: Sistema Di Raffreddamento
Spiegazione dei simboli grafici : IEC 60601-1: Classificazione applicata alla classe - Conforme con gli standard sulla protezione da scosse elettriche per i dispositivi di tipo B Apparecchiatura di classe II ISO 7000-1641 Seguire le istruzioni operative, oppure consultare le istruzioni per l’uso IEC 60417-5009: STAND-BY IEC 60417-5031: Corrente diretta. -
Page 52: Pulizia Del Prodotto
Sterilizzazione della sonda a fibre ottiche: Dopo ogni trattamento, è necessario disinfettare o sterilizzare la sonda a fibre ottiche. Avvolgerla completamente in una sacca di sterilizzazione, quindi mettere in autoclave a 132°C/75 psi per 4 minuti, utilizzando uno sterilizzatore pre-vuoto per ottenere i massimi risultati. -
Page 53: Composants Et Onctions
Composants et Fonctions: PARTE A L’unità principale LED: Sonda a fibre ottiche (2) Pannello di visualizzazione (3) Pulsante Modalità (▲) (4) Pulsante Tempo (▼) (5) Batteria agli ioni di litio (6) Porta di carica (7) Pulsante /Set (Imposta) (8) Spia di carica (9) Spia Pronto (12) (10) Sensore integrato... -
Page 54: Installazione
Installazione: InstalaciónInstallation:: Si prega di osservare attentamente le istruzioni seguenti per garantire il funzionamento corretto del dispositivo. Installazione/Sostituzione della sonda a fibre ottiche 1. Inserire la sonda a fibre ottiche nel manipolo fino a quando la base della sonda è abbinata completamente al manipolo e si ode un “clic” indicante che la sonda è fissata in modo sicuro. -
Page 55: Operazioni Eseguibili
Operazioni Eseguibili: (A) Accensione Premere il pulsante “ /Set” (Imposta) per accendere il pannello di visualizzazione. Premere nuovamente il pulsante “ /Set” (Imposta) per avviare la polimerizzazione. Premere nuovamente per interrompere le emissioni del dispositivo durante un ciclo di polimerizzazione. N.B. - Page 56 AVVERTENZA : Sviluppo di calore (rischio di ustioni) Come accade con tutte le luci ad alte prestazioni, l’intensità di luce elevata dà luogo allo sviluppo di un certo livello di calore. L’esposizione prolungata di zone vicine alla polpa e ai tessuti molli potrebbe dar luogo a danni irreversibili o reversibili.
-
Page 57: Segnali Dei
Segnali Dei : Posizionare il caricabatteria su una superficie piana e stabile. Collegare il cavo di alimentazione al caricabatteria al caricabatteria e collegarlo a una presa elettrica; la spia verde Pronto si accenderà. Spia Pronto ( Porta di carica Stato di carica Colore luce verde) Carica in corso... -
Page 58: Risoluzione Dei
Risoluzione Dei: DESCRIZIONI GUASTO CAUSA SOLUZIONE Verificare se la batteria è La batteria non è stata caricata completamente carica Il dispositivo non si accende Batteria o Restituire a BA/I rivenditori scheda PC di alimentazione autorizzati per la riparazione difettosa La spia LED non si Restituire a BA/I rivenditori Modulo LED difettoso accende... -
Page 59: Specifiche Tecniche
Specifiche Tecniche: Numero di modello BASE280 Spia LED Intensità della luce M1: 2,000 mW/cm in poi M2: 1,600 mW/cm in poi M3: 1,600 mW/cm (intensità forte) in poi 600 mW/cm (intensità debole) in poi Intervallo di lunghezze d’onda Luce blu: : 420 - 490 nm (picchi a 455 - 465 nm) Luce UV: 360 - 420 nm (picchi a 400 - 410 nm) Dimensioni del manipolo 250(L) x 40(l) x 90(H) mm... - Page 60 ULTIMATE BASE280 Disclaimer: 1. Allereerst dankt B.A. International klanten voor de aanschaf van de led- uithardingslamp BA Ultimate BASE280. Lees de gebruikershandleiding zorgvuldig door en gebruik het apparaat zoals hierin beschreven. Bewaar deze gebruikershandleiding goed voor toekomstig gebruik. 2. BA International aanvaardt geen verantwoordelijkheid voor storingen of schade veroorzaakt door onjuiste bediening, verwijdering, aanpassing of verkeerd onderhoud.
-
Page 61: Beoogd Gebruik
Beoogd Gebruik: Deze "LED uithardingslamp Ultimate " is een tandheelkundig uithardingstoestel dat gebruik maakt van zichtbaar licht, geprogrammeerd voor de polymerisatie van materialen die uitharden onder licht met een golflengtebereik tussen 360-420nm (UV-licht) en 420-490nm (blauw licht) voor tandheelkundigen. Voorzorgsmaatregel: Volg de instructies in deze handleiding voor de juiste en veilige bediening van apparaat. -
Page 62: Verklaring Van Grafische Symbolen
Verklaring van grafische symbolen : ISO 60601-1: Toegepaste deelclassificatie - voldoet aan normen voor bescherming tegen elektrische schokken voor type B apparatuur Klasse II apparatuur ISO 7000-1641 Volg de gebruiksaanwijzing of raadpleeg instructies voor gebruik ISO 60417-5009: STAND-BY IEC 60417-5031: Gelijkstroom Fabricagedatum Fabrikant Opslagtemperatuur: -20°C ~ 65°C... - Page 63 Sterilisatie van glasvezelsonde : De glasvezelsonde dient na iedere behandeling te worden ontsmet of gesteriliseerd. Wikkel de sonde volledig in een autoclaaf sterilisatiezakje, en steriliseer die vervolgens in de autoclaaf bij 132° C/75 psi gedurende 4 minuten met behulp van een vooraf vacuümgetrokken sterilisator voor het beste resultaat. Laat de glasvezelsonde in het sterilisatiezakje aan de lucht drogen voor 20-30 minuten voor u die eruit haalt.
-
Page 64: Onderdelen & Functies
Onderdelen & Functies: DEEL A Het LED hoofdtoestel : Glasvezelsonde (2) Displaypaneel (3) Modus-knop (▲) (4) Tijdsknop (▼) (5) Li-ton batterij (6) Oplaadpoort / Set knop (8) Batterij-Indicator (9) Klaar-Indicator (12) (10) Ingebouwde sensor (10) (11) Displaypaneel (11) (12) °C/°F schakelaar DEEL B Accessoires: Adapter -EU&UK&AUS&US... -
Page 65: Installatie
Installatie: Volg zorgvuldig de instructies hieronder voor een correcte werking van het apparaat. Glasvezelsonde-installatie/vervanging 1. Plaats de glasvezelsonde in het handstuk tot de basis van de sonde volledig gelijk is met het handstuk en luister tot u een 'klik' hoort, wat betekent dat de sonde veilig werd vastgemaakt. -
Page 66: Aanraakpaneel
Aanraakpaneel: (A) Ingeschakeld Druk op de " /Set" knop om het displaypaneel in te schakelen. Druk nogmaals op de " /Set" knop om met uitharden te beginnen. Druk er nogmaals op om te zorgen dat het apparaat stopt met licht geven tijdens een uithardingscyclus. - Page 67 WAARSCHUWING: Warmteontwikkeling (brandgevaar) Zoals het geval is met alle krachtige lichten, resulteert de hoge lichtintensiteit in een bepaalde warmteontwikkeling. Langdurige blootstelling van gebieden in de buurt van het tandmerg en zachte weefsels kan leiden tot onomkeerbare of omkeerbare schade. Deze krachtige uithardingslamp mag daarom alleen worden bediend door daartoe geschoolde vakmensen.
-
Page 68: Ladersignalen
Ladersignalen : Plaats de lader of een platte, stabiele ondergrond. Sluit het netsnoer aan op de lader en stop de stekker in een stopcontact, het groene lampje gaat branden. Gebruiksklaarindicator Oplaadpoort Oplaadstatus Lichtkleur (groen) Opladen Oranje Oplaadindicator (oranje) Volledig opgeladen Groen Radiometersensor °C/°F schakelaar... -
Page 69: Probleemoplossing
Probleemoplossing: BESCHRIJVINGEN STORING OORZAAK OPLOSSING Controleer of de batterij De batterij is niet volledig is opgeladen opgeladen Het toestel kan niet worden ingeschakeld Stuur het toestel terug naar de Defecte batterij of BA / onze erkende distributeurs stroom PC-bord voor reparatie Stuur het toestel terug naar de LED lamp geeft BA / onze erkende distributeurs... -
Page 70: Specificaties
Specificaties: Modelnummer BASE280 LED lamp Lichtintensiteit M1: 2,000 mW/cm en hoger M2: 1,600 mW/cm en hoger M3: 1,600 mW/cm (sterke intensiteit) en hoger 600 mW/cm (zwakke intensiteit) en hoger Golflengtebereik Blauw licht : 420 - 490 nm (hoogtepunt bij 455-465 nm) Lumière UV : 360 - 420 nm (pics à...