Publicité
Liens rapides
JS PRODUCTS | 6445 MONTESSOURI STREET, LAS VEGAS, NV 89113
(SEPT18)
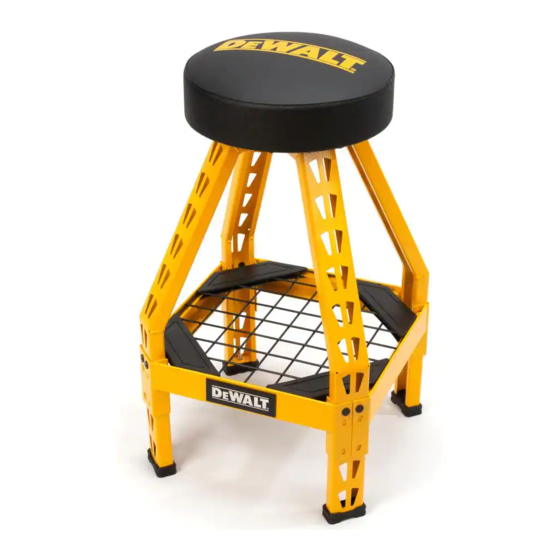
Part No. 41561
Copyright © 2018 D
D
WALT
and the D
WALT Logo are trademarks of the D
®
E
E
and are used under license. The yellow/black color scheme is a trademark for D
power tools & accessories.
Definitions: Safety Guidelines and Words
This instruction manuals use the following safety alert symbols and words to alert you
to hazardous situations and your risk of personal injuery or property damage.
WARNING:
Indicates a potentially hazardous situation which, if not avoided, could
result in death or serious injury.
CAUTION:
Indicates a potentially hazardous situation which, if not avoided, may
result in minor or moderate injury.
(Used without word) Indicates a safety related message.
NOTICE:
Indicates a practice not related to personal injury which, if not avoided,
may result in property damage.
IF YOU HAVE ANY QUESTIONS OR COMMENTS ABOUT THIS OR ANY D
FREE AT: 1-844-377-8451
WARNING! Read and understand all instructions.
safety and operating instructions.
this storage rack and save it for reference.
SAVE THESE INSTRUCTIONS
READ ALL INSTRUCTIONS
BEFORE YOU BEGIN:
•
Read all instructions thoroughly.
•
Remove all components from the box, and lay them on the floor in an orderly fashion.
•
Wear eye protection.
•
Be cautious of sharp edges.
•
Do not stand on product. You may fall which may cause personal injury.
•
300 lb weight limit.
•
Keep this information for further reference.
Hardware Unpacking (Fig. 1-2)
1. The hardware for mounting the swivel bracket to the stool can be found threaded into the top of stool. (Fig. 1)
2. The hardware for mounting the cushion seat to the swivel bracket can be found threaded into the bottom of
the cushion seat. (Fig. 2)
3. Remove the (8) machine screws from these locations so that the swivel bracket and cushion seat may be
installed in the next sections.
FIG. 1
FIG. 2
MACHINE
SCREW
Swivel Bracket to Upright Frame Instructions (Fig. 3-4)
1. Locate four (4) machine screws to attach the swivel bracket to the upright frame.
2. Place swivel bracket on the upright frame.
3. Align holes in the bottom bracket with the existing holes in the upright frame.
4. Offest top bracket flanges by 45 degress to provide clearance to attach the screws.
5. Install the (4) machine screws.
DXSTFH030
Copyright © 2018, D
WALT
E
WALT.
E
WALT Industrial Tool Co., or an affiliate thereof
E
WALT TOOL, CALL US TOLL
E
This manual contains important
Please read this manual carefully before assembling
MACHINE
SCREW
FIG. 3
Swivel Bracket to Cushion Seat Instructions (Fig. 5-6)
1. With the swivel bracket still clocked with a 45 degree offset, place the cushion seat onto the swivel bracket
and line up the mounting holes. (Fig. 4)
2. Using the remaining (4) machines screws, attach the cushion seat to the swivel bracket (Fig. 6). Be careful not
to over tighten these machine screws.
FIG. 5
CUSHION
SEAT
MACHINE
SCREWS
Foot Adjustment Instructions (Fig. 7)
NOTE: The images with the leveling foot extended out is an exaggeration to show the feature.
1. Check to see if the stool sits level when on the ground.
2. If it does not, make adjustments to the leveling foot found on the bottom of a single leg.
3. To do this, either thread the leveling pad into or out of the leg.
4. Make adjustments to the foot as needed when checking for a level and stable position of the leveling pad.
FIG. 7
LEG
FOOT
LEVELING
PAD
Two Year Limited Warranty
WALT
D
WALT stools are backed by a two year limited warranty. This warranty covers manufacturer defects and
E
E
workmanship. The warranty excludes misuse or abuse and normal wear and tear. Exclusion is not allowed in some
states and may not apply. This warranty gives you specific legal rights, and you may have other rights, which vary
from state to state. For further detail of warranty coverage, call 1-844-377-8451.
In addition to the warranty, D
90 Day Money Back Guarantee
If you are not completely satisfied with the performance of your D
within 90 days from the date of purchase with a receipt for a full refund – no questions asked.
Latin America
This warranty does not apply to products sold in Latin America. For products sold in Latin America, see country
specific warranty information contained in the packaging, call the local company or see website for
warranty information.
JS PRODUCTS | 6445 MONTESSOURI STREET, LAS VEGAS, NV 89113
(SEPT18)
D
WALT
®
et le logo D
E
société affiliée à cette dernière et sont utilisés sous licence. L'agencement de couleurs jaune et noir est une
marque de commerce des outlils électriques et accessorires D
Les définitions ci-dessous décrivent le niveau de danger pour chaque mot indicateur
employé. Lire le mode d'emploi et porter une attention particulière à ces symboles.
pas évitée, pourrait entraîner la mort ou des blessures graves.
évitée, pourrait entraîner des blessures légères ou modérées
(Si utilisé sans aucun terme) Indique un message propre à la sécurité.
AVIS :
indique une pratique ne posant aucun risque de dommages corporels
mais qui par contre, si rien n'est fait pour l'éviter, pourrait poser des risques de
dommages matériels.
POUR TOUTE QUESTION OU REMARQUE AU SUJET DE CET OUTIL OU DE TOUT AUTRE OUTIL
D
WALT, COMPOSEZ LE NUMÉRO SANS FRAIS: 1-844-377-8451.
E
Avertissement ! Lire et comprendre toutes les directives.
Ce manuel contient des consignes de sécurité et d'utilisation importantes. Veuillez
lire attentivement ce manuel avant d'assembler cette étagère de rangement et le
conserver à titre de référence.
AVANT DE COMMENCER :
•
Veuillez lire attentivement toutes les instructions.
•
Retirez tous les éléments de la boîte et placez-les sur le sol de façon ordonnée.
•
Portez des lunettes de protection.
•
Faites attention aux bords tranchants.
•
Ne vous mettez pas debout sur le produit. Vous risqueriez de tomber et de vous blesser.
•
Limite de poids de 300 lb (136 kg).
•
Conservez ces renseignements pour consultation ultérieure.
Déballage du matériel (Fig. 1-2)
1. Le matériel permettant de monter le support pivotant sur le tabouret est vissé sur le dessus du tabouret. (Fig. 1)
2. Le matériel permettant de monter le siège rembourré sur le support pivotant est vissé sur la partie inférieure du
siège rembourré. (Fig. 2)
3. Retirez les (8) vis d'assemblage de ces emplacements afin de permettre le montage du support pivotant et du
siège rembourré dans les sections suivantes.
FIG. 4
MACHINE
SCREW
TOP
BRACKET
INSTALL (4)
MACHINE
BOTTOM
SCREWS
BRACKET
THROUGH
BOTTOM
BRACKET
INTO
UPRIGHT
UPRIGHT
FRAME
FRAME
FIG. 6
INSTALL (4)
MACHINE
SCREWS
TOP
THROUGH
BRACKET
TOP BRACKET
INTO CUSHION
WALT stools are covered by our:
E
WALT Stool for any reason, you can return it
E
Part No. 41561
DXSTFH030
Copyright © 2018, D
WALT sont des marques de commerce de DEWALT Industrial Tool Co. ou d'une
E
Définitions : Règles de sécurité
indique une situation potentiellement dangereuse qui, si elle n'est
indique une situation potentiellement dangereuse qui, si elle n'est pas
CONSERVER CES CONSIGNES
LIRE TOUTES LES CONSIGNES
SEAT
WALT
E
WALT.
E
.
Publicité

Manuels Connexes pour DeWalt DXSTFH030


Sommaire des Matières pour DeWalt DXSTFH030
- Page 1 ® et le logo D WALT sont des marques de commerce de DEWALT Industrial Tool Co. ou d’une société affiliée à cette dernière et sont utilisés sous licence. L’agencement de couleurs jaune et noir est une WARNING! Read and understand all instructions.
- Page 2 Web afin d’obtenir les renseignements relatifs à la garantie. JS PRODUCTS | 6445 MONTESSOURI STREET, LAS VEGAS, NV 89113 BASE (SEPT18) Part No. 41561 DXSTFH030 Copyright © 2018, D WALT WALT y el logotipo de D WALT son marcas comerciales de D WALT Industrial Tool Co., o una filial del...