Publicité
Liens rapides
Please Contact Moen First
For Installation Help, Missing or Replacement Parts
(USA)
1-800-BUY-MOEN (1-800-289-6636)
Mon - Fri 8:00 AM to 7:00 PM, Eastern
Sat. 9:00 AM to 3:00 PM Eastern
WWW.MOEN.COM
(Canada)
1-800-465-6130
Mon - Fri 7:30 AM to 7:00 PM, Eastern
WWW.MOEN.CA
Por favor, contáctese primero con Moen
Para obtener ayuda de instalación, piezas
faltantes o de recambio
011 52 (800) 718-4345
Lunes a viernes de 8:00 a 20:00 hs.
(Costa Este)
Sáb. 8:00 a 18:30 hs. (Costa Este)
WWW.MOEN.COM.MX
Veuillez d'abord contacter Moen
En cas de problèmes avec l'installation, ou
pour obtenir toute pièce manquante ou de
rechange
1-800-465-6130
Du lundi au vendredi :
de 7 h 30 à 19 h, HE
WWW.MOEN.CA
HELPFUL TOOLS
For safety and ease of faucet replacement, Moen recommends
the use of these helpful tools.
Installation Guide
Guía de Instalación
Guide d'installation
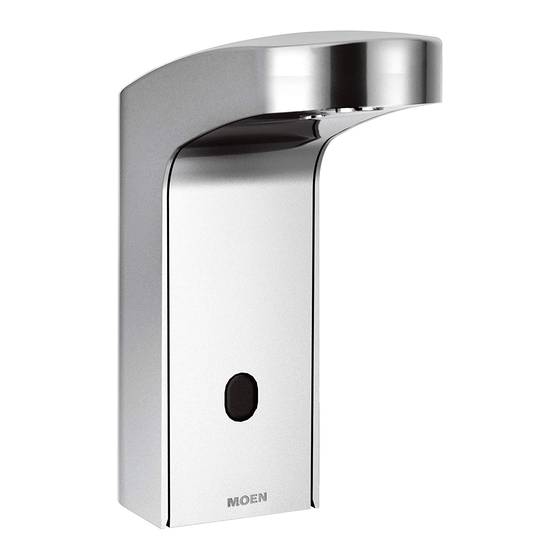
8552 Modern Style Mixing
8552 Estilo moderno mezclador
8552 Style moderne mélangeur
LAVATORY ELECTRONIC FAUCETS
8551- 8554
MEZCLADORAS ELECTRÓNICAS
PARA LAVABO
8551- 8554
ROBINETS DE LAVABO ÉLECTRONIQUES
8551 à 8554
HERRAMIENTAS ÚTILES
Para que el cambio de la llave sea fácil y seguro, Moen le
recomienda usar estas útiles herramientas.
INS10155B - 2/17
8553 Transitional Style Non-Mixing
8553 Estilo de transición no mezclador
8553 Style transitionnel non mélangeur
OUTILS UTILES
Par mesure de sécurité et pour faciliter l'installation, Moen
suggère l'utilisation des outils suivants.
Publicité

Sommaire des Matières pour Moen 8551
- Page 1 HERRAMIENTAS ÚTILES OUTILS UTILES For safety and ease of faucet replacement, Moen recommends Para que el cambio de la llave sea fácil y seguro, Moen le Par mesure de sécurité et pour faciliter l’installation, Moen the use of these helpful tools.
-
Page 2: Parts List
Parts List A. Outer Shell H. AA Batteries (4x) B. T10 Torx Wrench Battery Box C. Handle Assembly J. Sensor D. Mounting Shank K. Faucet Assembly E. Spring Washer L. Supply Hoses (1x or 2x) F. Mounting Nut M. Plug Button Kit (8552) G. - Page 3 *8552 is shown. 8551 and 8553 will only have one supply hose. Lower the supply hoses (L) and mounting shank (D) through the hole in the deck until the outer shell (A) is sitting on top of the deck.
- Page 4 1. Attach supply hoses (L) to the open end of the check valve(s) (G). 1. Remove Battery Box (I) top first to insert batteries (H). 2. Tighten the nut on the supply hoses (L). 2. Assemble the batteries into the battery box. Align batteries as indicated on the battery box top.
- Page 5 INS10155B - 2/17 White Indicator Indicador blanco Indicateur blanc Faucet Sensor (J) will begin flashing during its boot sequence. After the boot sequence, the 1. Slide battery box (I) tabs into the Battery Box mounting bracket and slide down until faucet will be ready to use.
- Page 6 Cold Frio Froid Caliente Chaud Turn on water supply. Test for waterflow. Abra el suministro de agua. Pruebe el flujo de agua. Ouvrir l’alimentation en eau. Tester le débit d’ e au.
- Page 7 INS10155B - 2/17 Temperature Adjustment For 8552 and 8554 Only / Ajuste de la temperatura para 8552 y 8554 solamente / Ajustement de température pour 8552 et 8554 seulement To externally adjust the water temperature, rotate the handle forward for hot or rearward for cold. To turn the faucet on manually, pull the handle out.
- Page 8 Low Flow / Flujo bajo / Faible débit If low flow, turn off water at stops before cleaning filter. To remove in-line filter, unthread filter cap on the Check Remove filter cap and filter screen. Valve (G) with flathead screwdriver. Si el flujo es bajo, corte el agua en las llaves de paso antes Retire la tapa y la malla del filtro.
- Page 9 INS10155B - 2/17 Remove red/ blue plug button from Handle Assembly (C). Use T15 Torx Wrench (B) to unscrew mixing handle. 1. Loosen screw with T15 Torx Wrench (B). 2. Slide off Outer Shell (A) from Faucet Assembly (K). Retire el botón de presión rojo/azul del conjunto de la Use la llave torx T15 (B) para destornillar el monomando mezcladora (C).
- Page 10 To lock temperature For 8554 / Para bloquear la temperatura para 8554 / Pour bloquer la température du modèle 8554 For 8554AC: Place Plug Button (N) in Outer Shell (A) hole. 1. Tuck the wires behind the copper waterway for ease of From the inside of the shell, use the plug button retainer assembling the Faucet Assembly (K).
-
Page 11: Mode Programmation
Consulter videos on sensor programming. sensor para ver videos sobre programación del sensor. le site pro.moen.com/sensor pour voir des vidéos portant sur la programmation du détecteur. Sentinel Mode On/Off: Flujo centinela encendido/apagado: Sentinel Flow is designed to flush out the water lines daily if not used. - Page 12 Si en esta llave mezcladora se llegara a producir alguna fuga o gotera durante Si ce robinet fuit ou dégoutte durant la période de garantie, Moen s’ e ngage à If this faucet should ever develop a leak or drip during the Warranty Period, el periodo de garantía, Moen le proporcionará...


