Table des Matières
Publicité
Les langues disponibles
Les langues disponibles
Liens rapides
Publicité
Chapitres
Table des Matières

Manuels Connexes pour Micro Micro Falcon X3 Black


Sommaire des Matières pour Micro Micro Falcon X3 Black
- Page 1 MICRO ELECTRIC SCOOTER User Manual English Deutsch Français User Manual Bedienungsanleitung Manuel de l’utilisateur Nederlands Español Italiano Gebruiksaanwijzing Manual de usuario Istruzioni per l’uso Русский язык 한국의 中文 Руководство пользователя 用户指南 사용 설명서...
-
Page 2: Table Des Matières
CONTENTS Components General information User Manual ....................... 5 Explanation of terms and symbols ................. 6 Intended Use Safety Instructions 8 – 11 Instructions for use Unit identification ....................12 Wear and tear ......................12 Battery instructions for use ................... 13 Protection against theft .................. - Page 3 Operating the hand brake ..................24 Riding with the electric scooter ................25 Throttle grip ......................25 Cruise control ......................26 Motion-control system ................... 26 Riding programs ...................... 27 Setting the riding programs ................... 28 Setup via the Setting Tool ..................29 Setup via the foot brake ..................
-
Page 4: Components
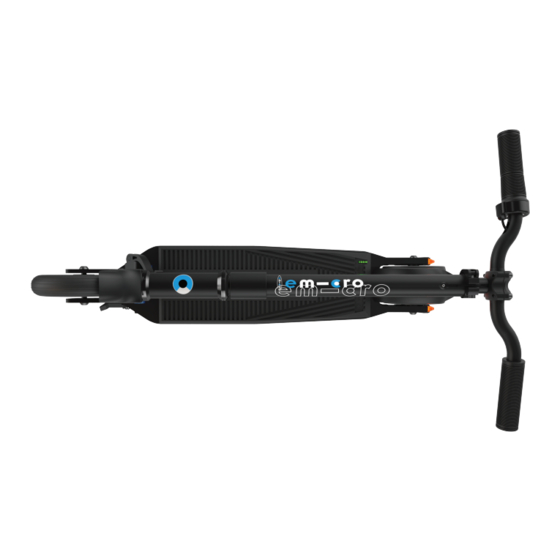
COMPONENTS Handlebar Hand grip Clamping lever Steering column Brake Clamp Folding mechanism Axle Footboard Steering head Anti-slip mat Wheel fork Wheel... -
Page 5: General Information
GENERAL INFORMATION User Manual Before you begin using the electric scooter, please take the time to read the user manual carefully, especially the safety instructions. Please observe the road regulations for driving electric scooters which are also applicable in other countries and which may differ. -
Page 6: Explanation Of Terms And Symbols
Explanation of terms and symbols The purpose of the security symbols is to draw your attention to possible dangers. Read the explanations carefully and make sure you understand the security symbols. Failure to follow the safety instructions can lead to personal injury or injury to third parties as well as damage to property. -
Page 7: Intended Use
INTENDED USE The electric scooter is intended exclusively for use as a scooter on defined ● roads and paths. ● The electric scooter is intended for the transport of one person. The electric scooter is designed for persons with a maximum weight of 100 kg, ●... -
Page 8: Safety Instructions
SAFETY INSTRUCTIONS WARNING for using the electric scooter Do not use the electric scooter if you are not entirely familiar with its operation ● and functions. ● The scooter must not be used by persons with limited physical, sensory or mental capacity, or lack of experience and expertise. - Page 9 Always pay attention to other road users. The misconduct of others may result ● in accidents and injuries. Always ride gently and pay particular attention to the condition of the road. ● Unpredictable road conditions, such as slipperiness or foliage, may lead to an increased risk of skidding.
- Page 10 WARNING for using the battery Make sure only to charge the battery with the enclosed charger and only at ● temperatures between 5° and 35° Celsius. Follow the safety instructions on the battery. ● Never charge the battery unattended. ● When charging the battery, ensure proper plug connection, adequate ●...
- Page 11 WARNING for attachments and modifications Do not modify the electric scooter or install incorrect accessories as this will ● put your safety at risk. The use of unauthorized accessories may result in serious injury or damage to ● the electric scooter. ‘Customization' or ’Tuning' of the electric scooter is forbidden.
-
Page 12: Instructions For Use
INSTRUCTIONS FOR USE Unit identification The serial number is found either in the front or rear part on the underside of ● the footboard. Please note the serial number of your electric scooter. cxxxxxxxxxxxx / emxxxxxxxxxxxxx emxxxxxxxxxxxxx More information about your scooter can be found on the adhesive label ●... -
Page 13: Battery Instructions For Use
Battery instructions for use The built-in lithium-ion battery is a high-tech product which provides excellent performance with correct handling and maintenance. Please read and follow the section ‘Charging the battery’ in the chapter ‘Operation’ and the instructions for ‘Battery maintenance’ in the chapter ‘Maintenance’. Protection against theft Ensure that you never leave your electric scooter unattended, and always protect it from theft with a suitable lock. -
Page 14: What To Do After A Fall Or Accident
What to do after a fall or accident After a fall or accident, bring your electric scooter to an authorised service centre and have it checked for any damage. Cleaning To prevent corrosion of the screws and unnecessary wear and tear, it is advisable to thoroughly clean and dry the unit every three months and after every ride in the rain. -
Page 15: Instructions For Disposal
Instructions for disposal Pay attention to the environment during disposal and observe the following instructions: ● Only dispose of the electric scooter and associated components (e.g. battery) at an approved disposal company or via the community disposal facility. Observe the current regulations. If in doubt, consult your disposal facility for ●... -
Page 16: Initial Setup
✓ ✓ ✓ ✓ ✓ ✗ ✗ em0012 Peugeot ✓ ✓ ✓ ✓ ✓ ✗ ✗ em0006 Micro e-Kick Micro ✓ ✓ ✗ ✗ ✓ ✓ ✗ em0008 Falcon Micro ✓ ✓ ✗ ✗ ✓ ✓ ✓ em0011... -
Page 17: Before Each Trip
Before each trip The electric scooter must be checked for its roadworthiness before each trip. The vehicle is delivered by the manufacturer fully ready for use. Because defects potentially impairing the function of the vehicle may occur during transport as well as during any periods off the road, please always pay attention to the following points before using for the first time and before each trip: Test item Test content... -
Page 18: Operation
OPERATION Unfolding and folding Your electric scooter is delivered folded up. In a few simple steps, it is unfolded and ready to ride. The following explains how to unfold the scooter. Release the clamping lever on the right side of the folding mechanism. Image: Quick clamp lever on the Folding mechanism... - Page 19 A click tells you that the scooter is fully unfolded. Now close the clamping lever again on the side to secure it. Image: Quick clamp lever open Image: Quick clamp lever closed To fold up, perform the same steps in reverse. Make sure that the clamping lever is WARNING always closed and fully tightened when...
-
Page 20: Side Stand
Side stand The electric scooter has a side stand. This is located on the side under the footboard, just below the folding mechanism. Always fold in the stand forwards so it can be folded down again with the toes when required. Image: Side stand folded out Image:... -
Page 21: Charging The Battery
Charging the battery The following describes the charging process: Connect the charger to an electrical outlet. The LED display on the charger ● should now light green. Now connect the electric scooter to the charger. You can see that the charger ●... -
Page 22: Brakes
The following overview illustrates your scooter’s brakes: emicro ✓ ✗ ✗ em0004 emicro ✓ ✗ ✗ em0012 Peugeot ✓ ✗ ✗ em0006 Micro e-Kick Micro ✓ ✓ ✗ em0008 Falcon Micro ✓ ✓ ✗ em0011 Condor (Korea) Micro ✓ ✓... -
Page 23: Operating The Foot Brake
Damp or wet road surfaces result in a longer braking distance. Be careful and WARNING reduce the speed on slippery or uneven road surfaces. Operating the foot brake During braking, shift the body so that the centre of gravity points towards the rear wheel to achieve the best braking performance. -
Page 24: Operating The Regenerative Brake
Operating the regenerative brake To activate the regenerative brake (motor brake), rotate the throttle grip from the zero position in the direction of travel. You will notice immediately how the electric motor brake feels. Image: Direction of rotation for regenerative brake Operating the hand brake The hand brake acts on the front wheel of your electric scooter. -
Page 25: Driving With The Electric Scooter
Driving with the electric scooter Ride slowly to become accustomed to the novel riding sensation, especially when riding for the first time. Always be aware WARNING that travelling at higher speeds on the electric scooter will also result in a longer braking distance. -
Page 26: Cruise Control
Cruise control The electric scooter has cruise control. To activate cruise control, turn the throttle grip to the limit twice within one second. The electric scooter subsequently maintains the current speed until one of the brakes is activated. Motion-control system In addition to speed control via the throttle grip, the electric scooter can also be operated by means of motion control. -
Page 27: Riding Programs
Riding programs Your electric scooter has several preset riding programs. For example, Eco mode gives you the option to travel long distances comfortably whereas Sport mode lets you climb up mountains quickly. Riding programs for models without throttle grip Number of flashing Maximum Riding program Maximum speed... - Page 28 X1 ✓ ✗ em0012 emicro one X2 Peugeot Micro ✓ ✗ em0006 e-Kick Micro ✗ ✓ em0008 Falcon X3 Micro Condor ✗ ✓ em0011 X3 (Korea) ✗ ✓ em0014 Micro Eagle X3 ✗ ✓ em0016 Micro Condor X3...
-
Page 29: Setup Via The Setting Tool
Setup via the Setting Tool A small arrow head is engraved on the Setting Tool; you have to align the tool ● to this arrow. Hold the Setting Tool on the circular cut-out on the footboard. Turning the Setting Tool and aligning the arrow to the empty circles enables ●... -
Page 30: Setup Via The Foot Brake
Setup via the foot brake Pressing the brake pedal briefly four times will take you to the setup mode. ● This is indicated by the flashing LED display on the footboard. While the LED display is blinking, tap the brake one to four times in succession ●... -
Page 31: Maintenance
MAINTENANCE To ensure a long operating life of your electric scooter, it is necessary to bring the scooter for a service once a year or every 500 kilometres (whichever occurs first) to an authorized dealer or an authorized service centre. Provide the service centre with the service record and make sure that the service has been entered correctly. -
Page 32: Folding Mechanism Maintenance
Folding mechanism maintenance A folding scooter always has a certain amount of play. This will become greater over time due to the usual load. To ensure that you enjoy your scooter for the longest time possible, we will show you how to practically remove the play of your folding mechanism in a few simple steps: ●... -
Page 33: Front Wheel Maintenance
Front wheel brake maintenance It is imperative that you regularly re-adjust the cable tension of the front wheel brake to allow for precise brake manoeuvres. You can adjust the cable tension via the set screw on the brake itself. Adapt the set screw for sufficient braking. Image: Setup of the set screw on the brake lever Maintenance of screws: Torque... -
Page 34: Technical Data
TECHNICAL DATA Peugeot Micro emicro one X1 emicro one X2 e-Kick Article number em0004 em0012 em0006 Wheel size 150 / 125 mm (front/rear) Weight 7.5 kg 8.5 kg ✗ ✗ ✗ Throttle grip Front wheel ✗ ✗ ✗ brake Intelligent rear ✗... - Page 35 Micro Falcon Micro Eagle Micro Condor X3 Black X3 Black X3 Black em0008 em0014 em0016 150 / 125 mm 200 / 200 mm 8 kg 9.6 kg 10.8 kg ✓ ✓ ✓ ✗ ✓ ✓ ✓ ✓ ✓ 250 / 350 / 500 W...
-
Page 36: Declaration Of Conformity
EC DECLARATION OF CONFORMITY Manufacturer: Micro Mobility Systems Ltd. Bahnhofstrasse 10 8700 Küsnacht Switzerland Micro Mobility Systems Ltd. Bahnhofstrasse 10 Authorised representative for the compilation of 8700 Küsnacht the technical documentation: Switzerland Electric scooter (E-scooter) Product: em0004 emicro one X1... -
Page 37: Warranty
We guarantee a remaining capacity of 60% of the original rated capacity. Scope of warranty services Based on this warranty, Micro commits to the following services during the respective warranty periods: at the discretion of Micro, repair or replacement with equivalent parts/components where the replacement may vary from the original in terms of model and/or colour;... - Page 38 Damage caused by storage, charging or usage outside the specified ● temperature range. Improper use, inappropriate application or negligent operation (e.g. jumps). ● ● Improper alteration by third parties (e.g. by opening the footboard). Improper charging (e.g. by charging with a charger different from the one ●...
- Page 39 Severability clause If any provision of this warranty is or becomes invalid, or has a loophole that needs to be closed, this will not affect the effectiveness of the other provisions. The missing or invalid provision shall be replaced with a provision that comes as close as possible to the intent and purpose of the original provision.
- Page 40 EMICRO-PASS Please fill out the emicro-Pass completely and keep it together with the purchase receipt. Owner Name and surname Street / House number Postal code Country Scooter Serial Number Model Colour Wheel size Special features Date of purchase Dealer name Dealer address Purchase price...
-
Page 41: Service Record
SERVICE RECORD Any maintenance of the electric scooter needs to be recorded in the service record. Your electric scooter needs to be checked by an authorised service centre once a year or every 500 kilometres. Type of order º Annual maintenance º... - Page 42 Type of order º Annual maintenance º Repair Performed date Performed by Order number Works performed Performed against payment Date, signature, stamp Type of order º Annual maintenance º Repair Performed date Performed by Order number Works performed Performed against payment Date, signature, stamp...
- Page 44 INHALT Geräteteile Allgemeines Bedienungsanleitung ..................... 47 Begriffs- und Symbolerklärung ................48 Bestimmungsgemässer Gebrauch Sicherheitshinweise 50 – 53 Hinweise zum Gebrauch Geräte-Identifikation ....................54 Verschleiss ....................... 54 Akku Gebrauchshinweise ..................55 Diebstahlschutz ....................... 55 Transport des Elektrorollers .................. 55 Lagerung ........................55 Nach einem Sturz oder Unfall ................
- Page 45 Bedienung der Handbremse ................. 66 Fahren mit dem Elektroroller ................67 Gasdrehgriff ......................67 Tempomat ....................... 68 Motion-control Steuerung ..................68 Fahrprogramme ...................... 69 Einstellen der Fahrprogramme ................70 Einstellen mittels Setting Tool ................71 Einstellen mittels Fussbremse ................72 Ein- und Ausschalten des Lichts ................
-
Page 46: Geräteteile
GERÄTETEILE Lenkstange Handgriff Schnellspanner Lenkrohr Bremse Klammer Faltmechanismus Radachse Trittbrett Lenkkopf Antirutschmatte Radgabel... -
Page 47: Allgemeines
ALLGEMEINES Bedienungsanleitung Lesen Sie die Bedienungsanleitung, insbesondere die Sicherheitshinweise sorgfältig durch, bevor Sie den Elektroroller verwenden. Beachten Sie auch die im Ausland geltenden und möglicherweise abweichenden Strassenverkehrsvorschriften für das Fahren von Elektrorollern. Bewahren Sie diese Bedienungsanleitung für die weitere Nutzung auf. Wenn Sie den Elektroroller an Dritte weitergeben, geben Sie diese Bedienungsanleitung mit. -
Page 48: Begriffs- Und Symbolerklärung
Begriffs- und Symbolerklärung Der Sinn von Sicherheitssymbolen besteht darin, Ihre Aufmerksamkeit auf mögliche Gefahren zu lenken. Lesen Sie deren Erläuterungen aufmerksam und stellen Sie sicher, dass Sie die Sicherheitssymbole verstehen. Nichtbefolgen der Sicherheitshinweise kann zu eigenen oder Verletzungen Dritter sowie zu Sachbeschädigungen führen. -
Page 49: Bestimmungsgemässer Gebrauch
BESTIMMUNGSGEMÄSSER GEBRAUCH Der Elektroroller ist ausschliesslich für den Gebrauch als Tretroller auf ● befestigten Strassen und Wegen bestimmt. ● Der Elektroroller ist für den Transport einer einzelnen Person bestimmt. Der Elektroroller ist für Personen bis maximal 100kg und maximal 190cm ●... -
Page 50: Sicherheitshinweise
SICHERHEITSHINWEISE WARNUNG bei der Verwendung des Elektrorollers Benutzen Sie den Elektroroller nur, wenn Sie mit der Bedienung und allen ● Funktionen vertraut sind. Der Roller darf nicht von Personen mit verringerten physischen, sensorischen ● oder mentalen Fähigkeiten oder Mangel an Erfahrung und Wissen benutzt werden. - Page 51 Achten Sie stets auf andere Verkehrsteilnehmer. Durch das Fehlverhalten ● anderer sind Unfälle und Verletzungen möglich. Fahren Sie stets vorausschauend und achten Sie insbesondere auf die ● Beschaffenheit der Fahrbahn. Durch unvorhersehbare Beschaffenheit der Fahrbahn wie Glätte oder Laub besteht erhöhte Rutschgefahr. Springen Sie nicht mit dem Roller und vermeiden Sie Schlaglöcher, Bordsteine ●...
- Page 52 WARNUNG bei der Verwendung des Akkus Den Akku nur mit dem mitgelieferten Ladegerät und nur bei Temperaturen ● zwischen 5° und 35° Grad Celsius laden. Sicherheitshinweise auf dem Akku beachten. ● Den Akku nie unbeaufsichtigt laden. ● Bei jedem Ladevorgang sicherstellen, dass eine ordentliche Steckverbindung, ●...
- Page 53 WARNUNG bei Anbauten und Veränderungen Durch Anbauten und Veränderungen des Elektrorollers mit falschem Zubehör ● gefährden Sie Ihre Sicherheit. Die Verwendung von nicht zugelassenem Zubehör kann zu schweren ● Verletzungen oder zur Beschädigung des Elektrorollers führen. Das „Tunen“ des Elektrorollers ist verboten. ●...
-
Page 54: Hinweise Zum Gebrauch
HINWEISE ZUM GEBRAUCH Geräte-Identifikation Notieren Sie sich die Seriennummer ihres Elektrorollers, welche Sie entweder ● im vorderen oder hinteren Bereich auf der Unterseite des Trittbretts finden. cxxxxxxxxxxxx / emxxxxxxxxxxxxx emxxxxxxxxxxxxx Weitere Informationen zu Ihrem Roller finden Sie auf dem Klebeetikett ●... -
Page 55: Akku Gebrauchshinweise
Akku Gebrauchshinweise Der verbaute Lithium-Ionen-Akku ist ein hochtechnologisches Produkt, welches bei korrekter Bedienung und Wartung exzellente Leistung erbringt. Lesen Sie den Abschnitt „Laden des Akkus“ im Kapitel ‚Bedienung‘ und die Anweisungen zum „Unterhalt des Akkus“ im Kapitel ‚Unterhalt‘ aufmerksam durch und befolgen Sie diese. -
Page 56: Nach Einem Sturz Oder Unfall
Nach einem Sturz oder Unfall Bringen Sie Ihren Elektroroller nach einem Sturz oder Unfall in eine autorisierte Servicestelle und lassen ihn auf allfällige Schäden prüfen. Reinigung Um Rost an Schrauben und unnötigem Verschleiß vorzubeugen, empfiehlt es sich, das Fahrzeug alle drei Monate und nach jeder Regenfahrt gründlich zu reinigen und zu trocknen. -
Page 57: Entsorgung
Entsorgung Achten Sie sich auch beim Entsorgen auf die Umwelt und beachten Sie folgende Hinweise: ● Entsorgen Sie den Elektroroller und die dazugehörigen Komponenten (z.B. Akku) unbedingt über einen zugelassenen Entsorgungsbetrieb oder über die kommunale Entsorgungseinrichtung. Beachten Sie die aktuell geltenden Vorschriften. Erkundigen Sie sich im ●... -
Page 58: Inbetriebnahme
✓ ✓ ✓ ✓ ✓ ✗ ✗ em0012 Peugeot ✓ ✓ ✓ ✓ ✓ ✗ ✗ em0006 Micro e-Kick Micro ✓ ✓ ✗ ✗ ✓ ✓ ✗ em0008 Falcon Micro ✓ ✓ ✗ ✗ ✓ ✓ ✓ em0011... -
Page 59: Vor Jeder Fahrt
Vor jeder Fahrt Vor jeder Fahrt muss der Elektroroller auf seine Verkehrssicherheit überprüft werden. Das Fahrzeug wird vom Hersteller komplett betriebsfertig ausgeliefert. Durch Transport oder Standzeiten können Mängel auftreten, die unter Umständen die Funktionen des Fahrzeuges beeinträchtigen. Bitte beachten Sie vor der ersten Inbetriebnahme sowie vor jeder Fahrt folgende Punkte: Prüfpunkt Prüfinhalt... -
Page 60: Bedienung
BEDIENUNG Auf- und Zuklappen Sie erhalten Ihren Elektroroller im zusammengeklappten Zustand. Mit nur wenigen Handgriffen ist er aufgeklappt und fahrbereit. Nachfolgend wird erklärt, wie man den Roller aufklappt. Sie lösen den Spannhebel auf der rechten Seite des Klappmechanismus. Bild: Schnellspannhebel am Faltmechanismus Sie drücken die beiden blauen Knöpfe links und rechts am Block und klappen das Vorderteil hoch. - Page 61 Durch ein Klicken hören Sie, dass der Roller vollständig aufgeklappt und sich eingeklickt hat. Schliessen Sie nun zur Sicherung den Spannhebel auf der Seite. Bild: Schnellspannhebel geöffnet Bild: Schnellspannhebel geschlossen Für das Zusammenklappen führen sie die gleichen Schritte in umgekehrter Reihenfolge aus.
-
Page 62: Seitenständer
Seitenständer Der Elektroroller verfügt über einen Seitenständer. Dieser befindet sich seitlich unter dem Trittbrett, direkt unterhalb des Faltmechanismus. Klappen Sie den Ständer zum Fahren immer gegen vorne weg, damit sie diesen anschliessend leicht mit der Fussspitze wieder herunterklappen können. Bild: Seitenständer ausgeklappt Bild: Seitenständer eingeklappt... -
Page 63: Laden Des Akkus
Laden des Akkus Im Folgenden wird der Ladevorgang beschrieben: Schliessen Sie das Ladegerät an eine Steckdose an. Die LED Anzeige auf dem ● Ladegerät sollte nun grün leuchten. Schliessen Sie nun auch den Elektroroller ans Ladegerät an. Sie erkennen, ● dass Ladegerät und Roller korrekt verbunden sind, wenn die LED Anzeige am Netzteil auf rot wechselt (dies kann einige Sekunden dauern). -
Page 64: Bremsen
In der folgenden Übersicht ist dargestellt, über welche Bremsen Ihr Roller verfügt: emicro ✓ ✗ ✗ em0004 emicro ✓ ✗ ✗ em0012 Peugeot ✓ ✗ ✗ em0006 Micro e-Kick Micro ✓ ✓ ✗ em0008 Falcon Micro ✓ ✓ ✗ em0011 Condor (Korea) Micro ✓... -
Page 65: Bedienung Der Fussbremse
Bei feuchter oder nasser Fahrbahn verlängert sich der Bremsweg erheblich. WARNUNG Seien Sie vorsichtig und reduzieren Sie die Geschwindigkeit bei rutschiger oder unebener Fahrbahn. Bedienung der Fussbremse Um eine optimale Bremsleistung zu erreichen, verlagern Sie den Körperschwerpunkt beim Bremsen übers Hinterrad. Bei der Verlagerung des Gewichts nach hinten / unten, erreichen Sie eine massive Verkürzung des Bremswegs. -
Page 66: Bedienung Der Rekuperationsbremse
Bedienung der Rekuperationsbremse Um die Rekuperationsbremse (Motorenbremse) zu aktivieren, drehen Sie den Gasdrehgriff aus der Nullposition in Fahrtrichtung. Sie spüren sofort, wie der Elektromotor bremst. Bild: Drehrichtung für Rekuperationsbremse Bedienung der Handbremse Die Handbremse wirkt auf das Vorderrad Ihres Elektrorollers. Betätigen Sie diese mit Vorsicht und üben Sie den Umgang mit dieser Bremsanlage auf gesichertem Privatgelände. -
Page 67: Fahren Mit Dem Elektroroller
Fahren mit dem Elektroroller Fahren Sie speziell bei Ihrer ersten Fahrt langsam, um sich an das neuartige Fahrgefühl zu gewöhnen. Seien sie stets WARNUNG bewusst, dass die höhere Geschwindigkeit eines Elektrorollers auch einen längeren Bremsweg zur Folge hat. Gasdrehgriff Der Elektroroller (ab X3 Generation) verfügt über einen Gasdrehgriff, über welchen die Geschwindigkeit reguliert wird. -
Page 68: Tempomat
Tempomat Der Elektroroller verfügt über einen Tempomat. Um den Tempomat zu aktivieren, drehen Sie den Gasdrehgriff innerhalb einer Sekunde zweimal hintereinander bis zum Anschlag. Der Elektroroller behält folglich die momentane Geschwindigkeit bei, bis eine der Bremsen betätigt wird. Motion-control Steuerung Neben der Geschwindigkeitsregulierung über den Gasdrehgriff kann der Elektroroller auch per Bewegungssteuerung gefahren werden. -
Page 69: Fahrprogramme
Fahrprogramme Bei Ihrem Elektroroller sind verschiedene Fahrprogramme vorprogrammiert. Damit haben Sie zum Beispiel die Wahl, zwischen im Eco Mode gemütlich lange Strecken zurückzulegen oder im Sport Mode flott Berge zu erklimmen. Fahrprogramme bei Modellen ohne Gasgriff Anzahl LEDs, Maximale Maximale Geschwin- Fahrprogramm die blinken Leistung... -
Page 70: Einstellen Der Fahrprogramme
X1 ✓ ✗ em0012 emicro one X2 Peugeot Micro ✓ ✗ em0006 e-Kick Micro ✗ ✓ em0008 Falcon X3 Micro Condor ✗ ✓ em0011 X3 (Korea) ✗ ✓ em0014 Micro Eagle X3 ✗ ✓ em0016 Micro Condor X3... -
Page 71: Einstellen Mittels Setting Tool
Einstellen mittels Setting Tool Auf dem Setting Tool ist eine kleine Pfeilspitze eingraviert, nach welcher Sie ● das Tool ausrichten müssen. Halten Sie das Setting Tool auf den kreisrunden Ausschnitt auf dem Trittbrett. Durch Drehen des Setting Tools und damit Ausrichten des Pfeils auf die leeren ●... -
Page 72: Einstellen Mittels Fussbremse
Einstellen mittels Fussbremse Durch viermaliges, kurzes Antippen des Bremspedals gelangen Sie in den ● Einstellungsmodus. Sie erkennen dies dadurch, dass die LED Anzeige am Trittbrett blinkt. Während die LED Anzeige blinkt, tippen Sie ein bis viermal hintereinander ● auf die Bremse, um in das jeweilige Programm (1 = Fussgänger, 2 = Eco, 3 = Sport, 4 = Active) zu aktivieren. -
Page 73: Unterhalt
UNTERHALT Um eine lange Lebensdauer Ihres Elektrorollers zu gewährleisten, müssen Sie den Roller einmal pro Jahr oder alle 500 Kilometer (je nachdem, was zuerst eintritt) bei einem autorisierten Händler oder einer autorisierten Servicestelle in die Wartung geben. Übergeben Sie der Servicestelle Ihren Wartungsnachweis und versichern Sie sich, dass die Wartung von der Servicestelle ordnungsgemäss eingetragen wird. -
Page 74: Unterhalt Des Faltmechanismus
Unterhalt des Faltmechanismus Jeder Faltmechanismus entwickelt über die Zeit und durch Beanspruchung ein gewisses Spiel. Damit Sie lange Freude an Ihrem Roller haben, zeigen wir Ihnen nachfolgend, wie Sie mit wenigen Handgriffen Ihren Klappmechanismus wieder spielfrei machen können: ● Öffnen Sie den Schnellspannhebel und sprühen Sie ein wenig Schmiermittel auf die Gleitfläche des Schnellspannhebels. -
Page 75: Unterhalt Der Vorderradbremse
Unterhalt der Vorderradbremse Für eine präzise Dosierung der Vorderradbremse ist es unerlässlich, dass Sie den Kabelzug der Bremse regelmässig nachjustieren. Sie können den Kabelzug an der Stellschraube am Bremshebel nachstellen. Justieren Sie die Stellschraube so, dass genügend Bremswirkung vorhanden ist. Bild: Einstellen der Stellschraube am Bremshebel Unterhalt der Schrauben: Drehmomente... -
Page 76: Technische Daten
TECHNISCHE DATEN Peugeot Micro emicro one X1 emicro one X2 e-Kick Artikelnummer em0004 em0012 em0006 Radgrösse 150 / 125 mm (vorne/hinten) Gewicht 7.5 kg 8.5 kg ✗ ✗ ✗ Gasdrehgriff Vorderrad- ✗ ✗ ✗ bremse Intelligentes ✗ ✗ ✗ Rücklicht... - Page 77 Micro Falcon Micro Eagle Micro Condor X3 Black X3 Black X3 Black em0008 em0014 em0016 150 / 125 mm 200 / 200 mm 8 kg 9.6 kg 10.8 kg ✓ ✓ ✓ ✗ ✓ ✓ ✓ ✓ ✓ 250 / 350 / 500 W...
-
Page 78: Konformitätserklärung
EG-KONFORMITÄTSERKLÄRUNG Hersteller: Micro Mobility Systems Ltd. Bahnhofstrasse 10 8700 Küsnacht Schweiz Micro Mobility Systems Ltd. Bahnhofstrasse 10 Bevollmächtigter für die Zusammenstellung der 8700 Küsnacht technischen Unterlagen: Schweiz Elektroroller (E-Scooter): Produkt: em0004 emicro one X1 em0012 emicro one X2 em0006 Peugeot Micro e-Kick... -
Page 79: Garantie
Restkapazität von 60% der Ursprungskapazität. Umfang der Garantieleistungen Micro verpflichtet sich aufgrund dieser Garantie während der jeweiligen Garantiefristen zu folgenden Leistungen: Nach Wahl von Micro, Reparatur oder Ersatz durch gleichwertige Teile / Komponenten, wobei der Ersatz bezüglich Modell und / oder Farbe vom zu Ersetzenden abweichen kann; Serviceleistungen, die nicht unter die Garantie fallen und im Kompetenzbereich des Händlers... - Page 80 Schaden in ursächlichem Zusammenhang mit Lagerung, Ladung oder ● Benutzung ausserhalb des spezifizierten Temperaturbereichs für Lagerung und Ladung. Unsachgemässe Benutzung, zweckfremde Verwendung oder fahrlässige ● Bedienung (z.B. Sprünge). ● Unsachgemässer Eingriff durch Dritte (z.B. durch Öffnen des Trittbretts). Unsachgemässes Laden (z.B. durch Laden mit einem anderen Ladegerät als ●...
- Page 81 Salvatorische Klausel Sollte eine Bestimmung dieser Garantie unwirksam sein oder eine zu schliessende Lücke aufweisen, so bleibt die Rechtswirksamkeit der übrigen Bestimmungen davon unberührt. Anstelle der fehlenden oder unwirksamen Bestimmung gilt eine Bestimmung als vereinbart, die dem Sinn der ursprünglichen Bestimmung am nächsten kommt. Anwendbares Recht und Gerichtsbarkeit Für alle Streitigkeiten aus oder im Zusammenhang mit dieser Garantie (auch mit Bezug auf die Frage deren Zustandekommens oder Gültigkeit) wird die...
- Page 82 EMICRO-PASS Bitte füllen Sie den emicro-Pass vollständig aus und bewahren Sie diesen mit der Kaufquittung zusammen auf. Eigentümer Vor- und Nachname Strasse / Hausnummer PLZ / Ort Land Roller Seriennummer Modell Farbe Reifengrösse Besondere Merkmale Kaufdatum Händler, Name Händler, Adresse Kaufpreis...
- Page 83 WARTUNGSNACHWEIS Lassen Sie in diesem Wartungsnachweis die Unterhaltsarbeiten an Ihrem Elektroroller eintragen. Ihr Elektroroller muss einmal im Jahr oder alle 500 Kilometer von einer autorisierten Servicestelle geprüft werden. Art des Auftrags º Jahreswartung º Reparatur Ausgeführt am Ausgeführt von Auftragsnummer Durchgeführte Arbeiten Gegen Bezahlung durchgeführt Datum, Unterschrift, Stempel...
- Page 84 Art des Auftrags º Jahreswartung º Reparatur Ausgeführt am Ausgeführt von Auftragsnummer Durchgeführte Arbeiten Gegen Bezahlung durchgeführt Datum, Unterschrift, Stempel Art des Auftrags º Jahreswartung º Reparatur Ausgeführt am Ausgeführt von Auftragsnummer Durchgeführte Arbeiten Gegen Bezahlung durchgeführt Datum, Unterschrift, Stempel...
- Page 86 SOMMAIRE Composants Information générale Manuel de l'utilisateur ....................89 Explication des termes et symboles ..............90 Utilisation prévue Instructions de sécurité 92 – 95 Instructions d’utilisation Identification de l’unité ....................96 Usure normale ......................96 Chargeur mode d’emploi ..................97 Protection contre le vol ..................97 Transport de la trottinette électrique ..............97 Entreposage ......................
- Page 87 Fonctionnement du frein à main ................ 108 Conduite de la trottinette électrique ..............109 Poignée d’accélérateur ..................109 Régulateur de vitesse .................... 110 Système de contrôle du mouvement ..............110 Programmes de conduite ..................111 Paramétrages des programmes de conduite .............112 Démarrage avec la molette de réglage ............... 113 Démarrage avec la pédale de frein ..............
-
Page 88: Composants
COMPOSANTS Guidon Poignée Levier de blocage Colonne de direction Frein Bride mécanisme de pliage Essieu Repose-pied Tête de fourche Tapis anti-dérapant Fourche de roue Roue... -
Page 89: Information Générale
INFORMATION GÉNÉRALE Manuel de l’utilisateur Avant de commencer à utiliser la trottinette électrique, veuillez prendre le temps de lire avec attention le manuel de l’utilisateur, spécialement les instructions de sécurités. Veuillez respecter les codes de la route applicables aux trottinettes électriques qui sont également applicables dans d’autres pays et qui peuvent être différents. -
Page 90: Explication Des Termes Et Symboles
Explication des termes et symboles L’objectif des symboles de sécurité est d’attirer votre attention sur les dangers éventuels. Lisez les explications avec attention et assurez-vous que vous comprenez les symboles de sécurité. Le non-respect des instructions de sécurité peut entraîner des dommages corporels ou des dommages à des parties tierces ainsi que des dommages matériels. -
Page 91: Utilisation Prévue
UTILISATION PRÉVUE La trottinette électrique est destinée exclusivement à être utilisée comme une ● trottinette sur des routes et chemins définis. ● La trottinette électrique est destinée au transport d’une personne. La trottinette électrique est conçue pour des personnes d’un poids maximum ●... -
Page 92: Instructions De Sécurité
INSTRUCTIONS DE SÉCURITÉ MISE EN concernant l’utilisation de la trottinette GARDE électrique N’utilisez pas la trottinette électrique si vous n’êtes pas complètement familier ● avec son opération et ses fonctions. La trottinette ne doit pas être utilisée par des personnes avec une capacité ●... - Page 93 Faites toujours attention aux autres usagers de la route. La mauvaise conduite ● des autres peut conduire à des accidents et à des dommages. Conduisez toujours doucement et portez une attention particulière à la ● condition de la route. Des conditions de routes imprévisibles, comme une chaussée glissante ou la présence de feuillage, peut conduire à...
- Page 94 MISE EN Concernant l’utilisation de la batterie GARDE Assurez-vous de charger la batterie avec le chargeur livré avec la trottinette et ● uniquement à des températures situées entre 5° et 35° Celsius. Respectez les instructions de sécurité concernant la batterie. ●...
- Page 95 MISE EN Équipements annexes et modifications GARDE Ne modifiez, ni n’installez, aucun accessoire inadéquat sur la trottinette, car ● cela pourrait vous mettre en danger. L’utilisation d’accessoires non autorisés peut entraîner des blessures graves ou ● des dommages sur la trottinette électrique. Il est interdit de « customiser »...
-
Page 96: Instructions D'utilisation
INSTRUCTIONS CONCERNANT L’UTILISATION Identification de l’unité Le numéro de série se trouve soit sur la partie avant ou la partie arrière sur ● la face inférieure du repose-pied. Veuillez noter le numéro de série de votre trottinette électrique. cxxxxxxxxxxxx / emxxxxxxxxxxxxx emxxxxxxxxxxxxx Plus d’informations sur votre trottinette sont disponibles sur l’étiquette... -
Page 97: Instructions Concernant L'utilisation De La Batterie
Instructions concernant l’utilisation de la batterie La batterie lithium-ion intégrée est un produit de haute technologie qui fournit d’excellentes performances s’il est manipulé et entretenu avec soin. Veuillez lire et suivre la section « Chargement de la batterie » du chapitre « Opération » et les instructions concernant « l’entretien de la batterie »... -
Page 98: Que Faire Après Une Chute Ou Un Accident
Que faire après une chute ou un accident Après une chute ou un accident, amenez votre trottinette électrique dans un centre de service autorisé et faites-la inspecter pour vérifier si elle a subi des dommages quelconques. Nettoyage Pour empêcher la corrosion des vis et une usure inutile, il est conseillé de nettoyer complètement et de sécher l’unité... -
Page 99: Instructions Pour L'élimination
Instructions pour l’élimination Faites attention à l’environnement lors de son élimination et respectez les instructions suivantes : ● Débarrassez-vous de la trottinette et de ses composants associés (par exemple la batterie) uniquement dans un service de collecte agréé ou dans un établissement d’élimination des déchets de la collectivité. -
Page 100: Configuration Initiale
✓ ✓ ✓ ✓ ✓ ✗ ✗ em0012 Peugeot ✓ ✓ ✓ ✓ ✓ ✗ ✗ em0006 Micro e-Kick Micro ✓ ✓ ✗ ✗ ✓ ✓ ✗ em0008 Falcon Micro ✓ ✓ ✗ ✗ ✓ ✓ ✓ em0011 Condor Corée... -
Page 101: Avant Chaque Déplacement
Avant chaque déplacement La trottinette électrique doit être inspectée pour vérifier sa capacité à fonctionner correctement avant chaque déplacement. Le véhicule est fourni par le fabricant complètement prêt à être utilisé. Parce que des défauts pouvant potentiellement entraîner des dysfonctionnements du véhicule peuvent aussi bien se produire pendant le transport que quand le véhicule est à... -
Page 102: Pliage Et Dépliage
OPÉRATION Pliage et dépliage Votre trottinette électrique est fourni pliée. En quelques étapes simples, il est déplié et prêt à être conduit. Le texte suivant explique comment déplier la trottinette. Libérer le levier de blocage sur le côté droit du mécanisme de pliage. Image : Levier de blocage rapide sur le mécanisme de pliage... - Page 103 Un clic vous indique que la trottinette est complètement dépliée. Maintenant, fermez à nouveau le levier de blocage situé sur le côté pour le verrouiller. Image : Levier de blocage rapide en position ouverte Image : Levier de blocage rapide en position fermée Pour replier, effectuez les mêmes opérations en sens inverse.
-
Page 104: Béquille Latérale
Béquille latérale La trottinette électrique comporte une béquille latérale. Elle est située sur le côté sous le repose-pied, juste en dessous du mécanisme de pliage. Pliez toujours la béquille vers l’avant afin qu’elle puisse ensuite être rabattue avec le pied quand cela est nécessaire. -
Page 105: Chargement De La Batterie
Chargement de la batterie Ce qui suit décrit le processus de recharge : Branchez le chargeur à une prise électrique. La DEL (Diode ● ÉlectroLuminescente) sur le chargeur devrait maintenant s’allumer en vert. Branchez maintenant la trottinette électrique au chargeur. Vous pouvez voir ●... -
Page 106: Freins
L’aperçu suivant illustre les freins de votre trottinette : emicro ✓ ✗ ✗ em0004 emicro ✓ ✗ ✗ em0012 Peugeot ✓ ✗ ✗ em0006 Micro e-Kick Micro ✓ ✓ ✗ em0008 Falcon Micro ✓ ✓ ✗ em0011 Condor (Corée) Micro ✓... -
Page 107: Fonctionnement De La Pédale De Frein
MISE EN Sur routes humides la distance de freinage est plus grande. Soyez prudent et réduisez GARDE la vitesse sur routes glissantes ou inégales. Fonctionnement de la pédale de frein Pendant le freinage, déplacer votre corps pour que le centre de gravité pointe vers la roue arrière afin d’obtenir la meilleure puissance de freinage. -
Page 108: Fonctionnement Du Frein À Récupération
Fonctionnement du frein à récupération Pour activer le frein à récupération (frein moteur), tournez la poignée d’accélération depuis la position zéro dans le sens du déplacement. Vous ressentirez immédiatement le frein du moteur électrique. Image : Sens de rotation pour le frein à récupération Fonctionnement du frein à... -
Page 109: Conduite De La Trottinette Électrique
Conduite avec la trottinette électrique Conduisez lentement pour vous accoutumer à la nouvelle sensation MISE EN de conduite, spécialement quand vous GARDE conduisez pour la première fois. Soyez toujours conscient que le déplacement à des vitesses plus élevées sur une trottinette électrique entrainera également une distance de freinage plus grande. -
Page 110: Régulateur De Vitesse
Régulateur de vitesse La trottinette électrique a un régulateur de vitesse. Pour activer le régulateur de vitesse, tournez la poignée d’accélération jusqu’à la limite deux fois en une seconde. La trottinette électrique maintiendra par la suite sa vitesse actuelle jusqu’à ce qu’un des freins soit activé. Système de contrôle de mouvement En complément du contrôle de vitesse par la poignée d’accélération, la trottinette électrique peut aussi être utilisée au moyen du contrôle de mouvement. -
Page 111: Programmes De Conduite
Programmes de conduite Votre trottinette électrique a plusieurs programmes de conduite prédéfinis. Par exemple, le mode Éco vous donne la possibilité de voyager sur de longues distances confortablement tandis que le mode Sport vous permets de grimper des montagnes rapidement. Programmes de conduite pour modèles sans poignée d’accélération Nombre de Programmes de... -
Page 112: Configuration Des Programmes De Conduite
X1 ✓ ✗ em0012 emicro one X2 Peugeot Micro ✓ ✗ em0006 e-Kick Micro ✗ ✓ em0008 Falcon X3 Micro Condor ✗ ✓ em0011 X3 (Corée) ✗ ✓ em0014 Micro Eagle X3 ✗ ✓ em0016 Micro Condor X3... -
Page 113: Configuration Par La Molette De Réglage
Configuration par la molette de réglage Une petite pointe de flèche est gravée sur la molette de réglage ; vous devez ● aligner la molette avec cette flèche. Positionnez la molette de réglage sur la découpe circulaire sur le repose-pieds. En tournant la molette de réglage et en alignant la flèche avec les cercles vides, ●... -
Page 114: Configuration Par La Pédale De Frein
Configuration par la pédale de frein Appuyer brièvement sur la pédale de frein quatre fois vous mettra en mode ● configuration. Ceci est indiqué par l’affichage DEL clignotant sur le repose- pieds. Tant que l’affichage DEL clignote, appuyez sur le frein de une à quatre fois ●... -
Page 115: Entretien
ENTRETIEN Pour assurer une longue durée d’utilisation de votre trottinette électrique, il est nécessaire d’apporter la trottinette pour un entretien une fois par an ou tous les 500 kilomètres (selon le premier qui survient) à un revendeur agréé ou à un centre d’entretien agréé. -
Page 116: Entretien Du Mécanisme De Pliage
Entretien du mécanisme de pliage Une trottinette pliante à toujours un certains nombres de jeu. Cela augmentera avec le temps en raison d’une charge habituelle. Pour vous assurer que vous apprécierez votre trottinette le plus longtemps possible, nous allons vous montrer comment pratiquement retirer le jeu de votre mécanisme de pliage en quelques étapes simples : ●... -
Page 117: Entretien Du Frein De La Roue Avant
Entretien du frein de la roue avant Il est impératif que vous réajustiez régulièrement la tension du câble du frein de la roue avant pour permettre des manœuvres de freinage précises. Vous pouvez ajuster la tension du câble par la vis de réglage sur le frein lui-même. Adaptez la vis de réglage pour un freinage suffisant. -
Page 118: Données Techniques
DONNÉES TECHNIQUES Peugeot Micro emicro one X1 emicro one X2 e-Kick Numéro article em0004 em0012 em0006 Taille roue 150 / 125 mm (avant/arrière) Poids 7,5 kg 8,5 kg Poignée ✗ ✗ ✗ d’accélération Frein de la roue ✗ ✗ ✗... - Page 119 Micro Falcon Micro Eagle Micro Condor X3 Black X3 Black X3 Black em0008 em0014 em0016 150 / 125 mm 200 / 200 mm 8 kg 9,6 kg 10,8 kg ✓ ✓ ✓ ✗ ✓ ✓ ✓ ✓ ✓ 250 / 350 / 500 W...
-
Page 120: Déclaration De Conformité Ce
DÉCLARATION DE CONFORMITÉ CE Fabricant : Micro Mobility Systems Ltd. Bahnhofstrasse 10 8700 Küsnacht Suisse Micro Mobility Systems Ltd. Bahnhofstrasse 10 Représentant agréé pour la compilation de la 8700 Küsnacht documentation technique : Suisse Scooter électrique (E-scooter) Produit: em0004 emicro one X1... -
Page 121: Portée Des Services De Garantie
Portée des services de garantie Sur la base de cette garantie, Micro s’engage sur les services suivants pendant les périodes de garantie respectives : à la discrétion de Micro, réparer ou remplacer par des composants / parties équivalentes ou le remplacement peut varier par rapport à... - Page 122 Dommage causé par le stockage, recharge l’utilisation en dehors de la plage de ● températures spécifiée. Utilisation inappropriée, application inappropriée ou opération inadéquate (ex. ● sauts). Modification inappropriée par une tierce partie (ex. En ouvrant le repose-pieds). ● Recharge inappropriée (ex. En chargeant avec un chargeur différent de celui ●...
- Page 123 Clause de sauvegarde Au cas où une disposition de cette garantie est ou devient invalide, ou contient une lacune qui doit être comblée, cela n’affectera pas l’efficacité des autres dispositions. La disposition manquante ou invalide devra être remplacée avec une disposition qui se rapproche le plus possible de l’intention et du but de la disposition d’origine.
-
Page 124: Propriétaire
EMICRO-PASS Remplissez entièrement le emicro-pass et conservez le avec le reçu d’achat. Propriétaire Nom et prénom Rue / N° Code postal Pays Trottinette Numéro de série Modèle Couleur Taille de roue Caractéristiques spéciales Date d’achat Nom du vendeur Adresse du vendeur Prix d’achat... -
Page 125: Relevé De Services
RELEVÉ DE SERVICES Tout entretien de la trottinette électrique doit être enregistré dans le livret d’entretien. Votre trottinette électrique doit être vérifiée par un centre d’entretien agréé une fois par an ou tous les 500 kilomètres. Type de commande º Entretien annuel º... - Page 126 Type de commande º Entretien annuel º Réparation Date de réalisation Réalisé par Numéro de commande Travaux réalisés Effectué contre paiement Date, signature, timbre Type de commande º Entretien annuel º Réparation Date de réalisation Réalisé par Numéro de commande Travaux réalisés Effectué...
- Page 128 INHOUD Onderdelen Algemene informatie Gebruikershandleiding ..................131 Uitleg van termen en symbolen ................132 Bedoeld gebruik Veiligheidsinstructies 134 – 137 Gebruiksaanwijzing Eenheid identificatie ....................138 Slijtage ........................138 Batterij-instructies voor gebruik ................139 Bescherming tegen diefstal .................. 139 Vervoer van de elektrische scooter ..............139 Opbergen ........................
- Page 129 De handrem bedienen ..................150 Vervoer van de elektrische scooter ..............151 Gashendel ........................151 Cruise controle ....................... 152 Bewegingscontrolesysteem .................. 152 Rijprogramma's ...................... 153 De rijprogramma's instellen ..................154 Setup via het instellingsgereedschap ..............155 Instellen via de voetrem ..................156 Licht aan- en uitschakelen ..................156 Onderhoud Batterij onderhoud ....................157 Onderhoud van het vouwmechanisme ...............158...
-
Page 130: Onderdelen
ONDERDELEN Stuur Handgreep Spanhendel Stuurkolom Klem Vouwmechanisme Treeplank Stuurkop Anti-slip mat Wielvork Wiel... -
Page 131: Algemene Informatie
ALGEMENE INFORMATIE Gebruikershandleiding Voordat u de elektrische scooter begint te gebruiken, neem de tijd om de gebruiksaanwijzing zorgvuldig te lezen, met name de veiligheidsinstructies. Houd rekening met de verkeersregels voor het rijden met elektrische scooters die ook in andere landen van toepassing zijn en die kunnen verschillen. Bewaar deze gebruiksaanwijzing voor toekomstige verwijzing. -
Page 132: Uitleg Van Termen En Symbolen
Uitleg van termen en symbolen Het doel van de beveiligingssymbolen is om uw aandacht te vestigen op mogelijke gevaren. Lees de toelichtingen zorgvuldig en zorg ervoor dat u de beveiligingssymbolen begrijpt. Niet-naleving van de veiligheidsinstructies kan leiden tot persoonlijk letsel of letsel van derden, alsmede schade aan eigendommen. -
Page 133: Bedoeld Gebruik
BEDOELD GEBRUIK De elektrische scooter is uitsluitend bedoeld als scooter op bepaalde wegen en ● paden. ● De elektrische scooter is bedoeld voor het vervoer van één persoon. De elektrische scooter is ontworpen voor personen met een maximumgewicht ● van 100 kg en een maximale lengte van 190 cm. ●... -
Page 134: Veiligheidsinstructies
VEILIGHEIDSINSTRUCTIES voor het gebruik van de elektrische WAARSCHUWING scooter Gebruik de elektrische scooter niet als u niet helemaal bekend bent met de ● werking en de functies ervan. De scooter mag niet worden gebruikt door personen met beperkte ● lichamelijke, zintuiglijke of mentale capaciteit, of bij gebrek aan ervaring en expertise. - Page 135 Let altijd op andere weggebruikers. Het wangedrag van anderen kan leiden tot ● ongevallen en letsels. Rijd altijd voorzichtig en let in het bijzonder op de toestand van de weg. ● Onvoorspelbare wegomstandigheden, zoals gladheid of bladeren, kunnen leiden tot een verhoogd risico op slippen. Spring niet met de scooter en let op gaten in het wegdek, bochten en andere ●...
- Page 136 WAARSCHUWING Voor het gebruik van de batterij Zorg ervoor dat u de batterij alleen met de meegeleverde oplader oplaadt en ● alleen bij temperaturen tussen 5 ° en 35 °C. Volg de veiligheidsinstructies op de batterij. ● Laad nooit de batterij onbewaakt achter bij het opladen. ●...
- Page 137 WAARSCHUWING voor accessoires en wijzigingen Wijzig de elektrische scooter niet of installeer geen onjuiste accessoires, ● aangezien dit uw veiligheid in gevaar brengt. Het gebruik van onbevoegde accessoires kan leiden tot ernstig letsel of schade ● aan de elektrische scooter. 'Aanpassing' of 'Tuning' van de elektrische scooter is verboden.
-
Page 138: Gebruiksaanwijzing
GEBRUIKSAANWIJZING Eenheid identificatie Het serienummer is te vinden op de voor- of achterkant onderaan het voetstuk. ● Neem notitie van het serienummer van uw elektrische scooter. cxxxxxxxxxxxx / emxxxxxxxxxxxxx emxxxxxxxxxxxxx Meer informatie over uw scooter is te vinden op het etiket dat op de scooter is ●... -
Page 139: Batterij-Instructies Voor Gebruik
Batterij-instructies voor gebruik De ingebouwde lithium-ion batterij is een high-tech product dat uitstekende prestaties biedt met een goede behandeling en onderhoud. Lees en volg de paragraaf 'Batterij opladen' in het hoofdstuk 'Bediening' en de instructies voor 'Batterij onderhoud' in het hoofdstuk 'Onderhoud'. Bescherming tegen diefstal Zorg ervoor dat u nooit uw elektrische scooter onbewaakt achterlaat, en bescherm hem altijd tegen diefstal met een passend slot. -
Page 140: Wat Te Doen Na Een Val Of Ongeval
Wat te doen na een val of ongeval Na een val of ongeval, breng uw elektrische scooter naar een erkend servicecentrum en laat hem controleren voor eventuele schade. Reiniging Om corrosie van de schroeven en onnodige slijtage te voorkomen, is het raadzaam om de scooter grondig schoon te maken en te drogen elke drie maanden en na elke rit in de regen. -
Page 141: Instructies Voor Verwijdering
Instructies voor verwijdering Let op het milieu tijdens de verwijdering en volg deze instructies: Verwijder alleen de elektrische scooter en bijbehorende componenten (bijv. ● De batterij) bij een erkend afvalbedrijf of via de verwijderingsinrichting van de gemeenschap. Houd rekening met de huidige voorschriften. In geval van twijfel, raadpleeg ●... -
Page 142: Initiële Setup
✓ ✓ ✓ ✓ ✓ ✗ ✗ em0012 Peugeot ✓ ✓ ✓ ✓ ✓ ✗ ✗ em0006 Micro e-Kick Micro ✓ ✓ ✗ ✗ ✓ ✓ ✗ em0008 Falcon Micro ✓ ✓ ✗ ✗ ✓ ✓ ✓ em0011... -
Page 143: Voor Elke Trip
Voor elke trip De elektrische scooter moet vóór elke trip worden gecontroleerd op zijn rijbaarheid. Het voertuig wordt volledig klaar voor gebruik geleverd door de fabrikant. Aangezien defecten die de functie van het voertuig kunnen schaden, tijdens het transport en onderweg optreden, dient u altijd de volgende punten op te volgen alvorens de scooter voor de eerste keer en voor elke trip te gebruiken: Test item Test inhoud... -
Page 144: Werking
WERKING Ontvouwen en opvouwen Uw elektrische scooter wordt opgevouwen geleverd. In een paar eenvoudige stappen is hij ontvouwen en klaar om te rijden. Hieronder wordt uitgelegd hoe u de scooter kunt ontvouwen. Laat de spanhendel aan de rechterkant van het vouwmechanisme los. Afbeelding: De snelle spanhendel op het Vouwmechanisme... - Page 145 Een klik laat weten dat de scooter volledig uitgevouwen is. Sluit de spanhendel weer aan de zijkant om deze te bevestigen. Afbeelding: De snelle spanhendel open Afbeelding: De snelle spanhendel gesloten Om op te vouwen, voer dezelfde stappen in omgekeerde volgorde uit. Zorg ervoor dat de spanhendel altijd WAARSCHUWING gesloten en volledig vastzit tijdens het...
-
Page 146: Zijstandaard
Zijstandaard De elektrische scooter heeft een zijstandaard. Dit bevindt zich aan de zijkant onder het voetplank, net onder het vouwmechanisme. Vouw de stand altijd naar voren zodat hij weer met de tenen kan worden gevouwen wanneer nodig. Afbeelding: Zijkant uitgevouwen Afbeelding: Zijkant opgevouwen Zorg ervoor dat de zijstandaard altijd goed... -
Page 147: De Batterij Opladen
De batterij opladen Hierna volgt het laadproces: Sluit de lader aan op een stopcontact. Het LED-display op de lader moet nu ● groen worden. Sluit nu de elektrische scooter aan op de lader. U kunt zien dat de lader en ●... -
Page 148: Remmen
Het volgende overzicht illustreert de remmen van uw scooter: emicro ✓ ✗ ✗ em0004 emicro ✓ ✗ ✗ em0012 Peugeot ✓ ✗ ✗ em0006 Micro e-Kick Micro ✓ ✓ ✗ em0008 Falcon Micro ✓ ✓ ✗ em0011 Condor (Korea) micro ✓... -
Page 149: Bediening Van De Voetrem
Vochtige of natte wegoppervlakken vereisen een langere remafstand. Wees WAARSCHUWING voorzichtig en verminder de snelheid op gladde of ongelijke wegoppervlakken. Bediening van de voetrem Verplaats tijdens het remmen het lichaam, zodat het zwaartepunt naar het achterwiel neigt voor de beste remwerking. Uw gewicht naar achteren/ beneden verplaatsen, vermindert de remafstand aanzienlijk. -
Page 150: De Regeneratieve Rem Bedienen
De regeneratieve rem bedienen Om de regeneratieve rem (motorrem) te activeren, draai de gasklep van de nulstand in de rijrichting. U zult onmiddellijk opmerken hoe de elektrische motor rem aanvoelt. Afbeelding: Draairichting voor regeneratieve rem De handrem bedienen De handrem werkt op het voorwiel van uw elektrische scooter. Gebruik deze voorzichtig en oefen met dit remsysteem op een veilig privégebied. -
Page 151: Gashendel
Rijden met de elektrische scooter Rijd langzaam om gewend te raken aan het nieuwe rijgevoel, vooral wanneer u de eerste keer rijdt. Wees er altijd van WAARSCHUWING bewust dat rijden aan hogere snelheden op de elektrische scooter ook leidt tot een langere remafstand. -
Page 152: Cruise Controle
Cruise controle De elektrische scooter heeft een cruise controle. Om de cruise controle te activeren, draai de gasklep twee keer binnen een seconde naar de begrenzing. De elektrische scooter handhaaft vervolgens de huidige snelheid tot een van de remmen is geactiveerd. Bewegingscontrolesysteem Naast de snelheidsbesturing via de gashendel, kan de elektrische scooter ook met behulp van een bewegingscontrole worden bediend. -
Page 153: Rijprogramma's
Rijprogramma's Uw elektrische scooter heeft verschillende rijvoorkeursprogramma's. Bijvoorbeeld, de Eco-modus geeft u de mogelijkheid om comfortabel te reizen voor lange afstanden, terwijl de sportmodus u snel de bergen laat beklimmen. Rijprogramma's voor modellen zonder gasklep Aantal knipperende Maximale Maximale Rijprogramma LED-lampjes prestatie snelheid... - Page 154 X1 ✓ ✗ em0012 emicro one X2 Peugeot Micro ✓ ✗ em0006 e-Kick Micro ✗ ✓ em0008 Falcon X3 Micro Condor ✗ ✓ em0011 X3 (Korea) ✗ ✓ em0014 Micro Eagle X3 ✗ ✓ em0016 Micro Condor X3...
-
Page 155: Setup Via Het Instellingsgereedschap
Setup via het instellingsgereedschap Een kleine pijlpunt wordt gegraveerd op het instellingsgereedschap; U moet ● het gereedschap uitlijnen op deze pijl. Houd het instellingsgereedschap op de cirkelvormige uitsnede op het voetplank. Met het instellingsgereedschap gedraaid en de pijl gericht op de lege cirkels, ●... -
Page 156: Instellen Via De Voetrem
Instellen via de voetrem Als u de rempedaal vier keer kort indrukt, gaat u naar de instelmodus. Dit ● wordt aangegeven door het knipperende LED-display op het voetplateau. Terwijl het LED-display knippert, tik de rem een tot vier keer achtereenvolgens ●... -
Page 157: Onderhoud
ONDERHOUD Om een lange levensduur van uw elektrische scooter te waarborgen, is het noodzakelijk om de scooter een keer per jaar of elke 500 kilometer (wat zich eerst voordoet) naar een erkende dealer of een erkend servicecentrum te brengen. Geef het servicecentrum het service record en zorg ervoor dat de service correct is ingevoerd. -
Page 158: Onderhoud Van Het Vouwmechanisme
Onderhoud van het vouwmechanisme Een opklapbare scooter heeft altijd een bepaalde hoeveelheid speling. Deze wordt mettertijd groter door de gebruikelijke belasting. Om ervoor te zorgen dat u zo lang mogelijk van uw scooter geniet, zullen wij u laten zien hoe u de speling van het vouwmechanisme praktisch kunt verwijderen in een paar eenvoudige stappen: ●... - Page 159 Onderhoud van voorwielrem Het is absoluut noodzakelijk dat u de kabelspanning van de voorwielrem regelmatig opnieuw instelt om precieze remmanoeuvres mogelijk te maken. U kunt de kabelspanning via de instelschroef op de rem zelf aanpassen. Verstel de instelschroef voor voldoende remmen. Afbeelding: Instellen van de instelschroef op de remhendel Onderhoud van schroeven: aandraaimoment...
-
Page 160: Technische Gegevens
TECHNISCHE GEGEVENS Peugeot Micro emicro one X1 emicro one X2 e-Kick Artikelnummer em0004 em0012 em0006 Wielmaat 150 / 125 mm (voor/achter) Gewicht 7,5 kg 8,5 kg ✗ ✗ ✗ Gashendel ✗ ✗ ✗ Voorwielrem Intelligent ✗ ✗ ✗ achterlicht Prestatie... - Page 161 Micro Falcon Micro Falcon Micro Falcon X3 Zwart X3 Zwart X3 Zwart em0008 em0014 em0016 150 / 125 mm 200 / 200 mm 8 kg 9,6 kg 10,8 kg ✓ ✓ ✓ ✗ ✓ ✓ ✓ ✓ ✓ 250 / 350 / 500 W...
-
Page 162: Eg-Verklaring Van Overeenstemming
EG-VERKLARING VAN OVEREENSTEMMING Fabrikant: Micro Mobility Systems Ltd. Bahnhofstrasse 10 8700 Küsnacht Zwitserland Micro Mobility Systems Ltd. Bahnhofstrasse 10 Gemachtigde vertegenwoordiger voor de 8700 Küsnacht verzameling van de technische documentatie: Zwitserland Electrische scooter (E-scooter) Product: em0004 emicro one X1 em0012... -
Page 163: Garantie
We garanderen een resterende capaciteit van 60% van de oorspronkelijke nominale capaciteit. Omvang van de garantiediensten Op basis van deze garantie verbindt Micro zich tot de volgende diensten tijdens de respectieve garantieperiodes: naar keuze van Micro, reparatie of vervanging met gelijkwaardige onderdelen/componenten, waarbij de vervanging van het origineel kan variëren in termen van model en/of kleur;... - Page 164 Schade veroorzaakt door opbergen, opladen of gebruik buiten het ● gespecificeerde temperatuurbereik. Onjuist gebruik, ongepaste toepassing of nalatige bediening (bijv. sprongen). ● ● Onjuiste wijziging door derden (bijv. door het openen van de voetplank). Onjuist laden (bijv. door het laden met een andere lader dan de meegeleverde). ●...
- Page 165 Scheidbaarheidsclausule Als een bepaling van deze garantie ongeldig is of wordt, of mazen heeft die moeten worden gesloten, is dit niet van invloed op de effectiviteit van de overige bepalingen. De ontbrekende of ongeldige bepaling wordt vervangen door een bepaling die zo dicht mogelijk bij de bedoeling en het doel van de oorspronkelijke bepaling komt.
-
Page 166: Emicro-Pass
EMICRO-PASS Vul de emicro-pas volledig in en bewaar deze samen met de aankoopbon. Eigenaar Naam en achternaam Straat / Huisnummer Postcode Land Scooter Serienummer Model Kleur Wielgrootte Speciale kenmerken Aankoopdatum Dealer naam Dealer adres Aankoopprijs... -
Page 167: Service Record
SERVICE RECORD Alle onderhoud van de elektrische scooter moet in het service record worden geregistreerd. Uw elektrische scooter moet eens per jaar of elke 500 kilometer door een erkend servicecentrum worden gecontroleerd. Soort bestelling º Jaarlijks onderhoud º Reparatie Uitvoerdatum Uitgevoerd door Bestellingsnummer Werken uitgevoerd... - Page 168 Soort bestelling º Jaarlijks onderhoud º Reparatie Uitvoerdatum Uitgevoerd door Bestellingsnummer Werken uitgevoerd Uitgevoerd tegen betaling Datum, handtekening, zegel Soort bestelling º Jaarlijks onderhoud º Reparatie Uitvoerdatum Uitgevoerd door Bestellingsnummer Werken uitgevoerd Uitgevoerd tegen betaling Datum, handtekening, zegel...
- Page 170 ÍNDICE DE CONTENIDOS Componentes Información general Manual de usuario ....................173 Explicación de términos y símbolos ..............174 Uso previsto Instrucciones de seguridad 176 – 179 Instrucciones de uso Identificación de la unidad .................. 180 Desgaste ......................... 180 Instrucciones para el uso de la batería ............... 181 Protección antirrobo ....................
- Page 171 Funcionamiento del freno de mano ..............192 Conducción del patinete eléctrico ................193 Puño del acelerador ....................193 Control de velocidad....................194 Sistema de control del movimiento..............194 Programas de conducción ................... 195 Ajuste de los programas de conducción ............196 Ajustes con la Herramienta de Configuración ...........
-
Page 172: Componentes
COMPONENTES Manillar Empuñadura Palanca de sujeción Columna de dirección Freno Abrazadera Mecanismo de plegado Base Cabezal de dirección Alfombrilla antideslizante Horquilla de rueda Rueda... -
Page 173: Información General
INFORMACIÓN GENERAL Manual de usuario Antes de utilizar por primera vez el patinete eléctrico, lea atentamente el manual de usuario, en especial las instrucciones de seguridad. Observe las normas viales para la circulación con patinetes eléctricos aplicables también en otros países y que puedan ser diferentes. -
Page 174: Explicación De Términos Y Símbolos
Explicación de términos y símbolos El propósito de los símbolos de seguridad es llamar su atención sobre los posibles peligros. Lea las explicaciones atentamente y asegúrese de que entiende los símbolos de seguridad. La no observancia de las instrucciones de seguridad puede provocar daños personales o daños a terceros, así... -
Page 175: Uso Previsto
USO PREVISTO El patinete eléctrico está previsto única y exclusivamente para su uso como ● patinete en determinadas carreteras y vías. ● El patinete eléctrico está previsto para el transporte de una persona. El patinete eléctrico ha sido diseñado para personas con un peso máximo de ●... -
Page 176: Instrucciones De Seguridad
INSTRUCCIONES DE SEGURIDAD ADVERTENCIA para el uso del patinete eléctrico No utilice el patinete eléctrico si no está familiarizado con su manejo y sus ● funciones. El patinete no debe ser utilizado por personas con una capacidad física, ● sensorial o mental limitada o que no posean experiencia o competencias. Los niños no deberán utilizar, limpiar ni realizar operaciones de mantenimiento ●... - Page 177 Preste siempre atención a los demás usuarios de la carretera. La conducta ● indebida de otros conductores puede provocar accidentes y lesiones. Circule siempre con cuidado y preste especial atención al estado de la calzada. ● Determinadas condiciones imprevisibles de la calzada como el carácter deslizante o el follaje, pueden desembocar en un mayor riesgo de derrape.
- Page 178 ADVERTENCIA para el uso de la batería Cargue la batería solamente con el cargador suministrado y únicamente a una ● temperatura comprendida entre 5° y 35° C. Siga las siguientes instrucciones relacionadas con la batería: ● No deje nunca desatendida la batería durante la carga. ●...
- Page 179 ADVERTENCIA para accesorios y modificaciones No modifique el patinete eléctrico ni instale accesorios inadecuados ya que ● podría poner en riesgo su seguridad. El uso de accesorios no autorizados podría provocar lesiones graves o daños ● importantes en el patinete eléctrico. Queda prohibida la 'personalización' o 'tuneo' del patinete eléctrico.
-
Page 180: Instrucciones De Uso
INSTRUCCIONES DE USO Identificación de la unidad El número de serie se encuentra situado en la cara inferior delantera o trasera ● de la base. Compruebe el número de serie de su patinete eléctrico. cxxxxxxxxxxxx / emxxxxxxxxxxxxx emxxxxxxxxxxxxx Podrá encontrar más información en la etiqueta adhesiva pegada en el ●... -
Page 181: Protección Antirrobo
Instrucciones de uso de la batería La batería de litio es un producto de alta tecnología que ofrece unos excelentes resultados cuando es manipulada y mantenida correctamente. Lea atentamente el apartado 'Carga de la batería' del capítulo 'Funcionamiento', así como las instrucciones 'Mantenimiento de la batería' del capítulo 'Mantenimiento'. -
Page 182: Qué Hacer Después De Una Caída O Accidente
Qué hacer después de una caída o accidente Tras una caída o accidente, lleve su patinete eléctrico a un centro de asistencia técnica autorizado y pida que lo revisen. Limpieza Para prevenir la corrosión de los tornillos y un desgaste innecesario, se recomienda limpiar la unidad y secarla a conciencia cada tres meses y después de conducir bajo la lluvia. -
Page 183: Instrucciones Para La Eliminación
Instrucciones para la eliminación Respete la normativa medioambiental durante la eliminación y observe las siguientes instrucciones: ● Elimine únicamente el patinete eléctrico y los componentes asociados (por ejemplo, la batería) a través de una empresa de eliminación de residuos autorizada o en las plantas de eliminación de residuos municipales. Observe las normativas actuales. -
Page 184: Configuración Inicial
✓ ✓ ✓ ✓ ✓ ✗ ✗ em0012 Peugeot ✓ ✓ ✓ ✓ ✓ ✗ ✗ em0006 Micro e-Kick Micro ✓ ✓ ✗ ✗ ✓ ✓ ✗ em0008 Falcon Micro ✓ ✓ ✗ ✗ ✓ ✓ ✓ em0011... -
Page 185: Antes De Cada Trayecto
Antes de cada trayecto Antes de cada trayecto deberá comprobar el buen estado de funcionamiento del patinete eléctrico. El vehículo es entregado por el fabricante totalmente listo para su uso. Teniendo en cuenta que durante el transporte, así como durante los períodos de inactividad, pueden aparecer defectos que posiblemente afecten a la función del vehículo, preste siempre atención a los siguientes puntos antes de utilizarlo por primera vez y antes de cada trayecto:... -
Page 186: Funcionamiento
FUNCIONAMIENTO Desplegado y plegado Su patinete eléctrico se entrega plegado. Se despliega en unos pocos y sencillos pasos y ya está listo para su uso. A continuación se explica cómo desplegar el patinete. Suelte la palanca de sujeción situada en el lado derecho del mecanismo de plegado. - Page 187 Un clic le avisará de que el patinete está totalmente desplegado. Ahora cierre de nuevo la palanca de sujeción en el lado para asegurarlo. Imagen: Palanca de sujeción rápida abierta Imagen: Palanca de sujeción rápida cerrada Para desplegar, realice los mismos pasos a la inversa ¡Compruebe que la palanca de sujeción ADVERTENCIA esté...
-
Page 188: Caballete
Caballete El patinete eléctrico dispone de caballete. El caballete está situado debajo de la base, justo debajo del mecanismo de plegado. Pliegue siempre el caballete hacia delante para que, cuando sea necesario, pueda desplegarlo de nuevo con la ayuda de los dedos del pie. Imagen: Caballete desplegado Imagen:... -
Page 189: Carga De La Batería
Carga de la batería A continuación se describe el proceso de carga: Conecte el cargador a una toma de corriente eléctrica. La pantalla LED del ● cargador debería iluminarse de color verde. Conecte ahora el patinete eléctrico al cargador. Verá que el cargador y el ●... -
Page 190: Frenos
El siguiente resumen ilustra los frenos de su patinete: emicro ✓ ✗ ✗ em0004 emicro ✓ ✗ ✗ em0012 Peugeot ✓ ✗ ✗ em0006 Micro e-Kick Micro ✓ ✓ ✗ em0008 Falcon Micro ✓ ✓ ✗ em0011 Condor (Corea) Micro ✓... -
Page 191: Funcionamiento Del Freno De Pie
Las superficies húmedas o mojadas exigen una distancia de frenado más larga. ADVERTENCIA Tenga cuidado y reduzca la velocidad en superficies deslizantes o irregulares. Funcionamiento del freno de pie Durante la frenada, incline el cuerpo de manera que el centro de gravedad apunte hacia la rueda trasera para obtener la mejor frenada. -
Page 192: Funcionamiento Del Freno Regenerativo
Funcionamiento del freno regenerativo Para activar el freno regenerativo (freno del motor), gire el puño del acelerador y pase de la posición cero a la posición del sentido de marcha. De inmediato percibirá la reacción del freno del motor eléctrico. Imagen: Dirección de rotación para el freno regenerativo Funcionamiento del freno de mano... -
Page 193: Conducción Del Patinete Eléctrico
Conducción del patinete eléctrico Circule lentamente para acostumbrarse a la novedosa sensación de conducir, sobre todo la primera vez. No olvide nunca ADVERTENCIA que ir en patinete eléctrico a grandes velocidades exige también una distancia de frenado más larga. Puño del acelerador El patinete eléctrico (generación X3 y superiores) está... -
Page 194: Control De Velocidad
Control de velocidad El patinete eléctrico está equipado con un sistema de control de velocidad. Para activar el control de velocidad, gire dos veces el puño del acelerador hasta el tope en un solo segundo. Seguidamente el patinete eléctrico mantendrá la velocidad actual hasta la activación de uno de los frenos. -
Page 195: Programas De Conducción
Programas de conducción Su patinete eléctrico dispone de varios programas de conducción predefinidos. Por ejemplo, el modo Eco le da la opción de recorrer cómodamente largas distancias, mientras que el modo Deporte le permite subir montañas con rapidez. Programas de conducción para modelos sin puño del acelerador Programas de Número de luces Rendimiento... -
Page 196: Ajuste De Los Programas De Conducción
X1 ✓ ✗ em0012 emicro one X2 Peugeot Micro ✓ ✗ em0006 e-Kick Micro ✗ ✓ em0008 Falcon X3 Micro Condor ✗ ✓ em0011 X3 (Corea) ✗ ✓ em0014 Micro Eagle X3 ✗ ✓ em0016 Micro Condor X3... -
Page 197: Ajustes Con La Herramienta De Configuración
Ajustes con la herramienta de configuración La herramienta de configuración lleva grabada una pequeña punta de ● flecha; alinee la herramienta con esta flecha. Mantenga la Herramienta de configuración en la muesca circular de la base. Gire la herramienta de configuración y alinee la flecha con los círculos vacíos ●... -
Page 198: Ajustes Con El Freno De Pie
Ajustes con el freno de pie Apriete brevemente el pedal del freno cuatro veces para activar el modo ajuste. ● El parpadeo de la pantalla LED situada en la base indica la activación. Durante el parpadeo de la pantalla LED, pulse el freno de una a cuatro veces ●... -
Page 199: Mantenimiento
MANTENIMIENTO Para garantizar una larga vida operativa a su patinete eléctrico, es necesario llevar el patinete a revisión una vez al año o cada 500 kilómetros (lo que primero ocurra) a un concesionario autorizado o a un servicio de asistencia técnica autorizado. Entregue al servicio de asistencia el registro de revisiones y compruebe que la revisión haya sido correctamente anotada. -
Page 200: Mantenimiento Del Mecanismo De Plegado
Mantenimiento del mecanismo de plegado Un patinete plegado presenta siempre una cierta holgura. Esta aumentará con el tiempo debido a la carga habitual. Para que disfrute a tope con su patinete y durante el mayor tiempo posible, le mostraremos cómo eliminar prácticamente la holgura de su mecanismo de plegado en unos pocos y sencillos pasos: ●... -
Page 201: Mantenimiento De Los Tornillos: Par De Apriete
Mantenimiento del freno de la rueda delantera Es imprescindible que reajuste regularmente la tensión del cable del freno de la rueda delantera para permitir unas maniobras de frenado precisas. Puede ajustar la tensión del cable con el tornillo de presión del propio freno. Adapte el tornillo de presión para conseguir una frenada suficiente. -
Page 202: Datos Técnicos
DATOS TÉCNICOS Peugeot Micro emicro one X1 emicro one X2 e-Kick Número de em0004 em0012 em0006 artículo Tamaño de las ruedas (delantera/ 150 / 125 mm trasera) Peso 7,5 kg 8,5 kg Puño del ✗ ✗ ✗ acelerador Freno de la rueda ✗... - Page 203 Micro Falcon Micro Eagle Micro Condor X3 Black X3 Black X3 Black em0008 em0014 em0016 150 / 125 mm 200 / 200 mm 8 kg 9,6 kg 10,8 kg ✓ ✓ ✓ ✗ ✓ ✓ ✓ ✓ ✓ 250 / 350 / 500 W PU / goma Núcleo de espuma / goma...
-
Page 204: Declaración De Conformidad
DECLARACIÓN DE CONFORMIDAD CE Fabricante: Micro Mobility Systems Ltd. Bahnhofstrasse 10 8700 Küsnacht Suiza Micro Mobility Systems Ltd. Bahnhofstrasse 10 Representante autorizado para la recopilación de 8700 Küsnacht la documentación técnica: Suiza Patinete eléctrico (E-scooter) Producto: em0004 emicro one X1... -
Page 205: Garantía
Alcance de los servicios de garantía Sobre la base de esta garantía, Micro se compromete a realizar los siguientes servicios durante los períodos de garantía correspondientes: por decisión de Micro, reparación o sustitución por piezas/componentes equivalentes cuando la sustitución pueda variar del original en términos de modelo y/o color;... - Page 206 Daños causados por el almacenamiento, la carga o el uso fuera del intervalo de ● temperatura especificado. Uso indebido, aplicación inadecuada o conducción negligente (por ejemplo, ● saltos). Modificación indebida por parte de terceros (por ejemplo, apertura de la base). ●...
- Page 207 Cláusula de separabilidad En caso de que una disposición de esta garantía no tenga o deje de tener validez, o bien presente una laguna legal que deba colmarse, esto no afectará a la efectividad de las demás disposiciones. La disposición inexistente o no válida será sustituida por una disposición que se acerque lo máximo posible a la intención y propósito de la disposición original.
-
Page 208: Permiso Emicro
PERMISO EMICRO Rellene el Permiso emicro y guárdelo junto con el recibo de compra. Propietario Nombre y apellidos Calle / número Código postal País Patinete Número de serie Modelo Color Tamaño de las ruedas Características especiales Fecha de compra Nombre del concesionario Dirección del concesionario Precio de compra... -
Page 209: Registro De Servicios
REGISTRO DE SERVICIOS Los mantenimientos del patinete eléctrico deben ser anotados en el registro de servicios. Su patinete eléctrico debe ser revisado por un servicio de asistencia técnica autorizado una vez al año o cada 5000 kilómetros. Tipo de pedido º... - Page 210 Tipo de pedido º Mantenimiento anual º Reparación Fecha de realización Realizado por Número de pedido Trabajos realizados Trabajos realizados de pago Fecha, firma, sello Tipo de pedido º Mantenimiento anual º Reparación Fecha de realización Realizado por Número de pedido Trabajos realizados Trabajos realizados de pago Fecha, firma, sello...
- Page 212 INDICE Componenti Informazioni generali Istruzioni per l’uso ....................215 Spiegazione dei termini e dei simboli ..............216 Uso previsto Istruzioni per la sicurezza 218 – 221 Istruzioni per l’uso Identificativo dell’unità ..................222 Usura ........................222 Istruzioni per l’uso della batteria ................ 223 Protezione contro il furto ..................
- Page 213 Funzionamento del freno manuale ..............234 Utilizzo dello scooter elettrico ................235 Manopola acceleratore ..................235 Cruise control ......................236 Sistema di motion-control ................... 236 Programmi preimpostati ..................237 Selezione dei programmi preimpostati ............. 238 Selezione tramite lo strumento di selezione ............. 239 Selezione tramite il freno a pedale ..............
-
Page 214: Componenti
COMPONENTI Manubrio Manopola Leva di bloccaggio Piantone dello sterzo Freno Morsetto Meccanismo di chiusura Asse Pedana Testa dello sterzo Tappetino antiscivolo Forcella ruota Ruota... -
Page 215: Informazioni Generali
INFORMAZIONI GENERALI Istruzioni per l’uso Prima di iniziare a utilizzare lo scooter elettrico, è importante leggere attentamente il manuale di istruzioni, soprattutto nella parte relativa alla sicurezza. Durante la guida dello scooter elettrico rispettate il codice stradale, che in Paesi stranieri può essere uguale o diverso. Conservare questo manuale di istruzioni per usi futuri. -
Page 216: Spiegazione Dei Termini E Dei Simboli
Spiegazione dei termini e dei simboli Lo scopo dei simboli di sicurezza è quello di portare la vostra attenzione a possibili pericoli. Leggete attentamente le spiegazioni e assicuratevi di aver compreso i simboli di sicurezza. Il mancato rispetto delle istruzioni di sicurezza può... -
Page 217: Uso Previsto
USO PREVISTO Lo scooter elettrico è stato ideato esclusivamente per l’utilizzo come scooter su ● strade e percorsi ben definiti. ● Lo scooter elettrico è stato ideato per il trasporto di una persona. Lo scooter elettrico è stato realizzato per persone con un peso massimo di 100 ●... -
Page 218: Istruzioni Per La Sicurezza
ISTRUZIONI PER LA SICUREZZA AVVERTENZA per l’utilizzo dello scooter elettrico Non utilizzate lo scooter elettrico se non avete una piena familiarità con il suo ● funzionamento e le sue impostazioni. Lo scooter non deve essere utilizzato da persone con capacità fisiche, mentale ●... - Page 219 Fate sempre attenzione alle altre persone. Una condotta scorretta degli altri ● può portare a danni e incidenti. Guidate sempre delicatamente e fate particolare attenzione alle condizioni ● della strada. Condizioni stradali imprevedibili, come la scivolosità o il fogliame, possono aumentare il rischio di sbandamento. Non saltate con lo scooter e assicuratevi sempre di evitare buche, cordoli e altri ●...
- Page 220 AVVERTENZA per l’utilizzo della batteria Assicuratevi di caricare la batteria solo con il caricatore fornito e solo a una ● temperatura tra i 5° e i 35° Celsius. Seguite le istruzioni sulla sicurezza della batteria. ● Non caricate mai la batteria senza sorveglianza. ●...
- Page 221 AVVERTENZA per gli accessori e le modifiche Modificare lo scooter elettrico o installare accessori erroneamente può mettere ● in pericolo la vostra sicurezza. L’utilizzo di accessori non autorizzati può comportare gravi lesioni o ● danneggiare lo scooter elettrico. È vietato personalizzare o modificare lo scooter. ●...
-
Page 222: Istruzioni Per L'uso
ISTRUZIONI PER L’USO Identificativo dell’unità Il numero di serie si trova sia nella parte anteriore o posteriore che sulla ● superficie inferiore della pedana. Annotatevi il numero di serie del vostro scooter elettrico. cxxxxxxxxxxxx / emxxxxxxxxxxxxx emxxxxxxxxxxxxx Maggiori informazioni sul vostro scooter potete trovarle sull’etichetta adesiva ●... -
Page 223: Istruzioni Per L'uso Della Batteria
Istruzioni per l’uso della batteria La batteria agli ioni di litio incorporata è un prodotto high-tech che offre prestazioni eccellenti con una corretta gestione e manutenzione. Leggete e seguite la sezione Caricamento batteria nel capitolo Preparazione e le istruzioni di Manutenzione batteria nel capitolo Manutenzione. -
Page 224: Cosa Fare In Caso Di Caduta O Incidente
Cosa fare in caso di caduta o incidente Dopo una caduta o un incidente, portate il vostro scooter elettrico a un centro servizi autorizzato e fate controllare eventuali danni. Pulizia Per prevenire la corrosione delle viti e una inutile usura, si raccomanda di pulire e asciugare accuratamente il prodotto ogni tre mesi e dopo ogni utilizzo con la pioggia. -
Page 225: Istruzioni Per Lo Smaltimento
Istruzioni per lo smaltimento Fate attenzione all’ambiente durante lo smaltimento e osservate le seguenti istruzioni: ● Smaltite lo scooter elettrico e i relativi componenti (es. batteria) in un centro di smaltimento abilitato oppure negli impianti di raccolta locali. Osservate le disposizioni vigenti. In caso di dubbio, consultate il vostro ●... -
Page 226: Installazione Iniziale
✓ ✓ ✓ ✓ ✓ ✓ ✓ em0012 Peugeot ✓ ✓ ✓ ✓ ✓ ✓ ✓ em0006 Micro e-Kick Micro ✓ ✓ ✓ ✓ ✓ ✓ ✓ em0008 Falcon Micro ✓ ✓ ✓ ✓ ✓ ✓ ✓ em0011... -
Page 227: Prima Di Ogni Utilizzo
Prima di ogni utilizzo Lo scooter elettrico deve essere revisionato prima di ogni utilizzo. Il veicolo viene consegnato dal produttore pronto per l’uso. Durante il trasporto e nei periodi di inutilizzo, possono verificarsi difetti che potenzialmente compromettono la funzionalità del veicolo. Fate sempre attenzione ai seguenti punti prima di utilizzarlo per la prima volta e prima di ogni utilizzo: Elemento da verificare Contenuto della verifica... -
Page 228: Preparazione
PREPARAZIONE Chiusura e apertura Il vostro scooter elettrico è consegnato chiuso. In pochi semplici passaggi, potrete aprirlo e guidarlo. I seguenti punti spiegano come aprire lo scooter. Allentate la leva di bloccaggio sul lato destro del meccanismo di chiusura. Immagine: Leva di bloccaggio veloce sul meccanismo di chisura. - Page 229 Un clic vi avvisa che lo scooter è completamente aperto. Chiudete nuovamente la leva di bloccaggio sul lato per fissarla. Immagine: Leva di bloccaggio veloce aperta Immagine: Leva di bloccaggio veloce chiusa Per richiuderlo, seguire gli stessi passaggi al contrario. Durante la guida assicuratevi che la leva di AVVERTENZA bloccaggio sia sempre chiusa e saldamente...
-
Page 230: Cavalletto Laterale
Cavalletto laterale Lo scooter elettrico dispone di un supporto laterale. È posizionato lateralmente sotto alla pedana, appena sotto al meccanismo di chiusura. Ripiegate sempre il cavalletto in avanti, al bisogno potrà essere tirato verso il basso con la punta del piede. -
Page 231: Caricamento Batteria
Caricamento batteria I seguenti passaggi descrivono il processo di caricamento: Connettere il caricatore a una presa elettrica. Il display LED sul caricatore deve ● essere illuminato in verde. Ora collegare lo scooter elettrico al caricatore. Capite che il caricatore e lo ●... -
Page 232: Freni
Il seguente prospetto mostra i freni del vostro scooter: emicro ✓ ✓ ✓ em0004 emicro ✓ ✓ ✓ em0012 Peugeot ✓ ✓ ✓ em0006 Micro e-Kick Micro ✓ ✓ ✓ em0008 Falcon Micro ✓ ✓ ✓ em0011 Condor (Korea) Micro ✓... -
Page 233: Funzionamento Del Freno A Pedale
Guidare su superfici bagnate o umide può comportare una distanza di frenata AVVERTENZA più lunga. Fate attenzione e limitate la velocità su superfici scivolose o sconnesse. Funzionamento del freno a pedale Durante la frenata, sbilanciate il peso del corpo in modo che il centro di gravità sia spostato verso la ruota posteriore per ottenere una migliore frenata. -
Page 234: Funzionamento Del Freno Rigenerativo
Funzionamento del freno rigenerativo Per attivare il freno rigenerativo (freno motore), ruotate la manopola dell’acceleratore fino alla posizione zero nella direzione di marcia. Sentirete immediatamente la sensazione del freno motore elettrico. Immagine: Direzione di rotazione del freno rigenerativo Funzionamento del freno manuale Il freno manuale agisce sulla ruota anteriore del vostro scooter elettrico. -
Page 235: Manopola Acceleratore
Guida dello scooter elettrico Guidate lentamente per abituarvi a questa nuova sensazione, soprattutto se è la prima volta. Ricordate sempre che guidare AVVERTENZA ad alta velocità sullo scooter elettrico comporta una distanza di frenata più lunga. Manopola acceleratore Lo scooter elettrico (generazione X3 e superiori) è dotato di una manopola dell’acceleratore che regola la velocità. -
Page 236: Cruise Control
Cruise control Lo scooter elettrico dispone del cruise control. Per attivare il cruise control, ruotare al massimo la manopola dell’accelerazione due volte in un secondo. Lo scooter elettrico manterrà la velocità corrente fino all’attivazione di uno dei freni. Sistema di motion-control Oltre al controllo della velocità... -
Page 237: Programmi Preimpostati
Programmi preimpostati Il vostro scooter elettrico è dotato di diversi programmi preimpostati. Per esempio, la modalità Eco vi consente di percorrere comodamente lunghe distanze mentre la modalità Sport vi permette di scalare velocemente le montagne. Programmi preimpostati per modelli senza manopola dell’acceleratore Programmi Numero di luci LED Prestazione... -
Page 238: Selezione Dei Programmi Preimpostati
X1 ✓ ✓ em0012 emicro one X2 Peugeot Micro ✓ ✓ em0006 e-Kick Micro ✓ ✓ em0008 Falcon X3 Micro Condor ✓ ✓ em0011 X3 (Korea) ✓ ✓ em0014 Micro Eagle X3 ✓ ✓ em0016 Micro Condor X3... -
Page 239: Selezione Tramite Lo Strumento Di Selezione
Selezione tramite lo strumento di selezione Sullo strumento di selezione è presente una piccola freccia che deve essere ● allineata allo strumento. Tenete lo strumento di selezione sulla sagoma circolare sulla pedana. Ruotando lo strumento, allineate la freccia ai cerchietti vuoti per selezionare ●... -
Page 240: Selezione Tramite Il Freno A Pedale
Selezione tramite freno a pedale Premere rapidamente il freno a pedale per quattro volte vi farà accedere alla ● modalità di selezione. Questa sarà indicata dal lampeggiamento del display LED sulla pedana. Mentre il display LED lampeggia, premete il freno da una a quattro volte in ●... -
Page 241: Manutenzione
MANUTENZIONE Per garantire un funzionamento di lunga durata del vostro scooter elettrico, è necessario farlo revisionare una volta all’anno oppure ogni 500 chilometri (la situazione che si verifica per prima) in un rivenditore o in un centro servizi autorizzati. Fornite al centro servizi il libretto di manutenzione e assicuratevi che la manutenzione venga registrata correttamente. -
Page 242: Manutenzione Meccanismo Di Chiusura
Manutenzione meccanismo di chiusura Tutti gli scooter pieghevoli hanno un po’ di gioco che può aumentare con il tempo a causa del normale carico. Per garantirvi di poter godere del vostro scooter il più a lungo possibile, vi mostriamo come rimuovere in pochi semplici passaggi il gioco del meccanismo di chiusura: ●... -
Page 243: Manutenzione Delle Viti: Coppia
Accensione e spegnimento dei fanali È necessario regolare periodicamente la tensione del cavo del freno della ruota frontale per permettere una precisa manovra di frenata. Potete regolare la tensione del cavo anche tramite la vite presente sul freno stesso. Regolate la vite per ottenere una frenata sufficiente. -
Page 244: Dati Tecnici
DATI TECNICI Peugeot Micro emicro one X1 emicro one X2 e-Kick Numero articolo em0004 em0012 em0006 Dimensioni ruota 150 / 125 mm (anteriore/ posteriore) Peso 7,5 kg 8,5 kg Manopola ✓ ✓ ✓ acceleratore Freno ruota ✓ ✓ ✓ anteriore Fanale ✓... - Page 245 Micro Falcon Micro Eagle Micro Condor X3 Black X3 Black X3 Black em0008 em0014 em0016 150 / 125 mm 200 / 200 mm 8 kg 9,6 kg 10,8 kg ✓ ✓ ✓ ✓ ✓ ✓ ✓ ✓ ✓ 250 / 350 / 500 W...
-
Page 246: Dichiarazione Di Conformità
DICHIARAZIONE CE DI CONFORMITÀ Produttore: Micro Mobility Systems Ltd. Bahnhofstrasse 10 8700 Küsnacht Svizzera Micro Mobility Systems Ltd. Bahnhofstrasse 10 Rappresentante autorizzato per la compilazione 8700 Küsnacht della documentazione tecnica: Svizzera Scooter elettrico (E-scooter) Prodotto: em0004 emicro one X1 em0012... -
Page 247: Garanzia
Ambito di applicazione garanzia Secondo questa garanzia, Micro si impegna a svolgere i seguenti servizi durante i rispettivi periodi di garanzia: a discrezione di Micro, la riparazione o la sostituzione con parti/componenti equivalenti, anche se la parte sostituita potrebbe variare in termini di modello e/o colore;... - Page 248 Conservazione, ricarica o utilizzo al di fuori dell’intervallo di temperature ● indicato. Utilizzo improprio, applicazione inappropriata o uso negligente (es. salti). ● ● Alterazione impropria da terze parti (es. apertura della pedana). Ricarica impropria (es. utilizzo di un caricatore diverso da quello fornito). ●...
- Page 249 Clausola salvatoria Se qualsiasi disposizione della presente garanzia è o diventa invalida o ha una lacuna che deve essere colmata, questa non ha l’effetto di invalidare le restanti disposizioni. Qualunque disposizione mancante o invalida deve essere sostituita con una disposizione che deve essere il più vicino possibile all’intento e allo scopo di quella iniziale.
- Page 250 EMICRO-PASS Compilate interamente l’emicro-Pass e conservatelo insieme alla fattura di acquisto. Proprietario Nome e cognome Via / Numero civico Codice postale Paese Scooter Numero di serie Modello Colore Dimensioni ruota Caratteristiche speciali Data di acquisto Nome rivenditore Indirizzo rivenditore Prezzo di acquisto...
-
Page 251: Libretto Di Manutenzione
LIBRETTO DI MANUTENZIONE Qualunque manutenzione dello scooter elettrico deve essere registrata in questo libretto di manutenzione. Il vostro scooter elettrico deve essere revisionato da un centro servizi autorizzato una volta all’anno oppure ogni 500 chilometri. Tipo di ordine º Manutenzione annuale º... - Page 252 Tipo di ordine º Manutenzione annuale º Riparazione Data di esecuzione Eseguito da Numero di ordine Lavori eseguiti Eseguiti a pagamento Data, firma e timbro Tipo di ordine º Manutenzione annuale º Riparazione Data di esecuzione Eseguito da Numero di ordine Lavori eseguiti Eseguiti a pagamento Data, firma e timbro...
- Page 254 СОДЕРЖАНИЕ Компоненты Общая информация Руководство пользователя ................257 Пояснение терминов и символов ..............258 Предназначение Инструкции по безопасности 260 – 263 Инструкции пользователя Идентификация устройства ................264 Износ ........................264 Инструкции пользования аккумулятором ............. 265 Защита от угона ....................265 Транспортировка электрического скутера .............265 Хранение...
- Page 255 Ручной тормоз ...................... 276 Передвижение на электрическом скутере ............277 Ручка газа ......................277 Система автоматического поддержания заданной скорости ....278 Система управления движением ..............278 Программы движения ..................279 Настройка программ движения ................280 Настройка с помощью Setting Tool (Инструмент настройки) ..... 281 Настройка...
-
Page 256: Компоненты
КОМПОНЕНТЫ Руль Ручка Зажимная рукоятка Колонка рулевого управления Тормоза Зажим Механизм складывания Вал Подножная доска Вилка поворотного кулака Противоскользящее покрытие Вилка колеса Колесо... -
Page 257: Общая Информация
ОБЩАЯ ИНФОРМАЦИЯ Руководство пользователя Перед началом использования электрического скутера внимательно ознакомьтесь с руководством пользователя, особенно с инструкциями по безопасности. Также ознакомьтесь с правилами вождения электрических скутеров, которые действуют в других странах и могут отличаться друг от друга. Сохраните данное руководство пользователя для дальнейшего использования. -
Page 258: Пояснение Терминов И Символов
Пояснение терминов и символов Цель символов безопасности — обратить ваше внимание на возможные опасности. Внимательно прочтите пояснение и убедитесь, что понимаете символы безопасности. Несоблюдение инструкций по безопасности может привести к личным травмам или травмированию третьих сторон, а также к порче имущества. В... -
Page 259: Предназначение
ПРЕДНАЗНАЧЕНИЕ Электрический скутер предназначен для использования исключительно ● на отведенных для скутера дорогах и тропинках. ● Электрический скутер предназначен для использования одним человеком. Электрический скутер разработан для людей с максимальным весом в 100 ● кг и максимальным ростом в 190 см. ●... -
Page 260: Инструкции По Безопасности
ИНСТРУКЦИИ ПО БЕЗОПАСНОСТИ МЕРЫ ПРЕДО- по использованию электрического СТОРОЖНОСТИ скутера Не используйте электрический скутер, если вы не совсем знакомы с ● принципом его работы и его функциями. Скутер не должны использовать люди с ограниченными физическими, ● органолептическими или умственными способностями, а также люди, имеющие... - Page 261 Всегда обращайте внимание на других участников дорожного движения. ● Нарушение правил по отношению к другим участникам может привести к несчастным случаям и травмам. ● Всегда двигайтесь аккуратно и обращайте внимание на условия на дороге. Непредсказуемые дорожные условия, например, скользкая поверхность или растительность, могут увеличить риск заноса. ●...
- Page 262 МЕРЫ ПРЕДО- по использованию аккумулятора СТОРОЖНОСТИ Всегда заряжайте аккумулятор только зарядным устройством, поставляемым ● в комплекте, и только при температуре от 5° до 35° Цельсия. Соблюдайте инструкции по безопасности для аккумулятора. ● Никогда не оставляйте аккумулятор на зарядке без присмотра. ●...
- Page 263 МЕРЫ ПРЕДО- по использованию комплектующих и СТОРОЖНОСТИ переустройству Не вносите технические изменения и не устанавливайте ненадлежащие ● комплектующие на электрический скутер, поскольку это поставит вашу безопасность под угрозу. Использование ненадлежащих комплектующих может вызвать серьезные ● травмы или повреждение электрического скутера. «Адаптация»...
-
Page 264: Инструкции Пользователя
ИНСТРУКЦИИ ПОЛЬЗОВАТЕЛЯ Идентификация устройства Серийный номер набит с внутренней стороны передней или задней ● части подножки. Обратите внимание на серийный номер вашего электрического скутера. cxxxxxxxxxxxx / emxxxxxxxxxxxxx emxxxxxxxxxxxxx Дополнительную информацию о вашем скутере можно найти на ● маркировке, наклеенной на скутер. Износ... -
Page 265: Транспортировка Электрического Скутера
Инструкции по использованию аккумулятора Встроенный литий-ионный аккумулятор является высоко технологическим продуктом, который обеспечивает высокую производительность и правильное управление и техническое обслуживание. Прочтите и соблюдайте инструкции раздела «Зарядка аккумулятора» в главе «Эксплуатация» и инструкции раздела «Техническое обслуживание аккумулятора» в главе «Техническое обслуживание». Противоугонная... -
Page 266: Действия При Падении Или Несчастном Случае
Действия при падении или несчастном случае В случае падения или несчастного случая отнесите ваш электрический скутер в авторизированный сервисный центр с целью проверки на наличие повреждений. Очистка Для предотвращения коррозии винтов и излишнего истирания рекомендуется тщательно очищать и высушивать прибор каждые три месяца... -
Page 267: Инструкции По Утилизации
Инструкции по утилизации При утилизации учитывайте окружающую среду и соблюдайте следующие инструкции: ● Утилизируйте электрический скутер и сопутствующие компоненты (например, аккумулятор) через соответствующие компании или сообщества по утилизации. Изучите действующее законодательство. В случае сомнений обратитесь ● в ваши органы по утилизации для экологически безопасной утилизации. Аккумуляторы... -
Page 268: Начальная Настройка
✓ ✓ ✓ ✓ ✓ ✗ ✗ em0012 Peugeot ✓ ✓ ✓ ✓ ✓ ✗ ✗ em0006 Micro e-Kick Micro ✓ ✓ ✗ ✗ ✓ ✓ ✗ em0008 Falcon Micro ✓ ✓ ✗ ✗ ✓ ✓ ✓ em0011... -
Page 269: Перед Каждой Поездкой
Перед каждой поездкой Перед каждой поездкой электрический скутер необходимо проверять на готовность к движению. Транспортное средство поставляется производителем в готовом к использованию виде. Поскольку дефекты, потенциально влияющие на работу транспортного средства, могут проявиться как во время транспортировки, так и при передвижении, всегда обращайте... -
Page 270: Эксплуатация
ЭКСПЛУАТАЦИЯ Складывание и раскладывание Электрический скутер поставляется в сложенном состоянии. Несколько простых движений — скутер разложен и готов к использованию. Ниже приводятся объяснения того, как разложить скутер. Освободите зажимную рукоятку с правой стороны механизма раскладывания. Изображение: Фиксирующий зажим на механизме складывания Нажмите... - Page 271 Щелчок укажет на то, что скутер полностью разложен. Защелкните зажимную рукоятку обратно в сторону, чтобы спрятать ее. Изображение: Фиксирующий зажим открыт Изображение: Фиксирующий зажим закрыт Чтобы сложить скутер, выполните эти же действия в обратном порядке. Всегда следите, чтобы во время МЕРЫ...
-
Page 272: Боковая Подножка
Боковая подножка У электрического скутера есть боковая подножка. Она расположена под подножной доской непосредственно под механизмом раскладывания. Всегда выставляйте подножку вперед, чтобы при необходимости ее можно было обратно сложить ногой. Изображение: Боковая подножка разложена Изображение: Боковая подножка сложена Во время каждой поездки проверяйте, МЕРЫ... -
Page 273: Зарядка Аккумулятора
Зарядка аккумулятора Ниже описан процесс зарядки аккумулятора: Включите зарядное устройство в розетку. ЖК-экран на зарядном ● устройстве должен засветиться зеленым. Затем подключите электрический скутер к зарядному устройству. Вы ● увидите, что скутер подключен к зарядному устройству правильно, когда ЖК-экран на блоке питания станет красным (это может занять несколько секунд). -
Page 274: Тормоза
перегрева. Ниже приведен обзор тормозов вашего скутера: emicro ✓ ✗ ✗ em0004 emicro ✓ ✗ ✗ em0012 Peugeot ✓ ✗ ✗ em0006 Micro e-Kick Micro ✓ ✓ ✗ em0008 Falcon Micro ✓ ✓ ✗ em0011 Condor (Korea) Micro ✓ ✓... -
Page 275: Ножной Тормоз
Мокрые или влажные дорожные МЕРЫ ПРЕДО- поверхности увеличивают тормозной путь. Будьте осторожны и снижайте СТОРОЖНОСТИ скорость на скользких или неровных дорожных поверхностях. Ножной тормоз Во время торможения переместите тело таким образом, чтобы центр тяжести был ближе к заднему колесу для наилучшей работы тормозов. Перенос... -
Page 276: Регенеративный Тормоз
Регенеративный тормоз Чтобы активировать регенеративный тормоз (тормоз двигателя) поверните ручку газа от положения ноль в направлении движения. Вы сразу же почувствуете как срабатывает тормоз электродвигателя. Изображение: Направление поворота для регенеративного тормоза Ручной тормоз Ручной тормоз срабатывает на переднем колесе вашего электрического скутера. -
Page 277: Ручка Газа
Управление электрическим скутером Двигайтесь медленно, чтобы привыкнуть к новому ощущению МЕРЫ ПРЕДО- движения, особенно если пользуетесь СТОРОЖНОСТИ скутером первый раз. Всегда помните, что движение на высоких скоростях на электрическом скутере также приводит к увеличению тормозного пути. Ручка газа Электрический скутер (поколение Х3 и выше) оснащен ручкой газа, которая регулирует... -
Page 278: Система Автоматического Поддержания Заданной Скорости
Система автоматического поддержания заданной скорости Электрический скутер оснащен системой автоматического поддержания заданной скорости. Чтобы активировать систему автоматического поддержания заданной скорости, дважды в течение секунды поверните ручку газа до предела. Затем электрический скутер будет поддерживать заданную скорость до тех пор, пока не будут активированы тормоза. Система... -
Page 279: Программы Движения
Программы движения Ваш электрический скутер оснащен несколькими заданными программами движения. Например, режим Eco дает возможность комфортно путешествовать на дальние расстояние, в то время как режим Sport позволяет быстро взбираться на возвышенности. Программы движения для моделей без ручки газа. Количество Программа Максимальная... -
Page 280: Настройка Программ Движения
X1 ✓ ✗ em0012 emicro one X2 Peugeot Micro ✓ ✗ em0006 e-Kick Micro ✗ ✓ em0008 Falcon X3 Micro Condor ✗ ✓ em0011 X3 (Korea) ✗ ✓ em0014 Micro Eagle X3 ✗ ✓ em0016 Micro Condor X3... -
Page 281: Настройка С Помощью Setting Tool (Инструмент Настройки)
Настройка с помощью Setting Tool (Инструмент настройки) На Setting Tool (Инструмент настройки) выгравирована маленькая ● стрелочка; необходимо выровнять инструмент по этой стрелочке. Направляйте Setting Tool (Инструмент настройки) по круглым наклейкам на подножной доске. Поворачивая Setting Tool (Инструмент настройки) и выравнивая стрелку ●... -
Page 282: Настройка С Помощью Ножного Тормоза
Настройка с помощью ножного тормоза Если четыре раза резко нажать педаль тормоза, то вы перейдете в режим ● настройки. Он будет обозначен миганием ЖК-экрана на подножной доске. Пока мигает ЖК-экран нажмите тормоз от одного до четырех раз в ● зависимости от программы, которую хотите активировать (1 = режим Pedestrian, 2 = режим... -
Page 283: Техническое Обслуживание
ТЕХНИЧЕСКОЕ ОБСЛУЖИВАНИЕ Чтобы продлить срок службы вашего электрического скутера, необходимо проводить его техосмотр один раз в год или каждые 500 км (в зависимости от того, что случится раньше) у авторизированного дилера или в авторизированном сервисном центре. Предоставьте сервисному центру записи о выполненных услугах и убедитесь, что новая запись была сделана правильно. -
Page 284: Техническое Обслуживание Механизма Складывания
Техническое обслуживание механизма складывания Складывающийся скутер всегда немного «играет». Со временем он будет «играть» еще больше из-за постоянной нагрузки. Чтобы вы как можно дольше наслаждались работой скутера, мы покажем вам, как несколькими простыми движениями уменьшить «игру» механизма складывания: ● Откройте быстрый фиксатор и впрысните немного смазки на поверхность трения... -
Page 285: Техническое Обслуживание Винтов: Динамометрический Гаечный Ключ
Техническое обслуживание тормоза переднего колеса Крайне важно, чтобы вы регулярно проверяли натяжение провода тормоза переднего колеса для выполнения точных тормозных движений. Вы можете регулировать натяжение провода с помощью винтов на самом тормозе. Отрегулируйте винты для удовлетворительной работы тормозов. Изображение: Регулировка винтов на тормозном рычаге Техническое... -
Page 286: Технические Данные
ТЕХНИЧЕСКИЕ ДАННЫЕ Peugeot Micro emicro one X1 emicro one X2 e-Kick Номер артикула em0004 em0012 em0006 Размер колеса (переднего/ 150 / 125 мм заднего) Вес 7,5 кг 8,5 кг ✗ ✗ ✗ Ручка тормоза Тормоз переднего ✗ ✗ ✗ колеса... - Page 287 Micro Falcon Micro Eagle Micro Condor X3 Black X3 Black X3 Black em0008 em0014 em0016 150 / 125 мм 200 / 200 мм 8 кг 9,6 кг 10,8 кг ✓ ✓ ✓ ✗ ✓ ✓ ✓ ✓ ✓ 250 / 350 / 500 Вт...
-
Page 289: Гарантия
Гарантийные услуги На основе этой гарантии в течение указанного гарантийного срока компания Micro предоставляет следующие гарантийные услуги: на усмотрение компании Micro ремонт или замена на равноценные части или комплектующие в случае, если они отличаются от оригинальных по модели и/или цвету;... - Page 290 Повреждение, вызванное хранением, зарядкой или использованием за ● пределами указанных температур. Неправильное использование, несоответствующее или запрещенное ● применение (например, прыжки). Неправильное изменение третьими лицами (например, открытие ● подножной доски). Неправильная зарядка (например, зарядка с помощью зарядного ● устройства, отличного от поставленного). Превышение...
- Page 291 Положение о действительности гарантии в случае недействительности одной из ее статей Если любое положение настоящей гарантии является или становится недействительным или имеет пробел, который должен быть заполнен, то это не повлияет на действительность других ее положений. Недостающее или недействительное положение необходимо заменить положением, чье содержание...
- Page 292 ТАЛОН EMICRO Полностью заполните Талон emicro и храните его вместе с чеком покупки. Владелец ФИО Улица / номер дома Почтовый индекс Страна Скутер Серийный номер Модель Цвет Размер колеса Особые характеристики Дата покупки Имя дилера Адрес дилера Стоимость покупки...
- Page 293 ПРЕДОСТАВЛЕННЫЕ УСЛУГИ Информация о любом техническом обслуживании электрического скутера должна быть внесена в запись о предоставленных услугах. Электрический скутер необходимо проверять в авторизированном сервисном центре один раз в год или каждые 500 км пробега. Тип заказа º Годовой техосмотр º Ремонт...
- Page 294 Тип заказа º Годовой техосмотр º Ремонт Дата выполнения Выполнено Номер заказа Выполненные работы Выполнено после оплаты Дата, подпись, печать Тип заказа º Годовой техосмотр º Ремонт Дата выполнения Выполнено Номер заказа Выполненные работы Выполнено после оплаты Дата, подпись, печать...
- Page 296 目录 部件 基本信息 用户指南........................299 术语说明和标志 ...................... 300 预期用途 安全守则 302 – 305 使用说明 批号 ......................... 306 磨损与破裂 ......................306 电池使用说明 ......................307 防盗 ......................... 307 运输 ..........................307 储存 ......................... 307 跌倒或意外事故处理措施 ..................308 清洁 ......................... 308 修理 ......................... 308 废弃处置说明 ......................309 初始设置...
- Page 297 使用手刹........................318 骑行电动滑板车 .......................319 电门把手 ........................319 定速巡航........................320 运动控制系统 ......................320 骑行模式 ........................321 设置骑行模式 ......................322 通过调整旋钮设置 ....................323 通过脚刹设置 ......................324 开关车灯 ........................324 维护 电池维护 ........................325 折叠机构维护 ......................326 前轮维护 ........................327 螺丝维护:扭矩 ...................... 327 328 – 329 技术参数...
- Page 298 部件 车把手 手柄 快拆夹 转向杆 刹车 锁紧扣 折叠机构 轮轴 踏脚板 转向头 防滑垫 轮叉 车轮...
-
Page 299: 基本信息
基本信息 用户指南 使用本电动滑板车前,请务必仔细阅读用户指南 , 特别是安全守则部分。请遵守骑行电 动滑板车的相关道路交通规则 ( 在其他国家也适用,可能会有所不同 )。请妥善保管本 指南,以备将来参考。若将本车转交给第三方,请务必将本指南一并转交。... -
Page 300: 术语说明和标志
术语说明和标志 安全标志的用途是提醒您注意可能发生的危险。请仔细阅读本说明,确保您完全理解安 全标志的含义。不遵守安全守则有可能造成人身伤害、第三方人身伤害以及财产损失。 本原始用户指南内、电动滑板车上或包装中使用以下标志和信号词: 警告 表示具有潜在的中级风险,若未注意到可能造成严重或致命人身伤害。 本信号词不用于表示仅造成单纯材料损坏的风险。 注意 表示具有潜在的低级风险,若未注意到可能造成轻微或中度人身伤害。 本信号词不用于表示仅造成单纯材料损坏的风险。 注意 表示实用信息和提示, 有助于您更合理地使用本电动滑板车。... -
Page 301: 预期用途
预期用途 ● 本电动滑板车仅可作为滑板车在指定的道路和小路上使用。 ● 本电动滑板车仅可供单人骑行。 本电动滑板车的最大承重为 100 公斤,骑行人员最高身高为 190 厘米。 ● ● 使用本电动滑板车前,请确保阅读并理解您所在国家的道路交通法规。 ● 本电动滑板车不适合于载运行李或儿童。 ● 本电动滑板车仅供私人使用,不得用于商业用途。 本电动滑板车适合 18 岁以上成人骑行。 ● ● 预期用途还包括遵守“使用说明”和“维护”章节中内容的用途。 ● 本电动滑板车仅可按照原始用户指南中所述之用途使用。做任何其他类型之用途均 视为非合规用途,有可能造成意外事故、人身伤害或财产损失。... -
Page 302: 安全守则
安全守则 警告 使用电动滑板车 ● 在未完全熟悉操作和功能的情况下,请勿使用本电动滑板车。 ● 身体、感官、精神不健全或经验、专业技巧不足的人禁止骑行本电动滑板车。 ● 儿童不得使用、清洁或维护本电动滑板车。 ● 附加的电子辅助制动装置 (电机制动器) 可以缩短制动距离。请注意, 若出现以下情况, 则电机制动器无法使用 ... • 电池电量耗光,靠自力骑行。 • 电池电量为 100%,因此无法再生能量。 ● 请避免在黄昏或视线不佳的环境中骑行。 ● 为了获得最佳的能见度和安全性,请为本电动滑板车安装车灯,并在骑行过程中时 刻开启车灯。 ● 请始终穿戴好适当的防护装备。 ● 即使没有法定要求,也请务必佩戴经核准且贴合的骑行头盔。 ● 请务必穿鞋骑行。 ● 请勿在陡峭的下坡路上骑行,以免失控摔倒。... - Page 303 ● 请始终留意道路上的其他车辆和行人。其他人的不当行为可能会引起意外事故和人 身伤害。 ● 请一定缓慢骑行,要特别注意路面的情况。如路面打滑或有落叶之类的不可预知路 面情况可能会增加侧滑的风险。 ● 请勿骑滑板车做跳跃动作,一定要避开坑洼、路缘等障碍物。 ● 长时间制动后请勿触碰刹车 ; 可能很热。 ● 如果本电动踏板车因潮湿天气或清洁而暴露在潮湿的环境中,湿气可能会影响刹车 系统的响应能力。清洁后,请在安全的地方骑行,令刹车干燥。 ● 切勿将本电动滑板车存放于生活区或靠近易燃物的地方。 警告 用于辅助蹬踏骑行模式时 ● 请注意, 电机驱动骑行模式需要良好的骑行习惯。骑行时, 请确保身体前倾, 不要后仰, 否则加速时前轮可能会抬离地面。 ● 切勿采用鞋底摩擦地面方式进行刹车。这一动作将激活运动控制系统(辅助蹬踏) , 从而触发运动传感器,使电机加速。 ● 切勿采用电机驱动模式在人行道上骑行。...
- Page 304 警告 使用电池 仅可使用随附的充电器给电池充电,而且只可在 5° C 和 35° C 之间的温度时充电。 ● ● 请遵守电池安全守则。 ● 无人看管时切勿给电池充电。 ● 电池充电时,请确保插头正确连接、通风良好、环境干燥。 ● 切勿使充电器、电源和连接电缆与水接触,否则可能会导致触电。手湿的情况下切勿 触摸电池和充电器。 ● 请定期检查连接插头和充电器。如有损坏请立即更换。 请始终将电池存放于温度在 5° C 和 35° C 之间的环境中。 ● ● 请始终将电池置于儿童和动物无法接触的地方。 ● 电池或充电器的任何修理和维护工作务必由专业人员来完成。...
- Page 305 警告 配件和改装 ● 请勿改装电动滑板车或安装错误的配件,否则会使您的安全受到威胁。 ● 使用未经授权的配件可能造成严重的人身伤害或损坏电动滑板车。 ● 禁止对本电动滑板车进行“改装”或“调校”。 ● 请勿将手提袋等物品挂在车把手上,否则会对操控性能产生不利影响。 警告 安装、维护和修理 ● 螺丝未正确拧紧可能造成材料疲劳。应力过大时,螺丝会变软,并且有可能破裂。 这种情况会增加意外事故和受伤的风险。因此,请一定使用扭矩扳手拧紧螺丝。 ● 有关驱动系统的修理问题,请一定咨询专业人员。...
-
Page 306: 使用说明
使用说明 批号 ● 踏脚板背面前后部均印有产品序列号。请注意电动滑板车的产品序列号。 cxxxxxxxxxxxx / emxxxxxxxxxxxxx emxxxxxxxxxxxxx ● 有关本电动滑板车的更多信息,请查看贴于车上的胶贴标签。 磨损与破裂 本电动滑板车在使用过程中会产生自然磨损与破裂。为始终确保骑行安全,请阅读本指 南‘维护’章节内容,遵守维护周期并由授权服务中心将其记录在服务记录中。另外, 每次启动本电动滑板车时均应遵循‘每次骑行前’章节的说明。... -
Page 307: 电池使用说明
电池使用说明 内置的锂离子电池是高科技产品,在正确处理和维护下可提供卓越性能。请阅读并遵 守‘操作’章节中的‘电池充电’内容以及‘维护’章节中的‘电池维护’说明。 注意防盗 请确保电动滑板车有人看管,并安装匹配的车锁,以防被盗。使用市面有售的自行车锁, 在折叠机构区锁好,确保电动滑板车的安全。 运输电动滑板车 电池受危险物品运输法规的约束。通过第三方进行运输时需满足特殊的包装和标签要求 (例如空运或包裹运送服务) 。需要装运时,请与危险物品专家联系。请勿运输或装运损 坏的电池。 储存 请勿将本电动滑板车长时间置于阳光直射处或寒冷的天气中。本电动滑板车和电池的理 想储存温度范围为 15° 至 20°C。将本电动滑板车存放于车库内,请勿放于生活区。... -
Page 308: 跌倒或意外事故处理措施
跌倒或意外事故处理措施 跌倒或发生意外事故后,请将电动滑板车送到授权服务中心检测是否出现损坏。 清洁 为了防止螺丝生锈以及不必要的磨损与破裂,建议每三个月和每次雨天骑行后对滑板车 进行彻底清洁和干燥。清洁后,用清水冲洗滑板车,保证无清洁剂残留。然后用布将滑 板车擦干。 使用特定的清洁剂、保养产品及专用软海绵。 注意 切勿使用溶剂清洁滑板车,避免直接在自来水 下冲洗。 修理 由授权经销商或授权服务中心执行所有修理工作。请勿自行对电气部件进行任何修理。 只有专业人员才可打开内置电气部件的壳体。... -
Page 309: 废弃处置说明
废弃处置说明 处理废弃滑板车时,请注意周围环境并遵守以下说明 : ● 只能在获得批准的废弃处置公司或通过社区废弃设施处理废弃的电动滑板车和相关 部件(例如电池) 。 ● 请遵守现行法规。若有疑问,请向所使用的废弃设施厂家咨询是否进行了无害环境处 理。禁止将电池和电器与生活垃圾一同废弃!... -
Page 310: 初始设置
✓ ✓ ✓ ✓ ✓ ✗ ✗ em0012 Peugeot ✓ ✓ ✓ ✓ ✓ ✗ ✗ em0006 Micro e-Kick Micro ✓ ✓ ✗ ✗ ✓ ✓ ✗ em0008 Falcon Micro ✓ ✓ ✗ ✗ ✓ ✓ ✓ em0011... -
Page 311: 每次骑行前
每次骑行前 每次骑行本电动滑板车前,请务必检查车辆性能。本车在制造商交付时即完全准备就 绪,可供骑行。因车辆在运输期间以及任何非运输时期会出现可能使功能受损的缺陷, 所以在首次使用前和每次骑行前,请一定注意以下几点: 测试项目 测试内容 一般情况 所有螺丝是否拧紧,所有部件是否牢固安装? 刹车 刹车装置是否正确安装,功能是否完整? 折叠机构 折叠机构是否正确嵌入到位,快拆夹是否闭合并紧固? 单脚撑 单脚撑是否正确折叠于踏脚板下? 电池充电状态 电池是否完全充电? 当前骑行模式 当前设置的是哪一种骑行模式?... -
Page 312: 展开与折叠
操作 展开与折叠 本电动滑板车以折叠状态交付。只需简单几步即可将其展开,供您骑行。以下介绍滑板 车展开方法。 掰开折叠机构右侧的快拆夹。 图片: 折叠机构上的快拆夹 推动折叠机构左右两侧的两个蓝色旋钮,将滑板车的前部向上折起。 图片: 折叠机构左右两侧的按钮... - Page 313 听到“咔哒”声表示滑板车已完全展开。此时再次闭合侧面的快拆夹,使其固定。 图片: 打开快拆夹 图片: 闭合快拆夹 折叠时,反向执行相同的步骤。 警告 请确保在骑行时,快拆夹始终闭合且完全固定!...
-
Page 314: 单脚撑
单脚撑 本电动滑板车装配一个单脚撑。它位于踏脚板下方的一侧,在折叠机构的正下方。请始 终向车前方向折起脚撑,以便在需要时用脚尖即可将其折下。 图片: 单脚撑折下 图片: 单脚撑折起 每次骑行期间,请确保单脚撑始终向车前方向正 警告 确折起。... -
Page 315: 电池充电
电池充电 以下为充电过程介绍 : ● 将充电器连接至电源插座。此时,充电器上的 LED 指示灯应为浅绿色。 现在,将充电器插入本电动滑板车。当看到充电器上的 LED 指示灯变为红色时, ● 说明充电器和滑板车已正确连接(变红可能需要几秒钟) 。 滑板车充满电时,充电器上的 LED 指示灯变回绿色。 ● 图片: 电动滑板车充电 安装的电池是可充电的锂离子电池。不需要充电 警告 的电池切勿充电。... - Page 316 只要有可能,请在刹车期间同时操作几个刹车装置。 ● 长距离下坡骑行期间,请切换使用不同的刹车装置,以避免造成过热。 以下为滑板车刹车装置的概述: emicro ✓ ✗ ✗ em0004 emicro ✓ ✗ ✗ em0012 Peugeot ✓ ✗ ✗ em0006 Micro e-Kick Micro ✓ ✓ ✗ em0008 Falcon Micro ✓ ✓ ✗ em0011 Condor (Korea) Micro ✓ ✓ ✓ em0014 Eagle Micro ✓...
-
Page 317: 使用脚刹
潮湿或湿滑的路面需要更长的刹车距离。 警告 在湿滑或不平的路面上应小心地低速驾驶。 使用脚刹 在刹车时,移动身体使重心指向后轮,以达到最佳刹车性能。身体后倾/下蹲可大大缩 短刹车距离。使用脚刹会自动激活电机制动器。... -
Page 318: 使用再生制动器
使用再生制动器 若要激活再生制动器(电机制动器),请将电门把手从起始位置朝行驶方向旋转。您会 立即感受到电机制动的感觉。 图片: 再生制动器旋转方向 使用手刹 手刹作用于电动滑板车的前轮。小心地使用手刹,请在安全的私人区域练习好如何使用 刹车系统。 使用前轮刹车时请小心谨慎。过度前轮刹车可能 会造成翻车。 注意 在湿滑或不平整的路面上使用前轮刹车时,请格 外小心。... -
Page 319: 骑行电动滑板车
骑行电动滑板车 低速骑行慢慢适应新奇的骑行感觉,特别是在首 警告 次骑行时。请一定注意,较高速骑行本电动滑板 车同样会增加刹车距离。 电门把手 本电动滑板车(X3 代及以上)装备调节骑行速度的电门把手。朝身体方向旋转,使滑 板车加速。朝身体反方向(行驶方向)旋转会激活再生制动器(电机制动器) ,使滑板 车减速。 图片: 加速的旋转方向。... -
Page 320: 定速巡航
定速巡航 本电动滑板车具有定速巡航功能。若要激活定速巡航功能,请在 1 秒内将电门把手转到 限速位两次。随后,电动滑板车保持当前速度行驶,直至激活任一刹车即停止定速巡航 功能。 运动控制系统 除了使用电门把手控制车速外 , 本电动滑板车还可以通过运动控制系统控制车速。在此 情况下,传感器检测骑行者的加速动作(= 用脚向后蹬地面) ,滑板车随后会提供与装 配驱动电机的电动自行车相似的动力。 重要信息 ● 运动控制系统仅在车速约为 5 公里 / 小时情况下启动。这就意味着,在首次启动该系 统之前,骑行者必须自行将滑板车加速至 5 公里 / 小时(蹬地 1-2 次) 。 ● 越用力、越密集地蹬地(提供动力) ,电机驱动越强,持续时间越长。 ● 几次大力地蹬地,比多次轻轻地蹬地更省力,同时看起来更优雅。 请注意,电机驱动的骑行模式需要良好的骑行习 惯。 警告 电机加速远大于正常的蹬地加速。对于骑行者来 说,这种加速方式最初会很陌生,会比较突然。 首次骑行时,请格外小心。... -
Page 321: 骑行模式
骑行模式 本电动滑板车提供多个预设骑行模式。例如,节能模式(Eco)可让您长途骑行更舒适, 而运动模式(Sport)可让您快速爬坡。 无电门把手车型的骑行模式 骑行模式 闪烁的LED灯数量 最佳性能 最高车速 250瓦 15公里/小时 节能模式 250瓦 25公里/小时 标准模式 500瓦 25公里/小时 运动模式 有电门把手车型的骑行模式 最高车速 (*) 骑行模式 闪烁的LED灯数量 标准连续额定功率(*) 250瓦 6公里/小时 行人模式 250瓦 20公里/小时 节能模式 350瓦 25公里/小时 运动模式 主动模式 (**) 500瓦 25公里/小时 性能和车速取决于设备上安装的特定软件,各国有所不同。请参阅设备上的胶贴 标签,了解有关编程软件以及所能达到的最佳性能和最高车速的信息。 (**) 在主动模式下,只有性能高达 500 瓦时运动控制系统(支持加速)才能生效。电 门把手关闭。... - Page 322 X1 ✓ ✗ em0012 emicro one X2 Peugeot Micro ✓ ✗ em0006 e-Kick Micro ✗ ✓ em0008 Falcon X3 Micro Condor ✗ ✓ em0011 X3 (Korea) ✗ ✓ em0014 Micro Eagle X3 ✗ ✓ em0016 Micro Condor X3...
-
Page 323: 设置骑行模式
通过调整旋钮进行设置 ● 调整旋钮上刻有一个小箭头,请务必将旋钮与该箭头对齐。请捏住踏脚板上圆形切槽 处的调整旋钮。 ● 转动调整旋钮并将箭头对准空圈,可在三种骑行模式之间进行切换。 LED 指示灯先闪三次暗光,以显示设置了哪种骑行模式,然后再闪三次亮光。 ● 图片:通过调整旋钮设置骑行模式... -
Page 324: 通过脚刹设置
通过脚刹设置 短踩刹车踏板四次,将进入设置模式。踏脚板上的 LED 指示灯闪烁时,则表示滑板 ● 车进入设置模式。 当 LED 指示灯闪烁时,依次踩刹车 1 至 4 次启动各种骑行模式 (1= 行人模式,2= 节 ● 能模式,3= 运动模式,4= 主动模式) 。 LED 灯闪烁的次数即表示设置的骑行模式类型。 ● 图片: 通过依次踩脚刹来设置骑行模式 开关车灯 本电动滑板车的后车灯可以关闭。请执行以下步骤 : 短踩刹车踏板四次,将进入设置模式。踏脚板上的 LED 指示灯闪烁时,则表示滑板 ● 车进入设置模式。 若要关闭后车灯,请在 LED 指示灯闪烁时踩住刹车 3 秒。 ● ●... -
Page 325: 电池维护
维护 为了延长电动滑板车的使用寿命,必须每年或骑行每 500 公里(以先到为准)将其送到 授权经销商或授权服务中心进行一次保养和检修。向服务中心提供服务记录,确保服务 正确登记。 首次骑行本电动滑板车 5 小时后,请检查所有螺钉 注意 是否拧紧,如有必要,请将所有松动的螺丝拧紧。 电池维护 请遵守保养说明延长电池组的使用寿命 : ● 电池储存温度范围为 5°C 到 35°C。 ● 购车后,请立即将电池充满电。 ● 不骑行时,请每三个月将电池充满电。 ● 电池电量完全耗尽后,请务必在三天内再次充满。 不遵守上述保养说明所造成的损坏不在保修索赔 注意 范围内。... -
Page 326: 折叠机构维护
折叠机构维护 折叠式滑板车往往具有一定量的游隙。通常滑板车要负重,所以随着时间的推移,游隙 会变大。为了确保您尽可能久地享受滑板车带来的乐趣, 我们向您展示几个简单的步骤, 即可消除折叠机构的游隙 : ● 掰开快拆夹,然后在其滑动面喷一点润滑油。 图片: 在快拆夹的滑动面上喷润滑油 ● 请将折叠机构相对侧的固定螺丝重新拧紧。用力拧紧固定螺丝到螺丝端头,直至快拆 夹闭合为止。 图片: 拧紧固定螺丝... -
Page 327: 螺丝维护:扭矩
前轮刹车维护 请务必定期重新调整前轮刹车线的张力,以便获得精确的刹车效果。您可以通过刹车上 的固定螺丝调整刹车线的张力。调整固定螺丝以便实现良好的刹车效果。 图片: 设置刹车握把上的固定螺丝。 螺丝维护:扭矩 本电动滑板车踏脚板上的一些螺丝需要 24NM 的特定拧紧扭矩。拧紧这些螺丝时,请确 保使用具有特定拧紧扭矩的扭矩扳手。 图片: 需要24NM扭矩拧紧的螺丝... -
Page 328: 技术参数
技术参数 Peugeot Micro emicro one X1 emicro one X2 e-Kick em0004 em0012 em0006 产品编号 车轮尺寸 150 / 125毫米 (前/后) 7.5 千克 8.5 千克 重量 ✗ ✗ ✗ 电门把手 ✗ ✗ ✗ 前轮刹车 ✗ ✗ ✗ 智能后车灯 250 / 500 瓦... - Page 329 Micro Falcon Micro Eagle Micro Condor X3 Black X3 Black X3 Black em0008 em0014 em0016 150 / 125毫米 200 / 200毫米 8 千克 9.6 千克 10.8 千克 ✓ ✓ ✓ ✗ ✓ ✓ ✓ ✓ ✓ 250 / 350 / 500 瓦...
- Page 331 电动滑板车部件享受 2 年保修 : 踏脚板、所有前部组件以及刹车踏板。所有易损件、 ● 小零件和螺丝均不在本保修范围之内。 电池享受 1 年保修或 1000 次完全充电周期服务 (以先到为准) 。我们保证剩余电池 ● 容量是原始额定容量的 60%。 保修服务范围 根据本保修服务,Micro 承诺在相应的保修期内提供以下服务 : 对于与原始型号和 / 或 颜色有所不同的替换件,由 Micro 自行决定是否维修或更换此类同等零件 / 部件 ; 不在保修范围内却属于经销商技能范畴的服务, 以及交付时未清洁的滑板车的清洁服务, 将以标准小时费率计费,包括所有材料和运输费用 ; 任何在保修期内提供的服务(维修 / 更换) 均不会延长原始保修期。 ● ●...
- Page 332 ● 因储存、充电或在超出规定温度范围外使用所造成的损坏。 ● 使用不当、应用不当或过失操作(例如跳跃)。 ● 第三方不正确的改造(例如打开踏脚板)。 ● 充电不当(例如使用与所提供的充电器不同的充电器充电)。 ● 在下坡骑行时,超过40公里/小时的最高车速。 ● 在未经制造商同意的情况,对滑板车进行技术改装。 ● 后续更换/安装不兼容的或非原厂的零件。 ● 磨损零件,如球轴承、滑动轴承、轴承螺栓和轴承螺丝等。 ● 未能遵从维护间隔要求。 ● 由于未设置、设置不当或磨损组件而导致的损坏。 ● 由于跌倒而产生的后果。 ● 使用本电动滑板车对第三方造成的任何人身伤害或财产损失等。 ● 使用不合适的清洁剂、如高压清洗机之类的工具或使用添加剂造成的损坏。 ● 用户在防水措施上的疏忽造成的损坏(本电动滑板车防溅湿,但不防水)。...
- Page 333 可分割性条款 本保修条款中的任何一条失效或成为无效条款时,或出现漏洞需要修订时,并不会影响 其他条款的有效性。遗漏或无效的条款应尽可能替换为与原始条款的意图和目的接近的 条款。 适用法律和管辖权 如因本保修条款产生任何争议(也涉及存在性或有效性问题) ,则专属管辖法院应为 Court of the Canton of Zurich。本采购合同受瑞士法律的约束,不适用冲突法,不适 用“联合国国际货物销售合同公约” (联合国国际买卖公约) 。...
- Page 334 EMICRO-保修卡 请完整填写emicro-保修卡,然后与购买收据存放在一起。 车主 姓名 街道/门牌号 邮政编码 国家 滑板车 序列号 型号 颜色 车轮尺寸 特征 购买日期 经销商名称 经销商地址 购买价格...
- Page 335 服务记录 必须将本电动滑板车的任何维护活动记录在服务记录中。必须每年或每 500 公里将电动 滑板车送到授权服务中心进行一次检查。 订单类型 º 年度维护 º 修理 维护日期 维护者 订单号 维护内容 付费维护 日期、签字、盖章 订单类型 º 年度维护 º 修理 维护日期 维护者 订单号 维护内容 付费维护 日期、签字、盖章...
- Page 336 订单类型 º 年度维护 º 修理 维护日期 维护者 订单号 维护内容 付费维护 日期、签字、盖章 订单类型 º 年度维护 º 修理 维护日期 维护者 订单号 维护内容 付费维护 日期、签字、盖章...
- Page 338 목차 구성품 일반 정보 사용 설명서 ....................... 341 용어 및 기호 설명 ..................... 342 사용 용도 안전 지침 344 – 347 사용 설명서 스쿠터 식별 ......................348 마모 .......................... 348 배터리 사용 지침 ...................... 349 도난 방지 ........................349 전기 스쿠터 이송 .......................349 보관...
- Page 339 핸드 브레이크 작동 ....................360 전기 스쿠터 타기 .......................361 스로틀 그립 ......................361 크루저 컨트롤 ......................362 모션 컨트롤 시스템 ....................362 라이딩 프로그램 ....................... 363 라이딩 프로그램 설정 ....................364 설정 도구로 설정 ...................... 365 풋 브레이크로 설정 ....................366 라이트...
-
Page 340: 구성품
구성품 핸들바 핸드 그립 클램핑 레버 스티어링 칼럼 브레이크 클램프 접히는 부위 축 풋보드 스티어링 헤드 미끄럼 방지 매트 휠 포크 바퀴... -
Page 341: 일반 정보
일반 정보 사용 설명서 전기 스쿠터를 사용하기 전에 안전 지침 등 사용 설명서를 주의 깊게 읽어 주십시오. 전기 스쿠터를 탈 때 국내외 도로 규정을 준수하십시오. 나중에 참고할 수 있도록 본 설명서를 잘 보관하십시오. 다른 사람에게 전기 스쿠터를 양도할 경우 본 설명서도 함께... -
Page 342: 용어 및 기호 설명
용어 및 기호 설명 안전 기호는 발생할 수도 있는 위험을 사용자에게 알려줍니다. 설명을 주의 깊게 읽고 안전 기호를 숙지하시기 바랍니다. 안전 지침을 준수하지 않을 경우 본인이나 다른 사람이 부상을 당하거나 기물이 파손될 수 있습니다. 다음과 같은 기호와 신호어가 사용 설명서 원본, 전기 스쿠터 또는 포장에 사용됩니다. 경고... -
Page 343: 사용 용도
사용 용도 ● 전기 스쿠터는 양호한 도로에서 사용해야 합니다. ● 전기 스쿠터는 한 사람만 사용해야 합니다. 전기 스쿠터는 체중이 최대 100kg, 신장이 최대 190cm인 사람만 사용하도록 설계되어 ● 있습니다. ● 전기 스쿠터를 사용하기 전에 해당 국가의 도로 교통 규정을 학습하고 숙지하십시오. ●... -
Page 344: 안전 지침
안전 지침 경고 - 전기 스쿠터 사용 ● 전기 스쿠터의 조작법과 기능을 완전히 숙지하지 않은 경우에는 사용하지 마십시오. ● 신체적 장애, 인지 또는 정신적 장애, 경험과 지식이 부족한 사람은 전기 스쿠터를 사용하지 마십시오. ● 어린이가 전기 스쿠터를 사용하거나, 청소하거나, 유지관리해서는 안 됩니다. ●... - Page 345 ● 항상 도로에 있는 다른 사람들의 움직임에 유의하십시오. 다른 사람의 실수로 사고와 부상을 입을 수 있습니다. ● 항상 조심해서 사용하고 도로 상황에 특별히 주의하십시오. 미끄럼, 나뭇잎 등 예상치 못한 도로 사정으로 미끄러질 위험이 높습니다. ● 스쿠터로 점프를 하면 안 되며, 항상 움푹 패인 곳, 커브, 기타 장애물을 피해야 합니다. ●...
- Page 346 경고 - 배터리 사용 동봉된 충전기로만 배터리를 충전하고 5°~ 35°C 사이에서만 충전하십시오. ● ● 배터리 안전 지침을 준수하십시오. ● 배터리를 충전할 때 자리를 비우지 마십시오. ● 배터리 충전 시 적절한 플러그를 사용하고, 환기를 시키고, 건조한 상태를 유지하십시오. ● 충전기, 본체, 연결 케이블이 물에 닿지 않도록 합니다. 물에 닿으면 전기에 감전될 수 있습니다.
- Page 347 경고 - 부착 및 개조 ● 전기 스쿠터를 개조하거나 잘못된 액세서리를 부착하지 마십시오. 위험할 수 있습니다. ● 비인가된 액세서리를 사용하면 심각한 부상을 당하거나 전기 스쿠터가 손상될 수 있습니다. 전기 스쿠터를 '개조' 또는 '튜닝'하는 것은 금지되어 있습니다. ● ● 가방 등 물건을 핸들바에 걸지 마십시오. 조작 특성에 나쁜 영향을 미칠 수 있습니다. 경고...
-
Page 348: 사용 설명서
사용 설명서 스쿠터 식별 ● 일련 번호는 풋보드 아래의 앞쪽이나 뒤쪽에 있습니다. 전기 스쿠터의 일변 번호를 적어두십시오. cxxxxxxxxxxxx / emxxxxxxxxxxxxx emxxxxxxxxxxxxx ● 스쿠터에 대한 자세한 내용은 스쿠터에 부착된 라벨에 나와 있습니다. 마모 전기 스쿠터는 사용하면 자연적으로 마모가 발생합니다. 항상 안전하게 사용할 수 있도록 '유지관리' 장을... -
Page 349: 배터리 사용 지침
배터리 사용 지침 내장된 리튬 배터리는 하이테크 제품으로서 , 정확히 사용하고 유지관리할 경우 뛰어난 성능을 발휘합니다 . ' 작동 ' 장의 ' 배터리 충전 ' 섹션과 ' 유지관리 ' 장의 ' 배터리 유지관리 ' 지침을 읽고 이에 따라 주십시오 . 도난... -
Page 350: 낙마 또는 사고 후 조치 사항
낙마 또는 사고 후 조치 사항 낙마나 사고 후 전기 스쿠터를 공식 서비스 센터로 가져와서 손상을 점검받으십시오. 청소 나사의 부식과 불필요한 마모를 방지하기 위해 매 3개월마다, 그리고 비가 올 때 사용한 후 완전히 청소하고 건조할 것을 권장합니다. 청소 후 깨끗한 물로 스쿠터를 씻어서 세제가 남아 있지... -
Page 351: 폐기 지침
폐기 지침 폐기 시 환경에 유의하고 다음 지침을 준수하십시오. ● 전기 스쿠터와 해당 구성품(예: 배터리)는 승인된 폐기업체에서 또는 커뮤니티 폐기 시설을 통해서만 폐기해야 합니다. ● 규정을 준수하십시오. 잘 모를 경우 폐기 시설에 문의하여 친환경적으로 폐기하십시오. 배터리와 전기 부품은 생활 쓰레기와 함께 폐기해서는 안 됩니다. -
Page 352: 초기 설치
✓ ✓ ✓ ✓ ✓ ✗ ✗ em0012 Peugeot ✓ ✓ ✓ ✓ ✓ ✗ ✗ em0006 Micro e-Kick Micro ✓ ✓ ✗ ✗ ✓ ✓ ✗ em0008 Falcon Micro ✓ ✓ ✗ ✗ ✓ ✓ ✓ em0011 Condor 한국... -
Page 353: 사용하기 전에
사용하기 전에 전기 스쿠터는 사용하기 전에 도로에 적합한지 점검을 해야 합니다. 스쿠터는 바로 사용할 수 있는 상태로 제조업체에서 배송합니다. 스쿠터의 성능에 악영향을 미치는 결함이 이송 중 또는 다른 상황에서 발생할 수 있기 때문에 항상 사용하기 전에 다음 항목을 확인하십시오. 시험 항목 시험... -
Page 354: 펴기 및 접기
작동 펴기 및 접기 전기 스쿠터는 접힌 상태로 배송됩니다. 2~3 단계만으로 펴고 바로 사용할 수 있습니다. 다음은 스쿠터를 펴는 방법입니다. 접히는 부위의 오른쪽에 있는 클램핑 레버를 해제합니다. 이미지: 접히는 부위의 퀵 클램프 레버 블록의 양쪽에 있는 파란 노브를 각각 누르고 스쿠터 앞쪽을 접습니다. 이미지: 접히는... - Page 355 딸깍하고 소리가 들리면 스쿠터가 완전히 접혀졌다는 것을 의미합니다. 이제 측면에 있는 클램핑 레버를 다시 닫아서 고정합니다. 이미지: 퀵 클램프 레버 열림 이미지: 퀵 클램프 레버 닫힘 접으려면 동일한 단계를 역으로 수행하면 됩니다. 사용할 때 클램프 레버가 항상 닫혀 있고 완전히 경고...
-
Page 356: 사이드 스탠드
사이드 스탠드 전기 스쿠터에는 사이드 스탠드가 있습니다. 이 스탠드는 풋보드 아래의 측면 즉, 접히는 부위의 바로 아래에 있습니다. 항상 스탠드를 앞으로 접어서 필요한 경우 토우와 함께 다시 아래로 펼 수 있도록 합니다. 이미지: 사이드 스탠드를 밖으로 편 상태 이미지: 사이드 스탠드를 안으로 접은 상태 사용할... - Page 357 배터리 교체 다음은 충전 절차를 설명합니다. ● 충전기를 전기 콘센트에 연결합니다. 충전기의 LED 디스플레이가 녹색으로 켜집니다. ● 전기 스쿠터를 충전기에 연결합니다. 충전기와 스쿠터가 정확히 연결되면 전원공급장치의 LED 디스플레이가 빨간색으로 바뀝니다(2~3초 정도 소요). 스쿠터가 완전히 충전되면 충전기의 LED 디스플레이가 다시 녹색으로 바뀝니다. ●...
-
Page 358: 브레이크
긴 경사로를 내려올 때 과열을 방지하기 위해 브레이크 장치를 바꿔서 사용하십시오. 다음은 스쿠터 브레이크를 개략적으로 설명합니다. emicro ✓ ✗ ✗ em0004 emicro ✓ ✗ ✗ em0012 Peugeot ✓ ✗ ✗ em0006 Micro e-Kick Micro ✓ ✓ ✗ em0008 Falcon Micro ✓ ✓ ✗ em0011 Condor (한국) Micro ✓ ✓... -
Page 359: 풋 브레이크 작동
습한 또는 젖은 노면에서는 정지 거리가 늘어납니다. 경고 주의를 기울이고 미끄럽거나 불규칙한 노면에서는 속도를 줄입니다. 풋 브레이크 작동 브레이크를 사용할 때 몸을 이동하여 중력의 중심이 뒷바퀴로 향하도록 하여 브레이크 효과를 최대로 높이십시오. 체중을 뒤로/아래로 이동하면 정지 거리를 많이 단축할 수 있습니다. 풋 브레이크를... -
Page 360: 회생 브레이크 작동
회생 브레이크 작동 회생 브레이크(모터 브레이크)를 작동하려면 스로틀 그립을 0 위치에서 이동 방향으로 회전하십시오. 전기 모터 브레이크가 작동하는 것을 바로 느끼실 수 있습니다. 이미지: 회생 브레이크의 회전 방향 핸드 브레이크 작동 핸드 브레이크는 전기 스쿠터의 앞바퀴에 작동합니다. 조심해서 사용하고 안전한 곳에서 브레이크... -
Page 361: 전기 스쿠터 타기
전기 스쿠터 타기 새로운 탑승 감각에 익숙해지도록 천천히 주행합니다(특히, 처음으로 사용할 경우). 경고 전기 스쿠터를 고속으로 주행하면 정지 거리도 길어진다는 사실을 항상 염두에 두십시오. 스로틀 그립 전기 스쿠터(X3 이상의 세대)에는 속도를 조절하는 스로틀 그립이 있습니다. 그립을 몸쪽으로 돌리면 스쿠터가 가속됩니다. 그립을 몸 반대쪽으로 돌리면 회생 브레이크(모터 브레이크)가 작동하여... -
Page 362: 크루저 컨트롤
크루저 컨트롤 전기 스쿠터에는 크루저 컨트롤이 있습니다. 크루저 컨트롤을 작동하려면 스로틀 그립을 1 초 이내에 제한치까지 2번 돌려야 합니다. 그러면 전기 스쿠터가 브레이크 중 하나가 작동할 때까지 현재 속도를 유지합니다. 모션 컨트롤 시스템 전기 스쿠터는 스로틀을 통한 속도 조절뿐만 아니라 모션 컨트롤로도 작동할 수 있습니다. 이... -
Page 363: 라이딩 프로그램
라이딩 프로그램 전기 스쿠터에는 몇 개의 라이딩 프로그램이 미리 설정되어 있습니다. 예를 들어, 에코 모드는 장거리를 편안하게 이동하고, 스포츠 모드는 언덕을 빠르게 올라갈 수 있습니다. 스로틀 그립이 없는 모델의 라이딩 프로그램 깜박이는 LED 개수 라이딩 프로그램 최대 성능 최대 속도 250와트... -
Page 364: 라이딩 프로그램 설정
X1 ✓ ✗ em0012 emicro one X2 Peugeot Micro ✓ ✗ em0006 e-Kick Micro ✗ ✓ em0008 Falcon X3 Micro Condor ✗ ✓ em0011 X3 (한국) ✗ ✓ em0014 Micro Eagle X3 ✗ ✓ em0016 Micro Condor X3... -
Page 365: 설정 도구로 설정
설정 도구로 설정 ● 설정 도구에는 작은 화살표가 각인되어 있습니다. 도구를 이 화살표에 맞춰야 합니다. 설정 도구를 풋보드의 둥근 컷 아웃에 올려놓습니다. 설정 도구를 회전하여 화살표를 빈 원에 맞추면 3가지 프로그램을 전환할 수 있습니다. ● LED 디스플레이에서 의미하게 3번 깜박인 후 밝게 3번 깜박이면서 어떤 라이딩 ●... -
Page 366: 풋 브레이크로 설정
풋 브레이크로 설정 풋 브레이크를 4번 짧게 밟으면 설정 모드로 이동합니다. 풋보드의 깜박이는 LED ● 디스플레이로 알 수 있습니다. LED 디스플레이가 깜박일 때 브레이크를 1~4번 연속해서 밟아서 프로그램을 ● 활성화합니다(1 = 도보, 2 = 에코, 3 = 스포츠, 4 = 활동) 깜박이는... -
Page 367: 유지관리
유지관리 전기 모터의 수명을 늘리려면 1년에 한 번 또는 매 500km마다 한 번(먼저 도달할 경우) 공식 대리점이나 공식 서비스 센터에서 서비스를 받아야 합니다. 서비스 센터에 서비스 일지를 제출하고 서비스가 정확하게 입력되었는지 확인하십시오. 전기 스쿠터를 처음으로 5시간 사용한 후 모든 참고사항 나사가... -
Page 368: 접히는 부위 유지관리
접히는 부위 유지관리 접히는 스쿠터에는 항상 어느 정도의 움직임이 있습니다. 이러한 움직임은 일반적인 탑재로 인해 시간이 지날수록 심해집니다. 스쿠터의 수명을 가능한 늘리도록, 2~3 단계의 간단한 작업으로 접히는 부위의 움직임을 줄이는 방법을 알려드리겠습니다. ● 퀵 클램프 레버를 열고 약간의 윤활유를 퀵 클램프 레버의 슬라이딩 표면에 뿌립니다. 이미지: 퀵... -
Page 369: 앞바퀴 유지관리
앞바퀴 브레이크 유지관리 브레이크가 정확하게 작동하도록 앞바퀴 브레이크의 케이블 장력을 주기적으로 조정해야 합니다. 브레이크 자체에 있는 세트 나사를 통해 케이블 장력을 조정할 수 있습니다. 브레이크가 충분히 잡히도록 세트 나사를 조정합니다. 이미지: 브레이크 레버에 세트 나사 설치 나사 유지관리: 토크 전기 스쿠터의 풋보드에 있는 일부 나사는 24NM의 조임 토크가 요구됩니다. 이러한 나사를 조일... -
Page 370: 기술 데이터
기술 데이터 Peugeot Micro emicro one X1 emicro one X2 e-Kick em0004 em0012 em0006 부품 번호 바퀴 크기 150 / 125 mm (앞쪽/뒤쪽) 7.5 kg 8.5 kg 무게 ✗ ✗ ✗ 스로틀 그립 ✗ ✗ ✗ 앞바퀴 브레이크 지능형 뒤쪽... - Page 371 Micro Falcon Micro Eagle Micro Condor X3 Black X3 Black X3 Black em0008 em0014 em0016 150 / 125 mm 200 / 200 mm 8 kg 9.6 kg 10.8 kg ✓ ✓ ✓ ✗ ✓ ✓ ✓ ✓ ✓ 250 / 350 / 500 W PU / 고무...
-
Page 373: 보증 서비스 범위
용량으로 보증합니다. 보증 서비스 범위 Micro는 본 보증에 따라 해당 보증 기간 동안 다음 서비스를 제공합니다. Micro의 자유재량에 의거, 수리 또는 동일한 부품/구성품으로 교체. 이때, 교체는 모델 및/또는 색상에 따라 원래 제품과 다를 수 있습니다. 보증에 해당되지 않고 대리점의 스킬 세트에 포함되는 서비스와... - Page 374 ● 지정된 온도 범위를 벗어난 보관, 충전, 사용으로 인한 피해. ● 부적절한 사용이나 부주의한 작동(예: 점프). ● 제3자에 의한 부적절한 개조(예: 풋보드 개방). ● 부적절한 충전(예: 제공된 충전기가 아닌 다른 충전기로 충전). ● 내리막길에서 최대 속도 40km/h를 초과. ● 제조업체의 동의 없이 스쿠터를 기술적으로 개조. ●...
- Page 375 가분성 조항 본 보증의 일부 조항이 무효가 되거나 개선해야 할 문제점을 내포하고 있는 경우 다른 조항의 유효성에는 영향을 미치지 않습니다. 누락된 또는 유효하지 않은 조항은 가능한 빨리 원래 조항의 취지에 맞게 새로운 조항으로 대체됩니다. 준거법 본 보증으로 인해 분쟁이 발생할 경우(존재 또는 유효성에 관한 의문에 관해서도) 전적으로 취리히...
- Page 376 EMICRO-PASS emicro-Pass를 모두 기입한 후 영수증과 함께 보관하십시오. 소유자 성명 주소 및 번지수 우편번호 국가 스쿠터 일련 번호 모델 색상 바퀴 크기 특수 기능 구입일 딜러 이름 딜러 주소 구입 가격...
- Page 377 서비스 일지 전기 스쿠터의 모든 유지관리를 서비스 일지에 기록해야 합니다. 전기 스쿠터는 공식 서비스 센터에서 1년이나 매 500km마다 한 번 점검을 받아야 합니다. 주문 유형 º 연례 유지관리 º 수리 작업일 작업자 주문 번호 작업 내용 지불 내역에 따른 작업 내용 날짜, 서명, 검인...
- Page 378 주문 유형 º 연례 유지관리 º 수리 작업일 작업자 주문 번호 작업 내용 지불 내역에 따른 작업 내용 날짜, 서명, 검인 주문 유형 º 연례 유지관리 º 수리 작업일 작업자 주문 번호 작업 내용 지불 내역에 따른 작업 내용 날짜, 서명, 검인...