Porter Cable 4210 Manuel D'instructions
Table des Matières
Les langues disponibles
Les langues disponibles
Liens rapides
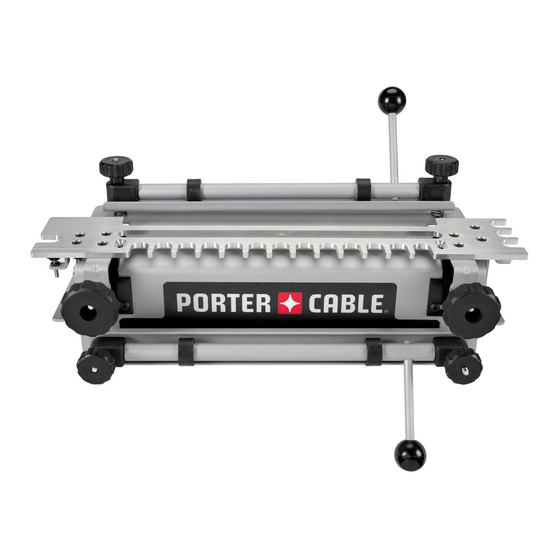
12" (305 mm)
Dovetail jig
Gabarit de queues d'aronde
de 305 mm (12 po)
Guí de 305 mm (12 pulg)
para cola de milano
Instruction manual
Manuel d'instructions
Manual de'instrucciones
Française : Page 28
Español: Página 53
www.deltaportercable.com
INSTRUCTIVO DE OPERACIÓN, CENTROS
DE SERVICIO Y PÓLIZA DE GARANTÍA.
LÉASE ESTE INSTRUCTIVO
ANTES DE USAR EL PRODUCTO.
4210
4212
4216
Table des Matières
Dépannage

Manuels Connexes pour Porter Cable 4210


Sommaire des Matières pour Porter Cable 4210
-
Page 28: Mesures De Sécurité - Définitions
La Porter-Cable recommande avec force que ce produit n'ait pas modifié et/ou utilisé pour l'application autrement que pour lequel il a été conçu.If you have any questions relative to its application DO NOT use the product until you have written Porter Cable and we have advised you. -
Page 29: Précautions Supplémentaires
16. ÉVITEZ LA MISE EN MARCHE ACCIDENTELLE. Ne transportez pas un outil branché avec le doigt appuyé sur l’interrupteur. Assurez-vous que l’interrupteur est en position d’arrêt avant de brancher l’outil. Tenez les mains, le corps et les vêtements à l’écart des lames, mèches, couteaux, etc., en branchant l’outil. 17. -
Page 30: Joints En Queues D'aronde Traversantes
JOINTS EN QUEUES D'ARONDE TRAVERSANTES Queues Tenons JOINTS EN QUEUES D'ARONDE SEMI-AVEUGLES JOINTS EN QUEUES D'ARONDE SEMI-AVEUGLES AVEC UNE PARTIE AVANT À REBORD JOINT À EMBOÎTEMENT (JOINT À QUEUES DROITES) Un joint similaire, appelé joint à emboîtement ou joint à queues droites, est pourvu de protubérances droites appelées «... -
Page 31: Capacités Des Produits
Kit d'accessoires - comprend le gabarit, la mèche de défonceuse et le guide de gabarits qui accompagnent le modèle standard 4210. 4213 Kit d'accessoires - comprend tous les instruments nécessaires pour conférer à l'appareil 4210 les mêmes capacités que l'appareil à queues d'aronde supérieur 4212. 4215 Kit d'accessoires - comprend le gabarit, les mèches de défonceuse et les guides de gabarits... -
Page 32: Contenu Du Carton
CONTENU DU CARTON APPAREILS À QUEUES D'ARONDE 4210 4212 1. Embase Embase 2. Gabarit pour queues d'aronde semi-aveugles et lambris Gabarit pour queues d'aronde semi-aveugles et lambris 3. Gabarit pour queues d'aronde traversantes et joints à Mèche à queues d'aronde emboîtement... -
Page 33: Kits D'accessoires
KITS D'ACCESSOIRES 4211 4213 4215 Gabarit pour queues d'aronde Gabarit pour queues d'aronde Gabarit pour joints à semi-aveugles et lambris traversantes et joints à emboîtement et queues d'aronde Supports (2) emboîtement traversantes et semi-aveugles en Support de profondeur pour Supports (2) miniature lambris Support de profondeur pour... -
Page 34: Outils Supplémentaires Nécessaires
à pince de 1/2 po pour emploi avec les appareils 4210 et 4212, ainsi qu'avec les kits d'accessoires 4211 et 4213. 4211 and 4213 accessory kits. doit avoir un mandrin à pince de 1/4 po pour emploi avec le kit ... -
Page 35: Utilisation
UTILISATION Montez correctement votre pièce à travailler sur l'appareil. Si la pièce à travailler n'est pas solidement en place, elle risque d'être endommagée lorsqu'elle sera déplacée. Les appareils utilisent deux positions de montage pour les pièces à travailler - une position horizontale et une position verticale. -
Page 36: Positionnement Du Bois
SUPPORT DES GABARITS Pour chaque type de joint, placez du bois dans la bride du haut, soit une pièce à travailler, soit un morceau de bois sans valeur supplémentaire, afin de fournir un support pour la défonceuse sur le gabarit. Vous pouvez ajouter un soutien supplémentaire en insérant une deuxième planche (A, sur la Fig. -
Page 37: Réduction Des Risques D'éclatement Du Bois
DEMI-TENONS OU DEMI-QUEUES Traditionnellement, les joints en queues d'aronde ont des entailles de type demi-tenon aux deux extrémités (Fig. G1). Des demi-queues seront tout aussi solides, mais elles ne seront pas aussi plaisantes sur le plan esthétique (Fig. G2). Si vos joints ont des demi-queues et si vous voulez des demi-tenons, déplacez la planche verticale de 1/2 po vers la gauche ou vers la droite, puis faites glisser la planche horizontale en conséquence. -
Page 38: Profondeur Des Mèches De Défonceuse
GUIDES DE GABARITS Utilisez les guides de gabarits corrects qui sont fournis avec cet appareil pour guider la défonceuse contre les queues droites du gabarit. Pour déterminer le guide correct pour un joint donné, placez le guide de gabarit dans la fente située sur le côté gauche du gabarit correspondant. -
Page 39: Préparation Du Bois
PRÉPARATION DU BOIS Une préparation correcte des matériaux pour vos projets est la clé du succès pour produire des joints bien ajustés et d'une esthétique agréable. Vous devez couper votre bois à des angles droits parfaits (Fig. L1). Les coupes qui sont inexactes ne serait-ce que d'un seul degré... -
Page 40: Configuration Des Projets
CONFIGURATION DES PROJETS Il est très important de toujours suivre la surface extérieure et la surface intérieure de chaque pièce à travailler, ainsi que la façon dont les différents composants s'emboîtent les uns dans les autres. Placez les pièces à travailler face orientée vers le bas et étiquetez les surfaces intérieures avec la lettre «... - Page 41 Utilisez deux toupies (si possible), une pour les goupilles et l’autre pour les queues d’aronde afin d’accélérer et de faciliter le processus. Si vous utilisez le gabarit de montage pour queue d’aronde 4210, il vous faudra utiliser la trousse d’accessoires 4213 pour effectuer ce joint.
- Page 42 4. Repositionnez le guide excentré (A, sur la Fig. P4) de façon à ce qu'il repose contre la planche verticale et assujettissez- 5. Repositionnez le morceau de bois supplémentaire (A, sur la Fig. P5) de façon à ce qu'il repose contre le bord arrière de la planche verticale (B).
-
Page 43: Résolution Des Problèmes Concernant Les Queues D'aronde Traversantes
Coupez entre les queues droites du gabarit (Fig. P12). Retirez la planche à tenons et assurez-vous que cette planche est bien ajustée par rapport à la planche à queues (Fig. P13). RÉSOLUTION DES PROBLÈMES CONCERNANT LES QUEUES D'ARONDE TRAVERSANTES Pour les joints qui ne sont pas suffisamment serrés, faites glisser légèrement le gabarit en le rapprochant de vous. Pour les joints qui sont trop serrés, faites glisser légèrement le gabarit en l'éloignant de vous. -
Page 44: Ajustage Et Résolution Des Problèmes
Bridez la planche à queues (côté du tiroir) dans la bride du bas (position verticale) sur le côté gauche de l'embase, avec l'extérieur de la planche CENTRER faisant face à l'appareil (A, sur la Fig. Q3). Centrez la planche entre la queue droite la plus éloignée vers la gauche et la queue droite la plus proche vers la droite de la planche. -
Page 45: Queues D'aronde Semi-Aveugles Avec Une Partie Avant À Rebord
QUEUES D'ARONDE SEMI-AVEUGLES AVEC UNE PARTIE AVANT À REBORD Pour produire des avants de tiroir, coupez les goupilles après que l'avant de tiroir ait été découpé en tranches. La profondeur de la tranche doit être plus profonde que le guide de profondeur. REMARQUE Coupez les queues en premier. - Page 46 Montez la mèche à queues d'aronde et le guide de gabarit sur la défonceuse, et ajustez la profondeur de pénétration de la mèche de la défonceuse en utilisant le guide de profondeur de la mèche « semi-aveugle » (Fig. R6). Faites une «...
-
Page 47: Joints À Emboîtement
REMARQUE Si vous utilisez l'appareil à queues d'aronde 4210, vous aurez besoin du kit d'accessoires 4213 pour produire ce joint. Vous aurez besoin du kit d'accessoires 4215 pour les joints à emboîtement en miniature. -
Page 48: Coupe De La Deuxième Pièce À Travailler
Repositionnez le guide excentré de gauche de façon à ce qu'il repose contre la pièce à travailler. Alignez le gabarit en utilisant la ligne de gabarit « queues/ emboîtement » avec l'intersection du morceau de bois supplémentaire et de la pièce à travailler. Montez la mèche droite et le guide de gabarit sur la défonceuse, et ajustez la profondeur de pénétration de la mèche de la défonceuse en utilisant le guide de profondeur de la mèche «... -
Page 49: Queues D'aronde Coulissantes
REMARQUE Assurez-vous que la mèche de la défonceuse ne pénétrera pas dans l'embase ou dans les guides excentrés pendant cette coupe. Les appareils 4210 et 4212 contiennent tout ce qu'il faut pour cette coupe. PIÈCES NÉCESSAIRES Gabarit pour joint à... -
Page 50: Coupe De Planches À Tenons
4. Ajustez la profondeur de pénétration de la mèche de votre défonceuse en utilisant l'une des trois options (A, B, ou C, sur la Fig. T3) sur le côté gauche du gabarit, ou en réglant manuellement la défonceuse sur une autre profondeur. 5. -
Page 51: Guide De Depannage
REMPLACEMENT GRATUIT DE L'ETIQUIETTE Si les étiquettes d’avertissement deviennent illisibles ou sont manquantes, composer le (888) 848-5175 pour en obtenir le remplacement gratuit. Model 4210 TO REDUCE THE RISK OF INJURY, USER 12" Dovetail Jig MUST READ INSTRUCTION MANUAL BEFORE OPERATING PRODUCT. -
Page 52: Garantie Limitée De Trois Ans
GARANTIE LIMITÉE DE TROIS ANS PORTER-CABLE réparera, sans frais, tout produit défectueux causé par un défaut de matériel ou de fabrication pour une période de trois ans à compter de la date d’achat. La présente garantie ne couvre pas les pièces dont la défectu- osité... - Page 78 NOTAS...
- Page 79 NOTAS...
- Page 80 ® ® ® ™ ® ® ® ® Crew , Performance Gear , Pocket Cutter , Porta-Band , Porta-Plane , Porter Cable , Porter-Cable Professional Power Tools , Powerback , POZI- ™ ® ® ® ® ® ® ® STOP ™...