Publicité

Les langues disponibles

Les langues disponibles

Liens rapides

SLIM COMBO
Setup guide
Guide d'installation

Publicité

Table des Matières
loading

Sommaire des Matières pour Logitech SLIM COMBO

  • Page 1 SLIM COMBO Setup guide Guide d'installation...
  • Page 2 English Français Español Português...
  • Page 3: Know Your Product

    SLIM COMBO Setup guide KNOW YOUR PRODUCT Holder for stylus or digital pencil iPad volume up/down iPad power button Holder of iPad Microphone hole Any Angle stand Magnetic spine to connect iPad Keyboard LED Shortcut keys Keyboard Keyboard power button...
  • Page 4 SETTING UP THE CASE 1. Insert iPad into iPad holder, and press down until it clicks into place. Make sure the camera and microphone match up to the openings on the iPad holder. 2. If you have a stylus or digital pencil, slide it into the holder on the side of the case.
  • Page 5: Led Behavior

    DETACHING YOUR iPAD 1. To detach your iPad from the case, lay it on a at surface. 2. Press down on one corner of the iPad holder to release one side of the iPad; repeat on the opposite corner. 3. Lift the iPad from the bottom to release it from the case.
  • Page 6: Charging The Battery

    CHARGING THE BATTERY BATTERY INFORMATION • A fully charged battery provides about 3 months If the status light is red, the keyboard folio battery needs to be charged. of use when the keyboard is used about two hours a day. 1.
  • Page 7: Présentation Du Produit

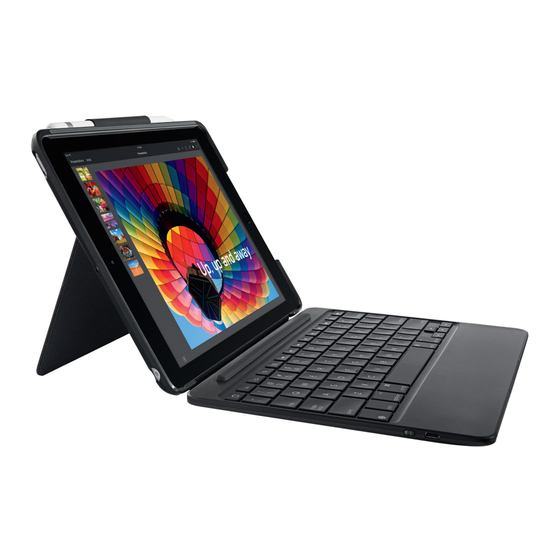
    SLIM COMBO Guide d'installation PRÉSENTATION DU PRODUIT Support pour stylet ou stylo numérique Volume +/- de l'iPad Bouton d'alimentation de l'iPad Support pour iPad Trou pour le microphone Support multi-angle Tranche magnétique pour connecter un iPad Témoin lumineux du clavier...
  • Page 8: Établissement De La Connexion

    INSTALLATION DE L'ÉTUI 1. Insérez l'iPad dans le support pour iPad, puis appuyez vers le bas jusqu'à ce qu'il s'enclenche. Véri ez que l'appareil photo et le microphone correspondent aux ouvertures du support pour iPad. 2. Si vous possédez un stylet ou un stylo numérique, glissez-le dans le support sur le côté...
  • Page 9: Témoins Lumineux

    RETRAIT DE L'IPAD 1. Pour retirer votre iPad de l'étui, posez-le sur une surface plate. 2. Appuyez sur un angle du support de l'iPad pour faire sortir un côté de l'iPad; répétez l'opération du côté opposé. 3. Soulevez l'iPad par le bas pour le faire sortir de l'étui.
  • Page 10: Charge De La Batterie

    CHARGE DE LA BATTERIE INFORMATIONS SUR LA BATTERIE • Chargée au maximum, la batterie a une auto- Si le témoin d'état est rouge, vous devez charger la batterie de l'étui Keyboard Folio. nomie de 3 mois, dans le cas d'une utilisation du clavier moyenne de deux heures par jour.
  • Page 11: Componentes Del Producto

    SLIM COMBO Guía de instalación COMPONENTES DEL PRODUCTO Soporte para stylus Subir y bajar volumen o lápiz digital de iPad Botón de encendido del iPad Soporte para iPad Ori cio de micrófono Soporte multiángulo Lomo magnético para acoplamiento de iPad...
  • Page 12: Colocación De La Funda

    COLOCACIÓN DE LA FUNDA 1. Inserta el iPad en el soporte para iPad y presiona hacia abajo hasta que encaje con un "click". Asegúrate de que la cámara y el micrófono coinciden con las aberturas del soporte para iPad. 2. Si tienes un stylus o lápiz digital, deslízalo en el soporte situado en el lateral de la funda.
  • Page 13 DESACOPLAMIENTO DEL IPAD 1. Para desacoplar el iPad de la funda, apóyalo sobre una super cie plana. 2. Presiona una esquina del soporte para iPad para liberar un lado del iPad. Repite para la esquina opuesta. 3. Levanta el iPad por la parte inferior para sacarlo de la funda.
  • Page 14: Carga De La Batería

    CARGA DE LA BATERÍA INFORMACIÓN SOBRE BATERÍAS • Si la batería tiene una carga completa, puede durar Si el diodo de estado es rojo, es preciso cargar la batería de la funda con teclado. unos tres meses con un uso medio del teclado de dos horas diarias.
  • Page 15: Conheça O Seu Produto

    SLIM COMBO Guia de instalação CONHEÇA O SEU PRODUTO Suporte para caneta Botões de volume ou lápis digital do iPad Botão de energia do iPad Suporte para iPad Abertura do microfone Suporte para múltiplos ângulos Faixa magnética para conectar ao iPad Pro...
  • Page 16 INSTALAÇÃO DA CAPA 1. Insira o iPad no suporte do iPad e pressione para baixo até encaixá-lo. Certi que-se de que a câmera e o microfone estão no mesmo lugar das aberturas no suporte do iPad. 2. Se você possuir uma caneta ou lápis digital, guarde no suporte na lateral do estojo.
  • Page 17 REMOVENDO O IPAD 1. Para soltar o iPad da capa, posicione-o em uma superfície plana. 2. Precione um dos cantos da capa do iPad para liberar um lado do iPad. Repita o procedimento ao canto oposto. 3. Erga o iPad para soltá-lo da capa. INDICADORES DE LUZ LED Comportamento do LED Status...
  • Page 18: Carregando A Bateria

    CARREGANDO A BATERIA INFORMAÇÕES DA BATERIA • Uma bateria completamente carregada fornece Se a luz de status vermelha acender, a bateria do teclado folio precisa ser carregada. energia por cerca de três meses de uso quando o teclado é usado por cerca de duas horas por dia. 1.
  • Page 19 © 2018 Logitech, Logi and the Logitech Logo are trademarks or registered trademarks of © 2018 Logitech, Logi et le logo Logitech sont des marques commerciales ou déposées de Logitech Europe S A and/or its affiliates in the U S and other countries Logitech Europe S A et/ou de ses sociétés affiliées aux États-Unis et dans d’autres pays...

Table des Matières