Vogel's Connect-it Instructions De Montage
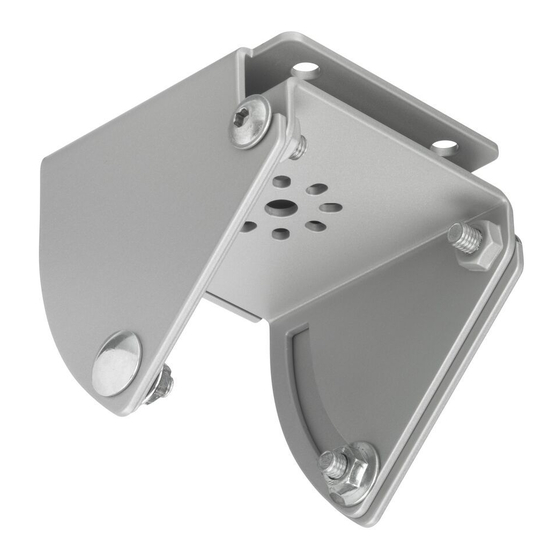
PUC 1011
Ceiling plate
Mounting instructions
Montagevoorschrift
Instructions de montage
Montageanleitung
Guía de montaje
Istruzioni di montaggio
Instruções de montagem
Monteringsanvisning
,QVWUXNFMD PRQWD X
Rekomendacii po ustanovke
Max. (2x) 30 kg / (2x) 66 lbs
geprüfte
Sicherheit
= 1x
A
= 1x
B
= 3x
C
= 3x
D
D
= 2x
E
B
= 2x
F
= 1x
G
A
F
E
G
(GB) Subject to printing errors and technical amendments.
(NL) Drukfouten en technische wijzigingen voorbehouden.
(F) Sous réserve de fautes d'impression et de modifications techniques.
(D) Für Druckfehler übernehmen wir keine Verantwortung. Technische Änderungen vorbehalten.
(E) Reservados errores de imprenta y sujete a modificationes.
(I) Con riserva di modifiche techniche e di eventueli errori di stampa.
(P) Reserva-se a ocorrência de gralhas e de modificações técnicas.
(H) Nyomdahibák és technikai változtatások joga fenntartva.
3/
=DVWU]HJD VL PR OLZR þ Z\VW SRZDQLD Eã GyZ GUXNDUVNLFK L ]PLDQ WHFKQLF]Q\FK
586 Vozmoøny oπibki pri pehati i texniheskie modifikacii.
1
C
2
2a
85 mm
2b
3
4
a
ø 10 mm
5
b
Table des Matières

Manuels Connexes pour Vogel's Connect-it


Sommaire des Matières pour Vogel's Connect-it
- Page 1 = 1x = 1x = 3x = 3x PUC 1011 Ceiling plate = 2x = 2x = 1x Mounting instructions Montagevoorschrift Instructions de montage Montageanleitung Guía de montaje ø 10 mm Istruzioni di montaggio Instruções de montagem Monteringsanvisning ,QVWUXNFMD PRQWD X 85 mm Rekomendacii po ustanovke (GB) Subject to printing errors and technical amendments.
-
Page 2: Guía De Montaje
= 3x = 1x = 1x = 2x = 2x = 1x = 1x = 2x 0-45˚ 45-90˚ = 1x = 3x PUC 1030 Ceiling plate Mounting instructions ø10 mm Montagevoorschrift Instructions de montage Montageanleitung Guía de montaje 85 mm Istruzioni di montaggio (GB) Subject to printing errors and technical amendments. - Page 3 ø10 mm = 1x = 1x = 1x = 1x = 1x = 3x = 1x = 1x = 3x 85 mm PUC 1040 Ceiling plate Mounting instructions Montagevoorschrift Instructions de montage Montageanleitung Guía de montaje Istruzioni di montaggio (GB) Subject to printing errors and technical amendments. Instruções de montagem (NL) Drukfouten en technische wijzigingen voorbehouden.
- Page 4 = 1x = 1x = 1x PUC 1050 Mounting instructions Montagevoorschrift Instructions de montage Montageanleitung Guía de montaje Istruzioni di montaggio (GB) Subject to printing errors and technical amendments. Instruções de montagem (NL) Drukfouten en technische wijzigingen voorbehouden. Monteringsanvisning (F) Sous réserve de fautes d’impression et de modifications techniques. (D) Für Druckfehler übernehmen wir keine Verantwortung.
- Page 5 = 1x = 1x PUC 2108 PUC 2115 PUC 2130 Mounting instructions Montagevoorschrift Instructions de montage Montageanleitung Guía de montaje Istruzioni di montaggio Instruções de montagem Monteringsanvisning ,QVWUXNFMD PRQWD X WARNING: PUC 2130: Stabilizing wires must be used! WAARSCHUWING: PUC 2130: Stabilisatiekabels moeten worden toegepast! Rekomendacii po ustanovke AVERTISSEMENT: PUC 2130: Utilisation obligatoire des câbles de stabilisation! (GB) Subject to printing errors and technical amendments.
- Page 6 = 1x = 1x = 1x = 3x = 8x PPA 310/320 Mounting instructions LOCK Montagevoorschrift Optional Instructions de montage Montageanleitung Optional Guía de montaje Istruzioni di montaggio LOCK Instruções de montagem Monteringsanvisning ,QVWUXNFMD PRQWD X 15º 15º Rekomendacii po ustanovke (GB) Subject to printing errors and technical amendments.
- Page 7 For instruction video, scan QR-code. PPC 1500 Mounting instructions Montaj k ılavuzu Montageanleitung Montageföreskrifter InstrukcEa monta u Consignes d’installation Montagevoorschrift 設置の説明書 Instrucciones de montage Istruzioni di montaggio Manual de montagem www.vogels.com for more information...
-
Page 8: Important
Important Before mounting the projector mount, first read the guarantee and warning sheet. (seperate sheet) - Lesen Sie vor Montage des Projektorhalters zuerst die Garantie und die Warnhinweise durch. (getrenntes Blatt) - Veuillez lire le document de garantie et d’avertissement avant de monter le support de projecteur. - Page 9 ø 10mm 80mm/3.15” ø 0.39 ” Drill the holes and mount the ceiling tube to the ceiling. DE - Bohren Sie die Löcher und befestigen Sie das Deckenrohr an der Decke. - Percez les trous et montez le tube de plafond au plafond. NL - Boor de gaten en monteer de plafondbuis aan het plafond.
- Page 10 80mm/3.15” ø 5mm ø 0.197 ” 1a Drill the holes and mount the ceiling tube to the ceiling. DE - Bohren Sie die Löcher und befestigen Sie das Deckenrohr an der Decke. - Percez les trous et montez le tube de plafond au plafond. NL - Boor de gaten en monteer de plafondbuis aan het plafond.
- Page 11 1-2-3 PROJECTOR PROJECTOR 1-2-3 PROJECTOR PROJECTOR Optional Mount the arms to the projector. DE - Befestigen Sie die Arme am Projektor. - Montez les bras du projecteur. NL - Monteer de armen aan de projector. - Enganche los brazos al proyector. - Montare i bracci sul proiettore.
- Page 12 CENTRE OF GRAVITY Mount the projector to the interface. DE - Befestigen Sie den Projektor am Adapter. - Montez le projecteur sur l’interface. NL - Monteer de projector aan de interface. - Enganche el proyector a la interfaz. - Montare il proiettore sull’interfaccia. - Monte o projector na interface.
- Page 13 LOCK Mount the projector to the ceiling tube and lock it (!) in place. DE - Befestigen Sie den Projektor am Deckenrohr und lassen Sie ihn einrasten. FR - Montez le projecteur sur le tube de plafond et verrouillez-le (!) en position. NL - Monteer de projector aan de plafondbuis en vergrendel deze (!) op zijn plek.
- Page 14 Turn the friction ring to eliminate all play and then rotate the projector in the correct position. DE - Drehen Sie den Reibring, um ein eventuell vorhandenes Spiel zu beseitigen, und drehen Sie dann den Projektor in die richtige Position. HU - FR - Tournez la bague de friction pour éliminer tout le jeu, puis faites pivoter le projecteur en position.
- Page 15 15˚ 15˚ Use the supplied tool to adjust the tilt angle for the perfect image. DE - Verwenden Sie das mitgelieferte Werkzeug, um den Neigungswinkel für das perfekte Bild anzupassen. RO - - Utilisez l’outil fourni pour régler l’angle d’inclinaison afin d’obtenir une image parfaite. UK - NL - Gebruik het meegeleverde gereedschap om de kantelhoek af te stellen voor het perfecte beeld.
- Page 16 15˚ 15˚ Use the supplied tool to adjust the roll angle for the perfect image. DE - Verwenden Sie das mitgelieferte Werkzeug, um den Rollwinkel für das perfekte HU - Bild anzupassen. - Utilisez l’outil fourni pour régler l’angle de basculement afin d’obtenir une image parfaite.
- Page 17 PUC 21xx PFA 90xx 8 Optional: For installation with PUC 21xx extension pole mount PL - the ceiling tube to the pole. 8b. Optional: For installation with PFA 90xx pole, first remove red spacer and mount the interface RU - direct to the pole.
-
Page 18: Vogel's Holding Bv 2011
ø 10mm ø 0,4 ” ø 5mm ø 0,2 ” 4x E1 4x E2 4x E3 (M6) www.vogels.com © Vogel’s Holding BV 2011 All rights reserved...