Table des Matières
Publicité
Les langues disponibles
Les langues disponibles
Liens rapides
•
Always connect the battery first, in order to
allow the Controller to recognize system voltage
•
Use a 12V (36 cells) solar array for a 12V system.
•
Use a 24V (72 cells) solar array for a 24V system.
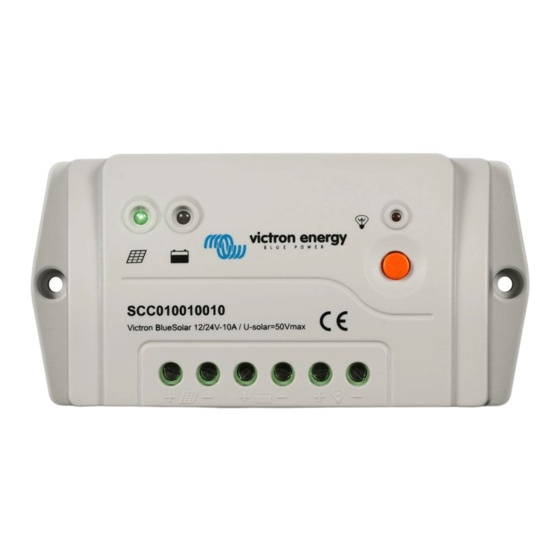
BlueSolar PWM-Pro Charge Controller
12V | 24V - 5A
12V | 24V - 10A SCC010010010
12V | 24V - 20A SCC010020110
12V | 24V - 30A SCC010030010
IMPORTANT
SCC010005010
Manual
Handleiding
Manuel
Anleitung
Manual
Publicité
Table des Matières

Manuels Connexes pour Victron energy BlueSolar PWM-Pro12V/24V-5A


Sommaire des Matières pour Victron energy BlueSolar PWM-Pro12V/24V-5A
- Page 1 Manual Handleiding Manuel Anleitung Manual IMPORTANT • Always connect the battery first, in order to allow the Controller to recognize system voltage • Use a 12V (36 cells) solar array for a 12V system. • Use a 24V (72 cells) solar array for a 24V system. BlueSolar PWM-Pro Charge Controller 12V | 24V - 5A SCC010005010...
-
Page 3: General Safety Information
1. General Safety Information Read all instructions and cautions in the manual before starting the installation. Keep the controller away from rain exposure, severe dust, vibration, corrosive gas and intense electromagnetic interference. Do not allow water to enter the controller. There are no user serviceable parts inside the controller. - Page 4 3. Installation and operation Important note: always connect the battery first, in order to allow the controller to recognize system voltage. The controller is a common positive controller. If system grounding is required, preferably the positive pole of the battery should be grounded.
- Page 5 Indicator Status Description: No voltage from solar Green array (night time) Low voltage from solar Green On Solid array (low irradiance) Green Slowly Flashing Charging Normal Green On Solid (Vbat > 12,1V resp. 24,2V) Green Fast Flashing Over voltage (Vbat > 15V resp. 30V) Orange On Solid Under voltage...
-
Page 6: Programming The Controller
4. Programming the controller The default settings (see specifications) can be modified with help of software (available free of charge on our website), or with the remote panel. The panel must be connected to the controller with a standard RJ45 UTP cable. - Page 7 5. Protection Load Overload If the load current exceeds the rated current of controller (≥1.05 times rated discharge current), the controller will disconnect the load. Overloading must be cleared, then press the switch button. Load Short Circuit Fully protected against load wiring short-circuit (≥2 times rated discharge current).
- Page 8 6. Troubleshooting Possible Faults Troubleshooting reasons Charging LED indicator off during daytime PV array Check that PV and battery wire when sunshine disconnected connections are correct and tight. falls on PV modules Battery voltage Check battery voltage. If too high, Green Battery higher than over disconnect the solar module...
-
Page 9: Technical Specifications
7. Technical specifications BlueSolar PWM-Pro charge controller 12/24V 5 A /10 A 20 A 30 A Battery voltage 12/24V Auto Select Rated charge 5 A / 10 A 20 A 30 A current Automatic load disconnect Maximum solar 28 V / 55 V (1) voltage Self-consumption 8 mA... - Page 10 8. Battery related programming options (see software manual or remote panel manual for details) Battery related programming Sealed Flooded User (default options defined setting) Battery capacity setting (needed 200Ah 1~9999 for the internal battery monitor) Over voltage load disconnect 16.0V 9~17V Charge limit 15.0V...
-
Page 11: Algemene Veiligheidsinformatie
1. Algemene veiligheidsinformatie Lees alle aanwijzingen en waarschuwingen in de handleiding voordat u met de installatie begint. Stel de controller niet bloot aan regen, grote hoeveelheden stof, trillingen, corrosieve gassen en sterke elektromagnetische interferentie. Voorkom dat water de controller kan binnendringen. De controller bevat geen onderdelen die door de gebruiker onderhouden moeten worden. -
Page 12: Installatie En Bediening
3. Installatie en bediening Belangrijke opmerking: sluit altijd eerst de accu aan om de controller in staat te stellen om de systeemspanning te De controller is een algemene positieve controller. Als systeemaarding vereist is, dient bij voorkeur de pluspool van de accu te worden geaard. - Page 13 Beschrijving ledaanduiding: Geen spanning van Groen zonnepaneel ('s nachts) Lage spanning van Groen Brandt continu zonnepaneel (weinig zon) Knippert Groen Opladen langzaam Normaal Groen Brandt continu (Vaccu > 12,1 V resp. 24,2 V) Overspanning (Vaccu > Groen Knippert snel 15 V resp. 30 V) Onderspanning (Vaccu<...
- Page 14 4. Programmering van de controller De fabrieksinstellingen (zie specificaties) kunnen met de software (gratis beschikbaar via onze website) of met het Remote Panel worden aangepast. Het paneel moet met een standaard RJ45 UTP-kabel worden verbonden met de controller. Mogelijke instellingen (zie de software-handleiding of de handleiding van het Remote Panel voor meer informatie): Belastingsprogramma's: •...
- Page 15 5. Bescherming Overbelasting belasting Als de belastingsstroom de nominale stroom van de controller (≥1,05 keer de nominale ontlaadstroom) overschrijdt, ontkoppelt de controller de belasting. De overbelasting moet worden opgeheven en daarna moet op de schakelknop worden gedrukt. Kortsluiting belasting Volledig beschermd tegen kortsluiting bij de belastingsbedrading (≥2 keer de nominale ontlaadstroom).
-
Page 16: Storingen Verhelpen
6. Storingen verhelpen Mogelijke Storingen Storingen verhelpen oorzaken Laad-led is overdag uit als Controleer of de bedrading van de Zonnepanelen de zon op de zonnepanelen en de accu juist en zijn losgekoppeld zonnepanelen stevig is aangesloten. schijnt Accuspanning Controleer de accuspanning. Als deze hoger dan de Groene accu-led te hoog is, koppel dan direct de... -
Page 17: Technische Specificaties
7. Technische specificaties BlueSolar PWM-Pro laadcontroller 12/24V 5 A /10 A 20 A 30 A Accuspanning 12/24 V Auto Select Nominale laadstroom 5 A / 10 A 20 A 30 A Automatische belastings- ontkoppeling Maximale spanning 28 V / 55 V (1) via zonne-energie Eigen verbruik 8 mA... - Page 18 8. Accu-gerelateerde programmeringsopties (zie softwarehandleiding of handleiding van het Remote Panel voor meer informatie) Accu-gerelateerde Gelaccu onderhoudsvrije Natte Gebruikers- programmeringsopties accu accu gedefinieerd (fabrieksinstelling) Accucapaciteitsinstelling 200 Ah 1~9999 (vereist voor de interne accumonitor) Belastingsontkoppeling 16,0 V 9~17 V bij te hoge spanning Laadlimiet 15,0 V 9~17 V...
- Page 19 9. Dag/nacht-timingopties (zie softwarehandleiding of handleiding van Remote Panel)
-
Page 21: Consignes Générales De Sécurité
1. Consignes générales de sécurité Lire toutes les instructions et mises en garde du manuel avant de commencer l'installation. Le contrôleur doit être maintenu éloigné d'une exposition à la pluie, à une poussière extrême, à des gaz corrosifs et à des interférences électromagnétiques intenses. -
Page 22: Installation Et Fonctionnement
3. Installation et fonctionnement Remarque importante : toujours connecter la batterie en premier, afin que le contrôleur puisse reconnaitre la è Le contrôleur est un contrôleur avec un pôle positif commun. Si la mise à la terre du système est requise, il est recommandé de mettre à... - Page 23 Description de l'état du voyant : Aucune tension depuis Vert le champ de panneaux Tension faible depuis le Vert On fixe champ de panneaux Clignote Vert En charge lentement Normal Vert On fixe (Vbat > 12,1 V et 24,2 V resp.) Clignotement Surtension (Vbat >...
-
Page 24: Programmation Du Contrôleur
4. Programmation du contrôleur Les paramètres par défaut peuvent être modifiés (voir les spécifications) à l'aide d'un logiciel (disponible gratuitement sur notre site Web) ou du tableau de commande à distance. Le tableau de commande doit être raccordé au contrôleur par un câble UTP RJ45. - Page 25 5. Protection Surcharge de la charge Si le courant de la charge dépasse le courant nominal du contrôleur (≥1,5 fois au courant de décharge nominal), le contrôleur déconnectera la charge. Supprimez la surcharge et appuyez ensuite sur l'interrupteur. Court-circuit de la charge Protection complète contre les courts-circuits dus au câblage de la charge (≥...
-
Page 26: Dépannages
6. Dépannages Causes Défaillances Solutions possibles Voyant LED de charge éteint durant la Vérifiez que les connexions de la Champs de PV journée quand batterie et des PV sont correctes et déconnecté. les modules PV bien serrées. reçoivent les rayons du soleil. La tension de la batterie est Le voyant LED... - Page 27 Causes Défaillances Solutions possibles Voyant de charge, de la Lorsque son dissipateur thermique charge dépasse 85℃, le contrôleur s'arrête connectée et de Surchauffe automatiquement. Lorsque la la batterie température repasse en dessous de (orange) 75℃, le contrôleur redémarre. clignotant en même temps Voyant de Vérifiez si la tension de batterie...
-
Page 28: Spécifications Techniques
7. Spécifications techniques Contrôleur de charge BlueSolar PWM-Pro charge de 12/24 V 5 A/10 A 20 A 30 A Tension de la batterie Sélection automatique 12/24 V Courant de charge 5 A/10 A 20 A 30 A nominal Déconnexion de charge automatique Tension solaire 28 V / 55 V (1) - Page 29 8. Options de programmation concernant la batterie Options de programmation concernant la batterie (Consulter le manuel du logiciel ou du tableau de commande à distance pour de plus amples détails) Options de Sans À Défini par programmation entretien électr l'utilisateu (configuration concernant la batterie olyte...
- Page 30 9. Options de programmation Jour/Nuit (consulter le manuel du logiciel ou du tableau de commande à distance...
-
Page 31: Allgemeine Sicherheitshinweise
1. Allgemeine Sicherheitshinweise Lesen Sie bevor Sie mit der Installation beginnen, sämtliche Anleitungen und Warnhinweise. Der Regler darf nicht Regen, starkem Staub, Vibrationen, Schadgasen und starken elektromagnetischen Interferenzen ausgesetzt werden. Vermeiden Sie, dass Wasser in den Regler eindringt. Im Inneren des Reglers befinden sich keine durch den Nutzer zu wartenden Teile. -
Page 32: Installation Und Betrieb
3. Installation und Betrieb Wichtiger Hinweis: Schließen Sie die Batterie immer zuerst an, um dem Regler die Erkennung der Systemspannung zu ermöglichen. Der Regler ist ein Regler mit gemeinsamer positiver Erdung. Wenn eine Betriebserde notwendig ist, sollte am besten der Pluspol der Batterie geerdet werden. - Page 33 Beschreibung der Status-Anzeigen Keine Spannung von der Grün Solaranlage (in der Nacht) Geringe Spannung von der Grün Leuchtet konstant Solaranlage (schwache Bestrahlung) Grün Blinkt langsam Ladevorgang Grün Leuchtet konstant Normal: (Vbat > 12,1 V bzw. 24,2 V) Grün Blinkt schnell Überspannung (Vbat >...
- Page 34 4. Programmierung des Reglers Die Standardeinstellungen (siehe "Technische Angaben") lassen sich mithilfe einer Software (unentgeltlich auf unserer Website verfügbar) oder mit dem Fernbedienungspaneel verändern. Das Paneel muss mit dem Regler über ein RJ45 UTP-Kabel verbunden sein. Verwenden Sie das Fernbedienungspaneel SCC900300000, um den Regler zu programmieren.
- Page 35 5. Schutz Überlastung Last Wenn der Last-Strom den Nennstrom des Reglers übersteigt (≥1,05 mal Nennwert des Entladestroms), schaltet der Regler die Last ab. Die Überlastung muss beseitigt werden, dann den Umschalter betätigen. Kurzschluss Last Vollständiger Schutz vor einen Kurzschluss bei der Lastverkabelung (≥2 mal Nennwert des Entladestroms).
- Page 36 6. Fehlerbehebung Mögliche Fehler Fehlerbehebung Ursache Ladevorgangs- LED-Anzeige ist Überprüfen Sie, dass die PV- und Batterie- PV-Anlage nicht tagsüber, während Kabelanschlüsse korrekt und fest angeschlossen Sonne auf das verbunden sind. PV-Modul einstrahlt, aus. Batteriespannung Schnelles Blinken ist höher als der Batteriespannung überprüfen.
-
Page 37: Technische Angaben
7. Technische Angaben BlueSolar PWM-Pro Laderegler 12/24 V 5 A / 10 A 20 A 30 A Batteriespannung 12/24 V automatische Wahl Nennladestrom 5 A / 10 A 20 A 30 A Automatische Lastabschaltung Maximale Solar- 28 V / 55 V (1) Spannung Eigenverbrauch 8 mA... - Page 38 8. Batteriebezogene Programmoptionen (weitere Einzelheiten dazu finden Sie im Software-Handbuch bzw. im Handbuch des Fernbedienungspaneels) Batteriebezogene Verschlossene Batterie Nass- Benutzer- Programmoptionen (Standardeinstellungen) batterie definiert Einstellung der Batteriekapazität 200 Ah 1~9999 (wird für internen Batteriewächter benötigt). Abschalten der Last bei 16,0 V 9~17 V Überspannung Ladebegrenzung...
- Page 39 9. Optionen für die Tag-/Nachteinstellung Tag/Nachteinstellungs-Optionen (siehe Software- Handbuch bzw. Handbuch des Fernbedienungspaneels).
-
Page 41: Información General De Seguridad
1. Información general de seguridad Lea todas las instrucciones y avisos de seguridad del manual antes de empezar la instalación. No exponga el controlador a la lluvia, a la abundancia de polvo, a las vibraciones, al gas corrosivo y a interferencias electromagnéticas intensas. - Page 42 3. Instalación y funcionamiento Nota importante: conectar siempre la batería en primer lugar para que el controlador reconozca la tensión del El controlador es un controlador de positivo común. Si el sistema debe ponerse a tierra, se deberá poner a tierra el terminal positivo de la batería.
- Page 43 Descripción de las indicaciones de estado: Sin tensión proveniente Verde Apagado de los paneles solares Poca tensión Verde Encendido fijo proveniente de los Verde Parpadeo lento Cargando Normal Verde Encendido fijo (Vbat > 12,1 V y 24,2 V resp.) Sobretensión (Vbat > Verde Parpadeo rápido 15V y 30V resp.)
-
Page 44: Programación Del Controlador
4. Programación del controlador Los ajustes por defecto (ver especificaciones) se pueden modificar con el software (disponible gratuitamente en nuestra web), o con el panel remoto. El panel deberá estar conectado al controlador con un cable RJ45 UTP estándar. Ajustes posibles (consultar los detalles en el manual del software o en el del panel remoto): Programas de carga: •... - Page 45 5. Protección Sobrecarga de la carga conectada Si la corriente de carga excede la corriente nominal del controlador (≥1,05 veces la corriente de descarga nominal), el controlador desconectará la carga. Se deberá solucionar la sobrecarga y, a continuación, pulsar el botón interruptor. Cortocircuido de la carga conectada Completamente protegida contra cortocircuitos por cableado de la carga conectada (≥2 veces la corriente de descarga nominal).
-
Page 46: Resolución De Problemas
6. Resolución de problemas Motivos Fallos Resolución de problemas posibles Indicador LED de proceso de carga Compruebe que las conexiones apagado durante Paneles FV de los paneles y de la batería el día con sol desconectados. sean correctas y estén apretadas. cayendo sobre los módulos FV. - Page 47 Motivos Fallos Resolución de problemas posibles 85 ℃, el controlador se apagará Cuando el disipador del controlador exceda los Indicadores de proceso de 75 ℃, el controlador se reiniciará. automáticamente. Cuando la carga, carga Sobretemperatura temperatura haya bajado de los conecta y batería parpadeando (en naranja) a la vez...
-
Page 48: Especificaciones Técnicas
7. Especificaciones técnicas Controlador de carga BlueSolar PWM Pro 12/24 V 5 A/10 A 20 A 30 A Tensión de la batería Selección automática: 12/24 V Corriente de carga 5 A/10 A 20 A 30 A nominal Desconexión automática Sí de la carga Tensión solar máxima 28 V/55 V (1) - Page 49 8. Opciones de programación de la batería (consultar los detalles en el manual del software o en el del panel remoto) Opciones de programación de la Sellada Inundada Definida (valores batería por el usuario defecto) Ajuste de la capacidad de la 200 Ah.
- Page 50 9. Opciones de temporizador día/noche (consultar el manual del software o el del panel remoto)
- Page 51 Serial number: Serial number: Version : 02 Date : 28 January 2015 Victron Energy B.V. De Paal 35 | 1351 JG Almere PO Box 50016 | 1305 AA Almere | The Netherlands General phone : +31 (0)36 535 97 00...