Table des Matières

Publicité

Les langues disponibles
  • FR

Les langues disponibles

  • FRANÇAIS, page 35

Liens rapides

USER´S MANUAL
BEDIENUNGSANLEITUNG
MANUEL D´UTILISATION
MANUAL DE USUARIO
INSTRUKCJA OBSŁUGI
MANUALE D´USO
H2 D / H2 T
DMX-CONTROLLABLE HOUSE LIGHT WITH DAYLIGHT / WARM WHITE LED
CLH2D(WH) / CLH2T(WH)

Publicité

Table des Matières
loading

Sommaire des Matières pour Cameo H2 D

  • Page 1 USER´S MANUAL BEDIENUNGSANLEITUNG MANUEL D´UTILISATION MANUAL DE USUARIO INSTRUKCJA OBSŁUGI MANUALE D´USO H2 D / H2 T DMX-CONTROLLABLE HOUSE LIGHT WITH DAYLIGHT / WARM WHITE LED CLH2D(WH) / CLH2T(WH)
  • Page 2: Table Des Matières

    CONTENTS / INHALTSVERZEICHNIS / CONTENU / CONTENIDO / TREŚĆ / CONTENUTO ENGLISH ESPAÑOL SAFETY INFORMATION MEDIDAS DE SEGURIDAD INTRODUCTION INTRODUCCIÓN CONNECTIONS, CONTROL, AND DISPLAY ELEMENTS CONEXIONES, ELEMENTOS DE MANEJO Y ELEMENTOS OPERATION DE VISUALIZACIÓN DIFFUSERS FUNCIONAMIENTO CROSSBEAM INSTALLATION DIFUSORES HANGING INSTALLATION MONTAJE EN TRAVESAÑO HOOKING UP THE CONNECTING TERMINAL INSTALACIÓN EN SUSPENSIÓN...
  • Page 3: English

    This device was developed and produced under the highest standards of quality in order to ensure smooth operation for many years. Please read these operating instructions carefully so that you can use your new Cameo Light product quickly and optimally. You can find more information on Cameo Light on our website WWW.CAMEOLIGHT.COM.
  • Page 4 36. The appliance is not to be used by persons (including children) with reduced physical, sensory or mental capabilities, or lack of experience and knowledge. 37. Children must be instructed not to play with the device. 38. If the power cord of the device is damaged, do not use the device. The power cord must be replaced by an adequate cable or assembly from an authorized service center.
  • Page 5: Introduction

    • Power consumption: 165 W CONNECTIONS, CONTROL, AND DISPLAY ELEMENTS The connections, operating elements, and display elements for the H2 T and H2 D models are the same. POWER IN Blue Power Twist power socket. Operating voltage: 100–240 V AC / 50–60 Hz. A suitable power cable with Power Twist...
  • Page 6: Operation

    POWER OUT White Power Twist power output socket to supply power to additional Cameo spotlights (max. 6 A). DMX IN Male 5-pin XLR connector to connect a DMX control device (e.g., DMX console). DMX OUT Female 5-pin XLR connector to transmit the DMX control signal.
  • Page 7: W-Dmx™ Status

    MAIN SCREEN STAND-ALONE MODE Mode Static is shown on the display. MAIN SCREEN 1 SLAVE MODE Mode Slave is shown on the display. MAIN SCREEN 2 W-DMX STATUS The W-DMX status is shown on the display. Briefly press ENTER and DOWN at the same time to switch between the two main displays. The main display 1 is automatically displayed again after approx.
  • Page 8 SETTING DMX MODE You can access the main menu by pressing MENU. Using UP and DOWN, now select the DMX Mode menu option and press ENTER to confirm your selection. Use UP and DOWN again to select the desired DMX mode and press ENTER to confirm your selection. You can find tables on channel assignment in the different DMX modes in these instructions under DMX CONTROL.
  • Page 9: Slave Mode

    SLAVE MODE Starting from the main display, press MENU to go to the main menu. Using UP and DOWN, now select the Slave menu option and press ENTER to confirm your selection. Use a DMX cable to connect the slave and the master unit (same model, same software version), and activate the static stand-alone mode and the timer function on the master unit if desired.
  • Page 10: System Info

    Wireless W-DMX settings W-DMX On/Off On = W-DMX activated Off = W-DMX deactivated Reset Press ENTER = disconnects paired transmitter and puts it in “ready to pair” mode Power Mode Constant Constant brightness over long periods of time Maximum Maximum brightness Software Update Only for servicing purposes Factory Reset...
  • Page 11: Diffusers

    DIFFUSERS Three diffusers (diffuser with medium beam angle already installed) are provided with the spotlight. The other two diffusers have a beam angle of 20° and 60°. To replace the diffusers, disconnect the spotlight from the power supply, use a suitable tool to unscrew the four Phillips-head screws from the retaining ring on the front of the spotlight, and then remove the retaining ring.
  • Page 12: Crossbeam Installation

    CROSSBEAM INSTALLATION Important safety information: Overhead mounting requires extensive experience, including the calculation of the load limit values of the installation material and regular safety inspection of all installation materials and spotlights! If you do not have these qualifi cations, do not attempt to carry out the installation yourself; contact a professional company! Install on a crossbeam using an optionally available crossbeam clamp that is attached to the mounting bracket ;...
  • Page 13: Hanging Installation

    HANGING INSTALLATION Important safety information: Overhead mounting requires extensive experience, including the calculation of the load limit values of the installation material and regular safety inspection of all installation materials and spotlights! If you do not have these qualifi cations, do not attempt to carry out the installation yourself; contact a professional company! The mounting bracket can be completely removed from the spotlight to create a refi ned and uniform look in the case of hanging installa- tions.
  • Page 14: Hooking Up The Connecting Terminal

    HOOKING UP THE CONNECTING TERMINAL Important safety information! In-depth technical knowledge is required to open the spotlight and connect the cables to the connection terminal. Only spe- cially trained persons may do this! If you do not have these qualifications, do not attempt to open the spotlight and connect the cable yourself;...
  • Page 15: Optional Accessories

    OPTIONAL ACCESSORIES Ceiling installation kit • CLH2CKB (black) • CLH2CKW (white) Important safety information! In-depth technical knowledge is required to install the spotlight in ceiling constructions. Only specially trained persons may do this! If you do not have these qualifi cations, do not attempt to install the spotlight in the ceiling yourself; instead, contact a professional company! The manufacturer is not liable for damage to property or injury to persons caused by improper handling! Omega mounting brackets...
  • Page 16: Dmx Technology

    DMX TECHNOLOGY DMX-512 DMX (Digital Multiplex) is the designation for a universal transmission protocol for communications between corresponding devices and controllers. A DMX controller sends DMX data to the connected DMX device(s). The DMX data is always transmitted as a serial data stream that is forwarded from one connected device to the next via the "DMX IN"...
  • Page 17: Technical Specifications

    TECHNICAL SPECIFICATIONS Article number: CLH2D(WH) CLH2T(WH) Product type: LED Spotlight LED Spotlight Type: Installation spotlights Installation spotlights Color spectrum: Daylight 5600 K Warm white 3000 K Number of LEDs: LED type: 150 W COB 150 W COB LED PWM frequency: 800 Hz, 1200 Hz, 2000 Hz, 3600 Hz, 12 kHz, 25 800 Hz, 1200 Hz, 2000 Hz, 3600 Hz, 12 kHz, 25 kHz (adjustable)
  • Page 18: Manufacturer´s Declarations

    MANUFACTURER´S DECLARATIONS MANUFACTURER‘S WARRANTY & LIMITATIONS OF LIABILITY You can find our current warranty conditions and limitations of liability at: https://cdn-shop.adamhall.com/media/pdf/MANUFACTURERS- DECLARATIONS_CAMEO.pdf. To request warranty service for a product, please contact Adam Hall GmbH, Adam-Hall-Str. 1, 61267 Neu Anspach / Email: Info@adamhall.com / +49 (0)6081 / 9419-0. CORRECT DISPOSAL OF THIS PRODUCT (valid in the European Union and other European countries with a differentiated waste collection system) This symbol on the product, or on its documents indicates that the device may not be treated as household waste.
  • Page 19: Deutsch

    Dieses Gerät wurde unter hohen Qualitätsanforderungen entwickelt und gefertigt, um viele Jahre einen reibungslosen Betrieb zu gewähr- leisten. Bitte lesen Sie diese Bedienungsanleitung sorgfältig, damit Sie Ihr neues Produkt von Cameo Light schnell und optimal einsetzen können. Weitere Informationen über Cameo Light erhalten Sie auf unserer Website WWW.CAMEOLIGHT.COM.
  • Page 20 34. Der Abstand zu brennbaren Materialien muss mindestens 0,5 m betragen. 35. Netzleitungen zur Spannungsversorgung mehrerer Geräte müssen mindestens 1,5 mm² Aderquerschnitt aufweisen. In der EU müssen die Leitungen H05VV-F, oder gleichartig, entsprechen. Geeignete Leitungen werden von Adam Hall angeboten. Mit diesen Leitungen können Sie mehrere Geräte über den Power out Anschluss mit dem Power IN Anschluss eines weiteren Gerätes verbinden.
  • Page 21: Einführung

    • Leistungsaufnahme 165W ANSCHLÜSSE, BEDIEN- UND ANZEIGEELEMENTE Die Anschlüsse, Bedien- und Anzeigeelemente der Modelle H2 T und H2 D sind identisch POWER IN Blaue Power Twist Netzeingangsbuchse. Betriebsspannung 100 - 240V AC / 50 - 60Hz. Ein geeignetes Netzkabel mit Power Twist...
  • Page 22: Bedienung

    POWER OUT Weiße Power Twist Netzausgangsbuchse für die Spannungsversorgung weiterer Cameo Scheinwerfer (max. 6A). DMX IN Männliche 5-Pol XLR-Buchse zum Anschließen eines DMX-Kontrollgeräts (z.B. DMX-Pult). DMX OUT Weibliche 5-Pol XLR-Buchse zum Weiterleiten des DMX-Steuersignals. OLED-DISPLAY Das OLED-Display zeigt die aktuell aktivierte Betriebsart (Hauptanzeige 1), den W-DMX-Status (Hauptanzeige 2) die Menüpunkte im Bearbei- tungsmenü...
  • Page 23 HAUPTANZEIGE STAND-ALONE-BETRIEBSART Im Display wird Mode Static angezeigt. HAUPTANZEIGE 1 SLAVE-BETRIEB Im Display wird Mode Slave angezeigt. HAUPTANZEIGE 2 W-DMX STATUS Im Display wird der W-DMX Status angezeigt. Zum Wechseln zwischen den beiden Hauptanzeigen drücken Sie gleichzeitig kurz auf ENTER und DOWN.
  • Page 24 DMX-BETRIEBSART EINSTELLEN Durch Drücken auf MENU gelangen Sie in das Hauptmenü. Mit Hilfe der Bedienfelder UP und DOWN wählen Sie nun den Menüpunkt DMX Mode aus und bestätigen mit ENTER. Wählen Sie wiederum mit Hilfe von UP und DOWN die gewünschte DMX-Betriebsart aus und bestätigen mit ENTER.
  • Page 25 SLAVE-BETRIEB Ausgehend von der Hauptanzeige gelangen Sie durch Drücken auf MENU in das Hauptmenü. Mit Hilfe der Taster UP und DOWN wählen Sie nun den Menüpunkt Slave aus und bestätigen mit ENTER. Verbinden Sie die Slave- und die Master-Einheit (gleiches Modell, gleicher Softwarestand) mit Hilfe eines DMX-Kabels und aktivieren in der Master-Einheit die Stand-Alone Betriebsart Static und die Timer-Funktion, wenn gewünscht.
  • Page 26: System Info

    Wireless W-DMX Einstellungen W-DMX On/Off On = W-DMX aktiviert Off = W-DMX deaktiviert Reset drücken auf ENTER = Die Kopplung mit einem Transmitter aufheben und in Koppelbereitschaft versetzen Power Betriebsmodus Constant Konstante Helligkeit über lange Zeiträume Maximum Maximale Helligkeit Software Update Nur für Servicezwecke Factory Reset Zurücksetzen auf Werk-...
  • Page 27: Streuscheiben

    STREUSCHEIBEN Im Lieferumfang des Scheinwerfers befinden sich drei Streuscheiben (Streuscheibe mit mittlerem Abstrahlwinkel bereits montiert). Die beiden anderen Streuscheiben verfügen über einen Abstrahlwinkel von einmal 20° und einmal 60°. Zum Austauschen der Streuscheiben nehmen Sie den Scheinwerfer vom Stromnetz, lösen die vier Kreuzschlitzschrauben vom Haltering auf der Vorderseite des Scheinwerfers mit Hilfe eines geeigneten Werkzeugs und nehmen den Haltering vom Scheinwerfer.
  • Page 28: Traversenmontage

    TRAVERSENMONTAGE Wichtiger Sicherheitshinweis: Überkopfmontage erfordert umfassende Erfahrung, einschließlich der Berechnung der Grenzwerte für die Arbeitslast, des verwendeten Installationsmaterials und der regelmäßigen Sicherheitsüberprüfung aller Installationsmaterialien und Scheinwerfer! Wenn Sie diese Qualifi kationen nicht haben, versuchen Sie nicht, eine Installation selbst durchzuführen, sondern nutzen Sie die Hilfe von professionellen Unternehmen! Die Montage an einer Traverse erfolgt mit Hilfe einer optional erhältlichen Traversenklemme, die am Montagebügel befestigt wird , ein Omega-Montagebügel ist optional erhältlich.
  • Page 29: Hängende Installation

    HÄNGENDE INSTALLATION Wichtiger Sicherheitshinweis: Überkopfmontage erfordert umfassende Erfahrung, einschließlich der Berechnung der Grenzwerte für die Arbeitslast, des verwendeten Installationsmaterials und der regelmäßigen Sicherheitsüberprüfung aller Installationsmaterialien und Scheinwerfer! Wenn Sie diese Qualifi kationen nicht haben, versuchen Sie nicht, eine Installation selbst durchzuführen, sondern nutzen Sie die Hilfe von professionellen Unternehmen! Für die hängende Installation kann der Montagebügel komplett vom Scheinwerfer demontiert werden, Resultat ist eine gleichmäßige und dezente Optik.
  • Page 30: Anschlussterminal Verkabeln

    ANSCHLUSSTERMINAL VERKABELN Wichtige Sicherheitshinweise! Das Öffnen des Scheinwerfers und das Anschließen von Kabeln an das Anschlussterminal erfordert detailliertes Fachwissen und darf nur von speziell ausgebildeten Personen durchgeführt werden! Wenn Sie diese Qualifikation nicht haben, versuchen Sie nicht, den Scheinwerfer zu öffnen und Kabel selbst anzuschließen, sondern nutzen Sie die Hilfe von professionellen Unternehmen! Der Hersteller haftet nicht für Sach- und Personenschäden, die durch unsachgemäße Handhabung entstehen! •...
  • Page 31: Optionales Zubehör

    OPTIONALES ZUBEHÖR Deckeneinbauset • CLH2CKB (schwarz) • CLH2CKW (weiß) Wichtige Sicherheitshinweise! Der Einbau des Scheinwerfers in Deckenkonstruktionen erfordert detailliertes Fachwissen und darf nur von speziell ausgebil- deten Personen durchgeführt werden! Wenn Sie diese Qualifi kation nicht haben, versuchen Sie nicht, den Scheinwerfer selbst in Decken einzubauen, sondern nutzen Sie die Hilfe von professionellen Unternehmen! Der Hersteller haftet nicht für Sach- und Personenschäden, die durch unsachgemäße Handhabung entstehen! Omega-Montagebügel...
  • Page 32: Dmx Technik

    DMX TECHNIK DMX-512 DMX (Digital Multiplex) ist die Bezeichnung für ein universelles Übertragungsprotokoll für die Kommunikation zwischen entsprechenden Geräten und Controllern. Ein DMX-Controller sendet DMX-Daten an das/die angeschlossene(n) DMX-Gerät(e). Die DMX-Datenübertragung erfolgt stets als serieller Datenstrom, der über die an jedem DMX-fähigen Gerät vorhandenen DMX IN- und DMX OUT-Anschlüsse (XLR-Steckverbinder) von einem angeschlossenen Gerät an das nächste weitergeleitet wird, wobei die maximale Anzahl der Geräte 32 nicht überschreiten darf.
  • Page 33: Technische Daten

    TECHNISCHE DATEN Artikelnummer: CLH2D(WH) CLH2T(WH) Produktart: LED-Scheinwerfer LED-Scheinwerfer Typ: Installationsscheinwerfer Installationsscheinwerfer Farbspektrum: Tageslicht 5600K Warmweiß 3000K LED Anzahl: LED Typ: 150W COB 150W COB LED PWM Frequenz: 800Hz, 1200Hz, 2000Hz, 3600Hz, 12kHz, 25kHz 800Hz, 1200Hz, 2000Hz, 3600Hz, 12kHz, 25kHz (einstellbar) (einstellbar) Abstrahlwinkel: 20°...
  • Page 34: Herstellererklärungen

    HERSTELLERERKLÄRUNGEN HERSTELLERGARANTIE & HAFTUNGSBESCHRÄNKUNG Unsere aktuellen Garantiebedingungen und Haftungsbeschränkung finden Sie unter: https://cdn-shop.adamhall.com/media/pdf/ MANUFACTURERS-DECLARATIONS_CAMEO.pdf. Im Service Fall wenden Sie sich bitte an Adam Hall GmbH, Adam-Hall-Str. 1, 61267 Neu Anspach / E-Mail Info@adamhall.com / +49 (0)6081 / 9419-0. KORREKTE ENTSORGUNG DIESES PRODUKTS (Gültig in der Europäischen Union und anderen europäischen Ländern mit Mülltrennung) Dieses Symbol auf dem Produkt oder dazugehörigen Dokumenten weist darauf hin, dass das Gerät am Ende der Produktlebenszeit nicht zusammen mit dem normalen Hausmüll entsorgt werden darf, um Umwelt- oder Personenschäden durch unkontrollierte Abfallentsorgung zu vermeiden.
  • Page 35: Francais

    Cet appareil a été développé et fabriqué en appliquant des exigences de qualité très élevées: il garantit des années de fonctionnement sans problème.Veuillez lire attentivement ce Manuel Utilisateur : vous apprendrez rapidement à utiliser votre appareil Cameo Light de façon optimale.
  • Page 36 34. Respectez une distance minimale de 0,5m par rapport à des matériaux inflammables. 35. Si vous désirez alimenter plusieurs projecteurs simultanément, les conducteurs du câble secteur doivent posséder une section minimale de 1,5 mm². Dans l’Union Européenne, les câbles électriques doivent être de type H05VV-F ou équivalent. Adam Hall propose des câbles secteur adaptés.
  • Page 37: Introduction

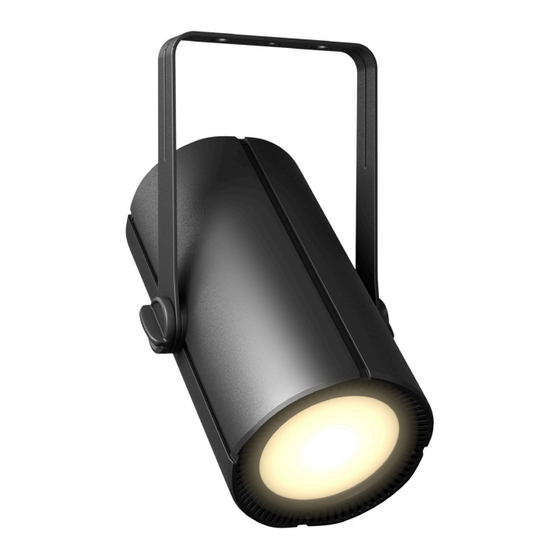
    INTRODUCTION Projecteur à lumière du jour suspendu avec W-DMX™ CLH2D (boîtier noir) CLH2DWH (boîtier blanc) Projecteur à lumière tungstène suspendu avec W-DMX™ CLH2T (boîtier noir) CLH2TWH (boîtier blanc) FONCTIONS DE PILOTAGE • Pilotage en mode DMX sur 1 canal, 2 canaux et 4 canaux •...
  • Page 38: Œillet De Sécurité

    POWER OUT (SORTIE D’ALIMENTATION) Embase secteur blanche Power Twist pour l’alimentation électrique d’autres projecteurs CAMEO (max. 6A). DMX IN (ENTRÉE DMX) Connecteur XLR mâle à 5 broches pour le raccordement d’un contrôleur DMX (par ex. console DMX). DMX OUT (SORTIE DMX) Connecteur XLR femelle à...
  • Page 39: Configuration De L'adresse De Départ Dmx

    ÉCRAN PRINCIPAL DU MODE STAND-ALONE (Autonome) L'écran affiche Mode Static. ÉCRAN PRINCIPAL 1 DU MODE SLAVE (Esclave) L'écran affiche Mode Slave. ÉCRAN PRINCIPAL 2 ÉTAT W-DMX L’écran affiche l’état W-DMX. Appuyer brièvement sur les touches ENTER et DOWN simultanément pour basculer d’un affichage principal à l’autre.
  • Page 40: Réglage Du Mode De Fonctionnement Dmx

    RÉGLAGE DU MODE DE FONCTIONNEMENT DMX Appuyer sur MENU pour accéder au menu principal. À l'aide des touches UP et DOWN, sélectionner l'option de menu DMX Mode et confirmer avec ENTER. Utiliser de nouveau les touches UP et DOWN pour sélectionner le mode de fonctionnement DMX de votre choix et appuyer sur ENTER pour confirmer.
  • Page 41: Mode De Fonctionnement Slave

    MODE DE FONCTIONNEMENT SLAVE À partir de l’écran principal, appuyer sur MENU pour accéder au menu principal. Sélectionner ensuite l’option de menu Slave à l’aide des touches UP et DOWN et appuyer sur ENTER pour confirmer. Connecter les unités Slave et Master (même modèle, même version de logiciel) au moyen d'un câble DMX et activer le mode Stand Alone Static et la fonction de temporisation comme vous le souhaitez sur le Master.
  • Page 42: Informations Système

    Autolock Verrouillage automa- Verrouillage automatique des éléments de commande au tique des éléments de bout d’env. 30 secondes d’inactivité. Affichage à l’écran : commande « LOCKED » Déverrouillage : appuyer simultanément sur les touches UP et DOWN pendant env. 5 secondes Verrouillage automatique des éléments de commande désactivé...
  • Page 43: Diffuseurs

    DIFFUSEURS Le volume de livraison du projecteur comprend trois diffuseurs (diffuseur à angle de dispersion moyen déjà monté). Les deux autres diffu- seurs offrent un angle de dispersion de 20° et de 60°. Pour remplacer les diffuseurs, déconnecter le projecteur du réseau électrique, desserrer les quatre vis à tête cruciforme de l’anneau de maintien situé...
  • Page 44: Montage Sur Traverse

    MONTAGE SUR TRAVERSE Consignes de sécurité importantes : Le montage tête en bas requiert des compétences poussées, notamment pour le calcul des valeurs limites pour la charge de service, le matériel d’installation utilisé et le contrôle de sécurité à effectuer régulièrement sur l’ensemble du matériel d’installation et sur le projecteur ! Sans les qualifi cations requises, ne pas essayer d’effectuer soi-même l’installation mais faire appel à...
  • Page 45: Installation Suspendue

    INSTALLATION SUSPENDUE Consignes de sécurité importantes : Le montage tête en bas requiert des compétences poussées, notamment pour le calcul des valeurs limites pour la charge de service, le matériel d’installation utilisé et le contrôle de sécurité à effectuer régulièrement sur l’ensemble du matériel d’installation et sur le projecteur ! Sans les qualifi cations requises, ne pas essayer d’effectuer soi-même l’installation mais faire appel à...
  • Page 46: Câblage De La Borne De Raccordement

    CÂBLAGE DE LA BORNE DE RACCORDEMENT Consignes de sécurité importantes ! L’ouverture du projecteur et le raccordement de câbles sur la borne de raccordement exigent des connaissances détaillées et ne doivent être effectués que par des personnes spécialement formées à cet effet ! Sans les qualifications requises, ne pas essayer d’ouvrir le projecteur et de raccorder soi-même les câbles, mais faire appel à...
  • Page 47: Accessoires Disponibles En Option

    ACCESSOIRES DISPONIBLES EN OPTION Ensemble de montage au plafond Ensemble de montage au plafond • CLH2CKB (noir) • CLH2CKW (blanc) Consignes de sécurité importantes ! Le montage du projecteur sur des structures plafonnières exige des connaissances détaillées et ne doit être effectué que par des personnes spécialement formées à...
  • Page 48: Technique Dmx

    TECHNIQUE DMX DMX-512 Le terme DMX (Digital Multiplex) désigne un protocole de transport universel permettant la communication entre des appareils et des contrôleurs à ce format. Un contrôleur DMX envoie des données DMX aux appareils DMX qui lui sont connectés. Les données DMX sont transportées sous forme d'un flux série, renvoyé...
  • Page 49: Caractéristiques Techniques

    CARACTÉRISTIQUES TECHNIQUES Référence : CLH2D(WH) CLH2T(WH) Catégorie de produit : Projecteur à LED Projecteur à LED Type : Projecteur d’installation fixe Projecteur d’installation fixe Spectre de couleurs : Lumière du jour 5600 K Blanc chaud 3000 K Nombre de LED : Type de LED : COB 150W COB 150W Fréquence du signal PWM 800 Hz, 1200 Hz, 2000 Hz, 3600 Hz, 12 kHz,...
  • Page 50: Declarations

    DECLARATIONS GARANTIE FABRICANT & LIMITATION DE RESPONSABILITÉ Nos conditions actuelles de garantie et de limitation de responsabilité sont disponibles à l‘adresse suivante : https://cdn-shop.adamhall.com/ media/pdf/MANUFACTURERS-DECLARATIONS_CAMEO.pdf. Pour les réparations, veuillez contacter Adam Hall GmbH, Adam-Hall-Str. 1, 61267 Neu Anspach / E-Mail Info@adamhall.com / +49 (0)6081 / 9419-0. TRI ET MISE AUX DÉCHETS CORRECTE DE CE PRODUIT (Valid in the European Union and other European countries with waste separation) (Applicable dans l‘Union Européenne et les autres pays européens pratiquant le tri des déchets) La présence de ce symbole sur le...
  • Page 51: Español

    Este equipo está diseñado y fabricado con los estándares de calidad más exigentes, para garantizar un correcto funcionamiento durante muchos años.Lea atentamente este manual de usuario para poder aprovechar rápidamente toda la funcionalidad de su nuevo producto de Cameo Light. Más información sobre Cameo Light en la web WWW.CAMEOLIGHT.COM. MEDIDAS DE SEGURIDAD 1.
  • Page 52 33. La acumulación de polvo y otras partículas en el interior del equipo puede causar daños. Dependiendo de las condiciones ambientales (polvo, nicotina, niebla, etc.), deberá realizarse periódicamente el mantenimiento o la limpieza del equipo por personal especializado, para evitar cualquier sobrecalentamiento o fallo de funcionamiento (mantenimiento y limpieza no cubiertos por la garantía). 34.
  • Page 53: Introducción

    • Consumo de potencia: 165 W CONEXIONES, ELEMENTOS DE MANEJO Y ELEMENTOS DE VISUALIZACIÓN Las conexiones y los elementos de manejo y visualización de los modelos H2 T y H2 D son idénticos POWER IN Toma de entrada de alimentación Power Twist azul. Tensión operativa: 100-240 V CA / 50-60 Hz. El volumen de suministro incluye un...
  • Page 54: Funcionamiento

    POWER OUT Toma de salida de alimentación Power Twist blanca para la alimentación eléctrica de otros focos Cameo (máx. 6 A). DMX IN Conector XLR macho de 5 pines para conectar un equipo de control DMX (por ejemplo, una mesa DMX).
  • Page 55 PANTALLA PRINCIPAL DEL MODO AUTÓNOMO En la pantalla se muestra Mode Slatic. PANTALLA PRINCIPAL 1 DEL MODO ESCLAVO En la pantalla se muestra Mode Slave. PANTALLA PRINCIPAL 2 DEL ESTADO W-DMX En la pantalla se muestra el estado W-DMX. Para cambiar entre ambas pantallas principales, pulse brevemente ENTER y DOWN al mismo tiempo.
  • Page 56 CONFIGURACIÓN DEL MODO DMX Pulsando MENU accederá al menú principal. Ahora, utilice los botones UP y DOWN para seleccionar la opción DMX Mode del menú y confirme con ENTER. Nuevamente con los botones UP y DOWN, seleccione el modo DMX deseado y confirme con ENTER. Encontrará tablas con la asignación de canales de los distintos modos DMX en la sección CONTROL DMX de este manual.
  • Page 57 MODO ESCLAVO Partiendo de la pantalla principal, si pulsa MENU accederá al menú principal. Ahora, utilice los botones UP y DOWN para seleccionar la opción Slave del menú y confirme la selección con ENTER. Conecte las unidades esclava y maestra (del mismo modelo y la misma versión de software) mediante un cable DMX y active en la unidad maestra el modo autónomo Static y la función de temporizador si así...
  • Page 58: System Info

    Autolock Bloqueo automático de los Bloqueo automático de los elementos de manejo tras elementos de manejo aproximadamente 30 segundos sin actividad. En la pantalla aparecerá: «LOCKED» Para desbloquear: Pulsar simultáneamente los botones UP y DOWN durante unos 5 segundos Bloqueo automático de los elementos de manejo desac- tivado Calibration Ajuste del brillo máximo...
  • Page 59: Difusores

    DIFUSORES El foco incluye tres difusores (el difusor con ángulo de dispersión intermedio ya viene montado). Los otros dos difusores tienen un ángulo de dispersión de 20° y 60°, respectivamente. Para cambiar los difusores, desconecte el foco de la red eléctrica, afloje los cuatro tornillos Philips del anillo de soporte situado en la parte frontal del foco con una herramienta adecuada y retire el anillo de soporte del foco.
  • Page 60: Montaje En Travesaño

    MONTAJE EN TRAVESAÑO Aviso de seguridad importante: El montaje en altura requiere mucha experiencia, incluido el cálculo de los valores límite de la carga de trabajo, el material de instalación utilizado y las comprobaciones de seguridad periódicas de todos los focos y materiales de instalación.
  • Page 61: Instalación En Suspensión

    INSTALACIÓN EN SUSPENSIÓN Aviso de seguridad importante: El montaje en altura requiere mucha experiencia, incluido el cálculo de los valores límite de la carga de trabajo, el material de instalación utilizado y las comprobaciones de seguridad periódicas de todos los focos y materiales de instalación.
  • Page 62: Cableado Del Terminal De Conexiones

    CABLEADO DEL TERMINAL DE CONEXIONES Indicaciones importantes de seguridad La apertura del foco y la conexión de cables al terminal de conexiones requieren conocimientos técnicos precisos y solo pueden ser efectuadas por personal que disponga de la cualificación específica pertinente. Si no está cualificado para ello, no intente abrir el foco ni conectar cables.
  • Page 63: Accesorios Opcionales

    ACCESORIOS OPCIONALES Set de montaje en techo Set de montaje en techo • CLH2CKB (negro) • CLH2CKW (blanco) Indicaciones importantes de seguridad El montaje del foco en techos requiere conocimientos técnicos precisos y solo puede ser efectuado por personal que disponga de la cualifi cación específi ca pertinente.
  • Page 64: Tecnología Dmx

    TECNOLOGÍA DMX DMX512 DMX (Digital Multiplex) es el nombre de un protocolo universal utilizado como medio de comunicación entre dispositivos y controladores. El controlador DMX envía datos DMX a los equipos DMX conectados. Los datos DMX se envían como datos serie que se transmiten de equipo a equipo a través de los conectores XLR «DMX IN»...
  • Page 65: Datos Técnicos

    DATOS TÉCNICOS Número de artículo: CLH2D(WH) CLH2T(WH) Clase de producto: Foco LED Foco LED Tipo: Foco para instalación fija Foco para instalación fija Espectro cromático: Luz diurna 5600 K Blanco cálido 3000 K Cantidad de LED: Tipo de LED: COB de 150 W COB de 150 W Frecuencia de la modula- 800 Hz, 1200 Hz, 2000 Hz, 3600 Hz, 12 kHz,...
  • Page 66: Declaración Del Fabricante

    DECLARACIÓN DEL FABRICANTE GARANTÍA DEL FABRICANTE Y LIMITACIÓN DE RESPONSABILIDAD Consulte nuestras condiciones de garantía y limitaciones de responsabilidad en: https://cdn-shop.adamhall.com/media/pdf/MANUFACTU- RERS-DECLARATIONS_CAMEO.pdf. En caso de necesitar servicio técnico, póngase en contacto con Adam Hall GmbH, Adam-Hall-Str. 1, 61267 Neu Anspach (Alemania); correo electrónico Info@adamhall.com; +49 (0)6081 / 9419-0. ELIMINACIÓN CORRECTA DE ESTE PRODUCTO (Aplicable en la Unión Europea y en los países europeos que dispongan de un sistema de recogida selectiva) El símbolo que aparece sobre el producto o en la documentación adjunta indica que al final de la vida útil del equipo, no deberá...
  • Page 67: Polski

    To urządzenie zostało zaprojektowane i wyprodukowane przy zastosowaniu najwyższych kryteriów jakościowych w celu zapewnienia wieloletniej bezawaryjnej eksploatacji. Proszę starannie przeczytać niniejszą instrukcję obsługi, aby móc jak najszybciej zacząć użytkować ten produkt marki Cameo Light. Więcej informacji na temat Cameo Light znajdą Państwo na naszej stronie internetowej pod adresem WWW.CAMEOLIGHT.COM.
  • Page 68 32. Instalacja urządzenia powinna odbywać się, gdy urządzenie nie jest podłączone do źródła zasilania (należy wyjąć wtyczkę z gniazda). 33. Kurz i inne osady wewnątrz urządzenia mogą je uszkodzić. W zależności od warunków otoczenia (kurz, nikotyna, opary itp.) urządzenie powinno być konserwowane lub czyszczone przez wykwalifikowanego specjalistę (usługa nieobjęta gwarancją), aby zapobiec przegrzaniu i nieprawidłowemu działaniu.
  • Page 69: Wprowadzenie

    • Pobór mocy 165 W PRZYŁĄCZA, ELEMENTY OBSŁUGI I WSKAŹNIKI Złącza, elementy obsługowe i wskaźnikowe modeli H2 T i H2 D są identyczne POWER IN Niebieskie wejściowe gniazdo sieciowe Power Twist. Napięcie robocze 100–240 V AC / 50–60 Hz. W zestawie znajduje się także odpowiedni...
  • Page 70: Obsługa

    POWER OUT Białe wyjściowe gniazdo sieciowe Power Twist do zasilania sieciowego kolejnych reflektorów CAMEO (maks. 6 A). DMX IN 5-stykowe złącze męskie XLR do podłączenia kontrolera DMX (np. pulpitu DMX). DMX OUT 5-stykowe złącze żeńskie XLR do przekazywania sygnału sterującego DMX.
  • Page 71 EKRAN GŁÓWNY: TRYB PRACY STANDALONE Na wyświetlaczu pojawi się Mode Static. EKRAN GŁÓWNY 1: TRYB PRACY SLAVE Na wyświetlaczu pojawi się Mode Slave. EKRAN GŁÓWNY 2: STATUS W-DMX Na wyświetlaczu jest pokazywany stan W-DMX. Aby przełączać między dwoma głównymi ekranami, należy krótko nacisnąć jednocześnie klawisze ENTER i DOWN.
  • Page 72 USTAWIANIE TRYBU DMX Naciśnij przycisk MENU, aby przejść do menu głównego. Przyciskami UP i DOWN wybierz opcję DMX Mode i potwierdź wybór przyciskiem ENTER. Ponownie przyciskami UP i DOWN wybierz żądany tryb DMX i potwierdź wybór przyciskiem ENTER. Tabele wykorzystania kanałów dla różnych trybów DMX można znaleźć...
  • Page 73 TRYB SLAVE Rozpoczynając od ekranu głównego, naciśnij MENU, aby wejść do menu głównego. Przyciskami UP i DOWN wybierz pozycję menu Slave i potwierdź przyciskiem ENTER. Połącz jednostki slave i master (ten sam model, ta sama wersja oprogramowania) kablem DMX i w razie potrzeby włącz w jednostce master tryb autonomiczny Static i funkcję...
  • Page 74: System Info

    Autolock automatyczna blokada automatyczna blokada elementów obsługi po ok. 30 sekun- elementów obsługi dach bezczynności. Komunikat na wyświetlaczu: „LOCKED” (Zablokowane) Zniesienie blokady: naciśnij jednocześnie przyciski UP i DOWN i przytrzymaj przez ok. 5 sekund automatyczna blokada elementów obsługi jest wyłączona Calibration ustawianie maksymalnej White Ustawienie jasności dla wszystkich trybów pracy z warto-...
  • Page 75: Dyfuzory

    DYFUZORY Reflektor jest dostarczany z trzema soczewkami dyfuzyjnymi (zamontowana jest soczewka dyfuzyjna o średnim kącie rozwarcia wiązki). Pozostałe dwie soczewki mają kąt rozwarcia wiązki 20° i 60°. Aby wymienić soczewkę, należy odłączyć reflektor od sieci elektrycznej, poluzować cztery śruby krzyżakowe z pierścienia mocującego z przodu reflektora za pomocą...
  • Page 76: Montaż Kratownicy

    MONTAŻ KRATOWNICY Ważna wskazówka bezpieczeństwa: Montaż na wysokości wymaga dużego doświadczenia w zakresie obliczania limitów obciążenia, stosowanych materiałów instalacyjnych oraz okresowych przeglądów bezpieczeństwa wszystkich materiałów instalacyjnych i refl ektorów! Użytkownik bez odpowiednich kwalifi kacji nie powinien wykonywać instalacji samodzielnie, lecz skorzystać...
  • Page 77: Montaż Wiszący

    MONTAŻ WISZĄCY Ważna wskazówka bezpieczeństwa: Montaż na wysokości wymaga dużego doświadczenia w zakresie obliczania limitów obciążenia, stosowanych materiałów instalacyjnych oraz okresowych przeglądów bezpieczeństwa wszystkich materiałów instalacyjnych i refl ektorów! Użytkownik bez odpowiednich kwalifi kacji nie powinien wykonywać instalacji samodzielnie, lecz skorzystać...
  • Page 78: Okablowanie Listwy Przyłączeniowej

    OKABLOWANIE LISTWY PRZYŁĄCZENIOWEJ Ważne zasady bezpieczeństwa! Otwieranie reflektora i podłączanie przewodów do listwy zaciskowej wymaga szczegółowej wiedzy technicznej i może być wykonywane tylko przez specjalnie przeszkolone osoby! Użytkownik bez odpowiednich kwalifikacji nie powinien tego robić samodzielnie, lecz skorzystać z pomocy profesjonalnych firm! Producent nie ponosi odpowiedzialności za szkody materialne lub obrażenia ciała spowodowane niewłaściwą...
  • Page 79: Akcesoria Opcjonalne

    AKCESORIA OPCJONALNE Zestaw do montażu na sufi cie Zestaw do montażu na sufi cie • CLH2CKB (czarny) • CLH2CKW (biały) Ważne zasady bezpieczeństwa! Montaż refl ektora na konstrukcjach sufi towych wymaga szczegółowej wiedzy specjalistycznej i może być przeprowadzany tylko przez specjalnie przeszkolone osoby! Użytkownik bez odpowiednich kwalifi kacji nie powinien tego robić samodzielnie, lecz skorzystać...
  • Page 80: Technika Dmx

    TECHNIKA DMX DMX-512 DMX (Digital Multiplex) to nazwa uniwersalnego protokołu transmisji do komunikacji między odpowiednimi urządzeniami a kontrolerami. Kontroler DMX wysyła dane DMX do podłączonych urządzeń DMX. Transmisja danych DMX następuje zawsze w formie szeregowego strumienia danych, który jest przekazywany z jednego urządzenia do następnego przez znajdujące się...
  • Page 81: Dane Techniczne

    DANE TECHNICZNE Numer artykułu: CLH2D(WH) CLH2T(WH) Rodzaj produktu: Reflektor LED Reflektor LED Typ: Reflektory instalacyjne Reflektory instalacyjne Spektrum kolorów: Światło dzienne 5600 K Ciepła biel 3000 K Liczba diod LED: Typ diod LED: 150W COB 150W COB Częstotliwość PWM diody 800 Hz, 1200 Hz, 2000 Hz, 3600 Hz, 12 kHz, 800 Hz, 1200 Hz, 2000 Hz, 3600 Hz, 12 kHz, LED:...
  • Page 82: Deklaracje Producenta

    DEKLARACJE PRODUCENTA GWARANCJA PRODUCENTA I OGRANICZENIE ODPOWIEDZIALNOŚCI Nasze aktualne warunki gwarancji i informacje dotyczące ograniczenia odpowiedzialności znajdą Państwo na stronie: https://cdn-shop. adamhall.com/media/pdf/MANUFACTURERS-DECLARATIONS_CAMEO.pdf. W razie konieczności skorzystania z serwisu proszę skontaktować się z firmą Adam Hall GmbH, Adam-Hall-Str. 1, 61267 Neu Anspach / e-mail Info@adamhall.com / +49 (0)6081 / 9419-0. PRAWIDŁOWA UTYLIZACJA NINIEJSZEGO PRODUKTU (Obowiązuje w Unii Europejskiej i innych krajach europejskich stosujących system sortowania odpadów) Niniejszy symbol na produk- cie lub związanych z nim dokumentach wskazuje, iż...
  • Page 83: Italiano

    Questo dispositivo è stato sviluppato e prodotto in conformità con elevati standard qualitativi che ne garantiscono il regolare funzionamento per molti anni. Leggete attentamente questo manuale d‘uso per utilizzare al meglio il vostro nuovo prodotto Cameo Light. Per maggiori informazioni su Cameo Light consultare la nostra pagina Web WWW.CAMEOLIGHT.COM.
  • Page 84 34. La distanza dai materiali infiammabili deve essere di almeno 0,5 m. 35. I cavi di rete utilizzati per l’alimentazione elettrica di più dispositivi devono avere una sezione di almeno 1,5 mm². I cavi impiegati nell’Unione Europea devono essere di tipo H05VV-F o simile. Adam Hall offre cavi idonei. Tali cavi consentono di collegare più dispositivi dalla presa di uscita POWER OUT di un apparecchio alla presa POWER IN di un altro dispositivo.
  • Page 85: Introduzione

    • Potenza assorbita 165 W CONNESSIONI, ELEMENTI DI COMANDO E DI VISUALIZZAZIONE Le connessioni e gli elementi di comando e visualizzazione dei modelli H2 T e H2 D sono identici POWER IN Presa ingresso di rete Power Twist blu. Tensione di esercizio 100 - 240 V AC / 50 - 60 Hz. Un cavo di alimentazione idoneo con...
  • Page 86: Utilizzo

    POWER OUT Presa uscita di rete Power Twist bianca per l'alimentazione di ulteriori proiettori Cameo (max. 6 A). DMX IN Connettore XLR maschio a 5 poli per il collegamento di un dispositivo di controllo DMX (ad es. mixer DMX). DMX OUT Connettore XLR femmina a 5 poli per il reindirizzamento del segnale di controllo del DMX.
  • Page 87 SCHERMATA PRINCIPALE MODALITÀ DI FUNZIONAMENTO STAND-ALONE Sul display viene visualizzato Mode Static. SCHERMATA PRINCIPALE 1 MODALITÀ SLAVE Sul display viene visualizzato Mode Slave. SCHERMATA PRINCIPALE 2 STATO W-DMX Sul display viene mostrato lo stato del W-DMX. Per passare da una schermata principale all'altra, premere brevemente e contemporanea- mente ENTER e DOWN.
  • Page 88: Funzione Timer

    IMPOSTAZIONE DELLA MODALITÀ DI FUNZIONAMENTO DMX Premendo MENU si accede al menu principale. Con i tasti UP e DOWN selezionare la voce di menu DMX Mode e confermare con ENTER. Con i tasti UP e DOWN selezionare la modalità di funzionamento DMX desiderata e confermare con ENTER. Le tabelle con l'assegnazione dei canali delle diverse modalità...
  • Page 89 MODALITÀ SLAVE Premere MENU dalla schermata principale per accedere al menu principale. Con i tasti UP e DOWN selezionare la voce di menu Slave e confermare con ENTER. Collegare le unità slave e master (stesso modello, stessa versione del software) utilizzando un cavo DMX; sull'unità master attivare la modalità...
  • Page 90 Autolock Blocco automatico degli Blocco automatico degli elementi di comando dopo circa 30 elementi di comando secondi di inattività. Visualizzazione sul display: "LOCKED" Per sbloccare: premere contemporaneamente UP e DOWN per circa 5 secondi Blocco automatico degli elementi di comando disattivato Calibration Impostazione della lumino- White...
  • Page 91: Diffusori

    DIFFUSORI Il proiettore viene fornito con tre diffusori (diffusore con angolo di emissione medio già montato). Gli altri due diffusori presentano un angolo di emissione di 20° e 60°. Per sostituire i diffusori, scollegare il proiettore dalla rete elettrica, allentare le quattro viti a croce dall'anello di fissaggio sulla parte anteriore del proiettore con un utensile adatto e rimuovere l'anello di fissaggio dal proiettore.
  • Page 92: Montaggio Su Traversa

    MONTAGGIO SU TRAVERSA Importante indicazione sulla sicurezza: il montaggio sopratesta richiede una vasta esperienza, incluso il calcolo dei valori limite del carico di lavoro, il materiale di installazione utilizzato e la verifi ca periodica della sicurezza di tutti i materiali di in- stallazione e dei proiettori.
  • Page 93: Installazione A Sospensione

    INSTALLAZIONE A SOSPENSIONE Importante indicazione sulla sicurezza: il montaggio sopratesta richiede una vasta esperienza, incluso il calcolo dei valori limite del carico di lavoro, il materiale di installazione utilizzato e la verifi ca periodica della sicurezza di tutti i materiali di in- stallazione e dei proiettori.
  • Page 94: Cablaggio Del Terminale Di Collegamento

    CABLAGGIO DEL TERMINALE DI COLLEGAMENTO Importanti indicazioni sulla sicurezza! L'apertura del proiettore e il collegamento di cavi sul terminale di collegamento richiedono conoscenze tecniche dettagliate e devono essere effettuati esclusivamente da personale opportunamente formato. Se non si dispone di questa qualifica, evitare di aprire il proiettore o di collegare i cavi.
  • Page 95: Accessori Opzionali

    ACCESSORI OPZIONALI Set di montaggio a soffi tto Set di montaggio a soffi tto • CLH2CKB (nero) • CLH2CKW (bianco) Importanti indicazioni sulla sicurezza: l'installazione del proiettore nelle strutture a soffi tto richiede conoscenze specialistiche dettagliate e deve essere effettuata esclusivamente da personale opportunamente formato.
  • Page 96: Tecnologia Dmx

    TECNOLOGIA DMX DMX512 DMX (Digital Multiplex) è la sigla di un protocollo di trasmissione universale per la comunicazione tra dispositivi e controller. Un controller DMX invia dati DMX ai dispositivi DMX collegati. I dati DMX vengono sempre trasmessi come flusso di dati seriale, che viene inoltrato da un dispositivo collegato al successivo attraverso le connessioni (connettori XLR) DMX IN e DMX OUT presenti per ogni dispositivo DMX compatibile, per un massimo di 32 dispositivi.
  • Page 97: Dati Tecnici

    DATI TECNICI Codice articolo: CLH2D(WH) CLH2T(WH) Tipologia di prodotto: Proiettore LED Proiettore LED Tipo: Proiettore per l'installazione Proiettore per l'installazione Spettro cromatico: Luce del giorno 5600 K Bianco caldo 3000K Numero di LED: Tipo di LED: COB da 150 W COB da 150 W Frequenza LED PWM: 800 Hz, 1200 Hz, 2000 Hz, 3600 Hz, 12 kHz, 25 kHz...
  • Page 98: Dichiarazioni Del Produttore

    DICHIARAZIONI DEL PRODUTTORE MANUFACTURER’S WARRANTY & LIMITATION OF LIABILITY Le nostre attuali condizioni di garanzia e la limitazione di responsabilità sono consultabili alla pagina: https://cdn-shop.adamhall.com/media/ pdf/MANUFACTURERS-DECLARATIONS_CAMEO.pdf. In caso di assistenza, rivolgersi a Adam Hall GmbH, Adam-Hall-Str. 1, 61267 Neu Anspach / E-mail Info@adamhall.com / +49 (0)6081 / 9419-0. CORRETTO SMALTIMENTO DEL PRODOTTO (In vigore nell‘Unione Europea e in altri Paesi europei in cui si attui la raccolta differenziata) Questo simbolo apposto sul prodotto o sui relativi documenti indica che, per evitare danni all‘ambiente e alle persone causati da uno smaltimento incontrollato dei rifiuti,...
  • Page 99: Dmx Control / Dmx Steuerung / Pilotage Dmx

    DMX CONTROL / DMX STEUERUNG / PILOTAGE DMX / CONTROL DMX / STEROWANIE DMX / CONTROLLO DMX 1 CH 2 CH 4 CH CH Mode Function Values Sub-Group Dimmer 0% to 100% Dimmer Dimmer fine 0% to 100% Strobe functions Strobe open Multifuncti- onal...
  • Page 100 CAMEOLIGHT.COM Adam Hall GmbH | Adam-Hall-Str. 1 | 61267 Neu-Anspach | Germany Phone: +49 6081 9419-0 | adamhall.com REV: 02...

Ce manuel est également adapté pour:

H2 tClh2dClh2dwhClh2tClh2twh

Table des Matières