Table des Matières

Publicité

Les langues disponibles
  • FR

Les langues disponibles

  • FRANÇAIS, page 62

Liens rapides

Digitaler Küchentimer
Digital kitchen timer | Temporizador de cocina
digital | Minuteur de cuisine numérique |
Contaminuti da cucina digitale | Cyfrowy timer
kuchenny
Bedienungsanleitung
TD 1600 / 1601
Operating instructions | Instrucciones de
operación | Mode d'emploi Istruzioni per l'uso |
Instrukcja obsługi

Publicité

Table des Matières
loading

Sommaire des Matières pour ADE TD 1600

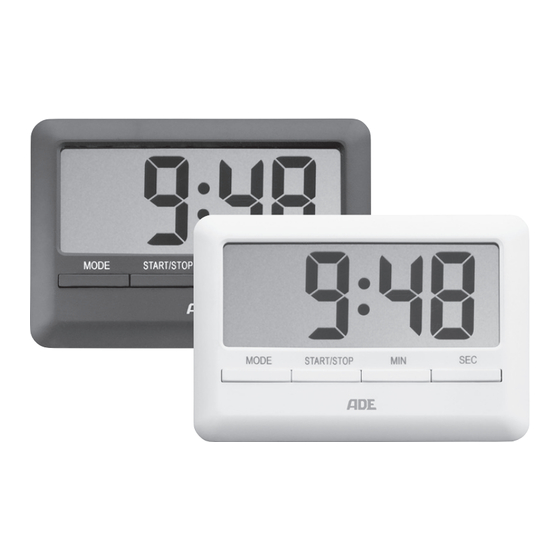
  • Page 1 Digital kitchen timer | Temporizador de cocina digital | Minuteur de cuisine numérique | Contaminuti da cucina digitale | Cyfrowy timer kuchenny Bedienungsanleitung TD 1600 / 1601 Operating instructions | Instrucciones de operación | Mode d‘emploi Istruzioni per l‘uso | Instrukcja obsługi...
  • Page 2 Funktionen mit einem außergewöhnlichen Design vereint. Dieser Timer ist ein praktischer Begleiter für Küche, Bad, Haushalt oder Hobby. Die langjährige Erfahrung der Marke ADE stellt eine technisch hohen Standard und bewährte Qualität sicher. Wir wünschen Ihnen viel Freude beim perfekten Zeitmanagement!
  • Page 3: Allgemeines

    Dieses Symbol in Verbindung mit dem Wort GEFAHR warnt vor schweren Verletzungen. Dieses Symbol in Verbindung mit dem Wort WARNUNG warnt vor Verletzungen mittleren und leichten Grades. Dieses Symbol in Verbindung mit dem Wort HINWEIS warnt vor Sachschäden. TD 1600 / 1601...
  • Page 4: Table Des Matières

    Grundfunktionen ..........11 Kurzzeitmessung durchführen ....13 Stoppuhrfunktion nutzen ......14 Weckfunktion nutzen ........15 Timer zurücksetzen (RESET) ......16 Reinigen .............. 17 Störung / Abhilfe ..........18 Technische Daten ..........18 Konformitätserklärung ......... 19 Garantie ..............20 Entsorgen ............20 TD 1600 / 1601...
  • Page 5: Bestimmungsgemäßer Gebrauch

    Gefahren verstehen. ‚ Kinder dürfen nicht mit dem Artikel spielen. ‚ Reinigung und Benutzerwartung dürfen nicht von Kindern vorgenommen werden, es sei denn, sie sind 8 Jahre oder älter und werden beaufsichtigt. TD 1600 / 1601...
  • Page 6: Gefahr Für Kinder

    Verpackungsbeutel nicht über den Kopf gestülpt wird. GEFAHR von Brand/Verbrennung und/ oder Explosion ‚ Explosionsgefahr bei unsachgemäßem Auswechseln der Batterie. Ersetzen Sie die Batterie nur durch denselben oder einen gleichwertigen Batterietyp. Beachten Sie die „Technischen Daten“. TD 1600 / 1601...
  • Page 7 ‚ Nehmen Sie die Batterie aus dem Artikel heraus, wenn diese verbraucht ist oder wenn Sie den Timer länger nicht benutzen. So vermeiden Sie Schäden, die durch Auslaufen entstehen können. ‚ Achten Sie beim Einsetzen und Wechseln der Batterie auf die richtige Polarität (+/-). TD 1600 / 1601...
  • Page 8: Lieferumfang

    Magneten. Lagern Sie ihn daher nicht in der Nähe von Karten mit Magnetstreifen (Kreditkarten, Zutrittsausweise etc.). Die dort gespeicherten Daten könnten beschädigt werden. Lieferumfang ‚ Timer ‚ 1 Batterie Typ LR1130, 1,5 V ‚ Bedienungsanleitung TD 1600 / 1601...
  • Page 9: Auf Einen Blick

    Auf einen Blick Display Magnete (Rückseite) Batteriefach Minuten und Sekunden einstellen Stunden und Minuten einstellen Funktionen starten und stoppen Funktionen auswählen TD 1600 / 1601...
  • Page 10: Inbetriebnahme

    Piepton und im Display erscheint „12:00“. Batterie einlegen/wechseln Für den Gebrauch benötigen Sie eine Batterie des Typs LR1130 / 1,5 V. 1. Drehen Sie die Befestigungsschraube des Batteriefachdeckels mit einem feinen Kreuzschlitzschrauber los und nehmen Sie den Batteriefachdeckel ab. TD 1600 / 1601...
  • Page 11: Grundfunktionen

    ‚ Entsorgen Sie alte Batterien umweltgerecht, siehe „Entsorgen“. Grundfunktionen Uhrzeit stellen Sobald der Timer mit Strom versorgt wird, wird im Display „12:00“ angezeigt. 1. Halten Sie die Taste START/STOP gedrückt, bis die Display-Anzeige anfängt zu blinken. TD 1600 / 1601...
  • Page 12 (Taste MIN gedrückt halten). Timer befestigen HINWEIS vor Sachschaden − Schieben Sie den Timer nicht über den Untergrund, dies könnte zu Kratzern führen. − Befestigen Sie den Timer mit den Magneten auf der Rückseite auf einem metallischen Untergrund. TD 1600 / 1601...
  • Page 13: Kurzzeitmessung Durchführen

    Dauer von ca. 1 Minute Pieptöne, die nach ca. 30 Sekunden schneller werden. 4. Drücken Sie eine beliebige Taste, um die Pieptöne zu unterbrechen oder warten Sie ca. 1 Minute, bis die Pieptöne automatisch beendet werden. TD 1600 / 1601...
  • Page 14: Stoppuhrfunktion Nutzen

    Anzeige auf null zu stellen. 3. Drücken Sie START/STOP, um die Messung zu starten, zu stoppen und ggf. wieder fortzusetzen. Über MODE können Sie sich z.B. wieder die Uhrzeit anzeigen lassen. Die Zeitmessung läuft im Hintergrund weiter. TD 1600 / 1601...
  • Page 15: Weckfunktion Nutzen

    6. Drücken Sie so oft MODE, bis Sie wieder die aktuelle Uhrzeit angezeigt bekommen. Um die Weckfunktion vor Erreichen der eingestellten Weckzeit zu deaktivieren, drücken Sie gleichzeitig die Tasten MIN und SEC. Das Glockensymbol erlischt. Weckalarm beenden Zur eingestellten Weckzeit werden Sie von Pieptönen geweckt: TD 1600 / 1601...
  • Page 16: Timer Zurücksetzen (Reset)

    Sie den Timer auf die Werkseinstellungen zurücksetzen. Anschließend sollte er wieder normal funktionieren. Hierfür befindet sich auf der Rückseite eine kleine Öffnung, die mit RESET gekennzeichnet ist. 1. Stecken Sie einen dünnen Gegenstand (z.B. eine auseinandergebogene Büroklammer) in die Öffnung. TD 1600 / 1601...
  • Page 17: Reinigen

    − Tauchen Sie den Timer nicht in Wasser oder andere Flüssigkeiten. − Verwenden Sie keinesfalls harte, kratzende oder scheuernde Reinigungsmittel o. Ä., um den Timer zu reinigen. Hierbei könnte die Oberfläche zerkratzen. − Entstauben Sie den Timer bei Bedarf mit einem weichen, trockenen Tuch. TD 1600 / 1601...
  • Page 18: Störung / Abhilfe

    Modell: Timer TD 1600 (weiß) TD 1601 (schwarz) Batterie: 1x LR1130 / 1,5 V Bemessungsstrom: <30 mA Abmessungen: ca. 101 x 70 x 10,5 mm Inverkehrbringer (keine Service-Adresse): Waagen-Schmitt GmbH Hammer Steindamm 27-29 22089 Hamburg, Germany TD 1600 / 1601...
  • Page 19: Konformitätserklärung

    Aus diesem Grund sind Design- und technische Änderungen jederzeit möglich. Konformitätserklärung Hiermit erklärt die Waagen-Schmitt GmbH, dass der digitale Küchentimer TD 1600/1601 den Richtlinien 2014/53/EU und 2011/65/ EU entspricht. Der vollständige Text der EU- Konformitätserklärung ist unter der folgenden Internetadresse verfügbar: www.ade-germany.de/doc...
  • Page 20: Garantie

    Reklamationsgrundes) an Ihren Händler zurück. Entsorgen Verpackung entsorgen Entsorgen Sie die Verpackung sortenrein. Geben Sie Pappe und Karton zum Altpapier, Folien in die Wertstoff-Sammlung. Artikel entsorgen Entsorgen Sie den Artikel entsprechend der Vorschriften, die in Ihrem Land gelten. TD 1600 / 1601...
  • Page 21 Verwaltung. Batterien und Akkus gehören nicht in den Hausmüll Alle Batterien und Akkus müssen bei einer Sammelstelle der Gemeinde, des Stadtteils oder im Handel abgegeben werden. Dadurch können Batterien und Akkus einer umweltschonenden Entsorgung zugeführt werden. TD 1600 / 1601...
  • Page 22 The many years of experience of the brand ADE ensures a high technical standard and proven quality. We wish you a lot of success with perfect time management!
  • Page 23: General Information

    Explanation of symbols This symbol, combined with the word DANGER, warns against serious injury. This symbol, combined with the word WARNING, warns against moderate and mild injuries. This symbol, combined with the word NOTE, warns against material damage. TD 1600 / 1601...
  • Page 24 Overview ............29 Start-up ...............30 Basic functions ..........31 Using the timer..........33 Using the stopwatch function ....34 Using the alarm function ......35 Resetting the timer .........36 Cleaning ..............37 Fault/Remedy............38 Technical Data ..........38 Declaration of Conformity ......39 Guarantee ............40 Disposal...............40 TD 1600 / 1601...
  • Page 25: Intended Use

    ‚ Batteries can be life-threatening. Therefore, keep batteries out of reach of small children. If a battery has been swallowed or has entered the body in any other way, seek medical help immediately. Failure to do so within TD 1600 / 1601...
  • Page 26 ‚ Avoid contact of the battery fluid with skin, eyes, and mucosa. If you do come into contact with it, rinse the affected areas immediately and thoroughly with clean water and consult a doctor immediately. TD 1600 / 1601...
  • Page 27 ‚ Clean the battery and device contacts, as needed, before inserting the battery. ‚ Do not make any modifications to the item. Only allow repairs to be carried out at a specialist workshop. Repairs carried out incorrectly can considerably endanger the user. TD 1600 / 1601...
  • Page 28 Do not, therefore, store it in the vicinity of cards with magnetic stripes (credit cards, access cards, etc.). The data saved on these could be damaged. Scope of delivery ‚ Timer ‚ 1 Type LR1130 battery, 1.5 V ‚ Operating Manual TD 1600 / 1601...
  • Page 29: Overview

    Overview Display Magnets (rear side) Battery compartment Setting minutes and seconds Setting hours and minutes Starting and stopping functions Selecting functions TD 1600 / 1601...
  • Page 30: Start-Up

    Inserting/changing batteries In order to use the timer you require a battery of type LR1130/1.5 V. 1. Loosen the fastening screw of the battery compartment cover using fine Phillips screwdriver and remove the battery compartment cover. TD 1600 / 1601...
  • Page 31: Basic Functions

    (see “Disposal”). Basic functions Setting the time As soon as the timer is supplied with current, “12:00” appears on the display. 1. Press and hold the START/STOP key until the display indicator starts to blink. TD 1600 / 1601...
  • Page 32 (press and hold MIN). Securing the timer NOTE on material damage − Do not slide the timer over surfaces, this could lead to scratching. − Secure the timer using the magnets to the rear side of a metallic surface. TD 1600 / 1601...
  • Page 33: Using The Timer

    Once the set time has run down, for approx. 1 minute beeping can be heard, which gets faster after 30 seconds. 4. Press any key in order to stop the beeping or wait approx. 1 minute until the beeping automatically come to an end. TD 1600 / 1601...
  • Page 34: Using The Stopwatch Function

    2. Press MIN and SEC simultaneously in order to set the indicator to zero. 3. Press START/STOP to start, to stop, and to continue. Via MODE you can display the time again. The time measurement continues to run in the background. TD 1600 / 1601...
  • Page 35: Using The Alarm Function

    In order to deactivate the alarm function before the set alarm time is reached, press the MIN and SEC keys simultaneously. The bell symbol disappears. Stopping the alarm At the set alarm time, you will be woken by beeping: TD 1600 / 1601...
  • Page 36: Resetting The Timer

    RESET. 1. Stick a thin object (e.g. an unwound paperclip) into the opening. 2. Remove the object from the RESET opening when a peep tone sounds. TD 1600 / 1601...
  • Page 37: Cleaning

    − Do not under any circumstances use hard, scratching or abrasive cleaning agents or the like to clean the timer. If you do, the surface could be scratched. − Remove dust from the timer as needed using a soft, dry cloth. TD 1600 / 1601...
  • Page 38: Fault/Remedy

    Model: Timer TD 1600 (white) TD 1601 (black) Battery: 1x LR1130/1.5 V Rated current: <30 mA Dimensions: approx. 101 x 70 x 10.5 mm Distributor (no service address): Waagen-Schmitt GmbH Hammer Steindamm 27-29 22089 Hamburg, Germany TD 1600 / 1601...
  • Page 39: Declaration Of Conformity

    Declaration of Conformity Waagen-Schmitt GmbH hereby declares that the digital kitchen timer TD 1600/1601 is in compliance with EU directives 2014/53/EU and 2011/65/EU. The full text of the EU declaration of conformity is available at the following internet address: www.ade-germany.de/doc...
  • Page 40: Guarantee

    Disposing of the packaging Dispose of the packaging with similar materials. Put cardboard with waste paper, films with recyclable materials. Disposing of the product Dispose of the product in accordance with the regulations that apply in your country. TD 1600 / 1601...
  • Page 41 All batteries must be handed in at a collection point in your community, suburb, or at the retailer. Such batteries can thus be disposed of in an environmentally friendly way. TD 1600 / 1601...
  • Page 42 ¡Estimada/o cliente! Se ha decidido por la compra de un producto de gran calidad de la marca ADE, que aúna unas funciones inteligentes con un diseño extraordinario. Este temporizador es un práctico complemento para la cocina, el baño, el hogar y el tiempo libre.
  • Page 43: Información General

    Este símbolo unido a la palabra PELIGRO advierte de heridas graves. Este símbolo unido a la palabra ADVERTENCIA advierte de heridas de grado medio o leve. Este símbolo unido a la palabra INDICACIÓN advierte de daños materiales. TD 1600 / 1601...
  • Page 44 Funciones básicas..........51 Realizar mediciones de periodos cortos .53 Utilizar la función cronómetro....54 Utilizar la función despertador ....55 Reiniciar el temporizador (RESET) .....56 Limpieza .............57 Problema/Solución .........58 Datos técnicos ..........58 Declaración de conformidad.......59 Garantía ..............60 Eliminación ............60 TD 1600 / 1601...
  • Page 45: Uso Adecuado

    ‚ La limpieza y el mantenimiento por parte del usuario no deben ser realizados por niños, salvo que sean mayores de 8 años y estén supervisados. ‚ Las pilas pueden resultar peligrosas. Por tanto, manténgalas fuera del alcance TD 1600 / 1601...
  • Page 46 Tenga en cuenta los “Datos técnicos”. ‚ Las pilas no deben cargarse, reactivarse con otros medios, desmontarse, arrojarse al fuego o ponerse en cortocircuito. En caso contrario existe un riesgo mayor de TD 1600 / 1601...
  • Page 47 ‚ No exponga las pilas a condiciones extremas, poniéndolas por ejemplo sobre radiadores o expuestas directamente al sol. ¡Riesgo elevado de derrame! ‚ Cuando sea necesario, limpie los contactos del aparato y de las pilas antes de colocarlas. TD 1600 / 1601...
  • Page 48 No lo guarde cerca de tarjetas con bandas magnéticas (tarjetas de crédito, pases de acceso, etc.). Podrían dañarse los datos almacenados. Artículos incluidos en la entrega ‚ Temporizador ‚ 1 pila del tipo LR1130, 1,5 V ‚ Manual de instrucciones TD 1600 / 1601...
  • Page 49: De Un Vistazo

    De un vistazo Pantalla Imanes (parte posterior) Compartimento para pilas Ajustar minutos y segundo Ajustar horas y minutos Iniciar y detener funciones Seleccionar funciones TD 1600 / 1601...
  • Page 50: Puesta En Funcionamiento

    1. Afloje el tornillo de fijación de la tapa del compartimento de las pilas con un destornillador fino de estrella y retire la tapa del compartimento de las pilas. 2. Coloque la pila en su soporte. Preste atención a la polaridad correcta (+/-). TD 1600 / 1601...
  • Page 51: Funciones Básicas

    “Eliminación”. Funciones básicas Ajustar la hora En cuanto el temporizador recibe corriente, en la pantalla aparece “12:00”. 1. Mantenga apretado el botón START/STOP hasta que la indicación en la pantalla comience a parpadear. TD 1600 / 1601...
  • Page 52 (mantenga presionado el botón MIN). Sujetar el temporizador INDICACIÓN de daños materiales − No arrastre el temporizador sobre la superficie, podría producir arañazos. − Fije el temporizador con los imanes posteriores sobre una superficie metálica. TD 1600 / 1601...
  • Page 53: Realizar Mediciones De Periodos Cortos

    Una vez transcurrido el tiempo ajustado se oyen unos pitidos durante 1 minuto, haciéndose más rápidos a los 30 segundos. 4. Presione cualquier botón para parar el pitido o espere 1 minuto hasta que el pitido se interrumpa automáticamente. TD 1600 / 1601...
  • Page 54: Utilizar La Función Cronómetro

    1. Presione repetidamente MODE, hasta que aparezca “00 ” en la pantalla. 2. Presione al mismo tiempo MIN y SEC para poner los indicadores a cero. 3. Presione START/STOP para empezar a cronometrar, parar o continuar. TD 1600 / 1601...
  • Page 55: Utilizar La Función Despertador

    4. Ajuste los minutos deseados del despertador con el botón SEC. 5. Finalmente presione START/STOP. La hora del despertador está ajustada. 6. Presione varias veces MODE hasta que se vuelva a mostrar la hora actual en el despertador. TD 1600 / 1601...
  • Page 56: Parar La Alarma

    1 minuto. El día siguiente volverá a sonar el despertador. Reiniciar el temporizador (RESET) Cuando en la pantalla se muestren valores claramente erróneos, puede volver a poner los ajustes de fábrica en el temporizador. Después TD 1600 / 1601...
  • Page 57: Limpieza

    − No utilice nunca productos o medios de limpieza duros, ásperos o abrasivos para limpiar el temporizador. Podría arañar la superficie. − Cuando sea necesario, quite el polvo al temporizador con un paño suave y seco. TD 1600 / 1601...
  • Page 58: Problema/Solución

    TD 1600 (blanco) TD 1601 (negro) Pilas: 1x LR1130/1,5 V Intensidad de corriente: <30 mA Dimensiones: 101 x 70 x 10,5 mm Distribuidor original (no hay dirección de servicio técnico): Waagen-Schmitt GmbH Hammer Steindamm 27-29 22089 Hamburgo, Alemania TD 1600 / 1601...
  • Page 59: Declaración De Conformidad

    Declaración de conformidad Por la presente, Waagen-Schmitt GmbH declara temporizador de cocina digital TD 1600/1601 cumple con la directiva 2014/53/EU y 2011/65/EU. Se encuentra disponible el texto completo de la declaración de conformidad de la UE en la siguiente dirección de Internet:...
  • Page 60: Garantía

    Elimine el embalaje separando los materiales. Lleve el papel y cartón al contenedor de cartón y las láminas al de plásticos. Eliminación del artículo Elimine el artículo conforme a la normativa correspondiente aplicable en su país. TD 1600 / 1601...
  • Page 61 Todas las pilas y baterías deben depositarse en los puntos de recogida del ayuntamiento, distrito o en los comercios. De este modo puede realizarse la eliminación de pilas y baterías de una forma respetuosa con el medio ambiente. TD 1600 / 1601...
  • Page 62 Chère cliente, cher client, Nous sommes ravis que vous ayez choisi un appareil de haute qualité de la marque ADE, qui allie des fonctions intelligentes à un design exceptionnel. Ce minuteur est un compagnon pratique pour la cuisine, le bain, le ménage ou les hobbys. Les années d'expérience de la marque...
  • Page 63: Généralités

    Légende Ce symbole, associé au mot DANGER, prévient de blessures graves. Ce symbole, associé au mot ATTENTION, prévient de blessures moyennes et légères. Ce symbole, associé au mot AVERTISSEMENT, prévient de dommages matériels. TD 1600 / 1601...
  • Page 64 Exécuter un chronométrage de courte durée .............73 Utilisez la fonction chronomètre ......74 Utilisez la fonction réveil ........75 Réinitialiser le minuteur (RESET) .......76 Nettoyage ..............77 Problèmes/solutions ..........78 Caractéristiques techniques .......78 Déclaration de conformité ........79 Garantie ..............80 Mise au rebut ............80 TD 1600 / 1601...
  • Page 65: Utilisation Conforme

    ‚ Le nettoyage et l'entretien ne doivent pas être réalisés par des enfants, à moins qu'ils aient 8 ans révolus et soient sous surveillance. ‚ Les piles/batteries peuvent présenter un danger mortel. Gardez toujours TD 1600 / 1601...
  • Page 66: Danger Pour Les Enfants

    DANGER d’incendie/brûlure et/ou d'explosion ‚ Risque d'explosion en cas de remplacement non conforme de la pile. Remplacez la batterie uniquement par un type de batterie similaire ou identique. Respectez les indications mentionnées dans les « Caractéristiques techniques ». TD 1600 / 1601...
  • Page 67: Attention Risque De Dommages Matériels

    ‚ Lorsque vous insérez et remplacez les piles, veillez à respecter la polarité (+/-). ‚ Ne soumettez pas les piles à des conditions extrêmes en les conservant TD 1600 / 1601...
  • Page 68: Contenu De L'emballage ‚ Minuteur

    Ne les placez jamais à proximité de cartes à bandes magnétiques (cartes de crédit, cartes d'accès, etc.). Les données qu'elles contiennent pourraient être endommagées. Contenu de l’emballage ‚ Minuteur ‚ 1 pile de type LR1130, 1,5 V ‚ Mode d’emploi TD 1600 / 1601...
  • Page 69: Aperçu

    Aperçu Écran Aimants (face arrière) Compartiment des piles Régler les minutes et secondes Régler les heures et minutes Démarrer et arrêter des fonctions Sélectionner des fonctions TD 1600 / 1601...
  • Page 70: Mise En Marche

    à pile. 2. Placez la pile sur son support. Veillez à respecter la polarité (+/-). La borne plus doit être orientée vers le haut. TD 1600 / 1601...
  • Page 71: Fonctions Principales

    ‚ Éliminez les piles usées en respectant l'environnement, voir « Mise au rebut ». Fonctions principales Réglez l'horloge Lorsque le minuteur est alimenté, l'écran affiche « 12:00 ». 1. Maintenez le bouton START/STOP enfoncé jusqu'à ce que l'affichage commence à clignoter. TD 1600 / 1601...
  • Page 72: Fixer Le Minuteur

    AVERTISSEMENT Risque de dommages matériels − Ne trainez pas le minuteur sur la surface au risque de provoquer des rayures. − Fixez le minuteur sur une surface métallique au moyen des aimants situés sur sa face arrière. TD 1600 / 1601...
  • Page 73: Exécuter Un Chronométrage De Courte Durée

    Au terme de la durée réglée un bip sonore retentit pendant près d'une minute avec une accélération au bout de 30 secondes. 4. Appuyez sur le bouton de votre choix pour interrompre le bip sonore ou attendez env. 1 minute avant qu'il s'arrête automatiquement. TD 1600 / 1601...
  • Page 74: Utilisez La Fonction Chronomètre

    « 00  ». 2. Appuyez simultanément les boutons MIN et SEC pour remettre l'affichage sur zéro. 3. Appuyez sur le bouton START/STOP pour lancer le chronomètre, l'arrêter et, le cas échéant, le relancer. TD 1600 / 1601...
  • Page 75: Utilisez La Fonction Réveil

    4. Réglez l'heure d'activation du réveil à l'aide du bouton SEC. 5. Appuyez ensuite sur START/STOP. L'heure d'activation du réveil est réglée. 6. Appuyez à plusieurs reprises le bouton MODE jusqu'à ce que l'heure actuelle s'affiche. TD 1600 / 1601...
  • Page 76: Arrêter La Sonnerie Du Réveil

    1 minute. Vous serez alors réveillé le jour suivant à la même heure. Réinitialiser le minuteur (RESET) Lorsque l'écran affiche des valeurs manifestement erronées, vous pouvez restaurer les paramètres de sortie d'usine du minuteur. TD 1600 / 1601...
  • Page 77: Nettoyage

    − Ne plongez jamais le minuteur dans de l'eau ou dans tout autre liquide. − N'utilisez jamais de nettoyants agressifs ou abrasifs pour nettoyer le minuteur. Cela pourrait rayer la surface. − Si nécessaire, dépoussiérez le minuteur à l'aide d'un chiffon doux et sec. TD 1600 / 1601...
  • Page 78: Problèmes/Solutions

    12 heures. Caractéristiques techniques Modèle : Minuteur TD 1600 (blanc) TD 1601 (noir) Piles : 1x LR1130/1,5 V Intensité nominale : <30 mA Dimensions : env. 101 x 70 x 10,5 mm Distributeur (aucune adresse de service) : Waagen-Schmitt GmbH Hammer Steindamm 27–29 22089 Hambourg/Allemagne TD 1600 / 1601...
  • Page 79: Déclaration De Conformité

    UE est disponible à l’adresse Internet ci-dessous : www.ade-germany.de/doc La déclaration perd sa validité dans le cas où la balance subirait une modification n’ayant pas été convenue avec nous. Hambourg, mars 2018 Waagen-Schmitt GmbH Hammer Steindamm 27–29 22089 Hambourg/Allemagne TD 1600 / 1601...
  • Page 80: Garantie

    Jetez le papier et le carton avec les papiers de récupération, les plastiques dans les collecteurs de matières recyclables. Mise au rebut de l'article Veuillez éliminer l'article selon les prescriptions en vigueur dans votre pays en matière de traitement des déchets. TD 1600 / 1601...
  • Page 81 être éliminées avec les déchets ménagers. Toutes les piles et batteries doivent être déposées dans un point de collecte de votre localité ou rapportées à leur point d’achat. Les piles et batteries seront ainsi traitées dans le respect de l'environnement. TD 1600 / 1601...
  • Page 82 Gentile cliente, La ringraziamo per aver scelto un prodotto di alta qualità della ADE che unisce funzioni intelligenti e un design fuori dal comune. Il presente contaminuti è un pratico accessorio per la cucina, il bagno, la casa e gli hobby.
  • Page 83: Informazioni Generali

    PERICOLO mette in guardia contro il rischio di gravi lesioni. Questo simbolo accompagnato dalla parola AVVERTENZA indica il rischio di lesioni di lieve o media entità. Questo simbolo accompagnato dalla parola ATTENZIONE indica il rischio di danni alle cose. TD 1600 / 1601...
  • Page 84 Messa in funzione ..........90 Funzioni principali..........91 Misurazione di tempi brevi .......93 Cronometro ............94 Sveglia ..............95 Azzeramento del contaminuti (RESET) ..96 Pulizia ................97 Risoluzione dei problemi ........98 Caratteristiche tecniche ........98 Dichiarazione di conformità ......99 Garanzia ..............100 Smaltimento ............100 TD 1600 / 1601...
  • Page 85: Destinazione D'uso

    ‚ I bambini non devono giocare con il dispositivo. ‚ I bambini possono eseguire le operazioni di pulizia e manutenzione solo se di età superiore agli 8 anni e sotto la supervisione di una persona adulta. TD 1600 / 1601...
  • Page 86 PERICOLO di incendio, ustioni e/o esplosione ‚ In caso di sostituzione non corretta delle batterie, potrebbe sussistere un pericolo di esplosione. Sostituire la batteria solo con un'altra uguale o di tipo equivalente. Osservare quanto indicato nella “Scheda tecnica”. TD 1600 / 1601...
  • Page 87 In tal modo si eviteranno danni causati da eventuali perdite di liquido dalle batterie. ‚ Durante l'inserimento e la sostituzione della batteria, prestare attenzione alla corretta polarità (+/-). ‚ Non sottoporre la batteria a temperature estreme, ad esempio conservandole vicino a TD 1600 / 1601...
  • Page 88: Ambito Della Fornitura

    (carte di credito, carte d'ingresso, ecc.). I dati in esse memorizzati potrebbero subire danni. Ambito della fornitura ‚ Contaminuti ‚ 1 batteria di tipo LR1130 da 1,5 V ‚ Istruzioni per l'uso TD 1600 / 1601...
  • Page 89: Descrizione

    Descrizione Display Calamita (retro) Vano batteria Impostazione dei minuti e dei secondi Impostazione delle ore e dei minuti Attivazione e disattivazione delle funzioni Selezione delle funzioni TD 1600 / 1601...
  • Page 90: Messa In Funzione

    Inserimento e sostituzione della batteria Per il funzionamento è necessaria una batteria del tipo LR1130 da 1,5 V. 1. Svitare la vite di fissaggio del coperchio del vano batterie con un piccolo cacciavite a croce e rimuovere il coperchio. TD 1600 / 1601...
  • Page 91: Funzioni Principali

    ‚ Utilizzare solo il tipo di batterie indicato nella “Scheda tecnica”. ‚ Provvedere allo smaltimento corretto delle batterie, vedi “Smaltimento”. Funzioni principali Impostazione dell'ora Appena la corrente elettrica alimenta il contaminuti, sul display appare “12:00”. TD 1600 / 1601...
  • Page 92 Fissaggio del contaminuti ATTENZIONE a eventuali danni al prodotto − Non spingere il contaminuti sul suo supporto in quanto ciò potrebbe causare graffi. − Utilizzare le calamite sul retro per fissare il contaminuti su una base metallica. TD 1600 / 1601...
  • Page 93: Misurazione Di Tempi Brevi

    30 secondi. 4. Premere un tasto qualsiasi per interrompere i bip oppure attendere circa un minuto, fino a quando i segnali acustici si interromperanno automaticamente. TD 1600 / 1601...
  • Page 94: Cronometro

    “00 ”. 2. Premere contemporaneamente MIN e SEC per azzerare il conteggio. 3. Premere START/STOP per avviare, interrompere o proseguire il conteggio. Con MODE è possibile visualizzare di nuovo l'ora. La misurazione continuerà in background. TD 1600 / 1601...
  • Page 95: Sveglia

    STOP. L'impostazione della sveglia è così completata. 6. Premere più volte MODE per tornare alla visualizzazione dell'ora attuale. Per disattivare la sveglia prima dell'ora impostata, premere contemporaneamente i pulsanti MIN e SEC. L'icona della campana scomparirà. TD 1600 / 1601...
  • Page 96: Interruzione Del Segnale Della Sveglia

    Azzeramento del contaminuti (RESET) Quando sul display vengono visualizzati valori errati, è possibile riportare il dispositivo alle impostazioni di fabbrica. Al termine, dovrebbe funzionare di nuovo correttamente. TD 1600 / 1601...
  • Page 97: Pulizia

    − Non immergere il contaminuti in acqua o altri liquidi. − Non utilizzare in nessun caso detergenti aggressivi o abrasivi per pulire il contaminuti, in quanto potrebbero graffiarne la superficie. − Se necessario, eliminare la polvere dal contaminuti con un panno morbido asciutto. TD 1600 / 1601...
  • Page 98: Risoluzione Dei Problemi

    Sul display appare “PM” ‚ L'orologio è stato impostato nel formato 12 ore. Caratteristiche tecniche Modello: Contaminuti TD 1600 (bianco) TD 1601 (nero) Batterie: una di tipo LR1130 da 1,5 V Corrente nominale: <30 mA Dimensioni: circa 101 x 70 x 10,5 mm TD 1600 / 1601...
  • Page 99: Dichiarazione Di Conformità

    EU è disponibile al seguente indirizzo Internet: www.ade-germany.de/doc La presente dichiarazione perde ogni sua validità qualora alla bilancia vengano apportate modifiche senza la nostra autorizzazione. Amburgo, marzo 2018 Waagen-Schmitt GmbH Hammer Steindamm 27-29 22089 Amburgo, Germania TD 1600 / 1601...
  • Page 100: Garanzia

    Smaltimento Smaltimento dell'imballaggio Smaltire l'imballaggio nella raccolta differenziata. Conferire il cartone nella raccolta della carta e la pellicola in quella del materiale riciclabile. Smaltimento del prodotto Smaltire il prodotto secondo le norme vigenti nel proprio paese. TD 1600 / 1601...
  • Page 101 Le batterie e gli accumulatori devono essere consegnati presso un centro di raccolta comunale o di quartiere, oppure presso il proprio rivenditore, al fine di garantire il loro smaltimento in modo rispettoso dell'ambiente. TD 1600 / 1601...
  • Page 102: Szanowny Kliencie

    Szanowny Kliencie! Zakupiony wysokiej jakości produkt marki ADE łączy w sobie inteligentne funkcje z wyjątkową stylistyką. Timer ten jest praktycznym dodatkiem w kuchni, łazience, gospodarstwie domowym i hobby. Wieloletnie doświadczenie marki ADE gwarantuje wysoki standard techniczny oraz sprawdzoną jakość. Życzymy przyjemności w doskonałym gospodarowaniu czasem! Zespół...
  • Page 103: Informacje Ogólne

    Ten symbol w połączeniu ze słowem NIEBEZPIECZEŃSTWO ostrzega przed poważnymi obrażeniami ciała. Ten symbol w połączeniu ze słowem OSTRZEŻENIE ostrzega przed obrażeniami ciała średniego i lekkiego stopnia. Ten symbol w połączeniu ze słowem WSKAZÓWKA ostrzega przed stratami materialnymi. TD 1600 / 1601...
  • Page 104 Uruchomienie .............130 Funkcje podstawowe ........131 Odliczanie krótkiego czasu ......133 Korzystanie ze stopera ........134 Korzystanie z funkcji budzenia .....135 Zerowanie timera (RESET) ......136 Czyszczenie............137 Usterka/środek zaradczy ........138 Dane techniczne ..........138 Deklaracja zgodności ........139 Gwarancja ............140 Utylizacja ..............140 TD 1600 / 1601...
  • Page 105: Użycie Zgodne Z Przeznaczeniem

    ‚ Dzieci nie mogą bawić się produktem. ‚ Dzieci nie mogą czyścić ani serwisować urządzenia, chyba że mają 8 lat lub więcej i są nadzorowane. ‚ Baterie mogą stanowić śmiertelne zagrożenie. Dlatego należy trzymać TD 1600 / 1601...
  • Page 106 ‚ Niebezpieczeństwo wybuchu w przypadku niewłaściwej wymiany baterii. Baterie proszę wymieniać na egzemplarz tylko tego samego typu lub równoważny. Przestrzegać “danych technicznych”. ‚ Baterii nie wolno ładować, reaktywować w inny sposób, rozkładać na części, wrzucać w TD 1600 / 1601...
  • Page 107 ‚ Podczas wkładania i wymiany baterii należy zwrócić uwagę na prawidłową biegunowość (+/-). ‚ Nie narażać baterii na oddziaływanie skrajnych warunków poprzez np. układanie ich na grzejnikach lub bezpośrednio w miejscach nasłonecznionych. Podwyższone TD 1600 / 1601...
  • Page 108 ‚ Z tyłu urządzenia znajdują się dwa magnesy. Dlatego proszę nie zbliżać do niego kart z paskami magnetycznymi (kredytowe, przepustki, itd.). Zgromadzone w nich dane mogą ulec uszkodzeniu. Zawartość dostawy ‚ Timer ‚ 1 bateria typ LR1130, 1,5 V ‚ Instrukcja obsługi TD 1600 / 1601...
  • Page 109: W Skrócie

    W skrócie Wyświetlacz Magnesy (ściana tylna) Kieszeń na baterie Ustawianie minut i sekund Ustawianie godzin i minut Uruchomienie i zatrzymanie funkcji Wybór funkcji TD 1600 / 1601...
  • Page 110: Uruchomienie

    Wkładanie/wymiana baterii Do działania potrzebna jest jedna bateria typu LR1130/1,5 V. 1. Proszę odkręcić śrubę mocującą pokrywkę posługując się małym śrubokrętem krzyżakowym i zdjąć pokrywkę. 2. Proszę włożyć baterię do jej uchwytu. Zwrócić uwagę na prawidłową biegunowość TD 1600 / 1601...
  • Page 111: Funkcje Podstawowe

    ‚ Utylizować stare baterie w sposób ekologiczny, patrz “Utylizacja”. Funkcje podstawowe Ustawienie czasu Timer po uzyskaniu zasilania, pokaże na wyświetlaczu “12:00”. 1. Proszę przytrzymać przycisk START/STOP, aż do rozpoczęcia migotania wskazania. 2. Przyciskiem MIN proszę ustawić aktualną godzinę. TD 1600 / 1601...
  • Page 112 (trzymając wciśnięty przycisk MIN). Mocowanie timera WSKAZÓWKA dotycząca strat materialnych − Proszę nie przesuwać timera na podłożu, bo może to skutkować jego zadrapaniem. − Timer należy mocować korzystając z jego magnesów na ścianie tylnej, mocujących go na metalowym podłożu. TD 1600 / 1601...
  • Page 113: Odliczanie Krótkiego Czasu

    3. Nacisnąć przycisk START/STOP, by rozpocząć odliczanie. Po upływie ustawionego czasu słychać będzie przez około jedną minutę dźwięki pisku, przyśpieszające po około 30-stu sekundach. 4. Proszę nacisnąć dowolny klawisz, by przerwać dźwięki pisku lub odczekać około minuty na ich automatyczne wyłączenie. TD 1600 / 1601...
  • Page 114: Korzystanie Ze Stopera

    ”. 2. Proszę jednocześnie nacisnąć przyciski MIN i SEC, by wyzerować wskazanie. 3. Nacisnąć przycisk START/STOP, by rozpocząć odliczanie, zatrzymać i ewentualnie wznowić. Naciśnięciem klawisza MODE można ponownie przywrócić wskazywanie czasu. Odliczanie nadal w tle przebiega. TD 1600 / 1601...
  • Page 115: Korzystanie Z Funkcji Budzenia

    5. Na zakończenie proszę nacisnąć przycisk START/STOP. Czas budzenia jest już ustawiony. 6. Proszę naciskać kilkakrotnie MODE, aż do wyświetlenia aktualnego czasu. Aby wyłączyć funkcję budzenia o ustawionym czasie, proszę jednocześnie nacisnąć przyciski MIN i SEC. Symbol budzika zgaśnie. TD 1600 / 1601...
  • Page 116: Wyłączanie Alarmu Budzenia

    Jeśli pojawią się na wyświetlaczu wyraźnie błędne wartości, to można timerowi przywrócić ustawienia fabryczne. Powinien on z nimi działać normalnie. Na tylnej ścianie znajduje się mały otwór oznaczony RESET. 1. Proszę wetknąć w otwór mały przedmiot (np. rozprostowany spinacz biurowy). TD 1600 / 1601...
  • Page 117: Czyszczenie

    − Proszę nie zanurzać timera w wodzie lub innej cieczy. − Proszę nigdy nie stosować twardych, zdrapujących lub szorujących środków czyszczenia. Może dojść bowiem do zarysowań powierzchni. − W razie potrzeby timer należy przetrzeć, miękką suchą ściereczką. TD 1600 / 1601...
  • Page 118: Usterka/Środek Zaradczy

    Model: Timer TD 1600 (biały) TD 1601 (czarny) Bateria: 1x LR1130/1,5 V Prąd znamionowy: <30 mA Wymiary: ok. 101 x 70 x 10,5 mm Dystrybutor (nie adres serwisu): Waagen-Schmitt GmbH Hammer Steindamm 27-29 22089 Hamburg, Germany TD 1600 / 1601...
  • Page 119: Deklaracja Zgodności

    Deklaracja zgodności Niniejszym firma Waagen-Schmitt GmbH cyfrowy timer kuchenny oświadcza, że TD 1600/1601 jest zgodna z dyrektywą 2014/53/UE i 2011/65/UE. Pełny tekst deklaracji zgodności E jest dostępny pod poniższym adresem internetowym: www.ade-germany.de/doc Deklaracja traci swą ważność, jeśli w wadze zostaną...
  • Page 120: Gwarancja

    Tektura i karton powinny trafić do pojemnika na papier, folia do pojemnika na surowce wtórne. Utylizacja produktu Produkt należy utylizować zgodnie z przepisami obowiązującymi w danym kraju. Urządzeń nie wolno wyrzucać razem ze zwykłymi odpadami domowymi TD 1600 / 1601...
  • Page 121 Baterii i akumulatorów nie wolno wyrzucać razem z odpadami domowymi Wszystkie baterie i akumulatory należy oddawać do punktu zbiórki w gminie, dzielnicy lub sklepie. W ten sposób baterie i akumulatory mogą trafić do ekologicznej utylizacji. TD 1600 / 1601...

Ce manuel est également adapté pour:

Td 1601

Table des Matières