Table des Matières
Publicité
Les langues disponibles
Les langues disponibles
Liens rapides
Deckenventilator und Lampe mit versenkbaren Flügelblättern
Ventilateur de plafond à pales rabattables avec luminaire
Ventilador de techo con paletas retráctiles y lámpara
Ventilatore da soffitto a pale retrattili e lampadario
Plafondventilator met intrekbare bladen en licht
GB
Installation Instruction Manual ...................................................................................................... 2
D
Installationsanleitung .....................................................................................................................11
F
Guide d'installation.........................................................................................................................20
E
Manual de instrucciones de instalación..........................................................................................29
I
Manuale delle istruzioni di installazione..........................................................................................38
NL
Installatiehandleiding.......................................................................................................................47
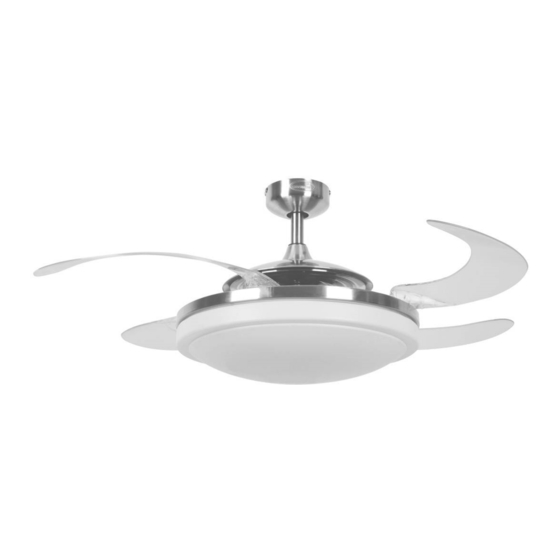
Retracting Blade Ceiling Fan and Light
Version 1.1 – Last updated on April 16, 2013– © Copyright 2013 – Fanaway
Publicité
Table des Matières

Manuels Connexes pour Fanaway LD-0003-10/WH/GS/E27

Sommaire des Matières pour Fanaway LD-0003-10/WH/GS/E27
- Page 1 Plafondventilator met intrekbare bladen en licht Installation Instruction Manual ...................... 2 Installationsanleitung ........................11 Guide d’installation.........................20 Manual de instrucciones de instalación..................29 Manuale delle istruzioni di installazione..................38 Installatiehandleiding........................47 Version 1.1 – Last updated on April 16, 2013– © Copyright 2013 – Fanaway...
-
Page 2: Important Safety Instructions
IMPORTANT SAFETY INSTRUCTIONS 1) This appliance is NOT intended for use by persons (including children) with reduced physical, sensory or mental capabilities, or lack of experience and knowledge, unless they have been given supervision or instruction concerning use of the appliance by a person responsible for their safety. 2) The all-poles disconnection must be incorporated in the fixed wiring in accordance with the wiring rules. - Page 3 Figure 1.
-
Page 4: Technical Information
TECHNICAL INFORMATION Model Rated Voltage Remote Lamp (watt) LD-0003-10/WH/GS/E27 220-240V, 50HZ 1.5V, AAA X 4 3 x Max. 20W, CFL, E27 LD-0003-10/SN/GS/E27 220-240V, 50HZ 1.5V, AAA X 4 3 x Max. 20W, CFL, E27... - Page 5 Figure 3...
- Page 6 INSTALL THE DOWN ROD 1) Feed down rod through ceiling canopy (No.3– Fig. 1) and bolt and pin cover (No.6– Fig. 1). 2) Loose ball joint and insert the motor wires through down rod, and then secure ball joint back to down rod. 3) Insert down rod (No.4–...
-
Page 7: Reverse Function
REVERSE FUNCTION Your ceiling can operate either in fan mode or reverse fan mode. SUMMER Mode: The reverse switch shall be in “down” (SUMMER) position to make the fan rotate in the anticlockwise direction. The airflow will be directed downwards, for cooling in summer. WINTER Mode: The reverse switch shall be “up”... - Page 8 ICONS ON THE REMOTE LCD PANEL Figure 7 Auto mode temperature setting icon 1) Indicate the temperature at which the fan turns on, when the fan is set to FAN AUTO function. 2) Indicate the time at which the fan turns off, when the fan is set to FAN TIMER function. 3) The icon will switch from temperature setting and timer setting every two seconds automatically.
- Page 9 BUTTONS ON THE REMOTE FAN AUTO: Press the button to switch from FAN AUTO mode to MANAUL mode. FAN: Press the button to set fan running at HIGH – MEDIUM – LOW – OFF speed. FAN TIMER: Press the button to turn off the fan at setting time automatically. LIGHT TIMER: Press the button to turn off the light at setting time automatically.
-
Page 10: After Installation
AFTER INSTALLATION WOBBLE: The fan blades have been adjusted in the factory to minimize any wobble. NOTE: CEILING FANS TEND TO MOVE DURING OPERATION DUE TO THE FACT THAT THEY ARE MOUNTED ON A RUBBER GROMMET. IF THE FAN WAS MOUNTED RIGIDLY TO THE CEILING IT WOULD CAUSE EXCESSIVE VIBRATION. -
Page 11: Wichtige Sicherheitshinweise
WICHTIGE SICHERHEITSHINWEISE 1) Dieses Gerät ist NICHT für den Gebrauch durch Personen (einschließlich Kinder) geeignet, die über eingeschränkte körperliche, sensorische oder mentale Fähigkeiten oder über mangelnde Erfahrung und Kenntnisse verfügen, es sei denn, ihr Gebrauch des Gerätes wird durch eine Person, die für deren Sicherheit verantwortlich ist, entsprechend beaufsichtigt oder angeleitet. - Page 12 Abbildung 1...
- Page 13 Baumwollhandschuhe zu tragen, damit keine Fingerabdrücke auf der Oberfläche des Ventilators hinterlassen werden. Technische Daten Nennspannung Fernbedienung Ventilator Lampe (Watt) LD-0003-10/WH/GS/E27 220-240V, 50HZ 1.5V, AAA X 4 3 x Max. 20W, CFL, E27 LD-0003-10/SN/GS/E27 220-240V, 50HZ 1.5V, AAA X 4 3 x Max. 20W, CFL, E27 LD-0003-10/CH/GS/E27 220-240V, 50HZ 1.5V, AAA X 4...
- Page 14 Abbildung 3...
-
Page 15: Installation Des Hängerohrs
INSTALLATION DES HÄNGEROHRS 1) Das Hängerohr durch die Deckenabdeckung (Nr. 3 – Abbildung 1) und die Abdeckung für Bolzen und Sicherungsstift (Nr. 6 – Abbildung 1) führen. 2) Das Kugelgelenk lockern und die Motorkabel durch das Hängerohr führen. Dann das Kugelgelenk wieder am Hängerohr befestigen. -
Page 16: Einstellung Der Dip-Schalter
RÜCKLAUFFUNKTION Der Ventilator kann sowohl im Vorlauf als auch im Rücklauf betrieben werden. SOMMERBETRIEB: Wenn der Schalter für die Rücklauffunktion auf “down” (SOMMER) steht, dreht der Ventilator sich gegen den Uhrzeigersinn. Die Luftbewegung wird nach unten gelenkt und bringt im Sommer den gewünschten Abkühlungseffekt. - Page 17 SYMBOLE AUF DER LCD-ANZEIGE DER FERNBEDIENUNG Abbildung 7 Symbol für automatische Temperatureinstellung Anzeige der Temperatur, bei der der Ventilator eingeschaltet wird, wenn der Ventilator auf FAN AUTO eingestellt ist Anzeige der Zeit, bei der der Ventilator ausgeschaltet wird, wenn der Ventilator auf FAN TIMER eingestellt ist Das Symbol wechselt automatisch alle zwei Sekunden zwischen der Temperatur- und Timereinstellung.
- Page 18 FUNKTIONSTASTEN DER FERNBEDIENUNG FAN AUTO: Durch Drücken dieser Taste wird der Modus ausgewählt: FAN AUTO bzw. MANUAL. FAN: Durch Drücken dieser Taste wird die Geschwindigkeit geändert: hoch, mittel, niedrig, aus (HIGH – MEDIUM – LOW – OFF). FAN TIMER: Durch Drücken dieser Taste wird der Ventilator nach der eingestellten Zeit automatisch ausgeschaltet.
-
Page 19: Nach Der Installation
NACH DER INSTALLATION WACKELN: Die Flügelblätter des Ventilators wurden ab Werk angepasst, um ein Wackeln möglichst zu vermeiden. HINWEIS: DA DECKENVENTILATOREN AN EINER GUMMI-ISOLIERSCHEIBE MONTIERT SIND, TENDIEREN SIE DAZU, WäHREND DES BETRIEBS IN BEWEGUNG ZU SEIN. FALLS DER VENTILATOR ZU FEST AN DER DECKE BEFESTIGT WIRD, KANN DIES ZU ÜBERMäSSIGER VIBRATION FÜHREN. -
Page 20: Recommandations De Sécurité Importantes
RECOMMANDATIONS DE SÉCURITÉ IMPORTANTES 1) Cet appareil N’est PAS destiné à être utilisé par des personnes (y compris des enfants) avec des capacités physiques, sensorielles ou mentales limitées, ou un manque d’expérience et de connaissances, à moins qu’ils ne bénéficient de la supervision ou qu’il ne leur ait été dispensé des instructions concernant l’utilisation de l’appareil par une personne responsable de leur sécurité. - Page 21 Figure 1...
-
Page 22: Installation Du Support De Montage
Spécifications Tension nominale Commande à Ventilateur Lampe distance (Watt) LD-0003-10/WH/GS/E27 220-240V, 50HZ 1.5V, AAA X 4 3 x Max. 20W, CFL, E27 LD-0003-10/SN/GS/E27 220-240V, 50HZ 1.5V, AAA X 4 3 x Max. 20W, CFL, E27 LD-0003-10/CH/GS/E27 220-240V, 50HZ 1.5V, AAA X 4... - Page 23 Figure 3...
-
Page 24: Installation De La Tige De Suspension
INSTALLATION DE LA TIGE DE SUSPENSION 1) Faites passer la tige de suspension à travers la garniture de plafond (No. 3 Figure 1) et le couvercle de goupille et clavette (No. 6 Figure 1). 2) Desserrez la rotule de suspension ; enfilez et faites passer les fils moteur dans la tige de suspension, puis refixez la rotule sur la tige de suspension. -
Page 25: Fonctionnement Inversé
FONCTIONNEMENT INVERSÉ Votre ventilateur peut être opéré en mode ventilateur et en mode ventilateur inversé. Mode ÉTÉ: Positionner l'interrupteur inverseur sur “down” (SUMMER) afin de faire tourner le ventilateur dans le sens inverse des aiguilles du montre. Le jet d'air orienté vers le bas crée un courant d'air frais. Mode HIVER: Positionner l'interrupteur inverseur sur “up”... -
Page 26: Icônes Sur Le Cadran À Cristaux Liquides De La Commande À Distance
ICÔNES SUR LE CADRAN À CRISTAUX LIQUIDES DE LA COMMANDE À DISTANCE Figure 7 Icône de réglage de la température en mode auto 1) Indique la température à laquelle le ventilateur se met en marche, lorsque le ventilateur est programmé pour la fonction FAN AUTO. -
Page 27: Boutons Sur La Commande À Distance
BOUTONS SUR LA COMMANDE À DISTANCE FAN AUTO: (Ventilateur auto) -----------------Appuyez ce bouton pour passer du mode FAN AUTO au mode MANUAL. FAN: (Ventilateur) --------------------------------Appuyez ce bouton pour régler la vitesse du ventilateur sur HIGH – MEDIUM – LOW – OFF (Rapide-Moyen-Lent-Arrêt). FAN TIMER: (Temporisation ventilateur) ---Appuyez ce bouton pour arrêter le ventilateur automatiquement à... -
Page 28: Après L'installation
APRÈS L’INSTALLATION OSCILLATION : Les pales du ventilateur ont été réglées en usine pour minimiser le phénomène d’oscillation. REMARQUE : LES VENTILATEURS DE PLAFOND ONT TENDANCE À BOUGER EN FONCTIONNEMENT DU FAIT QU’ILS SONT MONTÉS SUR UNE BAGUE EN CAOUTCHOUC. SI LE VENTILATEUR ÉTAIT MONTÉ... -
Page 29: Instrucciones Importantes De Seguridad
INSTRUCCIONES IMPORTANTES DE SEGURIDAD 1) Este aparato NO ha sido diseñado para ser utilizado por personas (incluidos niños) con capacidades físicas, sensoriales o mentales disminuidas, o falta de experiencia o conocimiento, a menos que haya una persona responsable de su seguridad que los supervise o brinde instrucción respecto al uso del dispositivo. - Page 30 FIGURA 1...
-
Page 31: Instalación Del Soporte De Montaje
Especificaciones Tensión nominal Control remoto Ventilador Lámpara (vatios) LD-0003-10/WH/GS/E27 220-240V, 50HZ 1.5V, AAA X 4 3 x Max. 20W, CFL, E27 LD-0003-10/SN/GS/E27 220-240V, 50HZ 1.5V, AAA X 4 3 x Max. 20W, CFL, E27... - Page 32 Figura 3...
- Page 33 INSTALE LA VARILLA VERTICAL 1) Pase la varilla vertical a través del dosel para cielo raso (No. 3 - Figura 1) y la cubierta para perno y pasador (No. 6 - Figura 1). 2) Afloje la junta esférica y pase los cables del motor a través de la varilla vertical. Luego, fije nuevamente la junta esférica a la varilla.
- Page 34 FUNCIÓN DE GIRO INVERSO EL ventilador puede girar en dirección del sentido de las agujas del reloj o en el contrario. Modo VERANO: Si el interruptor para dirección del giro está hacia abajo “down” (SOMMER) el ventilador girará en sentido de las agujas del reloj. El flujo de aire estará dirigido hacia abajo para enfriar con una brisa directa en verano.
- Page 35 ÍCONOS DE LA PANTALLA DE VISUALIZACIÓN DEL CONTROL REMOTO Figura 7 Ícono de configuración de la temperatura en modo automático 1) Indica la temperatura a la que se enciende el ventilador, cuando el ventilador está configurado para la función “FAN AUTO” 2) Indica la hora a la que se apaga el ventilador, cuando el ventilador está...
-
Page 36: Botones Del Control Remoto
BOTONES DEL CONTROL REMOTO FAN AUTO (Ventilador automático): ---------Presione el botón para pasar de modo FAN AUTO a modo MANUAL. FAN (Ventilador): ---------------------------------Presione el botón para configurar el funcionamiento del ventilador a velocidad HIGH – MEDIUM – LOW – OFF. FAN TIMER (Temporizador del ventilador): Presione el botón para que el ventilador se apague a la hora configurada de forma automática. -
Page 37: Después De La Instalación
DESPUÉS DE LA INSTALACIÓN OSCILACIÓN: Las paletas del ventilador han sido ajustadas en fábrica para minimizar toda oscilación. NOTA: LOS VENTILADORES DE TECHO TIENDEN A MOVERSE DURANTE EL FUNCIONAMIENTO DEBIDO A QUE ESTÁN MONTADOS A UNA ARANDELA DE CAUCHO. SI EL VENTILADOR FUE MONTADO DIRECTAMENTE EN EL CIELO RASO, SE PRODUCIRÁ... -
Page 38: Istruzioni Importanti Per La Sicurezza
ISTRUZIONI IMPORTANTI PER LA SICUREZZA 1) Questa unità NON è intesa per l’uso da parte di persone (e bambini) con ridotte capacità fisiche, sensoriali o mentali e inesperte, a meno che non siano sorvegliate o abbiano ricevuto le istruzioni sull’uso dell’unità... - Page 39 figura 1...
- Page 40 Specifications Tensione Telecomando Ventilatore Lampada nominale (watt) LD-0003-10/WH/GS/E27 220-240V, 50HZ 1.5V, AAA X 4 3 x Max. 20W, CFL, E27 LD-0003-10/SN/GS/E27 220-240V, 50HZ 1.5V, AAA X 4 3 x Max. 20W, CFL, E27 LD-0003-10/CH/GS/E27 220-240V, 50HZ 1.5V, AAA X 4...
- Page 41 Figura 3...
-
Page 42: Installazione Della Lampada
INSTALLARE L’ASTA DI SOSPENSIONE 1) Infilare l’asta attraverso la calotta a soffitto (N. 3 – Figura 1) e il coperchietto del bullone e puntale (N. 6 – Figura 1). 2) Allentare il giunto sferico e inserire i fili del motore attraverso l’asta, quindi rimontare il giunto sull’asta. 3) Inserire l’asta di sospensione (N. -
Page 43: Impostazione Degli Interruttori Dip
FUNZIONE DI RITORNO Il ventilatore può essere azionato in senso orario e antiorario. Modo ESTIVO: se l'interruttore della funzione di ritorno si trova su “down” (ESTATE), significa che ventilatore gira in senso antiorario.In questo caso l'aria viene deviata in basso rinfrescando il locale in estate. Modo INVERNALE: se l'interruttore della funzione di ritorno si trova su “up”... - Page 44 ICONE SUL PANNELLO LCD DEL TELECOMANDO Icona di impostazione temperatura in modalità automatica 1) Indica la temperatura alla quale si aziona il ventilatore, quando è impostato per il funzionamento automatico (FAN AUTO). 2) Indica la durata di accensione del ventilatore, quando è impostato per il funzionamento a tempo (FAN TIMER).
- Page 45 BUTTONS ON THE REMOTE FAN AUTO: -----------premere questo tasto per commutare tra le modalità AUTOMATICA e MANUALE. FAN: -------------------premere questo tasto per impostare una velocità tra HI (alta) – MED (media) – LO (bassa) 0 OFF (spento) FAN TIMER: ----------premere questo tasto per spegnere automaticamente il ventilatore all’ora impostata. LIGHT TIMER: -------premere questo tasto per spegnere automaticamente la luce all’ora impostata.
-
Page 46: Dopo L'installazione
DOPO L’INSTALLAZIONE TRABALLAMENTO: Le pale del ventilatore sono state calibrate in fabbrica per ridurre al minimo il traballamento. NOTA: I VENTILATORI A SOFFITTO TENDONO A MUOVERSI DURANTE IL FUNZIONAMENTO POICHÉ SONO MONTATI SU UN OCCHIELLO DI GOMMA. SE SI MONTASSE IL VENTILATORE IN MODO RIGIDO AL SOFFITTO, PROVOCHEREBBE UNA VIBRAZIONE ECCESSIVA. -
Page 47: Belangrijke Veiligheidsinstructies
BELANGRIJKE VEILIGHEIDSINSTRUCTIES 1) Dit apparaat is NIET bestemd voor gebruik door personen (inclusief kinderen) met beperkt fysiek, zintuiglijk of mentaal vermogen, of gebrek aan ervaring en kennis, tenzij ze instructies hebben gekregen over het gebruik van het apparaat of onder toezicht staan van een persoon die verantwoordelijk is voor hun veiligheid. - Page 48 AFBEELDING 1...
- Page 49 Specificaties Nominale Afstandsbedie Ventilator Lamp spanning ning (Watt) LD-0003-10/WH/GS/E27 220-240V, 50HZ 1.5V, AAA X 4 3 x Max. 20W, CFL, E27 LD-0003-10/SN/GS/E27 220-240V, 50HZ 1.5V, AAA X 4 3 x Max. 20W, CFL, E27 LD-0003-10/CH/GS/E27 220-240V, 50HZ 1.5V, AAA X 4...
- Page 50 afbeelding 3...
- Page 51 DE STANG INSTALLEREN Voer de stang door de plafondkap (nr. 3 – afbeelding 1) en de bout- en penafdekking (nr. 6 – afbeelding Maak het kogelgewricht los, steek de motordraden door de stang en zet het kogelgewricht weer op de stang vast.
- Page 52 OMKEERFUNCTIE De ventilator kan zowel voorwaarts als achterwaarts worden toegepast. ZOMER-toepassing: Wanneer de schakelaar voor de omkeerfunctie op “down” (ZOMER) staat, draait de ventilator tegen de klok in. De luchtbeweging wordt naar beneden gericht en zorgt in de zomer voor het gewenste koelende effect.
- Page 53 PICTOGRAMMEN OP HET LCD VAN DE AFSTANDSBEDIENING Afbeelding 7 Pictogram Auto-modus temperatuurinstelling Toont de temperatuur waarop de ventilator wordt ingeschakeld, als de ventilator op FAN AUTO (ventilator automatisch) is ingesteld. Toont de tijd waarop de ventilator wordt uitgeschakeld, als de ventilator op FAN TIMER (ventilator timer) is ingesteld.
-
Page 54: Knoppen Op De Afstandsbediening
KNOPPEN OP DE AFSTANDSBEDIENING FAN AUTO: -------------------Druk op de knop om tussen de modus FAN AUTO (ventilator automatisch) en MANUAL (handmatig) te wisselen. VENTILATOR: ---------------Druk op de knop om de ventilator te laten lopen met de snelheid op HIGH – MEDIUM –... -
Page 55: Reiniging En Verzorging
NA DE INSTALLATIE WIEBELEN: De ventilatorbladen zijn in de fabriek afgesteld om zo weinig mogelijk te wiebelen. NB: TIJDENS BEDRIJF ZIT ER SPELING IN PLAFONDVENTILATOREN OMDAT ZE OP EEN RUBBER DOORVOERRING ZIJN GEMONTEERD. ALS DE VENTILATOR VAST AAN HET PLAFOND WORDT GEMONTEERD, ONTSTAAT OVERMATIGE TRILLING.