gaviota Parabox Manuel D'installation

Manuels Connexes pour gaviota Parabox


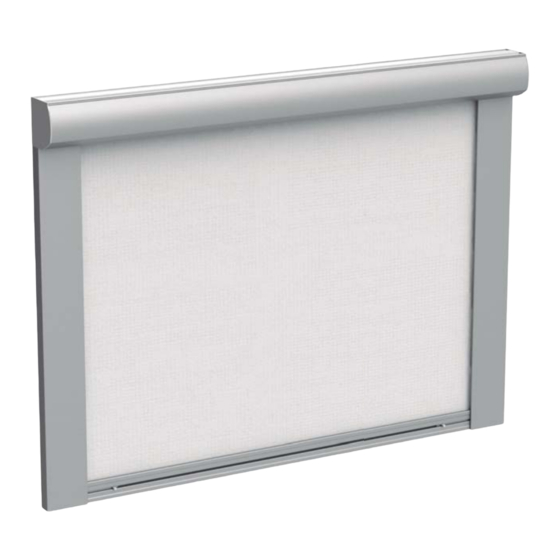
Sommaire des Matières pour gaviota Parabox
- Page 1 PARABOX Manual de Instalación Manuel d’Installation Installation Manual Manuale di Installazione...
-
Page 2: Advertencias De Seguridad
El no respetar las instrucciones de montaje, uso y especifi caciones técnicas del artículo, así como excederse en los rangos de uso máximos especifi cados (pesos, etc...), signifi cará la exclusión de la Política de Garantía y de Servicio Postventa de Gaviota Simbac, S.L. - Page 3 PARABOX Índice • Index • Index • Indice Identifi cación de las piezas • Part identifi cation Identifi cation des pièces • Identifi cazione dei pezzi Descuentos • Cutting Réductions • Misure Preparación en fábrica • Assembly at the factory Préparation à...
- Page 4 80140362 Profi lé chasse-pieds brise-vent blanc 5 m Metri profi lo rivestimento antivento bianco 5m 80170507 KIT TAPAS CAJÓN PARABOX • PARABOX BOX COVER SET KIT COUVERCLE CAISSON PARABOX • KIT TAPPI CASSONETTO PARABOX Tuerca autoblocante M6 DIN 985 Dacro...
- Page 5 PARABOX Numero • Number Código • Code Descripción • Description Numéro • Numero Code • Codice Description • Descizione Juego testeros Keeper con acople blanco Set of end caps for Keeper, white 45036151 Jeux consoles Keeper avec fi xation blanche Gruppo telaio Keeper con sistema di aggancio bianco Anillo compensación Q13 1415 Screen Universal Zip...
- Page 6 PARABOX Despiece montaje con motor • Motor assembly exploded view Découpe montage avec moteur • Esploso del montaggio con motore Despiece eje para motor • Axis for motor exploded view Découpe axe pour moteur • Esploso asse motore...
- Page 7 PARABOX Despiece montaje con máquina • Gear assembly exploded view Découpe montage avec treuil • Esploso del montaggio con arganello Despiece eje para máquina • Axis for gear exploded view Découpe axe pour treuil • Esploso asse arganello...
- Page 8 PARABOX Descuentos • Cutting Réductions • Misure Rango de uso • Range of use Portée d’utilisation • Range d’uso 5000 mm 2500 mm Listado de descuentos • Cutting table Liste de réductions • Elenco misure Perfi l cajón • Box profi le X-6 mm Profi...
- Page 9 PARABOX Descuentos Lona • Canvas cutting Réduction toile • Misure tela Descuentos lona montaje con motor Canvas cutting for motor assembly Réductions toile montage avec moteur Misure tela montaggio con motore X-90 mm Y+300 mm Descuentos lona montaje con máquina Canvas cutting for gear assembly Réductions toile montage avec treuil...
- Page 10 PARABOX Preparación en fábrica • Assembly at the factory Préparation à l’usine • Preparazione in fabbrica Ensamblado motor • Motor assembly Assemblage du moteur • Assemblaggio motore Paso 1. Introducir la lona (1) en el eje (2). Introducir el casquillo punto (3) y el anillo motor (4).
- Page 11 PARABOX Ensamblado máquina • Gear assembly Assemblage du treuil • Assemblaggio arganello Paso 1. Introducir la lona (1) en el eje (2). Introducir el casquillo punto (3) y el casquillo maquina (4). Ensamblar el soporte interior cofre (5) con el punto rodamiento (6) e introducir en el eje.
- Page 12 PARABOX Para montaje con motor • For assembly with motor Pour montage avec le moteur • Montaggio con motore Paso 2. Alinear la barra de carga con la lona. Introducir los cerrojillos. Step 2. Align the charge profi le with the canvas.
- Page 13 PARABOX Paso 3. Introducir el tope cerrojillo (1) en la guía (2). Introducir los felpudos (3) la guía (2). Step 3. Introduce the lock caps (1) in the guide (2). Introduce the mat (3) in the guide (2). 3. Introduire la butée du verrou (1) dans la glissière (2).
- Page 14 PARABOX Paso 5. Mecanizado perfi l registro cajón para montaje con máquina. Realizar mecanizado a las medidas indicadas. Step 5. Box front profi le cutting for gear assembly. Cut with the indicated measures. 5. Mécanisation du profi lé de la chambre du caisson pour le montage avec le treuil.
- Page 15 PARABOX Instalación en obra • Built-in installation Installation dans les travaux • Installazione in loco Paso 1. Atornillar las guías a la estructura. Se aconseja un tornillo cada 50 cm. Step 1. Screw the guides into the structure. It is recommended to use a screw every 50 cm.
- Page 16 PARABOX Paso 3. Introducir la barra de carga dentro de las guías y sujetar el conjunto eje en los testeros mediante los casetes. Step 3. Insert the charge profi le in the guides and attach the axis set to the end caps with the cassettes.
- Page 17 PARABOX Instalación a pared o techo • Installation to wall or ceiling Installation au mur ou au plafond. • Installazione a parete sul soffi tto • La distancia entre soportes no debe ser superior a 750 mm. • The distance between the supports must not be over 750 mm.
- Page 18 PARABOX Fijación pared Wall mount Fixation au mur Fissaggio a parete Taladrar y fi jar soportes (Fig. 1). Introducir el cajón en los soportes, presionar la patilla y soltar (Fig. 2). Drill and fi x supports (Fig. 1). Introduce the box on the supports, press the pin and release (Fig.
- Page 19 PARABOX Fijación techo Ceiling mount Fixation au plafond Fissaggio a soffi tto Taladrar y fi jar soportes (Fig. 1). Introducir el cajón en los soportes, presionar la patilla y soltar (Fig. 2). Drill and fi x supports (Fig. 1). Introduce the box on the supports, press the pin and release (Fig.
- Page 20 GAVIOTA Autovía de Alicante, A-31 Km.196 03630 Sax (Alicante) - España / Spain Tel. +34 965 474 200•Fax +34 965 475 680 International Dept: +34 966 968 276•Fax +34 966 968 075 comercial@gaviotasimbac.com - export@gaviotasimbac.com www.gaviotasimbac.com...