Ninka Qanto Mode D'emploi

L'armoire de rangement pour cuisine
Table des Matières

Publicité

Les langues disponibles

Les langues disponibles

Liens rapides

Qanto_Id_A5_0000.50 65060_26042018 - DE • EN • FR • ES
DE Nachdruck, auch auszugsweise, nur mit schriftlicher Genehmigung der Firma Ninkaplast GmbH gestattet.
EN Reproduction, even in excerpts, is permitted only with the written permission of Ninka.
FR Toute reproduction, même par extrait, n'est autorisée qu'avec le consentement écrit de Ninkaplast GmbH.
ES Ninguna parte de este manual puede ser reproducida sin el consentimiento escrito de Ninkaplast GmbH.
Gebrauchsanleitung
Instructions for use
Mode d'emploi
Instrucciones de uso
DE
EN
FR
ES

Publicité

Table des Matières
loading

Sommaire des Matières pour Ninka Qanto

  • Page 1 DE Nachdruck, auch auszugsweise, nur mit schriftlicher Genehmigung der Firma Ninkaplast GmbH gestattet. EN Reproduction, even in excerpts, is permitted only with the written permission of Ninka. FR Toute reproduction, même par extrait, n’est autorisée qu’avec le consentement écrit de Ninkaplast GmbH.
  • Page 2: Table Des Matières

    3. Allgemeine Angaben ............7 3.1 Bezeichnung des Gerätes .........7 3.2 Verwendungszweck ...........7 3.3 Ausführungen (Einbau links / rechts) ......7 4. Technische Daten ..............7 5. Montage Qanto ..............8 5.1 Allgemeine Montagehinweise ........8 5.2 Anlieferung..............8 6. Bedienung Qanto ...............9 6.1 Elektrifizierung ............9 6.2 Bedienelement ............9...
  • Page 3 7. Wartung und Pflege ............17 8. Garantie und Gewährleistung ..........17 8.1 Garantie ..............17 8.2 Ersatzteile ..............17 8.3 Reparatur ..............18 9. Demontage / Montage ............18 9.1 Austausch LED Beleuchtung ........18 10. Recycling / Entsorgung ............19 11. Störungsbehebung .............20 12. Konformitätserklärung ............21 DE - 3 Qanto_Id_A5_ 0000.50.65060_DE 26042018...
  • Page 4: Symbolerklärung

    1. Symbolerklärung Achtung! Wichtiger Hinweis zur Warnung vor Personen- oder Sachschäden. Achtung! Wichtiger Hinweis zur Warnung vor Stromschlaggefahr. Achtung! Wichtiger Hinweis zur Warnung vor Wasserschäden. Hinweis, Tipp oder Verweis Optional Korrekte Montage Falsche Montage Schalter EIN / AUS Elektrisches Licht 4 - DE Qanto_Id_A5_ 0000.50.65060_DE 26042018...
  • Page 5: Sicherheitshinweise

    • Die Nichteinhaltung von Anweisungen, die mit dem Pikto- gramm „Achtung“ markiert sind, kann zu erheblichen Schäden führen. • Beim Einbau und bei der Nutzung des Qanto ist auf ausrei- chenden Freiraum zum Verfahren des Hubsystems zu achten, so dass für Anwender und Nebenstehende keine Risiken be- stehen.
  • Page 6 • Der Qanto kann von Kindern ab 8 Jahren und darüber, sowie von Personen mit verringerten physischen, sensorischen oder mentalen Fähigkeiten oder Mangel an Erfahrung und Wissen benutzt werden, wenn sie beaufsichtigt oder bezüglich des sicheren Gebrauchs des Qanto unterwiesen wurden und die da- raus resultierenden Gefahren verstehen.
  • Page 7: Allgemeine Angaben

    Hilfe eines Hubsystems Tablare anheben und absenken lassen. 3.3 Ausführungen Der Qanto ist für den Einbau „links“ bzw. „rechts“ geeignet. Der Qanto ist mit 2, wahlweise 3 Tablaren ausgestattet. Der Qanto ist wahlweise mit / ohne Steckdose ausgestattet.
  • Page 8: Montage Qanto

    5. Montage Qanto 5.1 Allgemeine Montagehinweise Jeder, der den Qanto anschließt, montiert oder nutzt, muss Zugang zu dieser Gebrauchsanleitung haben. Folgen Sie den Anweisungen. Nichtbe- achtung der genannten Anweisungen kann zu Unfällen mit ernsten Perso- nenschäden führen. Wenn das Produkt sichtbar beschädigt ist, darf es nicht eingebaut werden.
  • Page 9: Bedienung Qanto

    Eingangsspannung müssen identisch sein. Wenn nicht, darf der Qanto nicht angeschlossen werden. Bitte sprechen Sie Ihren Fachhändler an. 6.2 Bedienelement Bei der Nutzung des Qanto ist auf ausreichenden Freiraum zum Verfahren des Hubsystems zu achten, sodass für Anwender und Nebenstehende keine Risiken bestehen.
  • Page 10 Durch DRÜCKEN und HALTEN der Taste bewegt sich der Antrieb nach unten. Durch LOSLASSEN der Tasten schaltet der STOP Antrieb auf STOP. STOP Durch DRÜCKEN und HALTEN der Taste bewegt sich der Antrieb nach oben und schaltet in der Endstellung auf STOP. 10 - DE Qanto_Id_A5_ 0000.50.65060_DE 26042018...
  • Page 11: Sicherheitsabschaltung

    Durch DRÜCKEN und HALTEN der Taste STOP bewegt sich der Antrieb nach unten und schaltet in der Endstellung auf STOP. 6.3 Sicherheitsabschaltung Eine Abwärtsbewegung ist nur möglich, wenn die oberen Tablare aufgelegt sind. Ein Verfahren der Tablare ist nur bei gedrückter Taste möglich. Sollten sich in der Abwärtsbewegung die oberen Tablare verschieben / verkanten oder angehoben werden, so stoppt das System die Abwärtsbewe- gung sofort.
  • Page 12: Beleuchtung

    6.4 LED-Beleuchtung Der Schrank kann mit einer wartungsfreien LED-Beleuchtung geliefert wer- den. Beim Herausfahren der Tablare schaltet die LED-Beleuchtung automatisch auf „AN“. Beim Absenken der Tablare schaltet die LED-Beleuchtung automatisch auf „AUS“ Wenn eine Störung auftritt, wenden Sie sich bitte an Ihren Fachhändler oder Kundendienst.
  • Page 13 6.5 Höhenverstellung des mittleren Tablares max. ± 50 mm 360° SW 3 DE - 13 Qanto_Id_A5_ 0000.50.65060_DE 26042018...
  • Page 14: Höheneinstellung Tablare

    6.6 Höheneinstellung Tablare H = H TX20 14 - DE Qanto_Id_A5_ 0000.50.65060_DE 26042018...
  • Page 15: Spalteinstellung Tablare

    6.7 Spalteinstellung Tablare DE - 15 Qanto_Id_A5_ 0000.50.65060_DE 26042018...
  • Page 16: Initialisierung

    6.8 Initialisierung Vor und bei der Initialisierung ist zu prüfen und darauf zu achten, dass die Sicherheitsschalter Kontakt geben. Das Hubsystem wird durch Drücken und Halten der Taste initiali- siert. Sie muss gedrückt gehalten werden, bis der Antrieb die untere Endlage erreicht hat.
  • Page 17: Wartung Und Pflege

    7. Wartung und Pflege Trennen Sie vor jeder Reinigung den Qanto durch Ziehen des Netzsteckers oder durch Freischalten der Steckdose vom Netz. Entfernen Sie in regelmäßigen Abständen Staub und Schmutz am Qanto und vergewissern Sie sich, dass keine Schäden und Risse vorhanden sind.
  • Page 18: Reparatur

    Reparaturen am Qanto dürfen nur von autorisierten Werkstätten oder Service-Personal vorgenommen werden, da spezielle Werkzeuge benutzt werden müssen. Wenden Sie sich bitte an Ihren Fachhändler. Werden Teile am Qanto geöffnet, besteht das Risiko nachfolgender Fehl- funktionen. Es verfallen sämtliche Gewährleistungsansprüche. 9. Demontage / Montage Vor der Demontage und bei der Montage •...
  • Page 19: Recycling / Entsorgung

    10. Recycling / Entsorgung Die Recycling- oder Entsorgungsmöglichkeiten von motorischen Systemen sind länderspezifisch geregelt. Bitte informieren Sie sich bei Ihrer zuständigen Behörde oder fragen Sie Ihren Fach- händler. Wir empfehlen, unsere Produkte in so viele Teile wie möglich zu zerlegen, um sie zu entsorgen und wieder zu verwenden.
  • Page 20: Störungsbehebung

    11. Störungsbehebung Hubsystem funktioniert nicht • Hubsystem fährt nicht abwärts. ► Einstellung der Sicherheitsschalter gemäß Montageanleitung überprüfen. • Tablare liegen nicht richtig auf ► Lage der Tablare prüfen • Keine Stromzufuhr ► Netzstecker prüfen • Die Sicherung hat ausgelöst. ► Sicherung prüfen •...
  • Page 21: Konformitätserklärung

    Benzstraße 11 D-32108 Bad Salzuflen Bezeichnung: Küchen-Aufbewahrungsschrank mit motorischer Hubvorrichtung Produkte/Typen: Qanto Ausführung/Funktion: Der Qanto ist ein geschlossener Küchen- Aufbewahrungsschrank bei dem sich mit Hilfe einer Hubvorrichtung Tablare anheben und absenken lassen. Einschlägige EG-Bestimmungen/ Maschinenrichtlinie: Maschinenrichtlinie 2006/42/EG Niederspannungsrichtlinie 2014/35/EU Ggf. andere einschlägige EG-Richtlinien: Elektromagnetische Verträglichkeit Richtlinie...
  • Page 22 3.3 Versions (installation on left/right) ......7 4. Technical data ..............7 5. Assembly of Qanto.............8 5.1 General assembly instructions ........8 5.2 Delivery ..............8 6. Operation of Qanto ............9 6.1 Electrical system ............9 6.2 Control element ............9 6.3 Safety cut-off .............11 6.4 Lighting ..............12 6.5 Height adjustment of the middle tray ......13...
  • Page 23 7. Maintenance and care ............17 8. Warranty and guarantee ............17 8.1 Guarantee ..............17 8.2 Spare parts ..............17 8.3 Repair ................18 9. Disassembly/assembly ............18 9.1 Exchange of the LED lighting ........18 10. Recycling/disposal..............19 11. Troubleshooting ..............20 12. EC Declaration of Conformity ..........21 EN - 3 Qanto_Id_A5_0000.50 65060_EN 26042018...
  • Page 24: Explanation Of Symbols

    1. Explanation of symbols Attention! Important information to warn against personal injury or property damage. Attention! Important information to warn against the risk of electric shock. Attention! Important information to warn against water damage. Note, tip or reference Optional Correct assembly Incorrect assembly Switch ON/OFF Electric light...
  • Page 25: Safety Notices

    People can still be injured if the safety notices in these instructions for use are not observed. Carefully store these in- structions for use for later reference. If Qanto is passed on to a third party, these instructions for use must be handed over as well.
  • Page 26 • Qanto may be used by children 8 years of age and older, people with limited physical, sensory or mental aptitude or lack of experience and/or knowledge only if they are super- vised or have been instructed in the safe use of Qanto and understand the resulting risks.
  • Page 27: General Information

    3.1 Designation of the device The kitchen cabinet is called Qanto. 3.2 Intended use Qanto is an enclosed cabinet in which trays can be lifted and lowered using a lifting system. 3.3 Versions Qanto is suitable for “left” and/or “right” installation.
  • Page 28: Assembly Of Qanto

    200 mm to other cabinets or shelving must be observed. A clearance of 300 mm must be observed between Qanto and a gas stove. The electrical system of Qanto must be accessible (e.g., a double socket under the cabinet near the base).
  • Page 29: Operation Of Qanto

    The mains voltage and permissible input voltage must be identical. If not, Qanto must not be connected. Please contact your spe- cialist dealer. 6.2 Control element...
  • Page 30 PRESSING and HOLDING the button moves the drive down. RELEASING the button switches the STOP drive to STOP. STOP PRESSING and HOLDING the button moves the drive up and switches to STOP in the end position. 10 - EN Qanto_Id_A5_0000.50 65060_EN 26042018...
  • Page 31: Safety Cut-Off

    PRESSING and HOLDING the button STOP moves the drive down and switches STOP in the end position. 6.3 Safety cut-off Downward movement is possible only if the upper trays are in place. The trays can be moved only when the button is pressed. If the upper trays shift/cant or raise during the downward movement, the system stops the downward movement immediately.
  • Page 32: Lighting

    6.4 LED lighting The cabinet can be delivered with maintenance-free LED lighting. When the trays are raised, the LED lighting switches “ON” automatically. When the trays are lowered, the LED lighting switches “OFF” automatically If a fault occurs, please contact your specialist dealer or customer service.
  • Page 33: Height Adjustment Of The Middle Tray

    6.5 Height adjustment of the middle tray max. ± 50 mm 360° SW 3 EN - 13 Qanto_Id_A5_0000.50 65060_EN 26042018...
  • Page 34: Height Adjustment Of Trays

    6.6 Height adjustment of trays H = H TX20 14 - EN Qanto_Id_A5_0000.50 65060_EN 26042018...
  • Page 35: Gap Adjustment Of Trays

    6.7 Gap adjustment of trays EN - 15 Qanto_Id_A5_0000.50 65060_EN 26042018...
  • Page 36: Initialisation

    6.8 Initialisation Before and during initialisation, check and make sure that the safety switch- es are contacted. The lifting system is initialised by pressing and holding the button. It must be kept pressed until the drive reaches the lower end position. As soon as the drive stops in the lower end position, the button must be re- leased for 2-3 seconds.
  • Page 37: Maintenance And Care

    Before cleaning, always disconnect Qanto by pulling the mains plug or by disconnecting the socket from the mains. At regular intervals, remove dust and dirt from Qanto trays and make sure it is not damaged or cracked. Please clean with a mild household cleaner and a soft cloth. After that, wash off the cleaner with clear water and thoroughly wipe Qanto trays dry.
  • Page 38: Repair

    Repairs on Qanto may be performed by authorised workshops or service personnel only as special tools must be used. Please contact your special- ist dealer. If parts on Qanto are opened, there is a subsequent risk malfunctions. Such actions void all warranty claims. 9. Disassembly/assembly Before disassembly and during assembly: •...
  • Page 39: Recycling/Disposal

    10. Recycling/disposal The recycling or disposal possibilities for motorised systems are regulated in the country of use. Please obtain information from your respective public authority or ask your specialist dealer. We recommend the disassembly of our product in as many parts as possible for disposal and recycling.
  • Page 40: Troubleshooting

    11. Troubleshooting Lifting system does not work • The lifting system does not move down. ► Check the setting of the safety switches according to the assembly instructions. • The trays do not sit in place properly. ► Check the position of the trays. •...
  • Page 41: Ec Declaration Of Conformity

    32108 Bad Salzuflen, Germany Designation: Kitchen cabinet with motorised lifting system Products/types: Qanto Design/function: Qanto is an enclosed kitchen cabinet in which trays can be lifted and lowered using a lifting system. Pertinent EC regulations/ Machinery Directive: Machinery Directive 2006/42/EC...
  • Page 42 3. Indications générales ............7 3.1 Désignation de l’appareil ...........7 3.2 Destination ..............7 3.3 Versions (montage gauche / droit) ......7 4. Caractéristiques techniques ..........7 5. Montage Qanto ..............8 5.1 Consignes générales de montage ......8 5.2 Livraison ..............8 6. Utilisation Qanto ..............9 6.1 Électrification .............9 6.2 Élément de commande..........9...
  • Page 43 7. Maintenance et entretien ...........17 8. Garantie commerciale et garantie légale ......17 8.1 Garantie commerciale ..........17 8.2 Pièces de rechange ...........17 8.3 Réparation ..............18 9. Démontage / montage ............18 9.1 Remplacement de l’éclairage LED ......18 10. Recyclage / élimination ............19 11.
  • Page 44: Explication Des Symboles

    1. Explication des symboles Attention! Remarque importante destinée à avertir du risque de dommages corporels ou matériels. Attention! Remarque importante destinée à avertir du risque d’électrocution Attention! Remarque importante destinée à avertir du risque de dégâts des eaux. Remarque, conseil ou renvoi En option Montage correct Montage erroné...
  • Page 45: Consignes De Sécurité

    « Attention » peut conduire à des dommages considé- rables. • Lors du montage et de l’utilisation de la Qanto, il faut veiller à avoir suffisamment d’espacement libre par rapport au dépla- cement du système de levage, de façon à ce qu’il n’y ait aucun risque pour l’utilisateur et les gens situés à...
  • Page 46 • La Qanto peut être utilisée par des enfants âgés de 8 ans et plus ainsi que par des personnes à capacités physiques, sensorielles ou mentales réduites ou manquant d’expérience et de connais- sances si ces dernières sont surveillées ou ont été informées de la manière d’utiliser la Qanto en toute sécurité...
  • Page 47: Indications Générales

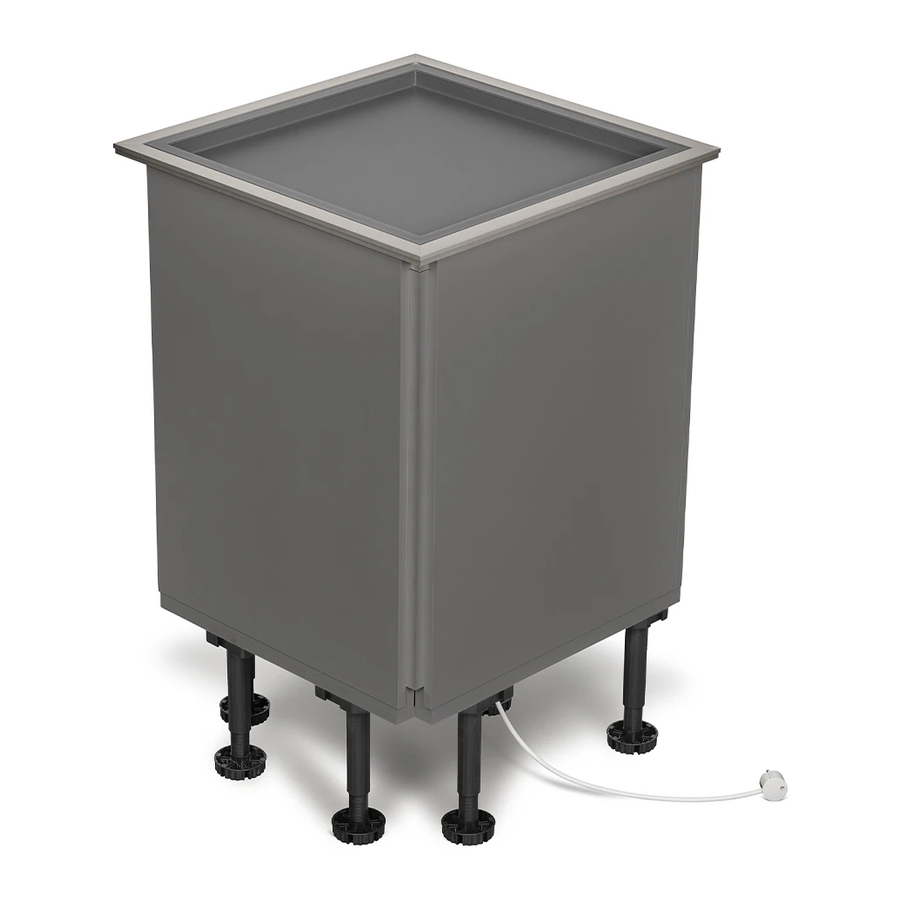
    3.1 Désignation de l’appareil L’armoire de rangement pour cuisine porte le nom de Qanto. 3.2 Destination La Qanto est une armoire de rangement fermée dont les tablettes peuvent être levées et baissées à l’aide d’un système de levage. 3.3 Versions LaQanto convient à...
  • Page 48: Montage Qanto

    200 mm par rapport aux autres armoires ou étagères doit être respec- tée vers le haut et les côtés lorsque ce dernier est sorti. Une distance de 300 mm au moins doit être respectée entre la Qanto et une cuisinière à gaz.
  • Page 49: Utilisation Qanto

    électrique à la tension d’entrée indi- quée sur la plaquette signalétique. La tension du réseau et la tension d’en- trée admissible doivent être identiques. Si ça n’est pas le cas, la Qanto ne doit pas être raccordée. Veuillez vous adresser à votre revendeur spécialisé.
  • Page 50 L’entraînement se déplace vers le bas lorsqu’on APPUIE sur la touche en la MAINTENANT appuyée. Lorsqu’on RELÂCHE les touches, l’entraînement STOP se commute sur STOP. STOP L’entraînement se déplace vers le haut lorsqu’on APPUIE sur la touche en la MAINTENANT appuyée. Et se commute en position finale sur STOP.
  • Page 51: Arrêt De Sécurité

    L’entraînement se déplace vers le bas STOP lorsqu’on APPUIE sur la touche en la MAINTENANT appuyée. et se commute en position finale sur STOP. 6.3 Arrêt de sécurité Un déplacement descendant ne peut avoir lieu que si les tablettes supé- rieures sont posées.
  • Page 52: Éclairage

    6.4 Éclairage LED L’armoire peut être livrée avec un éclairage LED sans maintenance. Lorsque les tablettes sont sorties, l’éclairage LED se commute automatique- ment sur « MARCHE ». Lorsque les tablettes sont abaissées, l’éclairage LED se commute automati- quement sur « ARRÊT ». Si un dysfonctionnement apparaît, adressez-vous à...
  • Page 53: Réglage En Hauteur De La Tablette Du Milieu

    6.5 Réglage en hauteur de la tablette du milieu max. ± 50 mm 360° SW 3 FR - 13 Qanto_Id_A5_0000.50 65060_FR 26042018...
  • Page 54: Réglage En Hauteur Des Tablettes

    6.6 Réglage en hauteur des tablettes H = H TX20 14 - FR Qanto_Id_A5_0000.50 65060_FR 26042018...
  • Page 55: Réglage Des Espacements Entre Les Tablettes

    6.7 Réglage des espacements entre les tablettes FR - 15 Qanto_Id_A5_0000.50 65060_FR 26042018...
  • Page 56: Initialisation

    6.8 Initialisation Avant et après l’initialisation, il faut vérifier et veiller à ce que les interrup- teurs de sécurité créent un contact. Le système de levage est initialisé en appuyant sur la touche en maintenant cette dernière appuyée. Elle doit être maintenue appuyée jusqu’à...
  • Page 57: Maintenance Et Entretien

    Coupez la Qanto du réseau électrique en débranchant la fiche de la prise ou en désactivant la prise électrique avant tout nettoyage. Éliminez à des intervalles réguliers la poussière et la saleté sur la Qanto et assurez-vous qu’il n’y ait pas de petits dommages ni de fissures.
  • Page 58: Réparation

    8.3 Réparation Les réparations de la Qanto ne doivent être réalisées que par des ateliers de réparation agréés ou le personnel de notre SAV du fait que celles-ci requièrent l’utilisation d’outils spéciaux. Adressez-vous à votre revendeur spécialisé. Le fait d’ouvrir des pièces de la Qanto risque de provoquer les dysfonction- nement suivants.
  • Page 59: Recyclage / Élimination

    10. Recyclage / élimination Les possibilités de recyclage ou d’élimination des déchets de systèmes motorisés font l’objet de règlementations spécifiques à chaque pays. Veuillez vous informer auprès de votre administration compétente ou demandez à votre revendeur spécialisé. Nous recommandons de désassembler nos produits en autant de pièces que possible afin de pouvoir les éliminer et les recycler.
  • Page 60: Élimination Des Dysfonctionnements

    11. Élimination des dysfonctionnements Le système de levage ne fonctionne pas • Le système de levage ne descend pas. ► Vérifier l’interrupteur de sécurité selon l’instruction de montage. • Les tablettes ne reposent pas correctement ► Vérifier la position des tablettes •...
  • Page 61: Déclaration De Conformité

    Produits/types : Qanto Version/fonction : la Qanto est une armoire de rangement pour cuisine dans le cas de laquelle des tablettes peuvent être levées ou abaissées à l’aide d’un dispositif de levage. Dispositions européennes en vigueur/...
  • Page 62 3.1 Denominación comercial del equipo......7 3.2 Uso previsto ..............7 3.3 Acabados (montaje a la izquierda / a la derecha) ..7 4. Datos técnicos ..............7 5. Montaje de Qanto ..............8 5.1 Indicaciones generales de montaje ......8 5.2 Suministro ..............8 6. Manejo de Qanto ...............9 6.1 Electrificación ..............9...
  • Page 63 7. Mantenimiento y conservación ..........17 8. Garantías postventa ............17 8.1 Garantía ..............17 8.2 Recambios ..............17 8.3 Reparación ..............18 9. Desmontaje / Montaje ............18 9.1 Sustitución de la iluminación LED ......18 10. Reciclaje / Eliminación ............19 11. Reparación de averías ............20 12.
  • Page 64: Es 1. Explicación De Los Símbolos

    1. Explicación de los símbolos ¡Atención! Aviso importante para alertar sobre posibles daños personales o materiales. ¡Atención! Aviso importante para alertar sobre peligro de descarga eléctrica. ¡Atención! Aviso importante para alertar sobre peligro de daños causados por el agua. Indicación, recomendación o advertencia Opcional Montaje correcto Montaje incorrecto...
  • Page 65: Indicaciones De Seguridad

    • El incumplimiento de las indicaciones marcadas con el picto- grama «Atención» podría provocar daños considerables. • A la hora de instalar y utilizar el Qanto, deberá disponerse de suficiente espacio libre para manejar el sistema de elevación, de manera que el usuario y las personas que se encuentren junto a él no corran ningún riesgo.
  • Page 66 • Pueden utilizar el Qanto los niños a partir de 8 años, así como las personas con discapacidad física, sensorial o mental o sin los suficientes conocimientos o experiencia, siempre y cuando estén bajo supervisión o hayan sido instruidos en el manejo se- guro del Qanto y comprendan los peligros derivados del mismo.
  • Page 67: Datos Generales

    3.3 Acabados El Qanto es apto para una colocación «a la derecha» o bien «a la izquierda». El Qanto puede estar equipado con 2 o con 3 estantes a elección.
  • Page 68: Montaje De Qanto

    Se debe comprobar que el cable no esté dañado. Antes de conectar el Qanto a la corriente, se debe comprobar si la tensión de la unidad de mando es correcta Si durante su funcionamiento la unidad de mando emitiera ruidos u olores inusuales, interrumpa la alimentación eléctrica.
  • Page 69: Manejo De Qanto

    La tensión de red y la tensión de entrada permitida debe- rán ser idénticas. De lo contrario, no podrá conectar el Qanto. Póngase en contacto con su distribuidor especializado.
  • Page 70 Al APRETAR y MANTENER APRETADA la tecla, se moverá el accionamiento hacia abajo. Al SOLTAR las teclas, el accionamiento STOP se detiene en posición STOP. STOP Al APRETAR y MANTENER APRETADA la tecla, se moverá el accionamiento hacia arriba y al llegar a la posición final activará...
  • Page 71: Desconexión De Seguridad

    Al APRETAR y MANTENER APRETADA STOP la tecla, se moverá el accionamiento hacia abajo y al llegar a la posición final activará el STOP. 6.3 Desconexión de seguridad Solamente se podrán mover hacia abajo los estantes superiores cuando estén colocados. Solamente se podrán desplazar mientras se mantenga presionada la tecla correspondiente.
  • Page 72: Sustitución De La Iluminación Led

    6.4 Sustitución de la iluminación LED El armario se puede suministrar con un iluminación LED que no requiere mantenimiento alguno. Al extraer el estante, la iluminación LED se enciende automáticamente («ENCENDIDO»). Al apoyar el estante, la iluminación LED se apaga automáticamente («APAGADO»).
  • Page 73: Ajuste De La Altura Del Estante Intermedio

    6.5 Ajuste de la altura del estante intermedio max. ± 50 mm 360° SW 3 ES - 13 Qanto_Id_A5_0000.50 65060_ES 23032018...
  • Page 74: Ajuste De La Altura De Los Estantes

    6.6 Ajuste de la altura de los estantes H = H TX20 14 - ES Qanto_Id_A5_0000.50 65060_ES 26042018...
  • Page 75: Ajuste De La Ranura Para Los Estantes

    6.7 Ajuste de la ranura para los estantes ES - 15 Qanto_Id_A5_0000.50 65060_ES 23032018...
  • Page 76: Inicialización

    6.8 Inicialización Antes y durante la inicialización, se debe comprobar y asegurar que los interruptores de seguridad hagan contacto. El sistema de elevación se inicializa manteniendo pulsada la tecla. Debe mantenerse pulsada hasta que el accionamiento haya alcanzado la posición final. En cuanto el accionamiento se detenga en la posición final, debe soltarse la tecla durante 2 - 3 segundos.
  • Page 77: Mantenimiento Y Conservación

    Antes de cada limpieza desconecte el Qanto tirando del enchufe de ali- mentación o desconectando la toma eléctrica de la red. Elimine de forma periódica el polvo y la suciedad del Qanto y asegúrese de que no presenta desperfectos ni grietas.
  • Page 78: Reparación

    Diríjase a su distribuidor especializado. Si se abren ciertas partes del Qanto, existe el riesgo de fallos en su funcio- namiento. Se perderán entonces los derechos de reclamación de la garan- tía.
  • Page 79: Reciclaje / Eliminación

    10. Reciclaje / Eliminación Las opciones para reciclar o eliminar sistemas motorizados están reguladas a nivel nacional dependiendo del país. Infórmese en la autoridad competente o consulte con su distribuidor espe- cializado. Le recomendamos desmontar nuestros productos en tantas piezas como sea posible con el fin de eliminarlos y volver a utilizarlos.
  • Page 80: Reparación De Averías

    11. Reparación de averías El sistema de elevación no funciona • El sistema de elevación no va hacia abajo. ► Compruebe el ajuste del interruptor de seguridad según las instrucciones de montaje. • Los estantes no apoyan correctamente ► Compruebe la posición de los estantes •...
  • Page 81: Declaración De Conformidad

    Productos/Modelos Qanto Acabado/Función El Qanto es un mueble de almacenamiento de cocina cerrado en el que, gracias a la ayuda de un sistema de ele vación, se pueden mover sus estantes hacia arriba y hacia abajo. Disposiciones pertinentes según la CE/ Directiva de máquinas:...
  • Page 84 DE Für weitere Rückfragen stehen wir Ihnen gerne zur Verfügung. EN We are gladly available in case of any questions. FR Nous nous tenons volontiers à votre disposition pour toute question enretour. ES Quedamos a su entera disposición si desea realizar cualquier consulta. Service-Nummer •...

Table des Matières