Table des Matières
Publicité
Les langues disponibles
Les langues disponibles
Liens rapides
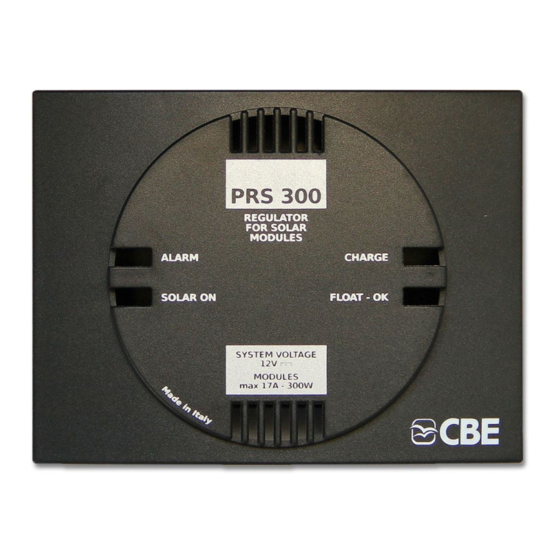
PRS300
PRS300
REGOLATORE DI CARICA PER MODULI FOTOVOLTAICI
12V
CHARGE REGULATOR FOR
12V
PHOTOVOLTAIC MODULES
REGULATEUR DE CHARGE POUR MODULES PHOTOVOLTAIQUES 12V
LADEREGLER FÜR 12V PHOTOVOLTAISCHE MODULE
ISTRUZIONI D'USO
USER'S MANUAL
INSTRUCTIONS D'EMPLOI
BEDIENUNGSANLEITUNG
Ed.11/2014 cod. 000153 Rev.00
Publicité
Table des Matières

Sommaire des Matières pour CBE PRS300
- Page 1 PRS300 PRS300 REGOLATORE DI CARICA PER MODULI FOTOVOLTAICI CHARGE REGULATOR FOR PHOTOVOLTAIC MODULES REGULATEUR DE CHARGE POUR MODULES PHOTOVOLTAIQUES 12V LADEREGLER FÜR 12V PHOTOVOLTAISCHE MODULE ISTRUZIONI D’USO USER’S MANUAL INSTRUCTIONS D’EMPLOI BEDIENUNGSANLEITUNG Ed.11/2014 cod. 000153 Rev.00...
-
Page 2: Informazioni Generali
(vedi pag. 4): un errato settaggio del tipo di batteria da caricare può danneggiare la batteria stessa! : il PRS300 non é adatto per la carica di batterie a nichel/cadmio, a ioni di litio (senza elettronica integrata) o altri tipi di batterie ricaricabili o non ricaricabili. -
Page 3: Caratteristiche Tecniche
LEGENDA Led rosso: indica l'eventuale inversione di polarità (errato collegamento) dei moduli fotovoltaici e/o della batteria servizi. Led bianco: indica che il regolatore è acceso (in assenza di luce solare il regolatore si spegne automaticamente). Led giallo: indica che i moduli fotovoltaici stanno caricando la batteria (fase 1 e fase 2). Led verde: indica la fase di mantenimento della carica a tensione costante (fase 3). - Page 4 COLLEGAMENTI Selettore tipo Collegamento batteria collegata moduli fotovoltaici ( e batteria servizi ( Connettore per collegamento centraline CBE predisposte Connettore per collegamento pannello test "PT 642” PT 642 150W 150W (max) (max) IMPORTANTE: - L'installazione di questo apparecchio deve essere eseguita solamente da personale \ tecnico specializzato.
- Page 5 Per visualizzare i valori premere leggermente 1 volta in corrispondenza del pulsante “touch” (Rif. 3). L’installazione può essere effettuata ad incasso o a parete con il distanziale in dotazione. Collegare il pannello test PT642 al regolatore solare PRS300 tramite l'apposito connettore (Rif.4) utilizzando il cavo in dotazione (L=1,5m). INSTALLAZIONE...
- Page 6 (see page 8); the wrong setting of the battery to charge may damage the battery itself! Note : the PRS300 regulator is not suitable for the charging of nickel/cadmium batteries, lithium batteries without integrated electronics or other kinds of rechargeable or non rechargeable batteries.
-
Page 7: Technical Data
SPECIFICATIONS Red led: indicates a reverse polarity (wrong connection) of the photovoltaic modules and/or the leisure battery. White led: indicates that the regulator is on (without sunlight, the regulator turns off automatically). Yellow led: indicates that the photovoltaic modules are charging the battery (step 1 and 2). Green led: indicates the charge maintenance stage at a constant voltage (step 3). - Page 8 CONNECTIONS Battery type selector Photovoltaic modules ( and 12V leisure battery ( connection Connector for "PT 642" test panel connection PT 642 150W 150W (max) (max) IMPORTANT: - The equipment shall be installed by qualified technical personnel only. - In case of misuse, the warranty of the device shall be void and the manufacturer declines any responsibilities for damage to things or persons.
- Page 9 To view the values, press lightly the touch button once (Ref. 3). The panel can be built in or fixed to the wall with the supplied spacer. Connect the PT642 test panel to the PRS300 solar regulator with the apposite connector (ref. 4) using the supplied cable (L=1,5m).
-
Page 10: Généralités
PRS300 GÉNÉRALITÉS Le régulateur de charge PRS300 est en mesure de charger automatiquement des batteries 12Vd.c. au plomb-gel, au plomb-liquide, AGM et lithium (avec électronique intégrée) en utilisant la ligne de charge adéquate (pouvant être sélectionnée par l’intermédiaire du commutateur situé... -
Page 11: Caracteristiques Techniques
LÉGENDE Led rouge: signale une éventuelle inversion de polarité (faute de raccordement) des modules photovoltaïques et/ou de la batterie de services. Led blanc : indique que le régulateur est allumé (en l’absence de lumière solaire, le régulateur s’éteint automatiquement). Led jaune: signale que les modules photovoltaïques sont en train de charger la batterie (phase 1 et phase 2). - Page 12 Raccordement modules photovoltaïques ( et batterie de services ( Connecteur pour raccordement Connecteur pour raccordement panneau test "PT 642" boîtiers CBE préréglés PT 642 150W 150W (max) (max) IMPORTANT: - L'installation de cet appareil doit être effectuée uniquement par des techniciens spécialisés.
- Page 13 L'installation peut être effectuée "par emboîtement" ou "au mur" avec l'écarteur fourni en standard. Raccorder le panneau test PT 642 au régulateur solaire PRS300 au moyen du connecteur prévu à cet effet (Réf. 4), en utilisant le câble (L=1,5m). INSTALLATION...
-
Page 14: Allgemeine Informationen
PRS300 ALLGEMEINE INFORMATIONEN Der Laderegler PRS300 ist in der Lage, 12Vd.c. Blei-Gel-, Flüssig-Blei-, AGM- und Lithiumbatterien mit integrierter Elektronik zu laden, wobei die geeignete Ladeleitung genutzt wird (die mit dem Umschalter im Laderegler gewählt werden kann). Das Laden erfolgt in 3 Phasen:... -
Page 15: Technische Eigenschaften
ZEICHENERKLÄRUNG Rote Leuchtdiode: Sie zeigt die eventuelle Verpolung (falsche Verbindung) der fotovoltaischen Module und/oder der Servicebatterie an. Weiße Leuchtdiode: Sie zeigt an, dass der Laderegler eingeschaltet ist (bei Abwesenheit von Sonnenlicht schaltet sich der Regler automatisch aus). Gelbe Leuchtdiode: Sie zeigt an, dass die fotovoltaischen Module dabei sind, die Batterie aufzuladen (Phase 1 und Phase 2). - Page 16 Anschluss Batterietyp fotovoltaische Module ( und Servicebatterie ( Stecker für Anschluss Testtafel PT 42" " Stecker für Anschluss vorbereitete CBE-Steuergeräte PT 642 150W 150W (max) (max) WICHTIG: - Die Installation dieses Geräts darf nur von technischem Fachpersonal ausgeführt werden.
-
Page 17: Beschreibung
Zur Anzeige der Werte die Touch-Taste (Bez. 3) einmal leicht berühren. Die Installation kann mit Einbau oder an der Wand mit dem mitgelieferten Distanzstück erfolgen. Die Testtafel PT642 mit dem entsprechenden Stecker (Bez. 4) unter Verwendung des mitgelieferten Kabels (L=1,5m) an den Solarregler PRS300 anschließen. INSTALLATION Fissaggio ad incasso... - Page 18 ....................
- Page 19 ....................
- Page 20 CBE S.r.l. Via Vienna, 4 - z.i. Spini (settore D) 38121 Trento - Italy Tel. +39 0461 991598 - Fax +39 0461 960009 www.cbe.it - E-mail: cbe@cbe.it...


