Publicité
Liens rapides
K-25m
Keyboard Unit
5 Take care so as not to get fingers pinched
5 Prestare attenzione a non procurarsi traumi da schiacciamento
5
5 Tenga cuidado de no pillarse los dedos
指などをはさまないように注意する!
5 Nicht die Finger verletzen
5 Tome cuidado para não prender os dedos
5 Veillez à ne pas vous pincer les doigts
5 Zorg ervoor dat uw vingers niet bekneld raken
Installation /
取り付けかた
/ Installation / Installation
Installazione / Instalación / Instalação / Installeren
1
2
3
4
5 FOLD the cable!
5
ケーブルを伸ばさない!
5
お問い合わせの窓口
製品に関するお問い合わせ先
050-3101-2555
ローランドお客様相談センター
電話受付時間: 月曜日~金曜日 10:00~17:30(弊社規定の休日を除く)
※IP電話からおかけになって繋がらない場合には、 お手数ですが、 電話番号の前に "0000"
(ゼロ4回) をつけてNTTの一般回線からおかけいただくか、 携帯電話をご利用ください。
※上記窓口の名称、電話番号等は、予告なく変更することがありますのでご了承ください。
最新サポート情報
製品情報、イベント/キャンペーン情報、サポートに関する情報など
http://www.roland.co.jp/
ローランド・ホームページ
http://jp.boss.info/
ボス・ホームページ
*
5
1
0
0
0
4
7
8
8
4
-
0
2
*
Owner's Manual /
取扱説明書
/ Bedienungsanleitung / Mode d'emploi / Manuale dell'utente / Manual del usuario / Manual do proprietário / Gebruikershandleiding
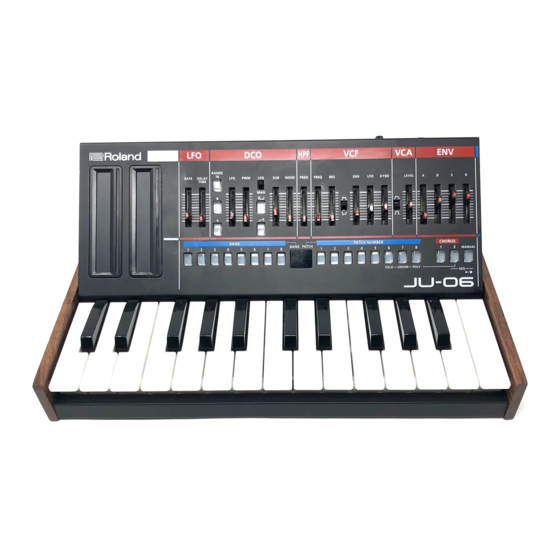
5 The K-25m is a dedicated keyboard unit for Roland sound modules (JU-06, JP-08, JX-03). The illustrations in this document depict the JU-06, but the installation procedure is the same for other sound modules.
5
K-25mはローランドのサウンド・モジュール(JU-06、JP-08、JX-03)専用のキーボード・ユニットです。本書の説明図ではJU-06を使用していますが、その他のサウンド・モジュールも同様の手順で取り付けできます。
5 Das K-25m ist ein spezieller Keyboard Controller für Roland-Soundmodule wie die Modelle JU-06, JP-08 und JX-03. Die Abbildungen in dieser Anleitung zeigen das Soundmodul JU-06, der Installationsvorgang ist jedoch für alle genannten Soundmodule gleich.
5 Le K-25m est une unité clavier dédiée pour les générateurs de son Roland (JU-06, JP-08, JX-03). Les illustrations de ce document sont basées sur le modèle JU-06, mais la procédure d'installation est identique pour les autres générateurs de son.
5 L'unità K-25m è una tastiera specifica per i moduli sonori Roland (JU-06, JP-08, JX-03). Le immagini in questo documento si riferiscono all'unità JU-06, ma la procedura di installazione è la stessa per tutti i moduli sonori.
5 El K-25m es un teclado dedicado para los módulos de sonido Roland (JU-06, JP-08, JX-03). Las ilustraciones incluidas en este documento corresponden al JU-06, pero el procedimiento de instalación es el mismo para otros módulos de sonido.t
5 O K-25m é um equipamento de teclado dedicado para módulos de som da Roland (JU-06, JP-08, JX-03). As ilustrações neste documento representam o JU-06, mas o procedimento de instalação é o mesmo para os outros módulos de som.
5 De K-25m is een speciaal klavier voor Roland-geluidsmodules (JU-06, JP-08, JX-03). De afbeeldingen in dit document tonen de JU-06, maar de installatieprocedure is dezelfde voor andere geluidsmodules.
5 Extend the projection.
5
突起を出す。
5 Schieben Sie den Führungsstift nach außen.
5 Déployez la partie saillante.
5 Estendere la sporgenza.
5 Extienda el saliente.
5 Aumentar a projeção.
5 Trek het uitsteeksel uit.
5 Align the projection into the hole.
5
突起を穴に合わせる。
5 Setzen Sie den Führungsstift in die Aussparung.
5 Alignez la partie saillante dans le trou.
5 Allineare la sporgenza al foro.
5 Alinee el saliente en el orificio.
5 Alinhar a projeção em um orifício.
5 Breng het uitsteeksel op één lijn met het gat.
5 While pressing the projection, insert it into the hole.
5
突起を押しながら穴に入れる。
5 Drücken Sie den Führungsstift und setzen Sie diesen in die
Aussparung.
5 Tout en appuyant sur la partie saillante, insérez-la dans le trou.
5 Premere la sporgenza e inserirla nel foro.
5 Mientras presiona el saliente, insértelo en el orificio.
5 Ao pressionar a projeção, insira-a no orifício.
5 Druk op het uitsteeksel en plaats dit in het gat.
5 Slowly raise the sound module.
5
ゆっくりサウンド・モジュールを起こす。
5 Heben Sie das Soundmodul langsam an.
5 Relevez lentement le générateur de son.
5 Alzare lentamente il modulo sonoro.
5 Levante con cuidado el módulo de sonido.
5 Erga lentamente o módulo de som.
5 Breng de geluidsmodule langzaam omhoog.
5 Do not force the sound module toward the keyboard!
Take care not to scratch the keyboard!
5
鍵盤方向に強い力で倒さない! 鍵盤にキズを付けないように注意!
5 Drehen Sie das Soundmodul nicht zu weit in Richtung Tastatur!
Achten Sie darauf, die Tastatur nicht zu zerkratzen.
5 Ne poussez pas avec force le générateur de son vers le clavier. Veillez à
ne pas érafler le clavier.
5 Non spingere con forza il modulo sonoro verso la tastiera e fare
attenzione a non graffiare la tastiera.
5 No fuerce el módulo de sonido hacia el teclado.
Tenga cuidado de no arañar el teclado.
5 Não force o módulo de som na direção do teclado!
Cuidado para não arranhar o teclado!
5 Forceer de geluidsmodule niet in het klavier.
Let erop dat u geen krassen maakt op het klavier.
5 Carefully insert the connector all the way in—until it is firmly in place.
5
コネクターは挿入方向や表裏に注意して、確実に奥まで差し込んでください。
また無理な挿入はしないでください。
5 Stecken Sie das Verbindungskabel vorsichtig in den dafür vorgesehenen Anschluss, so
dass dieses fest sitzt.
5 Avec précaution, insérez le connecteur à fond jusqu'à ce qu'il soit bien en place.
5 Inserire con attenzione il connettore fino in fondo, finché non è bloccato.
5 Con cuidado, inserte el conector todo lo posible hasta que quede bien en su sitio.
5 Insira com cuidado o conector, até que ele fique preso firmemente.
5 Doe de connector er voorzichtig helemaal in, totdat deze stevig op zijn plaats zit.
5 Do not touch any of the printed circuit pathways or connection terminals.
5
回路部や端子部には手を触れないでください。
5 Berühren Sie nicht die Kontakte der Schaltkreise bzw. Anschlüsse.
5 Ne touchez aucun des circuits imprimés ou bornes de connexion.
5 Non toccare i collegamenti del circuito stampato o i terminali di collegamento.
5 No toque ninguna de las rutas de los circuitos impresos ni los terminales de conexión.
5 Não toque nenhum dos terminais de conexão ou percurso do circuito impresso.
5 Raak de gedrukte circuitpaden en de verbindingsterminals niet aan.
5 Press in until you hear it click.
5
「カチッ」と鳴るまで押し込む。
5 Senken Sie das Soundmodul langsam ab, bis dieses einrastet.
5 Appuyez jusqu'à ce que vous entendiez un déclic.
5 Premere finché non si ascolta un clic.
5 Ejerza presión hasta que se oiga un clic.
5 Pressione até ouvir um clique.
5 Druk in totdat u een klik hoort.
'15. 03. 01 現在(Roland)
Copyright © 2015 ROLAND CORPORATION
Angle Adjustment /
角度の調整
/ Einstellen des Winkels / Réglage de l'angle
Regolazione dell'angolo / Ajuste del ángulo / Ajuste de ângulo / Hoekaanpassing
1
2
取り外しかた
Removal /
/ Herausnehmen des Soundmoduls / Retrait
Rimozione / Extracción / Remoção / Verwijderen
1
2
For China
For EU Countries
This product contains chemicals known to cause cancer, birth defects and other reproductive harm, including lead.
5 Press.
5
押す。
5 Hier drücken.
5 Appuyez.
5 Premere.
5 Presione.
5 Pressione.
5 Druk in.
5 Slowly lift until the stand rises.
5
スタンドが起き上がるまで、ゆっくり持ち上げる。
5 Langsam anheben, bis die Stütze angehoben wird.
5 Levez lentement jusqu'à ce que le support se soulève.
5 Alzare lentamente fino a sollevare il supporto.
5 Levante lentamente hasta que el soporte se eleve.
5 Levante lentamente até erguer o suporte.
5 Breng langzaam omhoog totdat de standaard omhoog komt.
5 The angle can be adjusted in two stages.
5
角度は2段階で調節できます。
5 Es können zwei verschiedene Winkel eingestellt werden.
5 Vous pouvez régler l'angle en deux étapes.
5 L'angolo può essere regolato su due livelli.
5 El ángulo se puede ajustar en dos fases.
5 O ângulo pode ser ajustado em dois estágios.
5 De hoek kan in twee stappen worden aangepast.
5 To return the stand to its original position, fold it down by pressing it
until you hear it click.
5
元に戻すときは、「カチッ」と鳴るまでスタンドを押してたたむ。
5 Um die Stütze wieder in ihre Originalposition zu bringen, drücken Sie
diese nach unten, bis sie einrastet.
5 Pour remettre le support dans sa position initiale, repliez-le en
appuyant dessus jusqu'à ce que vous entendiez un déclic.
5 Per riportare il supporto nella posizione originale, premerlo per
piegarlo finché non si ascolta un clic.
5 Para volver a poner el soporte en su posición original, pliéguelo hacia
abajo presionando sobre él hasta que se oiga un clic.
5 Para voltar o suporte à sua posição original, dobre-o pressionando até
ouvir o clique.
5 Als u de standaard wilt terugzetten naar zijn oorspronkelijke stand,
schuift u deze weg totdat u een klik hoort.
5 Detach the connector.
5
コネクターを外す。
5 Ziehen Sie den Stecker des Anschlusskabels ab.
5 Détachez le connecteur.
5 Scollegare il connettore.
5 Desconecte el conector.
5 Desprenda o conector.
5 Koppel de connector los.
5 Fold down the stand by pressing it until you hear it click.
5
「カチッ」と鳴るまでスタンドを押してたたむ。
5 Um die Stütze einzuklappen, drücken Sie diese nach unten, bis sie einrastet.
5 Repliez le support en appuyant dessus jusqu'à ce que vous entendiez un déclic.
5 Premere il supporto per piegarlo finché non si ascolta un clic.
5 Pliegue hacia abajo el soporte presionando sobre él hasta que se oiga un clic.
5 Dobre o suporte pressionando até ouvir o clique.
5 Schuif de standaard weg door erop te drukken totdat u een klik hoort.
5 While pressing with a pointed object, pull out the sound module.
5
ボールペンなどのとがったもので押しながら、サウンド・モジュールを引き抜く。
5 Drücken Sie die Sperre mit einem runden Gegenstand (z.B. ein Stift) ein,
und ziehen Sie das Soundmodul heraus.
5 Tout en appuyant avec un objet pointu, retirez le générateur de son.
5 Facendo pressione con un oggetto appuntito, estrarre il modulo
sonoro.
5 Mientras presiona con un objeto puntiagudo, tire del módulo de sonido
hacia fuera.
5 Ao pressionar com um objeto pontiagudo, empurre o módulo de som
para fora.
5 Druk op de geluidsmodule met een spits voorwerp en trek de module
uit.
For C.A. US (Proposition 65)
WARNING
Publicité

Manuels Connexes pour Roland K-25m


Sommaire des Matières pour Roland K-25m
- Page 1 5 Le K-25m est une unité clavier dédiée pour les générateurs de son Roland (JU-06, JP-08, JX-03). Les illustrations de ce document sont basées sur le modèle JU-06, mais la procédure d’installation est identique pour les autres générateurs de son.
- Page 2 Intellectueel eigendomsrecht • Quando l'unità viene spostata da un luogo a un altro in cui • Roland e BOSS sono marchi registrati o marchi di Roland • Si se traslada la unidad a un lugar cuyas condiciones • Roland y BOSS son marcas comerciales registradas o bien •...