Publicité

Les langues disponibles

Les langues disponibles

Liens rapides

VENT-M30T3
VENTILATORE DA TAVOLO - DESK FAN - VENTILATEUR DE TABLE - VENTILADOR DE SOBRE MESA - STEHVENTILATOR - ASZTALI
VENTILLÁTOR - WIATRAK - TAFEL VENTILATOR - VENTILATOR DE MASA - STOLNÍ VENTILÁTOR - STOLNÝ VENTILÁTOR - ΑΝΕΜΙΣΤΗΡΑΣ
ΓΡΑΦΕΙΟΥ - STOLNI VENTILATOR - VENTOINHA DE MESA
ISTRUZIONI PER L'USO / INSTRUCTION MANUAL / NOTICE D'UTILISATION / INSTRUCTION MANUAL / GEBRAUCHSANWEISUNG
/ HASZNÁLATI UTASÍTÁS / INSTRUKCJA OBSŁUGI / NÁVOD K OBSLUZE / NÁVOD NA POUŽITIE / HANDLEIDING / MANUAL DE
INSTRUCTIUNI / UPUTE ZA UPORABU / INSTRUÇÕES DE UTILIZAÇÃO
VENT-M30T3_MANUAL.indd 1
07/11/18 15:13

Publicité

Table des Matières
loading

Sommaire des Matières pour Vetech VENT-M30T3

  • Page 1 VENT-M30T3 VENTILATORE DA TAVOLO - DESK FAN - VENTILATEUR DE TABLE - VENTILADOR DE SOBRE MESA - STEHVENTILATOR - ASZTALI VENTILLÁTOR - WIATRAK - TAFEL VENTILATOR - VENTILATOR DE MASA - STOLNÍ VENTILÁTOR - STOLNÝ VENTILÁTOR - ΑΝΕΜΙΣΤΗΡΑΣ ΓΡΑΦΕΙΟΥ - STOLNI VENTILATOR - VENTOINHA DE MESA ISTRUZIONI PER L’USO / INSTRUCTION MANUAL / NOTICE D’UTILISATION / INSTRUCTION MANUAL / GEBRAUCHSANWEISUNG...
  • Page 2: Informazioni Generali Di Sicurezza

    ISTRUZIONI PER L’USO Leggere attentamente le istruzioni prima di far funzionare l’apparecchio oppure fare manutenzione. Osservare tutte le istruzioni di sicurezza; la mancata osservanza delle istruzioni può portare a incidenti e/o danni. Conservare queste istruzioni per futuro riferi- mento. A. INFORMAZIONI GENERALI DI SICUREZZA • Utilizzare questo ventilatore solo come descritto in questo manuale. Qualsiasi altro uso non consi- gliato dal costruttore può causare incendi, scosse elettriche, o incidenti a persone.
  • Page 3 • Non toccate la spina con le mani bagnate. • Non posizionare il ventilatore sopra o in prossimità di un’altra fonte di calore. • Non collegare il ventilatore all’alimentazione prima che sia stato correttamente assemblato o posizionato. • Non fate andare il cavo sotto a tappeti. Non coprite il cavo con coperte, tappeti o simili. Porre il cavo lontano da aree trafficate o dove non può essere accidentalmente estratto. • Non posizionare il ventilatore sotto una presa. • Non utilizzare all’aperto. Uso interno solamente. ATTENZIONE: L’INTERRUTTORE ON/OFF NON E’ L’UNICO MEZZO PER SCOLLEGARE L’ A LIMENTAZIONE. IN CASO DI NON UTILIZZO, SPOSTAMENTO O MANUTENZIONE DELL’ A PPARECCHIO, ESTRARRE SEMPRE LA SPINA DALLA PRESA. • Non utilizzare l’apparecchio su superfici morbide, come un letto, dove le griglie possono venire coperte. Appoggiare sempre il ventilatore su una superficie stabile, piana, quando è in funziona- mento per evitare che il ventilatore si capovolga. Mettere il cavo in modo tale che il ventilatore o altri oggetti non appoggino su di esso. • Estrarre sempre la spina quando l’apparecchio non è in uso. • Al fine di evitare incidenti spegnere l’unità se incustodita. • In caso di anomalie (un rumore anomalo o uno strano odore), spegnere subito l’apparecchio, non tentare di ripararlo e portarlo al punto di vendita. B. DESCRIZIONE DELLE PARTI DEL VENTILATORE DA TAVOLO 1. Griglia anteriore 2. Vite di sicurezza 3. Ganci per chiusura griglia...
  • Page 4 C. ISTRUZIONI DI MONTAGGIO DELLA PARTE VENTILAZIONE Aprire la confezione ed estrarre le parti dell’apparecchio. Svitare le quattro viti (6) dal blocco motore Inserire la griglia posteriore (7) sull’albero Montare la ventola (5) sull’albero del Il p motore (8) nella posizione corretta. motore(8). Avvitare le quattro viti (4) sul blocco Avvitare la vite(4) sul retro della ventola motore (9) in maniera salda per bloccare (5). la griglia posteriore. • • • • • Assemblare griglia anteriore (1) e posteriore (7) e Unire la griglia anteriore e quella posteriore fissandola chiudere i ganci (3) saldamente con vite e bullone (2) ISTRUZIONI DI MONTAGGIO DELLA BASE DEL VENTILATORE DA TAVOLO rici VENT-M30T3_MANUAL.indd 4 07/11/18 15:13...
  • Page 5: Manutenzione E Stoccaggio

    Collegare la base al corpo dell’apparecchio utilizzando le viti incluse come illustrato nella “ figura A”. Collocare il ventilatore su un tavolo. Per spostare il ventilatore utilizzare la maniglia sul retro. D. COME UTILIZZARE IL VENTILATORE Collegare il cavo di alimentazione ad una presa di corrente appropriata (220-240V~). Non utilizzare questo ventilatore in un’area umida o polverosa. Regolazione dell’inclinazione: Per regolare il flusso dell’aria verso l’alto o il basso, spegnere l’apparecchio e agire delicatamente sul perno regolandone l’angolo di inclina- zione. Regolazione velocità di ventilazione La manopola per la selezione delle velocità di ventilazione consente di selezionare tre velocità di ventilazione, dalla più bassa 1, alla più alta, Il pulsante “ 0” spegne l’apparecchio (12). Oscillazione laterale Per attivare / disattivare l’ o scillazione, tirare verso l’alto o abbassate la levetta posta sopra il motore (11) E. MANUTENZIONE E STOCCAGGIO ATTENZIONE: ESTRARRE SEMPRE LA SPINA PRIMA DI PULIRE L’ A PPARECCHIO O FARE MANUTENZIONE. IMPORTANTE: NON IMMERGERE IL VENTILATORE IN ACQUA. Pulizia della superficie esterna dell’apparecchio: • Spegnere il ventilatore e rimuovere la spina prima di fare pulizia o muovere l’apparecchio.
  • Page 6: Condizioni Della Garanzia

    dei RAEE e la promozione di politiche orientate alla tutela ambientale. CONDIZIONI DELLA GARANZIA ATTENZIONE: La garanzia non è valida senza lo scontrino fiscale o la fattura di acquisto. CLAUSOLE E GARANZIA 1. L’apparecchio è garantito per 24 mesi – salvo estensione – dalla data di acquisto contro difetti di materiale e fabbricazione. 2. Sono escluse dalla garanzia le parti estetiche, le batterie, le manopole, i led, le lampadine, le parti asportabili soggetti ad usura, i danni provocati da incuria, uso, installazione errata o impropria non conforme alle avvertenze riportate sul libretto di istruzioni o comunque causati da fenomeni estranei al normale funzionamento dell’apparecchio. In particolar modo, ed a titolo di esempio, si fa espressamente notare che il fatto di tagliare il cavo di alimentazione del trasformatore o il fatto di dimenticare di ricaricare le batterie al piombo dei prodotti che ne fanno uso fanno decadere di fatto la garanzia. 3. La garanzia decade qualora l’apparecchio sia stato manomesso o riparato da personale non autorizzato. 4. Per garanzia si intende la sostituzione o la riparazione dei componenti riconosciuti come difetti di fabbrica , compresa la manodopera necessaria. 5. A discrezione da parte di Velamp Industries srl potrà essere sostituita l’intera apparecchiatura con lo stesso modello o prodotto alternativo, senza che ciò costituisca prolungamento della garanzia. 6. È escluso il risarcimento di danni diretti o indiretti di qualsiasi natura a persone o cose, per l’uso o la sospensione d’uso dell’apparecchio 7. In ogni caso le spese e i rischi del trasporto sono a carico dell’acquirente INSTRUCTION MANUAL Read carefully and save these instructions for safe operation before using this fan so as to reduce the risk of fire, electric shock or injury A.
  • Page 7 • Do not sit on the fan or put heavy items on the fan. • Do not cover the fan • Ambient operating temperature: 40 °C • This appliance can be used by children aged from 8 years and above and persons with reduced physical, sensory or mental capabilities or lack of experience and knowledge if they have been given supervision or instruction concerning use of the appliance in a safe way and understand the ati hazards involved. Children shall not play with the appliance. Cleaning and user maintenance shall eni not be made by children without supervision. • The appliance is only to be used with the power supply unit provided with the appliance. • It must only be supplied at safety extra low voltage corresponding to the marking on the applian- ria. • Never insert fingers, pencils, or any other object through the guard when fan is running. • Unplug from outlet when not in use, when moving fan from one location to another, before putting on, or taking off parts, and before cleaning. • Disconnect fan when removing grilles for cleaning. • Be sure fan is on a stable surface when operating to avoid overturning. • DO NOT use fan in window. Rain may create electrical hazard. B. EXPLODE VIEW 1. Front grill 2. Security screws 3. Guard clips 4. Blade Screws 5. Blade 6. Rear grill fastening screws 7. Rear grill 8. Motor shaft 9. Main unit 10. Inclination screws...
  • Page 8 C. ASSEMBLY These operations must be carried out with the plug disconnected from the power outlet. Assembly of blade and grills Remove the 4 screw (6) from the main body Assemble the back grill (7) to the motor Insert the blade (5) onto the motor pin (8) (9) (refer to the picture above) section (9) and secure screwing the four and secure it with the screw (4). screws (6). Attention: the handle of grill (7) must be facing upwards. Position the front grill (1) on the back grill (7) by hooking it at the top with Insert the screws into the two holes and secure with the nut (2). the small guard clops (3) and aligning the bottom with the two holes (2). Close the hooks positioned around the circumference of the grill. Assembly of the circular stand Position the main body (10) in the centre of the base (14). Centre the on upright pole/base and secure well with the base/upright pole fastening screws (supplied) as indicated on figure A VENT-M30T3_MANUAL.indd 8 07/11/18 15:13...
  • Page 9: Maintenance Instruction

    D. OPERATION INSTRUCTION Plug the cable into an appropriate socket (220-240V~). Do not use the fan in a humid o dusty room. Tilting control The airflow can be adjusted upward or downward by gently tilting the fan head to the desired vertical angle. Speed control Select the desired airflow moving the speed knob (12) on: 0 = Stop 1 = Low 2 = Med 3 = High Oscillation control Pull up on the oscillating button (11) for non-oscillating operation. Push down on the oscillating button for oscillating operation. E. MAINTENANCE INSTRUCTION BEFORE CARRYING OUT ANY MAINTENANCE OR CLEANING OPERATION: PLEASE REMOVE THE ELECTRICAL PLUG FROM THE SOCKET. Clean fan body and fan blade to avoid discoloration. Use a non-abrasive detergent and soft cloth for cleaning. Do not use thinners, alcohol, or other chemicals to clean the fan. DO NOT immerse the fan in water, and never allow water to drip into the motor housing. You can use a vacuum cleaner to remove the dust from the vents on the rear of the motor housing. For storage, clean fan carefully as instructed and store in it’s original box. Store the fan in a clean, dry place. INFORMATION FOR USERS: pursuant to Art. 26 of Legislative Decree 14 March 2014, no. 49 “Implementation of Directive 2012/19/ EU on electrical and electronic waste equipment (WEEE)” The symbol of the crossed bin on the equipment or on the packaging indicates the product at the end of its useful life must be collected separately from other waste. The user should therefore give the appliance, which is no longerusable, to suitable municipal differentiated waste collection centres for electrotechnical and electronic waste. Alternatively, autonomous management is possible by delivering the appliance you want to dispose of to the retailer when purchasing a new, equivalent appliance. Electronic retailers with retail surfaces of at least 400 m2 can also accept electronic products for disposal with dimensions under 25 cm free of charge, without you being obliged to make a purchase. Appropriate differentiated collection and susequent sending of the equipment for recycling, processing and disposal, using environmentally compatible means, contributes to avoiding possible negative effects on the environment and health and promotes re-use and recycling of materials used to manufacture the equipment. GUARANTEE CONDITIONS Attention: the guarantee is not valid without the receipt or the invoice GUARANTEE CLAUSES The product is guaranteed for 24 months from the date of purchase against defects in materials and manufacturing Excluded from the guarantee are: the esthetic components, the batteries, the knobs, the LEDs, the bulbs, removable parts subject to wear,...
  • Page 10: Consignes De Securite

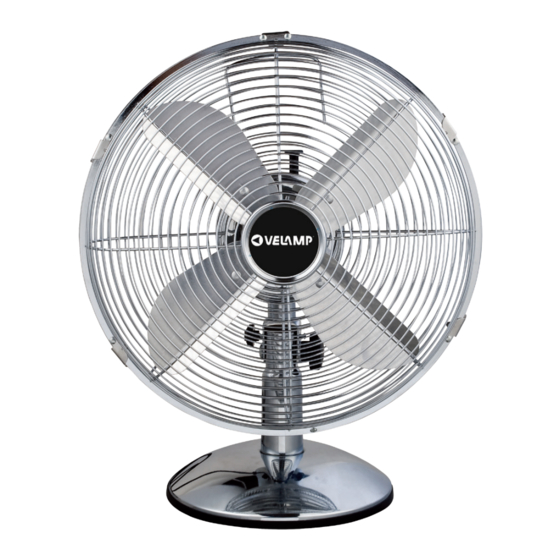
    NOTICE D’UTILISATION Lisez attentivement ces instructions avant d’utiliser l’appareil et conservez-les pour pouvoir les consulter lorsque vous en aurez besoin. A. CONSIGNES DE SECURITE • Avant de brancher votre appareil, vérifiez que la tension d’alimentation indiquée sur la plaque signalétique de l’appareil correspond bien à celle de votre installation électrique. • Cet appareil est destiné à un USAGE DOMESTIQUE UNIQUEMENT et A L’INTERIEUR d’une habita- tion. N’utilisez l’appareil que comme indiqué dans ce mode d’ e mploi. • Avant chaque utilisation, assurez-vous que le cordon d’alimentation soit en bon état. • N’utilisez pas l’appareil : • si le cordon d’alimentation ou la prise est endommagé(e), • en cas de mauvais fonctionnement, • si l’appareil a été endommagé de quelque façon que ce soit.
  • Page 11 B. DESCRIPTION 1. Grille avant 2. Vis de sécurité 3. Clips de fermeture grille 4. Vis hélice 5. Hélice 6. Ecrou pour grille arrière 7. Grille arrière 8. Axe de maintien 9. Moteur ( Unité principale) 10. Vis d’inclination du ventilateur 11. Bouton d’ o scillation 12. Cadran de sélection des vitesses 13. Vis de fixation du bloc moteur 14. Base 15. Tube 16. Ecrou 17. Rondelle 18. Vis de blocage de la base 19. Vis de sécurité du bloc moteur 20. Molette de fixation C. ASSEMBLAGE Assemblage des grilles et de l’hélice 1. Dévissez les 4 vis (6) du bloc moteur (9) Placez la grille arrière (7) sur la tige (8). La Placez l’hélice (5) sur la tige (8) jusqu’à ce poignée doit se trouver sur le dessus. qu’ e lle touche le bloc moteur (9). Vissez fermement les 4 vis (6) sur le bloc Visser la vis (4) dont le pas est situé...
  • Page 12: Utilisation

    • • • • • ÉL Placez la grille avant (1) sur la grille arrière (7). Fixez les grilles à l’aide des clips (3) puis, utilisez un tournevis pour Faites correspondre les petits trous ronds de manière à faire serrer la vis de fermeture. (2) passer la vis de fermeture Assemblage du pied du ventilateur Assembler la base (13) avec l’unité principale (14) en utilisant les vis fournies et en vous aidant de la figure A. D. UTILISATION Branchez le cordon d’alimentation sur une prise murale adaptée Réglage de l’inclinaison Pour incliner la trajectoire de l’air (de bas en haut ou vice versa): éteindre le ventilateur et agir délicatement sur le moteur pour régler l’angle. Réglage de la vitesse : Vous pouvez régler la vitesse à l’aide du cadran de selection des vitesses (12): 0 : arrêt 1 : vitesse lente 2 : vitesse moyenne 3 : vitesse rapide • Réglage de l’oscillation latérale: Pour activer ou arrêter l’ o scillation, appuyez ou tirez sur le bouton d’ o scillation (11). •...
  • Page 13: Entretien

    • Retirez la poussière à l’aide d’un chiffon doux et sec. • Pour un nettoyage plus approfondi, vous pouvez nettoyer l’hélice et les pièces en plastique à l’aide d’une éponge humide douce imprégnée d’un détergent doux (type liquide vaisselle). Rincez à l’ e au claire et séchez à l’aide d’un chiffon doux. • Assurez-vous que l’ e au ne puisse pas entrer en contact avec le moteur. Ne jamais immerger le ventilateur dans l’ e au. • Ne rebranchez pas l’appareil avant que celui-ci ne soit parfaitement sec. • Utiliser un aspirateur pour enlever la poussière accumulée dans les grilles d’ e ntrée et sortie d’air. Entretien Lors des périodes de non utilisation : débranchez le câble d’alimentation électrique de la prise et conserver le ventilateur avec le présent manuel dans la confection d’ o rigine et dans un lieu frais et ventilé ÉLIMINATION CORRECTE DE CE PRODUIT Participons à la protection de notre environnement en éliminant les piles et les produits électriques usagés de façon responsable. Les déchets électriques et électroniques (WEEE) et les batteries ne doivent pas être jetés avec les ordures ménagères. Contacter la mairie de votre domicile pour connaître la marche à suivre afin que des substances polluantes ne contaminent pas l’ e nvironnement. Le logo qui est apposé sur ce produit témoigne de votre participation à la collecte, la récupération, au recyclage et la réutilisation de ces déchets. Pb Batteries au plomb/Cd Batteries au cadmium/Hg batteries au mercure. CONDITIONS DE GARANTIE ATTENTION: la garantie est valable seulement si elle est accompagnée du ticket de caisse original. CLAUSES DE GARANTIE L’appareil est garanti contre les défauts de fabrication pendant 24 mois à partir de la date d’achat indiquée sur le ticket de caisse.
  • Page 14 den möglichen Risiken informiert worden sind. • • Das Ein- und Auslassgitter immer frei halten. • • Trennen Sie das Netzteil, wenn das Gerät nicht verwendet oder gereinigt wird. • Stellen Sie nichts auf das Produkt. Hängen Sie keine nassen Kleidungsstücke über den Ventilator. • Achten Sie darauf, dass keine Finger oder Fremdkörper in die Einlass- oder Auslassgitter gelangen, da dies zu einem Stromschlag oder Feuer oder einer Beschädigung des Lüfters führen kann. • Um Feuer zu vermeiden, blockieren oder manipulieren Sie nicht das Gitter, solange der Lüfter läuft. • Verwenden Sie das Gerät nicht mit beschädigten Kabeln oder Steckern. Wenn das Netzkabel beschädigt ist, muss es vom Hersteller, seinem Wiederverkäufer oder einer ähnlich qualifizierten Person ausgetauscht werden, um jegliches Risiko zu vermeiden. • Verwenden Sie den Ventilator nicht, wenn er aus einer bestimmten Höhe gefallen ist oder wenn er beschädigt wurde. • Wenden Sie sich an ein Servicecenter, um den Ventilator zu überprüfen oder elektrische oder mechanische Reparaturen durchzuführen. • Die häufigste Ursache für Überhitzung ist die Ansammlung von Staub im Gerät. Entfernen Sie Staubablagerungen, indem Sie den Stecker herausziehen und die Gitter mit Hilfe eines Staubsau- gers reinigen. • Verwenden Sie keine Scheuermittel um das Gerät zu reinigen. Mit einem feuchten Tuch (nicht nass) mit etwas Seifenwasser abspülen. Ziehen Sie den Stecker aus der Steckdose, bevor Sie das Gerät warten. • Um den Lüfter vom Strom zu trennen, stellen Sie den Schalter auf OFF (0) und ziehen Sie den Stecker aus der Steckdose. Ziehen Sie nur am Stecker. Ziehen Sie nicht am Kabel, wenn Sie den Lüfter ausschalten. • Stellen Sie nichts auf das Kabel und verbiegen Sie das Kabel nicht. • Die Verwendung von Verlängerungen wird nicht empfohlen, da die Verlängerung überhitzen und Brandgefahr verursachen kann. Verwenden Sie niemals nur eine Verlängerung um mehr als ein Gerät zu betreiben.
  • Page 15: Montage

    • Ziehen Sie den Stecker immer heraus, wenn das Gerät nicht benutzt wird. • Um Unfälle zu vermeiden, schalten Sie das Gerät aus, wenn es unbeaufsichtigt ist. Im Falle einer Unregelmäßigkeit (ein störendes Geräusch oder ein seltsamer Geruch) das Gerät sofort ausschalten. Nicht versuchen zu reparieren , das Gerät zum Händler bringen. B. EINZELTEILE 1. Frontgrill 2. Sicherheitsschrauben 3. Schutzclips 4. Schrauben für die Flügel 5. Flügel 6. Befestigungsschrauben Grills 7. Hinterer Grill 8. Motorwelle 9. Haupteinheit 10. Neigungsschrauben 11. Schwingungsknopf 12. Geschwindigkeitsregler 13. Motorschrauben 14. Base 15. Stange 16. Mutter 17. Unterlegscheibe 18. Schraube 19. Sicherheitsschrauben Motor 20. Befestigungsschraube Motor C. MONTAGE Diese Vorgänge müssen bei gezogenem Stecker von der Steckdose durchgeführt werden. Entfernen Sie die Schraube (6) vom Montieren Sie den hinteren Grill (7) am Schrauben Sie die Schraube (4) auf der Hauptgehäuse (9) (siehe obiges Bild). Motorteil (9) und befestigen Sie die vier Rückseite des Lüfters (5) fest. Schrauben (6). Achtung: Der Grillgriff (7) muss nach oben zeigen. Montieren Sie den Ventilator (5) auf die Motorwelle (8). VENT-M30T3_MANUAL.indd 15 07/11/18 15:13...
  • Page 16: Montage Des Rundstands

    • • • • • ringen Sie den vorderen Grill (1) am hinteren Grill (7) Schließen Sie die Haken um den Grills herum. Stecken (fü an, indem Sie ihn oben mit den kleinen Schutzklappen Sie die Schrauben in die beiden Löcher und sichern Sie (3) einhaken und den Boden mit den beiden Löchern sie mit der Mutter (2). (2) ausrichten. MONTAGE DES RUNDSTANDS Positionieren Sie den Hauptkörper (10) in der Mitte der Basis (14). Zentrieren Sie den aufrechten Pfosten / Sockel und befestigen Sie ihn gut mit den Befestigungsschrauben des Sockels / des Pfostens (mitgeliefert), wie in Abbildung A. D. INBETRIEBNAHME Stecken Sie das Kabel in eine geeignete Buchse (220-240V ~). Verwenden Sie den Ventilator nicht in einem feuchten oder staubigen Raum. • Kippsteuerung: Der Luftstrom kann nach oben oder nach unten eingestellt werden, indem der Ventilatorkopf leicht auf den gewünschten vertikalen Winkel • geneigt wird. Geschwindigkeitskontrolle • Wählen Sie den gewünschten Luftstrom, indem Sie den Geschwindigkeitsregler (12) bewegen: 0 = Stopp • 1 = niedrig 2 = mittel 3 = hoch • SCHWINGUNGSSTEUERUNG Den Schwingungsknopf (11) für stationären Betrieb hochziehen. Drücken Sie den Schwingungsknopf nach unten um die Funktion des • Schwingens einzustellen. VENT-M30T3_MANUAL.indd 16 07/11/18 15:13...
  • Page 17: Información General De Seguridad

    E. WARTUNGSANLEITUNG BEVOR SIE WARTUNGS- ODER REINIGUNGSMASSNAHMEN DURCHFÜHREN: BITTE DEN STECKER AUS DER STECKDOSE ENTFERNEN. • Reinigen Sie den Lüfterkörper und das Lüfterblatt, um Verfärbungen zu vermeiden. • Verwenden Sie zum Reinigen ein nicht scheuerndes Reinigungsmittel und ein weiches Tuch. Verwenden Sie keine Verdünner, Alkohol oder andere Chemikalien, um den Ventilator zu reinigen. • Tauchen Sie den Ventilator NICHT in Wasser und lassen Sie niemals Wasser in das Motorgehäuse tropfen. • Sie können einen Staubsauger verwenden, um den Staub von den Lüftungsschlitzen auf der Rückseite des Motorgehäuses zu entfernen. • Reinigen Sie den Ventilator zur Lagerung sorgfältig wie beschrieben und lagern Sie ihn in der Originalverpackung. Lagern Sie den Ventilator an einem sauberen, trockenen Ort Bedeutung des Symbols auf dem Produkt, der Verpackung oder Gebrauchsanleitung. Elektrogeräte sind Werkstoffe und gehören am Ende der Laufzeit nicht in den Hausmüll! Helfen Sie uns bei Umweltschutz und Resourcenschonung und geben Sie dieses Gerät bei den entsprechenden Rücknahmestellen ab. Fragen dazu beantwortet Ihnen die für die Abfallbeseitigung zuständige Organisation oder Ihr Fachhändler. GEWÄHRLEISTUNG (für die Inanspruchnahme der Garantie bewahren Sie bitte die Kaufquittung bzw. den Kassenbon auf!) GARANTIE-BEDINGUNGEN Die Garantieleistung erstreckt sich auf 24 Monate ab Kaufdatum und deckt Fabrikations- und Materialfehler Ausgeschlossen aus der Garantie sind die Batterien, die Außengriffe, die LED’ s , die herausnehmbaren T eile, mögliche durch unsachgemäße Handhabung verursachte Schäden, Schäden die aus einer fehlerhaften oder nicht anweisungsgemäßen Inbetriebnahme entstehen können Die Garantie entfällt wenn es feststeht, dass das Gerät von nicht autorisierten Personen repariert wurde Unter dem Begriff „ Gewährleistung“ versteht man den Austausch oder die Reparatur von T eilen welche als fehlerhaft anerkannt wurden inkl. der dafür notwendigen Lohnkosten VELAMP obliegt die Entscheidung, das gesamte Gerät durch das selbe Modell oder durch ein Alternativmodell auszutauschen; dies verlängert jedoch den ursprünglichen Garantie-Zeitraum nicht Ein Anspruch auf Schadenersatz in Folge von direkten oder indirekten Personen- oder Sachschäden die aus der fehlerhaften Funktion des Geräts entstehen können, ist ausgeschlossen Die mit einer Rücksendung des fehlerhaften Geräts verbundenen Kosten und Risiken gehen zu Lasten des Käufers INSTRUCCIONES DE USO...
  • Page 18 • Desconecte la fuente de alimentación si no se usa o si se limpia. • No coloque nada sobre el producto; No cuelgue ropa mojada en el ventilador. • No permita que los dedos o objetos extraños entren en las rejillas de entrada o de salida del aire ya que esto puede causar una descarga eléctrica o incendio o dañar el ventilador. • Para evitar incendios, no bloquee ni altere las rejillas de ninguna manera mientras el ventilador esté funcionando. • No utilice el aparato con cables o enchufes dañados. Si el cable de alimentación está dañado, debe ser reemplazado por el fabricante, su distribuidor o personal cualificado para evitar cualquier riesgo. • No utilice el ventilador si se ha caído de una cierta altura o si se ha dañado de alguna manera. • Póngase en contacto con un centro de servicio para revisar el ventilador o realizar reparaciones eléctricas o mecánicas. • La causa más común de sobrecalentamiento es la acumulación de polvo en el aparato. Retire los depósitos de polvo desconectando el ventilador y limpiando las rejillas con la ayuda de una aspiradora. • No utilice productos abrasivos para limpiar el aparato. Limpie con un paño húmedo (no mojado) y enjuague con agua jabonosa. Desconecte el enchufe de la toma de corriente antes de realizar el mantenimiento. • Para desconectar el ventilador, ponga el interruptor en OFF (0) y lo desenchufe. No tire del cable para apagar el ventilador. • No coloque nada sobre el cable y no doble el cable. • No se recomienda el uso de extensiones, ya que la extensión puede recalentarse y provocar un incendio. Nunca use una sola extensión para operar más de un aparato. • No sumerja el cable, el enchufe o cualquier otro elemento del aparato en agua u otros líquidos. • No toque el enchufe con las manos mojadas. • No coloque el ventilador sobre o cerca de otra fuente de calor. • No conecte el ventilador a la fuente de alimentación antes de montarlo o colocarlo correctamente.

Table des Matières