Table des Matières
Publicité
Les langues disponibles
Les langues disponibles
Liens rapides
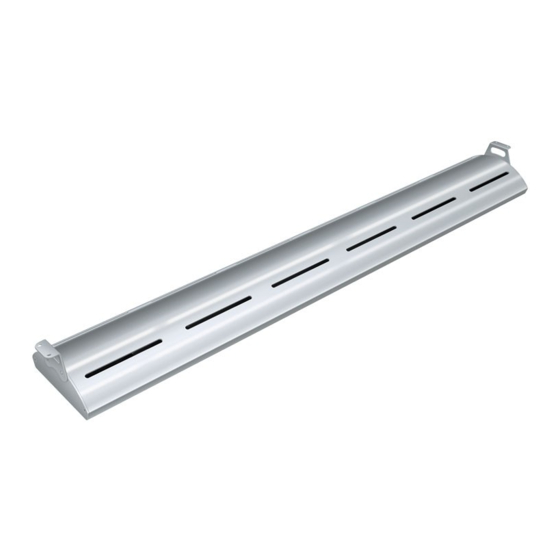
Curved Infrared Strip Heaters
GM5AH and GM5AHL Series
Installation and Operating Manual
Gebogene Infrarot-Speisenwärmer
GM5AH- und GM5AHL-Serie
Installations- und Bedienungshandbuch
P 14
Registrieren Sie sich online!
Les rampes chauffantes arrondies à infrarouge
Séries GM5AH et GM5AHL
Manuel d'installation et d'utilisation
P 38
S'inscrire en ligne!
Gebogen infrarood verwarmingsstrips
GM5AH- en GM5AHL-series
Handleiding voor Installatie en Bediening
P 63
Registreer online!
P/N 07.04.818.00
GLOMAX
For
and non-
Original Instructions
Instrucciones originales
Instructions originales
®
Models
Los calentadores de banda infrarroja curvos
Series GM5AH y GM5AHL
Manual de Instalación y Operación
¡Regístrese en línea!
Riscaldatori a nastro curvi a infrarossi
Serie GM5AH e GM5AHL
Manuale per l'installazione e l'uso
Originalanleitung
Istruzioni originali
Vertaling van de
originele instructies
P 26
P 51
Registratevi online!
© 2019 Hatco Corporation
Publicité
Chapitres
Table des Matières
Dépannage

Manuels Connexes pour Hatco GLOMAX GM5AH Série

Sommaire des Matières pour Hatco GLOMAX GM5AH Série
- Page 1 Serie GM5AH e GM5AHL Manuel d’installation et d’utilisation Manuale per l’installazione e l’uso P 38 P 51 S’inscrire en ligne! Registratevi online! Gebogen infrarood verwarmingsstrips GM5AH- en GM5AHL-series Handleiding voor Installatie en Bediening P 63 Registreer online! P/N 07.04.818.00 © 2019 Hatco Corporation...
-
Page 2: Table Des Matières
(specification Hours: 7:00 to 5:00 Monday–Friday, label located on the underside of the unit). Please have this Central Time (CT) information available when calling Hatco for service assistance. (Summer Hours—June to September: 7:00 to 5:00 Monday–Thursday Model No. ________________________________________ 7:00... -
Page 3: Important Safety Information
• Do not steam clean or use excessive placing in unit. Failure to heat food product water on unit. properly may result in serious health risks. • Use only Genuine Hatco Replacement This unit is for holding pre-heated food Parts when service is required. Failure product only. -
Page 4: Model Description
Damage to any countertop material caused startup. This is a temporary condition. by heat generated from Hatco equipment Operate unit without food product until is not covered under the Hatco warranty. smoke dissipates. Contact the manufacturer of the countertop material for applicati on information. -
Page 5: Model Designation
MODEL DESIGNATION G M 5 A H L - xx Glo-Ray Curved Width (in inches) Aluminum Housing L = LED Display Lights No Character = No Lights H = High Wattage SPECIFICATIONS Dimensions — Strip Heater Unit Overall Model Width (A) Depth (B) Height (C) Height (D) -
Page 6: Installation
Do not add a decorative soffit to hide a pass-through mounted strip heater. Excessive heat can cause unit failure. Damage to any countertop material caused by heat generated from Hatco equipment is not covered under the Hatco warranty. Contact the manufacturer of the countertop material for application information. -
Page 7: Installation Site Requirements
2. Fasten the angle brackets to the underside of the shelf using appropriate fasteners (not supplied by Hatco). Make sure the unit is facing the desired direction with the wire leads on the proper side before fastening the unit to the shelf. -
Page 8: Installing The Control Box
INSTALLATION Installing the Control Box Use the following procedure to install the control box. WARNING Access Control box must be mounted in a vertical surface. Cover Mounting control box in a horizontal surface may result in the collection of liquids and lead to electric shock. NOTICE Install remote-mounted control box outside of areas subject to temperatures above 104°F (40°C). -
Page 9: Operation
OPERATION General Startup 1. Turn on the strip heater. GLOMAX Curved Infrared Strip Heaters are designed for ease ® of operation. Use the following information and procedures to • Move the Power I/O (on/off) switch to the I (on) position. operate the unit. -
Page 10: Maintenance
Some after-market or generic replacement parts Authorized Hatco Service Agent. do not have the characteristics that will allow them to NOTE: Hatco LED light channels meet safety standards for operate safely in Hatco equipment. food holding and display areas. -
Page 11: Troubleshooting Guide
Troubleshooting Questions? If you continue to have problems resolving an issue, please contact the nearest Authorized Hatco Service Agency or Hatco for assistance. To locate the nearest Service Agency, log onto the Hatco website at www.hatcocorp.com, select the Support pull- down menu, and click on “Find A Service Agent”;... -
Page 12: Options And Accessories
3. Feed the conduit and LED wire leads from the unit through the conduit hole, and position the unit on the countertop. 4. Fasten the stands to the countertop using appropriate Mounting Holes fasteners (not supplied by Hatco). Each mounting flange Conduit Hole (64 mm [2-1/2″] has two mounting hole locations. -
Page 13: Product Warranty
Replacement Parts ANY OTHER PRODUCT OR GOODS. SERVICE INFORMATION The warranty on this Hatco unit is for one year from date of The Hatco dealer will do the following: purchase or eighteen months from date of shipping from Hatco, • Provide replacement part(s) as required whichever occurs first. - Page 14 Central Time (CT) (Spezifikationsaufkleber auf der Unterseite des Geräts). Haben (im Sommer—Juni bis September: Sie bitte dies Information zur Hand, wenn Sie Hatco wegen 7.00 Uhr bis 17.00 Uhr Montag bis Donnerstag einer Service-Unterstützung anrufen. 7.00 Uhr bis 16.00 Uhr Freitag)
-
Page 15: Wichtige Sicherheitshinweise
GEFAHR VON ELEKTROSCHOCKS: • Die Geräte benötigen eine fest • Verwenden Sie bei der Reparatur von Hatco verdrahtete Verbindung zum elektrischen Geräten ausschließlich Hatco Ersatzteile. System vor Ort. Die Anschlüsse müssen Wenn Sie keine Original-Hatco-Ersatzteile ordnungsgemäß geerdet sein und die für verwenden, setzen Sie die Bediener der die elektrischen Daten des Geräts richtige... -
Page 16: Modellbeschreibung
Schäden an Arbeitsplatten, die durch von Hatco-Geräten erzeugte Wärme verursacht Die bei der Herstellung verwendeten Öle werden, sind nicht von der Hatco-Garantie können bis zu 30 Minuten nach dem ersten gedeckt. Wenden Sie sich bezüglich Einschalten zu Rauchbildung führen. Dabei... -
Page 17: Modellbezeichnung
MODELLBEZEICHNUNG G M 5 A H L - xx Glo-Max gebogen Breite (in Zoll) Aluminiumgehäuse L = LED-Displayleuchten Kein Zeichen = Keine Lichter H = Hohe Wattzahl TECHNISCHE DATEN Abmessungen — Speisenwärmer Geräte- Gesamt- Modell Breite (A) Tiefe (B) höhe (C) höhe (D) GM5AH und GM5AHL 762–1981 mm... -
Page 18: Aufstellen Des Geräts
Durchreiche angebrachten Speisenwärmer abzudecken. Übermäßige Hitze kann zum Geräteausfall führen. Schäden an Arbeitsplatten, die durch wärmeerzeugende Hatco-Geräte verursacht werden, sind nicht durch die Hatco-Garantie abgedeckt. Wenden Sie sich bezüglich der Gebrauchsbestimmungen Ihrer Arbeitsplatten an den Hersteller. ANMERKUNG: Wenden Sie sich vor der Installation des Geräts für Informationen zur Anwendung und... -
Page 19: Anforderungen An Den Installationsort
Mindestabstände für angrenzende Flächen bietet. HINWEIS WARNUNG Schäden an Arbeitsplatten, die durch wärmeerzeugende Hatco-Geräte verursacht werden, sind nicht durch die FEUERGEFAHR: Installieren Sie die Geräte nicht über Hatco-Garantie abgedeckt. Wenden Sie sich bezüglich oder um brennbare Oberflächen. Es kann zu Verfärbungen der Gebrauchsbestimmungen Ihrer Arbeitsplatten an den oder Verbrennungen führen. -
Page 20: Anbringen Des Schaltkastens
AUFSTELLEN DES GERÄTS Anbringen des Schaltkastens Gehen Sie zur Installation des Schaltschranks wie folgt vor. WARNUNG Abdeckung Der Schaltkasten muss auf einer vertikalen Oberfläche montiert werden. Die Montage des Schaltschranks auf einer horizontalen Oberfläche kann zur Ansammlung von Flüssigkeiten und zu einem elektrischen Schlag führen. HINWEIS Installieren Fernbedienung-Schaltkasten... -
Page 21: Betrieb
BETRIEB Allgemeines Inbetriebnahme 1. Schalten Sie den Speisenwärmer ein. GLOMAX Gebogene Infrarot-Speisenwärmer sind für eine ® einfache Bedienung ausgelegt. Es folgen Informationen und • Stellen Sie den Ein-/Ausschalter auf die Position I (ein). Anweisungen zum Betrieb des Geräts. • Die Leuchte der Betriebsanzeige leuchtet (falls vorhanden), die Heizelemente werden aktiviert und die WARNUNG LED-Lichtkanäle leuchten (falls vorhanden). -
Page 22: Wartung
Lebensmittelbereich. sich an einen autorisierten Hatco-Servicepartner oder an den Hatco-Kundendienst unter +1-414 6716350. Verwenden Sie nur die von Hatco zugelassenen LED- Leuchten, die speziell für den Lebensmittelbereich entwickelt wurden. Die Verwendung von LED-Leuchten, die nicht für Lebensmittelbereiche vorgesehen sind, kann zu Verletzungen und/oder Lebensmittelverunreinigungen führen. -
Page 23: Richtlinien Zur Störungsbeseitigung
Haben Sie Fragen zur Störungsbeseitigung? Wenn Sie weiterhin Probleme beim Beheben einer Störung haben, dann setzen Sie sich bitte mit einem autorisierten Hatco- Servicebetrieb in Ihrer Nähe oder mit Hatco in Verbindung. Um den nächstgelegenen Serviceanbieter zu finden, melden Sie sich bitte auf der Hatco-Webseite unter www.hatcocorp.com an, wählen Sie das Support Pulldown-Menü... -
Page 24: Optionen Und Zubehör
4. Befestigen Ständer geeignetem Rohrloch (64 mm [2-1/2"] Befestigungsmaterial (nicht im Lieferumfang von Hatco in der Mitte) enthalten) an der Arbeitsplatte. Jeder Montageflansch verfügt über zwei Montagelochstellen. 5. Verlegen Sie die Elementdrähte und LED-Drähte in Richtung des Installationsortes für den Schaltkasten. Weitere Informationen zum Anbringen des Schaltkastens/der Steuerung finden Sie im Abschnitt INSTALLATION dieses Handbuchs. -
Page 25: Internationale Beschränkte Garantie
Ladenrollen und -bahnen der Wärme-Lade Die Haftung seitens Hatco und das ausschließliche Rechtsmittel Metall-ummantelte Speisenwärmer-Elemente des Käufers ist nach Ermessen von Hatco oder einer von Hatco Metall-ummantelte Luft-Wärme-Elemente für Schaukästen autorisierten Serviceagentur nur der Ersatz des von der Garantie Metall-ummantelte Luft-Wärme-Elemente für geschützten Teils oder Produktes, sofern die oben angeführten... - Page 26 (Horario de verano—junio a septiembre: la parte inferior de la unidad). Por favor, tenga esta información 7:00 a.m. a 5:00 p.m., lunes a jueves disponible cuando llame a Hatco para recibir asistencia técnica. 7:00 a.m. a 4:00 p.m., viernes) ______________________________________ Teléfono:...
-
Page 27: Información Importante De Seguridad
Los repuestos Hatco autorizado de Hatco o con el Departamento originales están especificados para de Servicio de Hatco al +1-414-671-6350. operar en forma segura en los entornos en los que se usan. -
Page 28: Descripción Del Modelo
A fin de garantizar un funcionamiento seguro La garantía de Hatco no cubre los daños y adecuado, consulte “Requisitos del sitio de materiales del mostrador causados por de instalación” en la sección INSTALACIÓN el calor que generan los equipos Hatco. -
Page 29: Especificaciones
MODEL DESIGNATION G M 5 A H L - xx Curva Glo-Max Ancho (en pulgadas) Carcasa de Aluminio L = Luces de la pantalla LED Sin carácter = Sin luces H = Vataje alto ESPECIFICACIONES Dimensiones — Calentador de banda Altura de Altura Modelo... -
Page 30: Instalación
El calor excesivo puede causar fallas en la unidad. La garantía de Hatco no cubre los daños de materiales de la mesada causados por el calor que generan los equipos Hatco. Póngase en contacto con el fabricante del material de la mesada para obtener información sobre la aplicación. -
Page 31: Requisitos Del Sitio De Instalación
AVISO espacios libres mínimos adecuados para las superficies adyacentes. La garantía de Hatco no cubre los daños de materiales de ADVERTENCIA la mesada causados por el calor que generan los equipos Hatco. Póngase en contacto con el fabricante del material RIESGO DE INCENDIO: No instale las unidades sobre de la mesada para obtener información sobre la aplicación. -
Page 32: Instalación De La Caja De Control
INSTALACIÓN Instalación de la caja de control Utilice el siguiente procedimiento para instalar la caja de control. ADVERTENCIA Cubierta de acceso La caja de control debe montarse en una superficie vertical. El montaje de la caja de control en una superficie horizontal puede ocasionar la recolección de líquidos y provocar una descarga eléctrica. -
Page 33: Operación
OPERACIÓN Generalidades Puesta en funcionamiento 1. Enciende el calentador de banda. GLOMAX Los calentadores de banda infrarroja curvos están ® diseñados para un funcionamiento sencillo. Utilice la siguiente • Coloque el interruptor de encendido y apagado (I/O) en información y procedimientos para hacer funcionar la unidad. la posición I (encendido). -
Page 34: Mantenimiento
• No limpie la unidad con vapor ni la exponga a cantidades seco. excesivas de agua. • Solo utilice Piezas de repuesto originales de Hatco cuando Reemplazo de la luz de la pantalla—Serie se requiera mantenimiento. El hecho de no utilizar Piezas GM5AHL de repuesto originales de Hatco anulará... -
Page 35: Guía De Resolución De Problemas
¿Tiene preguntas sobre cómo resolver un problema? Si no logra resolver un problema, póngase en contacto con el agente de servicio autorizado de Hatco más cercano para obtener ayuda. Para encontrar la Agencia de Servicios más cercana, ingrese en el sitio web de Hatco www.hatcocorp.com, seleccione el Menú... -
Page 36: Opciones Y Accesorios
Orificios de montaje 4. Ajuste los soportes a la mesada usando los sujetadores Orificio del (64 mm [2-1/2"] adecuados (no suministrados por Hatco). Cada brida de conducto en el centro) montaje tiene dos ubicaciones para los orificios de montaje. 5. Dirija los conectores de los cables del elemento y los conductores de los cables de los LED hacia la ubicación... -
Page 37: Garantía Internacional Limitada
Hatco, o por DEL DERECHO DE PROPIEDAD INTELECTUAL. Sin limitar la 18 meses a partir de su envío por Hatco. El comprador debe generalidad de lo anterior, TALES GARANTÍAS NO CUBREN: establecer la fecha de compra del producto registrando el... - Page 38 7h00 à 17h00 du lundi au vendredi (plaque signalétique située sous l’appareil). Veuillez avoir cette Heure du Centre (CT) information à portée de la main si vous appelez Hatco pour (Horaires d’été—juin à septembre: assistance. 7h00 à 17h00 du lundi au jeudi 7h00 à...
-
Page 39: Consignes De Sécurité Importantes
Utilisez uniquement systèmes d’éclairage à LED agréés par Hatco conçus spécialement pour les zones de maintien au chaud. L’utilisation d’un système d’éclairage à LED non conçu pour les zones de maintien au chaud pourrait provoquer des blessures et/ou contaminer les aliments. - Page 40 Si cet appareil distance hors des zones soumises à des doit être réparé, contacter un réparateur températures supérieures à 104°F (40°C). Hatco agréé ou le Service après-vente Hatco Des températures excessives entraîneront au +1-414-671-6350. une surchauffe, un dysfonctionnement et une défaillance.
-
Page 41: Tous Les Modèles
DESCRIPTION DU MODÈLE Tous les modèles Modèles GM5AH Tous les comptoirs de présentation chauffants GLOMAX Toutes Ces modèles produisent de la chaleur uniquement. Les ® les rampes chauffantes arrondies à infrarouge se composent commandes sont logées dans un boîtier de commande monté d’un boîtier en aluminium arrondi, idéal pour l’installation dans à... -
Page 42: Caractéristiques Techniques
CARACTÉRISTIQUES TECHNIQUES Dimensions — Rampe chauffante Hauteur Hauteur Modèle Largeur (A) Profondeur (B) de l’appareil (C) globale (C) GM5AH et GM5AHL 762–1981 mm 152 mm 50 mm 75 mm (30″–78″) (6″) (2″) (3″) Dimensions — Boîtier de commande 190 mm 136 mm (7-1/2″) (5-3/8″) -
Page 43: Installation
Les dommages à toute partie du comptoir pouvant être causés par la chaleur générée par l’équipement de Hatco ne sont pas couverts par la garantie de Hatco. Contactez le fabricant du comptoir pour obtenir des informations concernant ce problème. -
Page 44: Exigences Du Lieu D'installation
Hatco dessus ou à proximité de surfaces combustibles. Une ne sont pas couverts par la garantie de Hatco. Contactez le décoloration ou une combustion pourraient survenir. fabricant du comptoir pour plus de renseignements. -
Page 45: Installation Du Boîtier De Commande
INSTALLATION Installation du boîtier de commande Appliquez la procédure suivante pour installer le boîtier de commande. AVERTISSEMENT Couvercle d’accès Le boîtier de commande doit être installé sur une surface verticale. L’installation du boîtier de commande sur une surface horizontale peut entraîner une accumulation de liquides et un risque d’électrocution. -
Page 46: Mode D'emploi
MODE D’EMPLOI Généralités Mise en service 1. Allumez la rampe chauffante. GLOMAX Les rampes chauffantes arrondies à infrarouge sont ® conçues pour une utilisation facile. Utilisez les informations et • Mettre l’interrupteur d’alimentation I/O (marche/arrêt) en les procédures suivantes pour faire fonctionner l’appareil. position «... -
Page 47: Maintenance
Hatco. l’environnement dans lequel elles sont utilisées. NOTA : Les barres à LED d’Hatco répondent aux standards Certaines pièces de rechange génériques ne disposent de sécurité pour la conservation de la nourriture et des pas de caractéristiques leur permettant de fonctionner... -
Page 48: Guide De Dépannage
Vous avez des questions en ce qui concerne les pannes ? Si le problème persiste, veuillez contacter l’agence d’entretien agréée Hatco la plus proche ou Hatco pour obtenir une assistance. Pour trouver l’agence d’entretien la plus proche, rendez-vous sur le site Internet de Hatco (www.hatcocorp.com) et sélectionnez le menu déroulant Support (Assistance), puis cliquez sur «... -
Page 49: Supports Non Réglables
3. Alimentez le conduit et les câbles LED de l’appareil à travers le trou de conduit et positionnez l’appareil sur le comptoir. 4. Fixez les supports sur le comptoir en utilisant les fixations adaptées (non fournies par Hatco). Chaque bride de montage Trous de fixation Orifice de possède deux emplacements pour le trou de fixation. -
Page 50: Garantie Limitée Internationale
écrites de Sans limitation quand aux garanties pré-citées, DE TELLES Hatco ou de 18 mois à partir de la date d’expédition de l’usine GARANTIES NE COUVRENT PAS: Les ampoules à Hatco. L’acheteur doit prouver la date d’achat du Produit par incandescence enduites, les lampes fluorescentes, les ampoules l’enregistrement du produit auprès de Hatco ou par d’autres... -
Page 51: Informazioni Importanti Per Il Proprietario
AVVISO serve a indicare situazioni che non sicurezza e funzionamento di GLOMAX Riscaldatori a nastro riguardano lesioni della persona. curvi a infrarossi. Hatco consiglia di leggere tutte le istruzioni di installazione, funzionamento e sicurezza contenute nel presente manuale prima di installare o utilizzare l’unità. -
Page 52: Importanti Informazioni Sulla Sicurezza
“l’utente” può intervenire. Se l’unità • Nell’eseguire interventi sull’unità usare richiede un intervento di assistenza mettersi solo pezzi di ricambio originali di Hatco. Il in contatto con un Agente di assistenza mancato uso di pezzi di ricambio originali di autorizzato di Hatco o con il Reparto di Hatco può... -
Page 53: Pericolo Di Ustione
I danni ai materiali dei piani di lavoro causati alimentari fino al dissolvimento del fumo. dal calore generato dalle apparecchiature Hatco non sono coperti dalla garanzia Hatco. Per garantire un funzionamento sicuro e Contattare il produttore del materiale del piano corretto, fare riferimento a "Requisiti della... -
Page 54: Designazione Del Modello
DESIGNAZIONE DEL MODELLO G M 5 A H L - xx Glo-Max Curvo Larghezza (in pollici) Alloggiamento in alluminio L = Luci LED del display Nessun carattere = Assenza di luci H = Alta potenza DATI TECNICI Dimensioni — Riscaldatore a nastro Altezza Altezza Modello... -
Page 55: Installazione
I danni ai materiali dei piani di lavoro causati dal calore generato dalle apparecchiature Hatco non sono coperti dalla garanzia Hatco. Contattare il produttore del materiale del piano di lavoro per informazioni sulle applicazioni. NOTA: Contattare il produttore del materiale della base del... -
Page 56: Requisiti Della Posizione Di Installazione
PERICOLO D'INCENDIO: Non installare le unità al di sopra generato dalle apparecchiature Hatco non sono coperti o in prossimità di superfici infiammabili. Potrebbero dalla garanzia Hatco. Contattare il produttore del materiale verificarsi decolorazione o combustione. Le unità devono del piano di lavoro per informazioni sulle applicazioni. -
Page 57: Installazione Della Scatola Di Controllo
INSTALLAZIONE Installazione della scatola di controllo Procedere come segue per installare la scatola di controllo. AVVERTENZA Copertura La scatola di controllo deve essere montata su una dell'accesso superficie verticale. Il montaggio della scatola di controllo su una superficie orizzontale può provocare una raccolta di liquidi e causare scosse elettriche. -
Page 58: Funzionamento
FUNZIONAMENTO Informazioni Generali Avvio 1. Accendere il riscaldatore a nastro. GLOMAX I riscaldatori a nastro curvi a infrarossi sono ® progettati per garantire facilità di funzionamento. Utilizzare le • Portare l’interruttore di accensione (I/O) nella posizione seguenti informazioni e procedure per azionare l'unità. I (acceso). -
Page 59: Manutenzione
Hatco. Questa unità non presenta parti sui cui l’utente possa NOTA: I tubi luminosi a LED Hatco soddisfano gli standard di eseguire l’assistenza. Se risulta necessaria l’assistenza sicurezza per le aree di conservazione e di esposizione su questa unità, contattare un Centro di Assistenza... -
Page 60: Guida Alla Soluzione Dei Problemi
Per trovare il centro assistenza più vicino, accedere al sito Web Hatco all’indirizzo www.hatcocorp.com, selezionare il Support (Assistenza) e fare clic su “Find A Service Agent” (Trova un centro di assistenza); o contattare il Team assistenza e ricambi Hatco al numero/indirizzo e-mail:... -
Page 61: Opzioni E Accessori
4. Fissare i supporti al piano di lavoro mediante i dispositivi di (64 mm [2-1/2"] del foro fissaggio appropriati (non forniti da Hatco). Ogni flangia ha al centro) due posizioni per i fori di montaggio. 5. Dirigere il cablaggio dell'elemento e quello dei LED verso la posizione di installazione della scatola di controllo. -
Page 62: Garanzia Limitata Internazionale
) parti nuove o rigenerate, a scelta di Hatco, da parte di Hatco Elementi del pozzo riscaldato incorporato — stessa o di un centro di servizio autorizzato in relazione alla... -
Page 63: Belangrijke Informatie Voor De Eigenaar
Deze handleiding bevat instructies voor de installatie, veiligheid en bedieningsinstructies voor GLOMAX Gebogen infrarood te vestigen op praktijken die niet tot verwarmingsstrips. Hatco beveelt aan dat u voor het installeren lichamelijke letsels leiden. of gebruiken van een apparaat alle voorschriften rond de installatie, de veiligheid en het gebruik die in deze handleiding opgenomen zijn, leest. -
Page 64: Belangrijke Veiligheidsinformatie
Installatie door de vereiste eigenschappen om veilig te onbevoegde medewerkers leidt tot het kunnen werken in apparaten van Hatco. ongeldig verklaren van uw garantie. Het kan ook resulteren in een elektrische BRANDGEVAAR: schok, brandwonden, schade aan het •... - Page 65 Dit apparaat is alleen bedoeld voor De Hatco-garantie dekt geen schade aan voorverwarmde voedingsmiddelen. materiaal van het werkblad veroorzaakt door warmte die opgewekt wordt door VOORZICHTIG Hatco-apparatuur.
-
Page 66: Modelbeschrijving
MODELBESCHRIJVING Alle modellen GM5AHL-modellen Alle GLOMAX Gebogen infrarood verwarmingsstrips bestaan Naast verwarming bieden deze modellen twee ledlichtkanalen ® uit een gebogen aluminium behuizing, ideaal voor installatie die warm wit licht bieden (2700-3200 K) om het voedingsmiddel in krappe ruimten. Een vooraf ingericht verwarmingspatroon eronder te accentueren. -
Page 67: Specificaties
SPECIFICATIES Afmetingen — Verwarmingsstrip Hoogte Totale Model Breedte (A) Diepte (B) apparaat (C) hoogte (D) GM5AH en GM5AHL 762–1981 mm 152 mm 50 mm 75 mm (30″–78″) (6″) (2″) (3″) Afmetingen — Bedieningskastje 190 mm 136 mm (7-1/2″) (5-3/8″) 46 mm (1-7/8″) Vooraanzicht Zijaanzicht... -
Page 68: Installatie
Voeg geen decoratief soffiet toe om een verwarmingsstrip in een doorgeefluik aan het zicht te onttrekken. Oververhitting kan een defect in het apparaat veroorzaken. De Hatco-garantie dekt geen schade aan materiaal van het werkblad veroorzaakt door warmte die opgewekt wordt door Hatco-apparatuur. Neem contact op met de fabrikant van het materiaal van het werkblad voor informatie over de toepassing. -
Page 69: Vereisten Voor De Installatieplek
ATTENTIE WAARSCHUWING De Hatco-garantie dekt geen schade aan materiaal van het werkblad veroorzaakt door warmte die opgewekt wordt BRANDGEVAAR: Installeer geen apparaten boven of nabij door Hatco-apparatuur. Neem contact op met de fabrikant brandbare oppervlakken. -
Page 70: Het Bedieningspaneel Installeren
INSTALLATIE Het bedieningspaneel installeren Volg de volgende procedure om het bedieningskastje te installeren. WAARSCHUWING Toegangspaneel Het bedieningskastje moet op een verticaal oppervlak worden bevestigd. Het bevestigen van het bedieningspaneel in een horizontaal oppervlak kan resulteren in de ophoping van vloeistoffen, wat kan leiden tot een elektrische schok. ATTENTIE Installeer het decentraal bevestigde bedieningskastje buiten Netsnoer... -
Page 71: Werking
WERKING Algemeen Ingebruikname 1. Zet de verwarmingsstrip aan. GLOMAX Gebogen infrarood verwarmingsstrips zijn ® ontworpen voor gebruiksgemak. Volg onderstaande informatie • Zet de aan-uitschakelaar in de I -stand (aan). en procedures om het apparaat te bedienen. • Het indicatorlampje gaat aan (indien aanwezig), de verwarmingselementen worden ingeschakeld en de WAARSCHUWING ledlichtkanalen lichten op (indien aanwezig). -
Page 72: Onderhoud
Hatco-apparatuur te kunnen functioneren. uitgestald. Dit apparaat heeft geen onderdelen die door de 'gebruiker gerepareerd kunnen worden'. Als het apparaat onderhoud nodig heeft, neem dan contact op met een erkende Hatco-onderhoudsagent of de Hatco-klantendienst op +1-414-671-6350. -
Page 73: Oplossen Van Problemen
Vragen over het oplossen van problemen? Als het u niet lukt om een probleem op te lossen, kunt u met het dichtstbijzijnde door Hatco erkende serviceagentschap of met Hatco contact opnemen voor assistentie. Ga voor het dichtstbijzijnde servicepunt naar onze website www.hatcocorp.com, selecteer in het vervolgkeuzelijst van Support (Ondersteuning) en klik op “Find A Service Agent”... -
Page 74: Opties En Accessoires
3. Voer de voedings- en ledkabels vanuit het apparaat door het kabelgat en plaats het apparaat op het werkblad. 4. Bevestig de standaarden met geschikte bevestigingsmiddelen Bevestigingsgaten Uitsparing op het werkblad (niet door Hatco geleverd). Elke (64 mm [2-1/2"] voor gat op middelpunt) bevestigingsflens heeft twee plekken voor bevestigingsgaten. -
Page 75: Productgarantie
Zonder de algemeenheid van het voorafgaande te De koper van het product moet de aankoopdatum valideren beperken DEKKEN ZULKE GARANTIES NIET HET door het product te registreren bij Hatco of door andere VOLGENDE: Gloeilampen met coating, fluorescentielampen, bevredigende middelen naar Hatco’s eigen goeddunken. - Page 76 Water bijvullen, laag waterpeil Humidity, Humidity Cycle Feuchtigkeit, Befeuchtungszyklus Humedad, ciclo de humedad Umidità, ciclo di umidità Humidité, Cycle Humidité Vochtigheid, bevochtigingscyclus HATCO CORPORATION P.O. Box 340500 Milwaukee, WI 53234-0500 U.S.A. Telephone +1-414-671-6350 support@hatcocorp.com www.hatcocorp.com June 2019 P/N 07.04.818.00 Form No. GM5AHCEM-0619...