Table des Matières

Publicité

Les langues disponibles

Les langues disponibles

Liens rapides

Gebrauchsanweisung
DE
Vor Inbetriebnahme Gebrauchsanweisung lesen!
Mode d'emploi
FR
Lire attentivement le mode d'emploi avant chaquemise en service !
Istruzioni per l'uso
IT
Prima della messa in funzione leggere le istruzioni per l'utilizzo!
Operating Instructions
GB
Read operating instructions before use!
73701856-11
- Originalbetriebsanleitung
- Traduction du mode d'emploi d'origine
- Traduzione delle istruzioni per l'uso originali.
- Translation of the original Operating Instructions
BLS 31

Publicité

Table des Matières
loading

Sommaire des Matières pour Okay BLS 31

  • Page 1 BLS 31 Gebrauchsanweisung - Originalbetriebsanleitung Vor Inbetriebnahme Gebrauchsanweisung lesen! Mode d‘emploi - Traduction du mode d’emploi d’origine Lire attentivement le mode d‘emploi avant chaquemise en service ! Istruzioni per l’uso - Traduzione delle istruzioni per l‘uso originali. Prima della messa in funzione leggere le istruzioni per l‘utilizzo!
  • Page 3: Table Des Matières

    • Reinigung und Lagerung………………………………………………………………………………..• Entsorgung und Umweltschutz ....................• Störungsbeseitigung……………………………………………………………………………………... • Technische Daten………………………………………………………………………………....• Konformitätserklärung........................• Garantie............................LIEFERUMFANG Folgende Positionen sind im Lieferumfang enthalten: • Laubsauger mit Blas-/Häckselfunktion, Modell BLS 31 • Blas-/Saugrohr • Schultergurt • Fangsack • Kleinteilpaket (Befestigungsmaterial) •...
  • Page 4: Einleitung

    Benzin-Laubsauger BLS 31 OKAY EINLEITUNG DIE VORLIEGENDE BEDIENUNGSANLEITUNG ENTHÄLT WICHTIGE INFORMATIONEN. BITTE AUFBEWAHREN! DANKE. Vielen Dank, dass sich für dieses Qualitätsprodukt entschieden haben. Lesen Sie die vollständige Bedienungsanleitung und befolgen Sie sämtliche Anweisungen, damit Ihr neues Gar- tengerät stets in einwandfreiem Betriebszustand ist.
  • Page 5: Regeln Für Den Sicheren Betrieb

    REGELN FÜR DEN SICHEREN BETRIEB BEIM BETRIEB • Die Maschine darf nur zu vernünftigen Zeiten betrie- WICHTIGE SICHERHEITSHINWEISE ben werden - nicht früh morgens oder spät abends, Sämtliche Anleitungen und Hinweise vor Ge- wenn andere gestört werden könnten. Die bei den brauch lesen! örtlichen Behörden gelisteten Zeiten sind zu befolgen.
  • Page 6: Sicherheitssymbole Und Internationale Symbole

    • Legen Sie das Gerät mit laufendem Motor nur auf Sie keine weggeworfenen Zigarren oder Zigaretten sauberem, festem Untergrund ab. Objekte bzw. auf, solange deren Asche nicht vollständig abge- Materialien wie etwa Kies, Sand, Staub, Gras usw. kühlt ist. könnten in die Luftansaugöffnung gelangen und aus •...
  • Page 7 SYMBOL BEDEUTUNG ÖL Siehe die Bedienungsanleitung für den geeigneten Öltyp. SCHWERE VERLETZUNGEN DURCH UMHERFLIEGENDE OBJEKTE VORSICHT: Von der Blasöffnung fernhalten. Den Laubsauger im Blasbetrieb niemals auf sich selbst oder andere Personen richten. Es können Objekte aus dem Gerät geschleudert werden. Das Gerät niemals ohne die erforderlichen Zusatz- und Schutzvorrichtungen verwenden.
  • Page 8: Machen Sie Sich Mit Ihrem Gerät Vertraut

    MACHEN SIE SICH MIT IHREM GERÄT VERTRAUT ANWENDUNG ...im Blasbetrieb • Säubern von Gärten, Garagen, Einfahrten, Terrassen, Höfen, um Zäune/Mauern usw..im Saugbetrieb • Aufnahme von Laub, leichtem Unrat usw. DE Bezeichnung der Teile 1. Gashebel 7. Luftfilterabdeckung /Auspuffabdeckung 2. Startergriff 8.
  • Page 9: Montageanleitung

    MONTAGEANLEITUNG beiden Seiten des Gehäuses (Abb. 2) und ziehen Sie sie fest aber nicht zu stark an. ANBRINGEN UND ENTFERNEN DES BLAS-/SAUG- Achtung: ROHRS Stellen Sie vor Inbetriebnahme des Geräts sicher, HINWEIS: Das Blas-/Saugrohr wird nicht am Gerät dass das Saugrohr korrekt sitzt und mit Schrauben montiert geliefert.
  • Page 10: Anbringen Und Entfernen Des Fangsacks

    ANBRINGEN UND ENTFERNEN DES FANGSACKS der Gurtschnalle. 2. Legen Sie den Gurt über die Traverse und schieben Anbringen Sie ihn durch den vorderen Schlitz in der Schnalle 1. Haken Sie den Fangsack am Haken am Saug-/ (Abb. 7). Blasrohr ein (Abb. 5). 3.
  • Page 11: Informationen Zu Öl- Und Benzintypen

    • Verkürzen Sie den Schultergurt, indem Sie den beim Auffüllen des Benzintanks stets ab und lassen Sie ihn abkühlen. Beim Befüllen des Gurt zurück durch die Schnalle ziehen und die Benzintanks nicht rauchen. Halten Sie Funken Schnalle dabei festhalten (Abb. 10). und offenes Feuer fern.
  • Page 12: Anleitung Für Das Arbeiten Mit Dem Gerät

    stoff im Knopf befinden, drücken Sie den Knopf so AUSSCHALTEN lange, bis dies der Fall ist. • Den Gashebel auf Position „Leerlauf“ stellen (Abb. • Den Starterhebel in Stellung A stellen (Abb. 12). 11). Lassen Sie den Motor im Leerlauf abkühlen. •...
  • Page 13: Blasbetrieb

    ARBEITEN IM BLASBETRIEB • Starten Sie den Motor. Siehe hierzu die Anleitungen zum Ein-/Ausschalten des Geräts. • Stellen Sie den Umschalthebel für die Betriebsart in die obere Position (Blasbetrieb) (Abb. 15). HINWEIS: Betreiben Sie das Gerät niemals mit dem Umschalthebel in der Mitte zwischen den Positionen für die beiden Betriebsarten.
  • Page 14: Entfernen Von Blockaden Im Saugrohr Und Am Flügelrad

    5. Schließen sie den Reißverschluss und bringen Sie den Fangsack wieder an. ENTFERNEN VON BLOCKADEN IM SAUGROHR UND AM FLÜGELRAD 1. Stellen Sie den Zündschalter auf Position AUS [O] (Abb. 11) und warten Sie, bis das Flügelrad vollstän- dig zum Stillstand kommt. 2.
  • Page 15: Luftfilter

    LUFTFILTER Entfernen des Luftfilter-/Auspuffdeckels 1. Starterhebel in Stellung B bewegen. HINWEIS: Um den Luftfilter-/Auspuffdeckel zu ent- fernen, muss der Starterhebel in Stellung B sein (Abb. 22). 2. Entfernen Sie die vier (4) Schrauben, mit denen der Luftfilter-/Auspuffdeckel gesichert ist (Abb. 22). Verwenden Sie hierzu einen Schraubendreher mit flacher Klinge oder ein T-20 Torx-Bit.
  • Page 16: Austauschen Der Zündkerze

    AUSTAUSCHEN DER ZÜNDKERZE b. Fangsack umstülpen (Innenseite nach außen). c. Fangsack aufhängen. Verwenden sie eine Zündkerze vom Typ RDJ8J (oder d. Sorgfältig mit einem Schlauch abspritzen. gleichwertig). Der korrekte Elektrodenabstand beträgt e. Zum Trocknen aufhängen. 0,5 mm. Bauen Sie die Zündkerze alle 50 Betriebs- f.
  • Page 17 gen Sie es umweltgerecht. Entleeren Sie Öltank und Benzintank sorgfältig und geben Sie die Reste an eine Sammelstelle. Geben Sie das Gerät bitte (ebenfalls) in einer Verwertungsstelle ab. Kunststoff- und Metall- teile können hier getrennt und der Wiederverwertung zugeführt werden. Auskunft hierzu erhalten Sie auch in Ihrer Gemeinde- oder Stadtverwaltung.
  • Page 18: Technische Daten

    Benzin-Laubsauger BLS 31 OKAY TECHNISCHE DATEN MOTOR Motortyp luftgekühlt, Zweitakt Hubraum 31 cm³ Max. Motorleistung gemäß ISO 8893 0,75 kW Max. Motordrehzahl 7.800 min Leerlaufdrehzahl 3.800 min Zündung Elektrodenabstand (Zündkerze) 0,5 mm Zweitaktgemisch 40:1 Vergasertyp lageunabhängiger Membranvergaser Startertyp Seilzugstarter Tankinhalt...
  • Page 19: Konformitätserklärung

    EG-Konformitätserklärung Wir, Ikra GmbH, Schlesierstraße 36, D-64839 Münster, erklären in alleiniger Verantwortung, dass das Produkt Benzin Laubsauger BLS 31 OKAY, auf das sich diese Erklärung bezieht, den einschlägigen Sicherheits- und Gesundheitsanforderungen der EG-Richtlinien 2006/42/EG (Maschinenrichtlinie), 2004/108/EG (EMV- Richtlinie), 97/68/EG (Abgasrichtlinie) zuletzt geändert durch 2011/88/EU und 2000/14/EG (Geräuschrichtlinie) entspricht.
  • Page 20: Etendue De La Livraison

    • Conditions de garantie........................ETENDUE DE LA LIVRAISON Les éléments suivants sont compris dans la livraison : • Aspirateur de feuilles avec fonctions souffleur / broyeur, modèle BLS 31 • Tube d’aspiration / de soufflage • Bandoulière • Sac de ramassage •...
  • Page 21: Introduction

    Aspirateur de feuilles à essence, moteur à deux temps, avec fonctions souffleur et broyeur BLS 31 OKAY INTRODUCTION LE PRESENT MODE D’EMPLOI CONTIENT DES INFORMATIONS IMPORTANTES. VEUILLEZ LE CONSERVER ! MERCI. Nous vous remercions d’avoir choisi ce produit de qualité.
  • Page 22: Règles Pour Une Utilisation En Toute Sécurité

    RÈGLES POUR UTILISATION • Eloignez l’outil de 9 mètres au moins de toute source de carburant et de l’espace de remplissage TOUTE SECURITE avant de mettre le moteur en marche. Ne fumez pas MPORTANTES CONSIGNES DE SÉCURITÉ lors du remplissage du réservoir ou de l’utilisation Lire l’ensemble des instructions et des remarques de l’appareil! avant toute utilisation !
  • Page 23: Autres Consignes De Sécurité

    etc. • cant. Les pièces de rechange correspondantes sont disponibles auprès de votre revendeur agréé. N’uti- UTILISATION DE L’ASPIRATEUR lisez pas de pièces de rechange ou d’accessoires • Evitez les situations au cours desquelles le sac de non autorisés pour cet appareil! Ceci pourrait cau- ser de graves blessures à...
  • Page 24 SYMBOLE SIGNIFICATION ESSENCE SANS PLOMB Toujours utiliser de l’essence sans plomb propre et récente. HUILE Consulter le mode d’emploi pour le type d’huile approprié. BLESSURES GRAVES CAUSÉES PAR DES PROJECTILES ATTENTION : Se tenir éloigné de l’orifice du souffleur. Ne jamais diriger l’aspirateur de feuilles en fonction souffleur vers soi ou vers d’autres personnes.
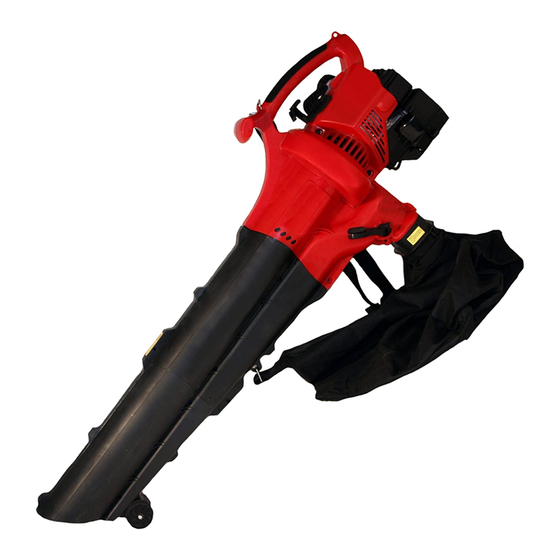
  • Page 25: Familiarisez-Vous Avec Votre Appareil

    FAMILIARISEZ-VOUS AVEC VOTRE APPAREIL UTILISATION ...en fonction souffleur • Nettoyage des jardins, garages, entrées, terrasses, cours intérieures, le long des murs ou des clôtures, etc..en fonction aspirateur • Aspiration des feuilles, de légères ordures, etc. FR Désignation des pièces 1.
  • Page 26: Instructions De Montage

    INSTRUCTIONS DE MONTAGE vous que le tube d’aspiration est correctement placé et qu’il est fixé par des vis. PLACER ET RETIRER LE TUBE D’ASPIRATION OU DE SOUFFLAGE Retirer le tube d’aspiration ou de soufflage REMARQUE : Le tube d’aspiration ou de soufflage AVERTISSEMENT : Eteignez le moteur et at- n’est pas livré...
  • Page 27: Placer Et Ajuster La Bandoulière

    2. Insérez le tube du sac de ramassage sur le raccord de tube du bâti. Poussez le tube du sac de ramas- sage sur le raccord de tube jusqu’à la butée (Ill. 5). 3. Utilisez deux vis auto taraudeuses de chaque côté afin de fixer le sac de ramassage sur les deux côtés du raccord de tube du bâti (Ill.
  • Page 28: Informations Sur Les Types D'huile Et D'essence

    Tableau pour le mélange de carburant Essence Huile à 2 temps/40:1 1 litre 25 ml 5 litres 125 ml INSTRUCTIONS POUR DÉMARRER ARRÊTER L’APPAREIL DÉMARRAGE Mélangez l’essence et l’huile. Remplissez le réservoir avec le mélange huile-essence. (Voir « Instructions pour la fabrication d’un mélange huile-essence ».) AVERTISSEMENT : Retirez toujours le sac de ramassage avant de remplir le réservoir avec le mélange de carburant afin d’éviter...
  • Page 29: Instructions Pour Le Maniement De L'appareil

    ARRÊT • Placez le levier de vitesse en position « Marche à vide » (Ill. 11). Laissez le moteur refroidir en marche à vide. • Pressez l’interrupteur de démarrage vers le bas en position « ARRÊTER » (O) jusqu’à ce que le moteur soit complètement à...
  • Page 30: Travailler Avec Le Souffleur

    TRAVAILLER AVEC LE SOUFFLEUR • Démarrez le moteur. Voir à ce sujet « instructions pour démarrer et arrêter l’appareil ». • Placez l’interrupteur de réglage du mode de fonc- tionnement en position supérieure (utilisation du souffleur) (Ill. 15). REMARQUE: N’utilisez jamais l’appareil avec l’inter- rupteur de réglage positionné...
  • Page 31: Éliminer Les Engorgements Dans Le Tube D'aspiration Et Sur L'hélice

    modes de fonctionnement. (Ill. 21). 2. Retirez le sac de ramassage de son tube et décro- 3. Passez la bandoulière au-dessus de votre tête et chez le clip de fixation du tube d’aspiration. posez-la sur votre épaule; ajustez-la correctement. 3. Ouvrez la fermeture à glissière et videz le contenu Voir sur ce point «Placer et ajuster la bandoulière».
  • Page 32: Entretien Et Maintenance

    ENTRETIEN ET MAINTENANCE ATTENTION: Tous les travaux de maintenance qui ne sont pas énumérés dans cette notice d‘utilisation doivent être réalisés par un atelier agréé. N‘utilisez que des PIÈCES DÉTACHÉES D‘ORIGINE afin de garantir un fonctionnement constant et règlementaire. FILTRE À AIR Retirer le couvercle du filtre à...
  • Page 33: Changer La Bougie

    REMARQUE : L’utilisation de l’appareil sans filtre à NETTOYER LE SAC DE RAMASSAGE air ni module de couvercle du filtre à air ou du tuyau 1. Videz le sac de ramassage après chaque utilisation d’échappement conduit à la PERTE de la garantie. afin d’éviter une détérioration générale de son état et de ne pas bloquer le flux d’air, ce qui conduirait à...
  • Page 34: Recyclage Et Protection De L'environnement

    Recyclage et protection de l’environnement l’appareil avec les déchets ménagers, mais veillez à un recyclage conforme aux principes écologiques. Videz Ne jamais verser les restes d’huile de chaîne soigneusement le réservoir à huile et à essence et allez ou le mélange pour moteurs à 2 temps dans les déposer les restes dans un centre de traitement des égouts, les canalisations ou sur le sol, mais les déchets.
  • Page 35: Données Techniques

    Aspirateur de feuilles à essence, moteur à deux temps, avec fonctions souffleur et broyeur BLS 31 OKAY DONNÉES TECHNIQUES MOTEUR Type de moteur refroidissement air, 2 temps Cylindrée 31 cm³ Puissance max. du moteur selon ISO 8893 0,75 kW Vitesse max. du moteur 7.800 min-1...
  • Page 36: Déclaration De Conformité

    Nous, ikra GmbH, Schlesier Straße 36, D-64839 Münster / Altheim, déclarons sous notre seule responsabi- lité que le produit BLS 31 OKAY, faisant l’objet de la déclaration sont conformes aux prescriptions fondamen- tales en matière de sécurité et de santé stipulées dans les Directives de la 2006/42/CE (directive relative aux machines), 2004/108/CE (directive EMV), 97/68/CE (prescription en matière de gaz d’échappement) telle que...
  • Page 37: Contenuto Della Fornitura

    Dati tecnici ………………………………………………………………………….....…....• Dichiarazione di Conformità......................Garanzia............................• CONTENUTO DELLA FORNITURA La fornitura comprende quanto segue: • aspiratore per foglie con funzione di soffiaggio/trinciatura, modello BLS 31 • tubo soffiante/aspirante • bretella • sacchetto di raccolta • sacchetto contenente il materiale di fissaggio •...
  • Page 38: Introduzione

    Aspiratore per foglie a benzina a due tempi con funzione di soffiaggio e trinciatura BLS 31 OKAY INTRODUZIONE LE PRESENTI ISTRUZIONI PER L’USO CONTENGONO INFORMAZIONI IMPORTANTI. SI PREGA DI CONSERVARLE CON CURA! GRAZIE. Grazie mille per aver scelto di acquistare questo prodotto di qualità.
  • Page 39 REGOLE PER UN UTILIZZO SICURO gente del carburante e dall’area di rifornimento pri- ma di accendere il motore. Nel riempire il serbatoio DELL’ATTREZZO o durante l’azionamento dell’attrezzo non fumare! IMPROTANTI ISTRUZIONI DI SICUREZZA DURANTE IL FUNZIONAMENTO Prima dell’uso leggere tutte le istruzioni e le indi- •...
  • Page 40 e/o acqua poiché ciò potrebbe danneggiare l’aspi- • Non utilizzare mai questo attrezzo per l’erogazione ratore. Non aspirare metalli, pezzetti di vetro o simili di sostanze chimiche, fertilizzanti o altre sostanze per non danneggiare gravemente la ruota a pale. che potrebbero contenere sostanze nocive. ULTERIORI NORME DI SICUREZZA FUNZIONE DI SOFFIAGGIO •...
  • Page 41 SYMBOL BEDEUTUNG GRAVI LESIONI CAUSATE DA OGGETTI SCAGLIATI IN ARIA ATTENZIONE: tenersi lontani dall’apertura di soffiaggio. Non puntare mai su se stessi né su altre persone il tubo dell’aspiratore quando esso è regolato sulla funzione di soffiaggio. Eventuali oggetti potrebbero essere scagliati in aria dall’attrezzo.
  • Page 42: Come Acquisire Dimestichezza Con L'attrezzo

    COME ACQUISIRE DIMESTICHEZZA CON L’ATTREZZO IMPIEGO … in caso di soffiaggio • Pulizia di giardini, garage, viali d’accesso, terrazze, cortili e siepi/muri, ecc..in caso di aspirazione • Aspirazione di fogliame, immondizia sparsa, ecc. IT Identificazione dei componenti 1. Leva dell’acceleratore 7.
  • Page 43: Istruzioni Per Il Montaggio

    ISTRUZIONI PER IL MONTAGGIO Smontaggio del tubo soffiante/aspirante ATTENZIONE: spegnere il motore ed atten- MONTAGGIO E SMONTAGGIO DEL TUBO ASPI- dere fino al completo arresto della ruota a pale RANTE/SOFFIANTE prima di montare o smontare le parti di tubo al AVVERTENZA: alla consegna dell’attrezzo il tubo non fine di non provocare gravi lesioni.
  • Page 44: Come Indossare E Regolare La Bretella

    3. Utilizzare due viti autofilettanti su ciascun lato per fissare il sacchetto di raccolta su entrambi i lati del 5. Indossare la tracolla in modo tale che questa poggi bocchettone sul corpo (fig. 6). sulla spalla destra (fig. 9). 4. Il tubo del sacchetto di raccolta, dopo il primo mon- taggio, di norma dovrò...
  • Page 45: Informazioni Sui Vari Tipi Di Olio Ebenzina

    Tabella per la miscelazione del carburante Benzina olio due tempi/40:1 1 litro 25 ml 5 litri 125 ml ISTRUZIONI PER L’ACCENSIONE E LO SPEGNIMENTO ACCENSIONE Miscelare la benzina con l’olio. Riempire il serbatoio con la miscela di benzina e olio. (Si vedano le “Istruzioni per la preparazione della miscela di benzina ed olio”).
  • Page 46: Istruzioni Su Come Lavorare Con L'attrezzo

    SPEGNIMENTO • Regolare la leva dell’acceleratore sulla posizione “minimo” (fig. 11). Lasciar raffreddare il motore facendolo girare al minimo. • Premere in basso l’interruttore d’accensione in posizione „STOP O“ fino al completo arresto del motore (fig. 11). ISTRUZIONI SU COME LAVORARE CON L’ATTREZZO COME REGGERE L’ASPIRATORE Sistemarsi, prima di iniziare a lavorare con l’attrezzo,...
  • Page 47: Lavoro In Modalita' Di Soffiaggio

    LAVORO IN MODALITA’ DI SOFFIAGGIO • Avviare il motore. Si vedano al riguardo le istruzioni per l’accensione/spegnimento dell’attrezzo. • Spostare la leva di regolazione della modalità di funzionamento nella posizione alta (fig. 15). AVVERTENZA: non azionare mai l’attrezzo con la leva di regolazione della modalità...
  • Page 48: Rimozione Di Occlusioni Dal Tubo Aspirante E Dalla Ruota A Pale

    RIMOZIONE DI OCCLUSIONI DAL TUBO ASPI- RANTE E DALLA RUOTA A PALE 1. Regolare l’interruttore d’accensione sulla posizione OFF [0] (fig. 11) ed attendere fino all’arresto com- pleto della ruota a pale. 2. Staccare il cavo d’accensione per impedire l’accen- sione del motore.
  • Page 49: Sostituzione Della Candela

    3. Smontare il coperchio dal motore. Non esercitare troppa forza. viti viti 5. Comprimere il filtro per distribuire l’olio e per rimuo- vere la quantità d’olio eccedente (fig. 26). Pulizia del filtro dell’aria Pulire ed oliare il filtro dell’aria ogni 10 ore di servizio. Il filtro dell’aria è...
  • Page 50: Rimessaggio Prolungato

    3. Sostituire le candele rotte, corrose o molto sporche. RIMESSAGGIO PROLUNGATO Regolare la distanza interelettrodica con un calibro Nel caso in cui l’attrezzo rimanga inutilizzato per pe- per spessori a 0,5 mm (fig. 27). riodi lunghi: 1. Svuotare tutto il carburante in un recipiente appo- sito per carburanti.
  • Page 51: Risoluzione Dei Problemi

    RISOLUZIONE DEI PROBLEMI IL MOTORE NON SI ACCENDE. CAUSA PROVVEDIMENTO - Serbatoio del carburante vuoto. - Riempire il serbatoio. - Il pulsante della pompa non è stato premuto - Premere lentamente e a fondo per 10 volte il abbastanza. pulsante dello starter. - Il motore si è...
  • Page 52: Dati Tecnici

    Aspiratore per foglie a benzina a due tempi con funzione di soffiaggio e trinciatura BLS 31 OKAY DATI TECNICI MOTORE Tipo di motore raffreddato ad aria, a due tempi Cilindrata 31 cm³ Potenza massima del motore secondo ISO 8893 0,75 kW Massimo regime del motore 7.800 min...
  • Page 53: Dichiarazione Di Conformità

    Noi, ikra GmbH, Schlesier Straße 36, D-64839 Münster / Altheim, dichiara sotto la propria responsabilità che i prodott BLS 31 OKAY, sono conformi ai Requisiti Essenziali di Sicurezza e di Tutela della Salute di cui alle Direttive 2006/42/CE (Direttiva Macchine), 2004/108/CE (direttiva EMV), 97/68/CE, modificato dal 2011/88/ CE per il controllo dei gas di scarico e 2000/14/CE (Direttiva sulla rumorosità) comprensivi di modifiche.
  • Page 54 ENGLISH TABLE OF CONTENTS • Introduction............................. • Rules for Safe Operation……………………………………………………........- Important safety information…………………………………………..........- Safety and international symbols………………………………………………......... - Know Your Unit…………………………………………………………..........• Assembly instructions……………………………………………………………......... - Attaching and Removing the Blower/Vacuum Tube………………………........- Attaching and removing the Vacuum Bag……………………………..........- Installing and Adjusting the Shoulder Harness………………………….........
  • Page 55: Introduction

    2-Cycle Mulching Blower/Vacuum Tool BLS 31 OKAY INTRODUCTION THIS MANUAL CONTAINS IMPORTANT INFORMATION. PLEASE KEEP IT! THANK YOU. Thank you for buying this quality product. Read the whole manual and follow all the instructions to keep your new outdoor tool in proper operating condi- tion.
  • Page 56: Rules For Safe Operation

    RULES FOR SAFE OPERATION • In dusty conditions, slightly dampen surfaces. • Use the full blower nozzle extension so the airstream IMPORTANT SAFETY INFORMATION can work close to the ground. • Never start or run the unit inside a closed room or READ ALL INSTRUCTIONS BEFORE OPERATING building.
  • Page 57 OTHER SAFETY WARNINGS • Avoid situations that could catch the vacuum bag on fire. Do not operate near an open flame. Do not • Allow the engine to cool before storing or transpor- vacuum warm ash from fireplaces, barbecue pits, ting.
  • Page 58 SYMBOL MEANING THROWN OBJECTS CAN CAUSE SEVERE INJURY WARNING: Keep clear of blower outlet. Never point the blower at yourself or others. Objects can be thrown from blower. Do not operate unit without proper attachments and guards in place. IGNITION SWITCH ON / START / RUN IGNITION SWITCH OFF or STOP...
  • Page 59: Know Your Unit

    GET TO KNOW YOUR UNIT APPLICATION ...as a blower: • cleaning of yards, garages, driveways, porches, patios, around fences, etc..as a vacuum: • picking up leaves, light debris, etc. GB List of components 1. Throttle lever 7. Air filter / muffler cover 2.
  • Page 60: Assembly Instructions

    ASSEMBLY INSTRUCTIONS Removing the Blower/Vacuum Tube WARNING: To avoid serious injury switch off ATTACHING AND REMOVING THE BLOWER/VAC- the engine and wait until the impeller fully stops UUM TUBE before attaching or removing tube parts. NOTE: The blower/vacuum tube comes unassembled 1.
  • Page 61: Installing And Adjusting The Shoulder Harness

    it has been attached any more – except for mainte- nance purposes. Attention: Before using the unit, make sure the vacuum bag 5. Put the harness so that it lies over the right shoulder tube is correctly seated and fixed with screws. (Fig.
  • Page 62: Oil And Petrol Information

    Mix petrol (gasoline) with oil. Fill petrol tank with petrol/ oil mixture. (See Oil and Petrol Mixing Instructions.) WARNING: Always detach the vacuum bag prior to refilling the tank with the fuel mixture to avoid serious personal injury. The bag may become highly flammable when saturated with petrol.
  • Page 63: Stopping Instructions

    • Pull starter rope briskly 1 to 3 times to start the engine (Fig 13). • If the engine does not start, repeat steps 3 through OPERATING TIPS • Allow the engine to warm up for 5 to 10 seconds. Place the choke lever in position C (Fig.
  • Page 64: Operating As A Vacuum

    • Hold the blower as shown in Figures 16, 17 and • Use the blower for walls, overhangs and screens 18. Sweep from side to side with the nozzle several (Fig. 18) inches above the ground or floor. Slowly advance, keeping the accumulated pile of debris in front of OPERATING AS A VACUUM you.
  • Page 65: Empty The Vacuum Bag

    4. Carefully remove material blocking the tube or im- peller. Inspect the blades to assure no damage has occurred. Rotate the impeller blades by hand to as- sure the blockage is completely cleared. 5. Reinstall the vacuum bag and blower/vacuum tube. 6.
  • Page 66: Replacing The Spark Plug

    screws screws 5. Squeeze the filter to spread and remove excess oil (Fig. 26). Cleaning the Air Filter 6. Replace the air filter in the air filter/muffler cover Clean and re-oil the air filter every 10 hours of opera- (Fig. 23). tion.
  • Page 67: Cleaning And Storage

    the cylinder. Pull the starter rope slowly to distribute the oil. Reinstall the spark plug. NOTE: Remove the spark plug and drain all of the oil from the cylinder before attempting to start the blower/vacuum after storage. 4. Thoroughly clean the unit and inspect for any loose or damaged parts.
  • Page 68 TROUBLESHOOTING ENGINE WILL NOT START. CAUSE ACTION - Empty petrol tank - Fill petrol tank. - Primer bulb wasn‘t pressed enough - Press primer bulb fully and slowly 10 times. - Engine flooded - Use starting procedure with choke lever in Position - Old or improperly mixed petrol - Drain petrol tank.
  • Page 69: Specifications

    2-Cycle Mulching Blower/Vacuum Tool BLS 31 OKAY SPECIFICATIONS MOTOR Engine Type air-cooled, 2-cycle Displacement 31 cm³ Maximum engine power in accordance with ISO8893 0,75 kW Max. engine speed 7.800 min Idle speed 3.800 min Ignition type Spark plug gap 0,5 mm...
  • Page 70: Declaration Of Conformity

    We, ikra GmbH, Schlesier Straße 36, D-64839 Münster / Altheim, declare under our sole responsibility that the product 2-Cycle Mulching Blower/Vacuum Tool BLS 31 OKAY, to which this declaration relates correspond to the relevant basic safety and health requirements of Directives 2006/42/EC (Machinery Directive), 2004/108/EC (EMC-Guideline), 97/68/EC including all amendments until 2011/88/EC (exhaust gases) and 2000/14/EC (noise directive).
  • Page 71 Service Zentral-Genossenschaft eG Lauterbergstraße 1 D - 76137 Karlsruhe Tel.: 0049 - 721-352 1325 Fax: 0049 - 721-352 1324 Landi Schweiz AG Schulriedstrasse 5 CH - 3292 Dotzigen Tel.: 0041 - 32-352 0111 Fax: 0041 - 32-352 0270 Raiffeisenverband Salzburg Wasserfeldstrasse 2 A - 5024 Salzburg Tel.: 0043 - 662-468 68100...

Table des Matières