Publicité
Les langues disponibles
Les langues disponibles
Liens rapides
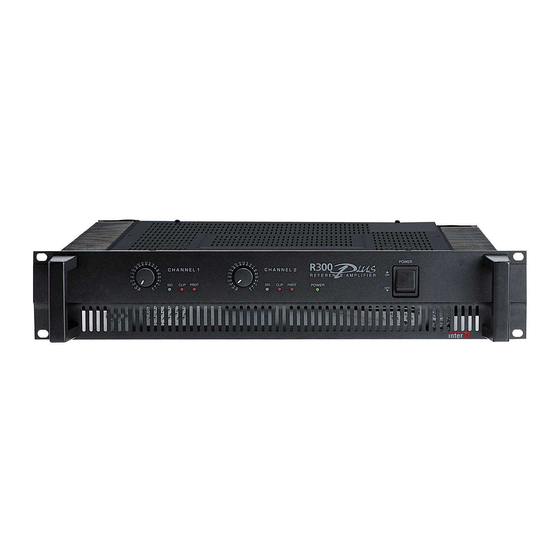
Operation Manual
Reference Amplifier
R150 PLUS/300 PLUS/500 PLUS
* Rack mount products in the Western Hemisphere(North America, South America, and the Caribbean)
do not have handles installed due to customer preference.
Publicité

Manuels Connexes pour InterM 300 PLUS


Sommaire des Matières pour InterM 300 PLUS
- Page 1 Operation Manual Reference Amplifier R150 PLUS/300 PLUS/500 PLUS * Rack mount products in the Western Hemisphere(North America, South America, and the Caribbean) do not have handles installed due to customer preference.
- Page 2 REFERENCE AMPLIFIER Contents Contents Welcome Warning ............................1 Unpacking............................2 Short Form Instructions........................2 Installation Environment............................3 Important Safety Instructions......................3 Description ............................4 Features ............................4 Accessories.............................4 Front Panel ............................5 Rear Panel ............................6 Mounting in a Rack ........................7 Applications Stereo Installation..........................8 Bridge Mono Installation ........................9 Linked Installation..........................10 Connections ...........................11 Block Diagram...
- Page 3 Operation of this equipment in a residential area is likely to cause harmful interference in which case the user will be required to correct the interference at his own expense. R150 PLUS/300 PLUS/500 PLUS...
- Page 4 8. The product is ready for operation. Slowly increase the LEVEL control to the desired operating level. Avoid illuminating the PEAK indicator and do not apply too much power to the speakers. 9. Operate the product and the system in a manner which DOES NOT illuminate the PEAK warning indicator. R150 PLUS/300 PLUS/500 PLUS...
- Page 5 S3125A S3125A R150 PLUS/300 PLUS/500 PLUS...
- Page 6 - Front panel indicators for signal strength, clip, protect, and power - Rack Ears for permanent installation in a standard 19” (rack mount width) enclosure. - Detachable AC power cord Accessories One detachable AC power cord is provided for use with this product. R150 PLUS/300 PLUS/500 PLUS...
- Page 7 Amplifiers are always the last item in a system to be turned on. It is a good idea to turn down the level controls before applying AC mains power. 7. HANDLE Handles are provided for moving and installing into equipment enclosures or racks. R150 PLUS/300 PLUS/500 PLUS...
- Page 8 If the fuse continues to open after verifying that the system is wired correctly and that an overload has not occurred, the amplifier should be checked for proper operation by a service technician. 5. AC INPUT Connect this product to an appropriate AC power source using the supplied Universal AC Power Cord. R150 PLUS/300 PLUS/500 PLUS...
- Page 9 3. Install blank (or vent) panels between amplifiers. Typical Rack with multiple amplifiers PF-9302 AUTO BLOWER POWER LED Auto Blower(PF-9302) MANUAL AUTO R150 PLUS/300 PLUS/500 PLUS Blank Panel R150 PLUS/300 PLUS/500 PLUS Blank Panel R150 PLUS/300 PLUS/500 PLUS R150 PLUS/300 PLUS/500 PLUS...
- Page 10 REFERENCE AMPLIFIER Applications-1 Applications-1 STEREO INSTALLATION R150 PLUS/300 PLUS/500 PLUS...
- Page 11 REFERENCE AMPLIFIER Applications-2 Applications-2 BRIDGED MONO INSTALLATION R150 PLUS/300 PLUS/500 PLUS...
- Page 12 REFERENCE AMPLIFIER Applications-3 Applications-3 LINKED INSTALLATION Linking works with stereo or bridged mono operation R150 PLUS/300 PLUS/500 PLUS...
- Page 13 Sleeve Ring Amp/Line Input 3 Pole (Stereo) Jack Hot ( positive ) Cold ( negative ) Screen Sleeve Ring Headphones Left Signal Right Signal Ground Sleeve Unbalanced Input/Output 2 Pole (Mono) Jack AUX Send Signal Ground R150 PLUS/300 PLUS/500 PLUS...
- Page 14 Bridged Mono operation has an impedance limitation of 8Ω. BRIDGED MONO CONNECTION OUTPUT CHANNEL 2 CHANNEL 1 BRIDGED MONO (8 ~16 ) Negative Positive NOT CONNECTED NOT CONNECTED BRIDGED MONO BRIDGED MONO Positive Negative Positive Negative R150 PLUS/300 PLUS/500 PLUS...
- Page 15 REFERENCE AMPLIFIER Block Diagram Block Diagram R150 PLUS/300 PLUS/500 PLUS...
- Page 16 100V-120VAC Both Channel Driven R =4Ω 4.8A 7.8A 230V-240VAC Both Channel Driven R =4Ω 1.5A 2.4A 3.9A Weight 7.2kg/15.9lb 8.4kg/18.5lb 10.4kg/22. * Specifications and design subject to change without notice. Dimensions 482(W) x 88(H) x 317(D)mm/19(W) x 3.5(H) x 12.5(D)in R150 PLUS/300 PLUS/500 PLUS...
- Page 17 To obtain specific warranty information and available service locations contact Inter-M directly or the authorized Inter-M Distributor for your specific country or region. R150 PLUS/300 PLUS/500 PLUS...
- Page 18 Manual d'Utilisation Amplificateur Professionnel R150 PLUS/300 PLUS/500 PLUS...
- Page 19 AMPLIFICATEUR PROFESSIONNEL Sommaire Sommaire Felicitations Précautions ...........................19 Emballage ............................20 Les Premières Instructions .......................20 Installation Mise en place ..........................21 Sécurité ............................21 Description .............................22 Caractéristiques ..........................22 Accessoires...........................22 Face Avant .............................23 Face Arriere ...........................24 Montage en Rack .........................25 Applications Configuration Mode Stéréo ......................26 Configuration Mode Mono/Bridge ....................27 Configuration Mode «chaînage»...
- Page 20 à ces dispositifs de connection extérieure doivent être effectivés par un opérateur formé ou en utilisant des cordons déjà préparés. Cordon d’alimentation: Évitez d’endommager le cordon d’alimentation. N’UTILISEZ PAS L’APPAREIL si le cordon d’alimentation est endommagé. Service: Consultez un technicien qualifié pour l’entretien de votre appareil. R150 PLUS/300 PLUS/500 PLUS...
- Page 21 ATTENTION : Evitez que la LED «PEAK» s’illumine et n’augmentez pas de façon trop importante le contrôle de volume afin d’éviter d’endommager vos enceintes. 9. D’une façon générale, réglez votre niveau de sorte que la LED «PEAK» ne soit jamais allumée. R150 PLUS/300 PLUS/500 PLUS...
- Page 22 13. Débranchez votre appareil lors d’orages ou lors d’une non-utilisation trop importante. 14. Adressez-vous pour toute intervention à un service après-vente qualifié (pannes liées à l’alimentation secteur, liquide introduit ou objet tombé dans l’appareil qui empêcherait une utilisation normale). S3125A S3125A R150 PLUS/300 PLUS/500 PLUS...
- Page 23 - Equerres de mise en rack pour une installation permanente dans une baie ou un rack au format 19”. - Câble secteur séparé. Accessoire Un câble secteur séparé est fourni avec cet appareil. R150 PLUS/300 PLUS/500 PLUS...
- Page 24 à mettre en fonction. Il est impératif que les boutons de volume soient totalement au niveau 0 avant extinction ou avant allumage. 7. POIGNÉES DE MANUTENTION Vous pouvez déplacer ou installer dans un rack plus facilement votre amplificateur de puissance en utilisant ces poignées. R150 PLUS/300 PLUS/500 PLUS...
- Page 25 été constatée), il sera nécessaire de faire vérifier votre amplificateur par un technicien confirmé. 5. CONNEXION SECTEUR Branchez cet appareil à une prise de courant appropriée en utilisant le câble secteur universel adéquat. R150 PLUS/300 PLUS/500 PLUS...
- Page 26 3. Installez une plaque de bouchage (de préférence perforée) entre les amplificateurs. Rack type avec plusieurs unités d’amplificateurs. PF-9302 AUTO BLOWER POWER LED Auto Blower(PF-9302) MANUAL AUTO R150 PLUS/300 PLUS/500 PLUS Blank Panel R150 PLUS/300 PLUS/500 PLUS Blank Panel R150 PLUS/300 PLUS/500 PLUS R150 PLUS/300 PLUS/500 PLUS...
- Page 27 AMPLIFICATEUR PROFESSIONNEL Applications-1 Applications-1 CONFIGURATION MODE STÉRÉO R150 PLUS/300 PLUS/500 PLUS...
- Page 28 AMPLIFICATEUR PROFESSIONNEL Applications-2 Applications-2 CONFIGURATION MODE MONO/BRIDGE R150 PLUS/300 PLUS/500 PLUS...
- Page 29 AMPLIFICATEUR PROFESSIONNEL Applications-3 Applications-3 CONFIGURATION MODE «CHAÎNAGE» Ce cas de figure peut être utilisé soit en mode stéréo ou mono. R150 PLUS/300 PLUS/500 PLUS...
- Page 30 Anneau = Ring / Cold = Point Froid (-) Tige = Sleeve / Ground = Masse Câble d’insert Câble pour entrée niveau ligne Câble stéréo pour casque Câble pour entrée/sortie asymétrique type: AUX Send (départ d’auxilliaire/effet) AUX Return (retour d’auxilliaire/effet) R150 PLUS/300 PLUS/500 PLUS...
- Page 31 Mode mono utilisant les 2 bornes (+) des 2 canaux. Les bornes négatives (-) ne sont pas utilisées. ATTENTION : En mode mono l’impédance est limité à 8 Ohms. CONNEXION MONO BRIDGE OUTPUT CHANNEL 2 CHANNEL 1 BRIDGED MONO (8 ~16 ) R150 PLUS/300 PLUS/500 PLUS...
- Page 32 AMPLIFICATEUR PROFESSIONNEL Synoptique Synoptique R150 PLUS/300 PLUS/500 PLUS...
- Page 33 ROUGE Protection Power ON/OFF (coupé), court-circuit et thermique Données Électriques AC 100V/110V 60Hz, 230V/240V 50Hz Consommation Électrique 1.5A 2.4A 3.9A Poids 7.2kg 8.4kg 10.4kg * Caractéristiques pouvant-être modifiées sans préavis. Dimensions 482(L) x 88(H) x 317(P)mm R150 PLUS/300 PLUS/500 PLUS...
- Page 34 Les conditions et termes de garantie sont différents et dépendent de chaque pays. Ils ne sont pas soumis par conséquent aux mêmes règles. Pour obtenir ces informations, vous devez vous adresser à votre revendeur ou importateur national. R150 PLUS/300 PLUS/500 PLUS...
- Page 35 Inter-M, Ltd. (Korea) began operations in 1983. Since then, Inter-M has grown to become one of the largest manufacturers of professional audio and commercial sound electronics equipment in the world. Inter-M has gained worldwide recognition for its own branded products, as well as private label manufacturing of electronics sold under other names (OEM).