Publicité
Les langues disponibles
Les langues disponibles
Liens rapides
Publicité

Manuels Connexes pour LGB Abe 8/12 Allegra Serie


Sommaire des Matières pour LGB Abe 8/12 Allegra Serie
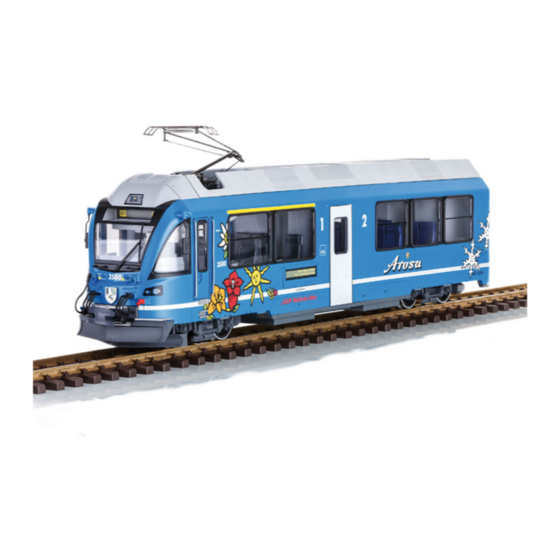
- Page 1 All manuals and user guides at all-guides.com Modell des Abe 8/12 „Allegra“ 20220...
- Page 2 All manuals and user guides at all-guides.com Richtige Zug-Zusammenstellung beachten! Let op de juiste treinsamenstelling! Pay attention to the correct order of the train! ¡Asegurarse de que la composición del tren sea la correcta! Veiller à ce que la composition de la rame soit correcte ! Si presti attenzione alla corretta composizione del treno!
- Page 3 All manuals and user guides at all-guides.com Seite Pagina Inhaltsverzeichnis: Inhoudsopgave: Sicherheitshinweise Veiligheidsvoorschriften Wichtige Hinweise Belangrijke aanwijzing Functies Funktionen Betriebshinweise Bedrijfsaanwijzingen Wartung und Instandhaltung Onderhoud en handhaving Bilder Afbeeldingen Ersatzteile Onderdelen Table of Contents: Page Indice de contenido: Página Safety Notes Aviso de seguridad Notas importantes Important Notes...
- Page 4 Pos. 2 Lokmotoren und Beleuchtung sind eingeschaltet Wichtige Hinweise Pos. 3 Wie Pos. 2 • Die Bedienungsanleitung ist Bestandteil des Produktes und muss deshalb aufbe- wahrt sowie bei Weitergabe des Produktes mitgegeben werden. Stromversorgung aus der Oberleitung • Für Reparaturen oder Ersatzteile wenden Sie sich bitte an Ihren LGB-Fachhändler. Dieser Triebzug kann den Strom über die LGB-Oberleitung erhalten. Auf der Untersei- • Entsorgung: www.maerklin.com/en/imprint.html te des Triebkopfes ist ein roter Punkt. Das Modell so auf die Schienen stellen, dass der rote Punkt zu der Schiene weist, die nicht mit dem Oberleitungs-Trafo verbunden Funktionen ist. • Das Modell ist für den Betrieb auf LGB-Zweileiter-Gleichstrom-Systemen mit VORSICHT! Eine Oberleitung darf nur im Analogbetrieb zur Stromversorgung verwendet herkömmlichen LGB-Gleichstrom-Fahrpulten vorgesehen (DC, 0 – 24 V).
- Page 5 All manuals and user guides at all-guides.com Kupplung montieren WARTUNG • großen und kleinen Schneepflug abschrauben (Bild 6 & 7) Schmierung • Kupplung montieren. Die Achslager hin und wieder mit je einem Tropfen Vorsicht, Verletzungsgefahr: Es bleiben scharfe Kanten. Märklin-Öl (7149) ölen. Wechsel des Haftfreifens Um den Haftreifen zu wechseln, muss der entsprechende Radsatz ausgebaut werden: • 4 Schrauben am Treibgestell lösen • Achshalter abnehmen und Radsatz ausbauen (Einbaurichtung beachten) • Haftreifen tauschen • Achse wieder einbauen. Vorsicht: Die Radschleifer können dabei leicht beschädigt werden. • Achshalter wieder befestigen...
- Page 6 Same as Pos. 2 Important Notes • The operating instructions are a component part of the product and must therefore Catenary Power Operation be kept in a safe place as well as included with the product, if the latter is given to This locomotive can be operated with a powered catenary system (see Operating someone else. Modes). The bottom of this model is marked with a red dot. Place the model on the • Please see your authorized LGB dealer for repairs or spare parts. track with the red dot pointing to the rail that is not connected to the catenary power • Disposing: www.maerklin.com/en/imprint.html supply (Figure 3). CAUTION! This model may be powered with a catenary on analog layouts only. For Functions operation with the digital Multi-Train System, the model must use track power. Other- • This model is designed for operation on LGB two-rail DC systems with conventio- wise, dangerously high voltages may result.
- Page 7 All manuals and user guides at all-guides.com Installing a Coupler SERVICE • Unscrew the large and small snowplow (Figure 6 & 7). Lubrication • Install the coupler. The axle bearings should be lubricated occasionally with a small amount of LGB Caution, danger of injury: There are still sharp edges. Märklin-Oil (7149). Changing Traction Tires A wheel set must be removed in order to change its traction tire: • Loosen 4 screws on the powered truck frame. • Remove the axle mount and remove the wheel set (note the order of installation). • Change the traction tire. • Install the axle again. Caution: The electrical wheel pickups are easily damaged during this process. • Install the axle mount again.
- Page 8 • Pour toute réparation ou remplacement de pièces, adressez-vous à votre détaillant-spécialiste LGB. Alimentation en courant via la caténaire • Elimination : www.maerklin.com/en/imprint.html Ce train automoteur peut être alimenté en courant à partir de la caténaire LGB. Sous le véhicule moteur se trouve un point rouge. Positionner le modèle sur les rails de Fonctionnement manière à ce que le point rouge se trouve au-dessus du rail non relié au transfo de la • Le modèle est prévu pour être exploité sur des systèmes deux rails c.c. LGB avec caténaire. des pupitres de commandes LGB classiques en courant continu (DC, 0 à 24 V). PRUDENCE ! Ce modèle peut être alimenté par une ligne à suspension caténaire • Commutation possible pour exploitation sous caténaire uniquement sur les réseaux analogiques. Il doit être alimenté par la voie pour pouvoir • Les portes sont fonctionnelles être utilisé avec le système multitrain numérique, sinon, il y a risque de surtensions (utiliser la ventouse fournie).
- Page 9 All manuals and user guides at all-guides.com Montage de l’attelage ENTRETIEN • Dévisser le grand et le petit chasse-neige (figure 6 & 7). Lubrification • Monter l’attelage Les roulements des essieux doivent être lubrifiés de temps à autre avec une goutte Attention, risque de blessure : Il reste des arêtes vives. d’huile de nettoyage Märklin (7149). Changer les bandages d’adhérence Changer un bandage d’adhérence nécessite le démontage de l’essieu correspondant : • Défaire les 4 vis du bogie moteur • Retirer le support d’essieu et démonter l’essieu (observer le sens de montage) • Echanger le bandage d’adhérence • Remonter l’essieu. Attention : Vous risquez d’abîmer légèrement les frotteurs de roues. • Refixer le support d’essieu...
- Page 10 Locmotoren en verlichting ingeschakeld • De gebruiksaanwijzing is een onderdeel van het product en dient daarom bewaard Pos. 3 Als pos. 2 en meegegeven worden bij het doorgeven van het product. • Voor reparaties en onderdelen kunt u terecht bij uw LGB-dealer. Stroomvoorziening uit de bovenleiding • Verwijderingsaanwijzingen: Dit treinstel kan de rijstroom uit de LGB-bovenleiding betrekken. Op de onderkant van www.maerklin.com/en/imprint.html het motorrijtuig is een rode stip zichtbaar. Het model dient dusdanig op de rails geplaatst...
- Page 11 All manuals and user guides at all-guides.com Koppelingen monteren ONDERHOUD • Grote en kleine sneeuwploeg losschroeven (afb. 6 & 7) Smeren • Koppeling monteren De aslagers af en toe met een druppel Mäklin – onderhoudsolie (7149) oliën. Voorzichtig, gevaar voor verwonding: er zijn scherpe kanten. Vervangen van de antislipbanden Om de antislipbanden te vervangen dient de desbetreffende wielas uitgebouwd te worden. • De 4 schroeven op het draaistel losdraaien • De ashouder verwijderen en de wielas er uitnemen (let op de wijze van de montage) • Antislipbanden vervangen • Wielas weer monteren. Voorzichtig: hierbij kunnen de wielslepers gemakkelijk beschadigd raken.
- Page 12 Enchufe multiuso • Conmutable a funcionamiento desde catenaria Los coches piloto poseen en el lado frontal sendos enchufes multiuso para conectores faston • Las puertas pueden abrirse (utilizar la ventosa adjunta). (Figura 2). Si equipa un coche con iluminación interior o con un módulo de sonido, puede • Se puede retroequipar un enganche LGB (adjunto) conectarlo aquí y de este modo alimentar corriente al mismo desde la vía. Para tal fin, retirar • Decoder retroequipable la tapa del enchufe. • Los vehículos pueden complementarse de modo individualizado con las etiquetas Sistema multitren adhesivas adjuntas. El modelo en miniatura está equipado en el coche central con una interfaz para conectar Nota: Utilice para este modelo en miniatura un aparato de conducción (transforma-...
- Page 13 All manuals and user guides at all-guides.com Montaje del enganche MANTENIMIENTO • Desatornillar los quitanieves grande y pequeño (Figura 6 & 7) Lubricación • Montar el enganche. Lubricar de vez en cuando con una gota de aceite de mantenimiento Märklin (7149) los Precaución, peligro de sufrir lesiones: quedan cantos cortantes. cojinetes de los ejes. Cambio del aro de adherencia Para cambiar el aro de adherencia, debe desmontarse el eje con ruedas montadas correspondiente: • Aflojar los 4 tornillos del bogie motor • Retirar el soporte del eje y desmontar el eje montado con ruedas (tener presente el sentido de montaje) • Sustituir el aro de adherencia • Montar de nuevo el eje. Precaución: Los patines de la rueda pueden resultar ligeramente dañados al hacerlo. • Sujetar de nuevo el soporte del eje...
- Page 14 Pos. 2 I motori della locomotiva e l’illuminazione sono attivati nire preservate nonché consegnate in dotazione in caso di cessione del prodotto. Pos. 3 Come Pos. 2 • Per le riparazioni o le parti di ricambio, contrattare il rivenditore LGB. Alimentazione di corrente dalla linea aerea • Smaltimento: www.maerklin.com/en/imprint.html Questo treno automotore può ricevere la corrente tramite la linea aerea LGB. Sulla Funzioni faccia inferiore della motrice di testa c’è un punto rosso. Si collochi il modello sopra le • Tale modello è predisposto per il funzionamento su sistemi LGB in corrente con-...
- Page 15 All manuals and user guides at all-guides.com Montaggio del gancio MANUTENZIONE • Svitare gli spazzaneve grande e piccolo (figura 6 & 7) Lubrificazione • Montare il gancio. Sollevare i cuscinetti degli assi e oliare di nuovo con una goccia di olio Märklin per Cautela, pericolo di ferimento: sono presenti degli spigoli acuminati. manutenzione (7149). Sostituzione delle cerchiature di aderenza Per sostituire le cerchiature di aderenza deve venire smontato il corrispondente asse con ruote: • Allentare le 4 viti sul carrello motore • Rimuovere il sostegno degli assi e smontare l’asse con ruote (si presti attenzione alla direzione di montaggio) • Sostituire la cerchiatura di aderenza • Montare nuovamente l’asse.
- Page 16 All manuals and user guides at all-guides.com Bild 1, Betriebsartenschalter Bild 2, Mehrzweck-Steckdose Bild 3, Türe öffnen Fig. 1, Power control switch Fig. 2, Multi-purpose socket Fig. 3, Open the door Img. 1, Modes d‘exploitation Img. 2, Douille à usages multiples Img.
- Page 17 All manuals and user guides at all-guides.com Bild 4, Verbindungskabel einstecken Bild 5, Zug zuammenkuppeln Fig. 4, Plugging in the connecting cables Fig. 5, Coupling the train together Img. 4, Brancher le câble de raccordement Img. 5, Atteler le train Afb.
- Page 18 All manuals and user guides at all-guides.com ZBCLK AUX6 Input1 TAKT AUX5 Motor2 AUX4 Input2 AUX3 AUX2 Motor1 AUX1 B (Gleis/track) Index B (Gleis/track) 0 (Gleis/track) 0 (Gleis/track) ZBDAT Bild 6 & 7, Kupplung montieren Bild 8, Schnittstellenbelegung ; Einige Funktionen müssen über SUSI gesteuert werden.
- Page 19 All manuals and user guides at all-guides.com Bild 9, Mittelwagen öffnen Fig. 9, Opening the middle car Img. 9, Ouvrir la voiture centrale Afb. 9, Middelste rijtuig openen Fig. 9, Abrir el coche intermedio Figura 9, Aprire la carrozza intermedia...
- Page 20 All manuals and user guides at all-guides.com Details der Darstellung können von dem Modell abweichen.
- Page 21 All manuals and user guides at all-guides.com Details der Darstellung können von dem Modell abweichen.
- Page 22 All manuals and user guides at all-guides.com...
- Page 23 All manuals and user guides at all-guides.com Steuer- Zwischen- Steuer- Zwischen- wagen wagen wagen wagen 1 Faltenbalg E194 306 E194 306 33 Puffer E186 780 — 2 Schraube E590 380 E590 380 34 Radsatz E190 090 — 3 Schraube E588 270 E588 270 35 Kohle, Draht, Blech E185 033...
- Page 24 All manuals and user guides at all-guides.com Due to different legal requirements regarding electro-magnetic compatibility, this item may be used in the USA only after separate certification for FCC com- pliance and an adjustment if necessary. Use in the USA without this certification is not permitted and absolves us of any liability. If you should want such certification to be done, please contact us – also due to the additional costs incurred for this. Gebr. Märklin & Cie. GmbH Stuttgarter Straße 55 - 57 73033 Göppingen 193265/1113/Sm5Ef Germany Änderungen vorbehalten www.maerklin.com/en/imprint.html www.lgb.de © Gebr. Märklin & Cie. GmbH...