Fox Spirit FH238 Guide D'utilisation
Table des Matières
Les langues disponibles
Les langues disponibles
Liens rapides
Chapitres
Table des Matières

Manuels Connexes pour Fox Spirit FH238


Sommaire des Matières pour Fox Spirit FH238
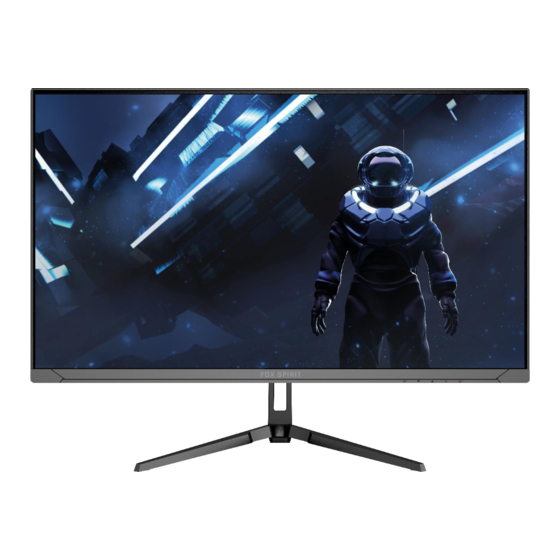
- Page 1 FH238 GUIDE D’UTILISATION Écran 23,8” FHD IPS 165 Hz...
- Page 2 Préface Tout a été mis en œuvre pour que les informations contenues dans ce manuel soient exactes. Néanmoins, le fabricant de cet appareil et le distributeur ne sauraient être tenus responsables de toute erreur ou omission dans ce manuel, ou de l’utilisation des informations contenues dans celui-ci.
-
Page 3: Déclaration De Conformité Au Marquage Ce
DÉCLARATION DE CONFORMITÉ AU MARQUAGE CE Produit conforme à la réglementation en vigueur sur le territoire Européen, aux spécifications des directives EMC 2014/30/EU et directives LVD 2014/35/EU sur les basses tensions. Ce produit est conforme aux régulations de la directive RoHS (Restriction of Hazardous Substances). -
Page 4: Table Des Matières
TABLE DES MATIÈRES INFORMATIONS DE SÉCURITÉ PRÉCAUTIONS ENTRETIEN ET NETTOYAGE REMARQUES SUR LES ÉCRANS LCD CONTENU DE L’EMBALLAGE VUE D’ENSEMBLE BOUTONS DU MONITEUR PORTS DU MONITEUR INSTALLATION DU PIED MONTAGE MURAL CONNECTIVITE ET OPTIONS ALIMENTATION SORTIE AUDIO SORTIE VIDÉO MISE SOUS TENSION ADAPTIVE SYNC MENU OSD PRÉSENTATION... -
Page 5: Informations De Sécurité
INFORMATIONS DE SÉCURITÉ PRÉCAUTIONS • Avant d’installer le moniteur, lisez attentivement toute la documentation. • Pour réduire le risque d’incendie ou de choc électrique, n’exposez jamais le moniteur à la pluie ou à l’humidité. • N’essayez jamais d’ouvrir le boîtier du moniteur. Les hautes tensions dangereuses à l’intérieur du moniteur peuvent entraîner de graves blessures corporelles. -
Page 6: Entretien Et Nettoyage
ENTRETIEN ET NETTOYAGE • Pour des raisons de sécurité, éteindre et débrancher le moniteur avant de le nettoyer. • Nettoyez la surface du moniteur à l’aide d’un chiffon non pelucheux et non abrasif. Les tâches coriaces peuvent être éliminées à l’aide d’un chiffon humidifié et d’un produit de nettoyage spécifique doux. -
Page 7: Remarques Sur Les Écrans Lcd
REMARQUES SUR LES ÉCRANS LCD Les symptômes suivants sont normaux pour les moniteurs LCD et n’indiquent pas de problème. De par la nature de la lumière fluorescente, l’écran peut scintiller lors de la première ⚫ utilisation. Éteignez l’interrupteur d’alimentation et rallumez-le pour vous assurer que le scintillement ait disparu. -
Page 8: Contenu De L'emballage
CONTENU DE L’EMBALLAGE Image Description Quantité Moniteur Colonne du pied Base du pied Adaptateur d’alimentation (1,5 m - Noir) (Entrée:100-240V 50/60Hz) (Sortie:12V 3.0A) Câble HDMI 2.0 (1,8 m - Noir) M4*14mm pour le montage du pied Entretoises pour montage VESA... -
Page 9: Vue D'ensemble
VUE D’ENSEMBLE BOUTONS DU MONITEUR Boutons de commande OSD Bouton d’alimentation Sélection de la source d’entrée / Quitter le menu OSD Parcourir le Menu OSD Principal vers le haut / Augmenter la valeur de la fonction sélectionnée Parcourir le Menu OSD Principal vers le bas / Diminuer la valeur de la fonction sélectionnée Activation du menu OSD / Sélection des sous-menus Allumer / éteindre le moniteur... -
Page 10: Ports Du Moniteur
PORTS DU MONITEUR Connectez le câble d’alimentation pour alimenter votre Port moniteur. d’alimentation DC12V Alimentation 12V, 3A Charge 5V/2A Insérez un connecteur audio Jack afin de recevoir le signal audio Port de sortie de votre moniteur. Pour casque, haut-parleurs audio Insérez un connecteur DP dans le port de votre ordinateur et le second connecteur dans le port DP de votre moniteur. -
Page 11: Installation Du Pied
INSTALLATION DU PIED 1. Sortez le moniteur en gardant son polystyrène de protection, placez-le doucement sur une table ou sur une surface plane. Protection Moniteur 2. Insérez la plaque de fixation du pied à l’arrière du moniteur. La plaquette émettra un clic une fois en place. - Page 12 1. Insérez la partie supérieure, puis appuyez vers le bas 2. Un clic confirmera le bon verrouillage de la plaque de fixation à la colonne du pied. 3. Fixez la colonne du pied à la base à l’aide de la vis M4*14mm fournie, en tournant dans le sens des aiguilles d’une montre.
- Page 13 Bouton de verrouillage / déverrouillage rapide 4. Saisissez le pied et positionnez avec attention l’écran monté sur une table ou sur une surface plane.
-
Page 14: Montage Mural
MONTAGE MURAL Ce moniteur est fourni sans support de montage mural, sans vis ou autres accessoires de montage, qui doiventt être achetés séparément. Seules les entretoises nécessaires sont fournies : 4x M4x10mm. La norme VESA est 75*75mm. 1. Sortez le moniteur en gardant son polystyrène de protection, placez-le doucement sur une table. -
Page 15: Connectivite Et Options
CONNECTIVITE ET OPTIONS ALIMENTATION Branchez l’extrémité adaptée du câble de l’adaptateur au port d’alimentation de votre moniteur. Puis branchez la prise du câble d’alimentation dans une prise murale. Adaptateur d’alimentation (1,5m) x1 SORTIE AUDIO Branchez votre casque ou vos enceintes à l’aide de la prise jack 3,5 mm directement sur votre moniteur. -
Page 16: Sortie Vidéo
Casque (non inclus) SORTIE VIDÉO HDMI Afin que le moniteur reçoive un signal HDMI, connectez le câble HDMI inclus sur l’entrée du moniteur correspondante et reliez-le au port correspondant sur votre machine. Câble HDMI 2.0 1,8m inclus Sortie HDMI... - Page 17 Afin que le moniteur reçoive un signal DP, connectez le câble DP inclus sur l’entrée du moniteur correspondante et reliez-le au port correspondant sur votre machine. Câble DP non inclus Sortie DP...
-
Page 18: Mise Sous Tension
MISE SOUS TENSION 1. Connectez les câbles aux ports correspondants de votre moniteur et de votre PC. Les sources seront détectées automatiquement. 2. Appuyez sur le bouton Power afin d’allumer le moniteur. L’indicateur LED s’affichera en bleu. 3. Pour changer la source d’entrée, appuyez sur le bouton pour entrer dans le menu Entrée. -
Page 19: Menu Osd
MENU OSD Présentation Le menu OSD peut être utilisé pour ajuster les réglages de votre appareil et apparait sur votre écran après l’avoir allumé et en pressant le bouton Le Menu Principal donne accès aux sous-menus suivants : LUMINOSITE, IMAGE, TEMP. COULEUR, REGLAGES OSD, RESET, AUTRES. -
Page 20: Fonctions Du Menu Osd
FONCTIONS DU MENU OSD LUMINOSITE Sous-menu Options Description Luminosité 0-100 Ajuste le niveau de luminosité Contraste 0-100 Ajuste le contraste de l’écran Black Level 0-100 Ajuste la balance des noirs Sélection du mode d’affichage : ECO, Sélection multimodes Standard, Photo, Film, Jeu, FPS et RTS On/Off Permet d’activer / de désactiver l’option IMAGE... - Page 21 TEMP. COULEUR. Sous-menu Options Description Définit la température des couleurs Utilisateur/6500/9300 Utilisateur : Température de Rouge 0-100 Personnalise les composantes RVB pour la couleur Vert 0-100 température de couleur personnalisée Bleu 0-100 Filtre Lumière 0-100 Définit un niveau de filtre lumière bleue Bleue REGLAGES OSD Sous-menu...
-
Page 22: Marche/Arrêt Volume
RESET Sous-menu Options Description Reset Aucune Réinitialise le menu aux réglages par défaut. Led Effect Marche/Arrêt Allume/éteint l’éclairage LED arrière AUTRES Sous-menu Options Description ENTREE DP / HDMI Sélection du signal d’entrée Mute Marche/Arrêt Active/Désactive le mode muet Volume 0-10 Ajuste le volume audio... -
Page 23: Spécifications Techniques
SPÉCIFICATIONS TECHNIQUES Fox SPIRIT FH238 Taille de la dalle 23,8’’ Type de dalle Courbure Rétroéclairage WLED Luminosité 250 cd/m² Contraste Ratio (Max.) 1000 :1 Taille des pixels 0.2745(H)*0.2745(H)mm Résolution FHD 1920*1080@165Hz (DP), 165Hz (HDMI) Taux de rafraichissement 165 Hz Écran Format de l’écran... - Page 24 1x M4*14mm Entretoises pour montage 4x M4*14mm VESA Pour tout incident rencontré avec ce matériel, nous vous invitons à prendre contact avec le SAV FOX SPIRIT : support@fox-spirit.com Prise en charge des pixels défectueux selon la norme ISO 9241-307 Classe 1...
- Page 25 FH238 USER’S GUIDE 23,8” Monitor FHD IPS 165 Hz...