Table des Matières
Publicité
Les langues disponibles
Les langues disponibles
Liens rapides
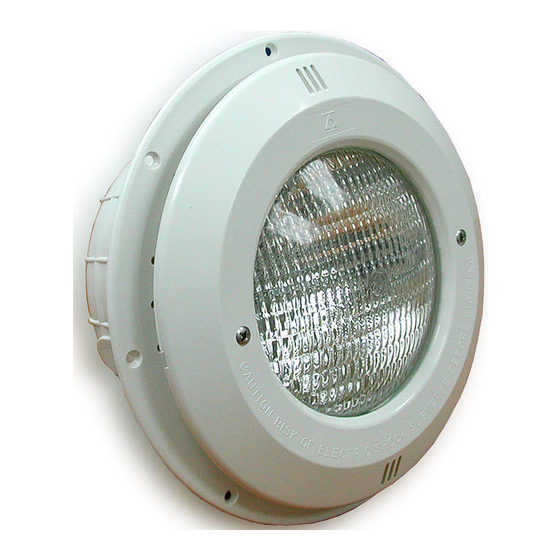
UNDERWATER LIGHT
PROJECTEUR SOUS-MARIN
PROYECTOR SUBACUÁTICO
FARO SUBACQUEO
UNTERWASSER-SCHEINWERFER
FARO SUBACQUEO
INSTALLATION AND MAINTENANCE MANUAL
MANUEL D'INSTALLATION ET D'ENTRETIEN
MANUAL DE INSTALACIÓN Y MANTENIMIENTO
MANUALE DI INSTALAZIONE E MANUTENZIONE
EINBAU-UND BETRIEBSANLEITUNG
MANUAL DE INSTRUÇÕES E MANUNTENÇÃO
Publicité
Table des Matières

Manuels Connexes pour Astralpool SKIMMER FLOTANDO


Sommaire des Matières pour Astralpool SKIMMER FLOTANDO
- Page 1 UNDERWATER LIGHT PROJECTEUR SOUS-MARIN PROYECTOR SUBACUÁTICO FARO SUBACQUEO UNTERWASSER-SCHEINWERFER FARO SUBACQUEO INSTALLATION AND MAINTENANCE MANUAL MANUEL D’INSTALLATION ET D’ENTRETIEN MANUAL DE INSTALACIÓN Y MANTENIMIENTO MANUALE DI INSTALAZIONE E MANUTENZIONE EINBAU-UND BETRIEBSANLEITUNG MANUAL DE INSTRUÇÕES E MANUNTENÇÃO...
-
Page 4: Vérifier Le Contenu De L'emballage
FRANÇAIS IMPORTANT: le manuel d’instructions que vous avez entre les mains contient des informations de première importance sur les mesures de sécurité à adopter au moment de l’installation et de la mise en service. Il est par conséquent indispensable que l’installateur et l’utilisateur lisent attentivement les instructions avant de commencer le montage et la mise en marche. -
Page 5: Montage
4. MONTAGE: Une fois installée la niche et la bride, dans le cas de la piscine préfrabriquée, procéder au montage du projecteur. Pour brancher le projecteur à la ligne électrique introduire le câble à travers l'écrou presse-étoupe (16). Serrer l'écrou presse-étoupe et s'assurer que le câble tient bon !orqu'on tire sur celui-ci. - Page 15 ENGLISH CODE DESCRIPTION CODE DESCRIPTION 07838R0001 White decorative ring 23670R0003 Bimaterial self-threading housing 7013106080 Screw DIN 966 M-6x80 23671R0002 Bimaterial metric pitch housing (1) 00347R0002 Floodlamp base fastening ring 07838R0012 Gland seal body butt joint 7010106055 DIN 933 M-6x55 screw 07838R0007 Gland seal body 00370...
- Page 20 WASSER GETAUCHT ANZUMACHEN / NAO ACENDER NUNCA O PROECTOR SE NAO ESTIVER SUBMERGIDO NA AGUA Made in EC Sacopa, S.A.U. Pol. Ind. Poliger Sud – Sector I 17854 Sant Jaume de Llierca (Spain) ASTRALPOOL Avda. Francesc Macià, 38, planta 16 08208 Sabadell (Barcelona) Spain 23670E201-01 info@astralpool.com •...