Télécharger Imprimer la page

Publicité

Les langues disponibles
  • FR

Les langues disponibles

Liens rapides

All manuals and user guides at all-guides.com
Kühl-Gefrierkombination
Refrigerator Freezer
Frigorífico combi
Combiné réfrigérateur congélateur
Congelatore
10032197 10032198

Publicité

loading

Sommaire des Matières pour Klarstein 10032197

  • Page 1 All manuals and user guides at all-guides.com Kühl-Gefrierkombination Refrigerator Freezer Frigorífico combi Combiné réfrigérateur congélateur Congelatore 10032197 10032198...
  • Page 2 All manuals and user guides at all-guides.com...
  • Page 3 Installation 7 Bedienung 10 Zubehör 1 1 Reinigung und Pflege 12 Fehlersuche und Fehlerbehebung 13 Hinweise zur Entsorgung 14 TECHNISCHE DATEN Artikelnummer 10032197, 10032198 Stromversorgung 220-240 V ~ 50-60 Hz KONFORMITÄTSERKLÄRUNG Hersteller: Chal-Tec GmbH, Wallstraße 16, 10179 Berlin, Deutschland. Dieses Produkt entspricht den folgenden Europäischen Richtlinien:...
  • Page 4 All manuals and user guides at all-guides.com SICHERHEITSHINWEISE Allgemeine Hinweise • Kinder ab 8 Jahren, physisch und körperlich eingeschränkte Menschen dürfen das Gerät nur benutzen, wenn sie vorher von einer für Sie verantwortlichen Aufsichtsperson ausführlich mit den Funktionen und den Sicherheitsvorkehrungen vertraut gemacht wurden.
  • Page 5 All manuals and user guides at all-guides.com • Schließen Sie das Gerät nicht an Verlängerungskabel an. • Verlegen Sie das Kabel so, dass es nicht gequatscht wird. Andernfalls kann es überhitzen und ein Feuer auslösen. • Achten Sie darauf, dass der Stecker immer frei zugänglich ist. •...
  • Page 6 All manuals and user guides at all-guides.com GERÄTEÜBERSICHT 1 Kühlschrank-Fach 5 Oberes Türfach (Kühlschrank) 2 Gefrierschrank-Schublade 6 Unteres Türfach (Kühlschrank) 3 Verstellbare Füße 7 Gefrierfach-Tür 4 Thermostat und Licht...
  • Page 7 All manuals and user guides at all-guides.com INSTALLATION So drehen Sie die Tür Benötigte Werkzeuge: Flacher Schraubenzieher, Kreuzschlitz-Schraubenzieher, Sechskantschlüssel. • Versichern Sie sich, dass der Strom ausgeschaltet ist. • Neigen Sie das Gerät leicht nach hinten und lehnen Sie es an eine feste Wand. •...
  • Page 8 All manuals and user guides at all-guides.com Legen Sie das Gerät Schrauben die den Pin an der Aufhängung ab, drehen mit der Rückseite auf Sie die Aufhängung um und befestigen Sie den Pin eine weiche Unterlage. wieder. Schrauben Sie die untere Aufhängung und die vorderen verstellbaren Füße ab.
  • Page 9 All manuals and user guides at all-guides.com Befestigen Sie die Setzen Sie zum Schluss obere Tür und die obere die beiden Abdeckungen Aufhängung. wieder auf. Abstandshalter Schrauben Sie die Abstandshalter hinten an das Gerät. Hinweise zum Standort • Stellen Sie das Gerät so auf, dass sich die Türen komplett öffnen lassen. •...
  • Page 10 All manuals and user guides at all-guides.com BEDIENUNG Vor dem ersten Gebrauch Bevor Sie das Gerät zum ersten Mal benutzen, wischen Sie den Innenraum und alle Innenteile mit lauwarmem Wasser und etwas Neutralreiniger ab. Trocknen Sie die Teile danach sorgfältig ab. Wichtig: Verwenden Sie keine scharfen Reinigungsmittel oder Scheuermittel, da sie die Oberflächen beschädigen.
  • Page 11 All manuals and user guides at all-guides.com Auftauen Tiefgefrorene oder gefrorene Lebensmittel können vor dem Gebrauch im Kühlschrank oder bei Raumtemperatur aufgetaut werden, je nachdem wie schnell sie auftauen sollen. Kleinere Stücke können sogar noch gefroren gekocht werden, In diesem Fall verlängert sich die Kochzeit etwas.
  • Page 12 All manuals and user guides at all-guides.com REINIGUNG UND PFLEGE Aus hygienischen Gründen sollte der Innenraum, einschließlich Innenausstattung, regelmäßig gereinigt werden. VORSICHT VORSICHT Verletzungsgefahr! Schalten Sie das Gerät vor der Reinigung aus und ziehen Sie den Stecker aus der Steckdose, um Stromschlägen vorzubeugen.
  • Page 13 All manuals and user guides at all-guides.com FEHLERSUCHE UND FEHLERBEHEBUNG Problem Mögliche Ursache Lösungsansatz Das Gerät läuft Kein Strom. Stecken Sie den Stecker ein. nicht. Die Sicherung ist kaputt. Ersetzen Sie die Sicherung. Die Steckdose ist kaputt. Stecken Sie das Gerät in eine andere Steckdose.
  • Page 14 All manuals and user guides at all-guides.com HINWEISE ZUR ENTSORGUNG Befindet sich die linke Abbildung (durchgestrichene Mülltonne auf Rädern) auf dem Produkt, gilt die Europäische Richtlinie 2012/19/EU. Diese Produkte dürfen nicht mit dem normalen Hausmüll entsorgt werden. Informieren Sie sich über die örtlichen Regelungen zur getrennten Sammlung elektrischer und elektronischer Gerätschaften.
  • Page 15 Accessories 23 Care and Cleaning 24 Troubleshooting 25 Hints on Disposal 26 TECHNICAL DATA Item number 10032197, 10032198 Power supply 220-240 V ~ 50-60 Hz DECLARATION OF CONFORMITY Producer: Chal-Tec GmbH, Wallstraße 16, 10179 Berlin, Germany. This product is conform to the following European...
  • Page 16 All manuals and user guides at all-guides.com SAFETY INSTRUCTIONS General Hints • This appliance can be used by children aged from 8 years and above and persons with reduced physical, sensory or mental capabilities or lack of experience and knowledge if they have been given super vision or instruction concerning use of the appliance in a safe way and understand the hazards involved.
  • Page 17 All manuals and user guides at all-guides.com • Power cord must not be lengthened. • Make sure that the power plug is not squashed or damaged by the back of the appliance. A squashed or damaged power plug may overheat and cause a fire. •...
  • Page 18 All manuals and user guides at all-guides.com PRODUCT DESCRIPTION 1Fridge Glass Shelf 5 Upper Fridge Door Shelf 2 Freezer Drawer 6 Lower Fridge Door Shelf 3 Levelling Feet 7 Freezer Door 4 Thermostat Control and Light...
  • Page 19 All manuals and user guides at all-guides.com INSTALLATION Reverse Door Tool required: Philips screwdriver, Flat bladed screwdriver, hexagonal spanner. • Ensure the unit is unplugged and empty. • To take the door off, it is necessary to tilt the unit backwards. You should rest the unit on something solid so that it will not slip during the door removing process.
  • Page 20 All manuals and user guides at all-guides.com Lie down the rear of Unscrew and remove the bottom hinge pin, turn the cabinet on a soft pad. And bracket over and replace it. unscrew the bottom hinge and leveling foot. Install the hinge at left side Stand up the unit and put Install the middle hinge.
  • Page 21 All manuals and user guides at all-guides.com Install the upper door with Clap in the hinge cover the upper hinge. and hole cover on the top of unit. Rear spacer Screw the rear spacers at the rear of the unit. Space Requirement •...
  • Page 22 All manuals and user guides at all-guides.com OPERATION Before first Use Before using the appliance for the first time, wash the interior and all internal accessories with lukewarm water and some neutral soap so as to remove the typical smell of a brand new product, then dry thoroughly.
  • Page 23 All manuals and user guides at all-guides.com Thawing Deep-frozen or frozen food, prior to be used, can be thawed in the fridge compartment or at room temperature, depending on the time available for this operation. Small pieces may even be cooked still frozen, directly from the freezer. In this case, cooking will take longer.
  • Page 24 All manuals and user guides at all-guides.com CARE AND CLEANING For hygienic reasons the appliance interior, including interior accessories, should be cleaned regularly. CAUTION CAUTION Danger of electrical shock! Before cleaning switch the appliance off and remove the plug from the mains, or switch off or turn out the circuit breaker or fuse.
  • Page 25 All manuals and user guides at all-guides.com TROUBLESHOOTING Problem Possible Cause Suggested Solution Appliance does Mains plug is not plugged in Insert mains plug. not work or is loose Fuse has blown or is defective Check fuse, replace if necessary. Socket is defective Mains malfunctions are to be corrected by an electrician.
  • Page 26 All manuals and user guides at all-guides.com HINTS ON DISPOSAL According to the European waste regulation 2012/19/ EU this symbol on the product or on its packaging indicates that this product may not be treated as household waste. Instead it should be taken to the appropriate collection point for the recycling of electrical and electronic equipment.
  • Page 27 Accesorios 35 Limpieza y cuidado 36 Detección y resolución de problemas 37 Retirada del aparato 38 DATOS TÉCNICOS Número de artículo 10032197, 10032198 Suministro eléctrico 220-240 V - 50-60 Hz DECLARACIÓN DE CONFORMIDAD Fabricante: Chal-Tec GmbH, Wallstraße 16, 10179 Berlín (Alemania). Este producto cumple con las siguientes directivas...
  • Page 28 All manuals and user guides at all-guides.com INDICACIONES DE SEGURIDAD Indicaciones generales • Los niños mayores de 8 años y las personas con discapacidades físicas o psíquicas solamente podrán utilizar el aparato si han sido previamente instruidas sobre su uso y conocen las indicaciones de seguridad. •...
  • Page 29 All manuals and user guides at all-guides.com • No conecte el aparato a un cable alargador. • Coloque el cable de tal manera que no quede atrapado. De lo contrario, podría calentarse y provocar un incendio. • Asegúrese de que el enchufe no quede atrapado. •...
  • Page 30 All manuals and user guides at all-guides.com DESCRIPCIÓN DEL APARATO 1 Compartimento del frigorífico 5 Compartimento superior de la puerta (frigorífico) 2 Cajón del congelador 6 Compartimento inferior de la puerta (frigorífico) 3 Patas ajustables 7 Puerta del congelador 4 Termostato y luz...
  • Page 31 All manuals and user guides at all-guides.com INSTALACIÓN Cómo revertir la puerta Herramientas necesarias: Destornillador plano, destornillador de estrella, llave hexagonal • Asegúrese de que el suministro eléctrico esté desconectado. • Incline el aparato ligeramente hacia atrás y apóyelo sobre una pared sólida. •...
  • Page 32 All manuals and user guides at all-guides.com Apoye el aparato sobre Desatornille el pin de la bisagra, revierta esta última y la parte trasera en fije de nuevo el pin. una superficie blanda. Desatornille la bisagra inferior y las patas ajustables delanteras.
  • Page 33 All manuals and user guides at all-guides.com Fije la puerta superior y la Por último, coloque ambas bisagra superior. cubiertas. Separador Atornille el separador a la parte trasera del aparato. Indicaciones para la ubicación • Coloque el aparato de tal manera que la puerta pueda abrirse completamente. •...
  • Page 34 All manuals and user guides at all-guides.com UTILIZACIÓN Antes del primer uso Antes de utilizar el aparato por primera vez, limpie el interior y todas las piezas interiores con agua tibia y un poco de limpiador neutro. Seque las piezas completamente.
  • Page 35 All manuals and user guides at all-guides.com Descongelar Los alimentos ultracongelados o congelados pueden descongelarse en el frigorífico o a temperatura ambiente antes de su consumo dependiendo de la rapidez con la que los necesite. Los pedazos más pequeños incluso pueden cocinarse congelados. En este caso, el tiempo de cocción será...
  • Page 36 All manuals and user guides at all-guides.com LIMPIEZA Y CUIDADO Por motivos de higiene, deberá limpiar el interior del aparato regularmente, incluidos todos sus accesorios. AVISO AVISO Riesgo de lesiones. Apague el aparato y desconecte el enchufe de la toma de corriente antes de limpiarlo para evitar descargas eléctricas. •...
  • Page 37 All manuals and user guides at all-guides.com DETECCIÓN Y RESOLUCIÓN DE PROBLEMAS Problema Posible causa Solución propuesta El aparato no No hay electricidad. Conecte el enchufe. funciona. El fusible está fundido. Sustituya el fusible. La toma de corriente no Pruebe el aparato con otra funciona.
  • Page 38 All manuals and user guides at all-guides.com RETIRADA DEL APARATO Si el aparato lleva adherida la ilustración de la izquierda (el contenedor de basura tachado) entonces rige la normativa europea, directiva 2012/19/UE. Este producto no debe arrojarse a un contenedor de basura común. Infórmese sobre las leyes territoriales que regulan la recogida separada de aparatos eléctricos y electrónicos.
  • Page 39 Accessoires 47 Nettoyage et entretien 48 Identification et résolution des problèmes 49 Conseils pour le recyclage 50 FICHE TECHNIQUE Numéro d’article 10032197, 10032198 Alimentation 220-240 V ~ 50-60 Hz DÉCLARATION DE CONFORMITÉ Fabricant : Chal-Tec GmbH, Wallstraße 16, 10179 Berlin, Allemagne. Ce produit est conforme aux directives européennes...
  • Page 40 All manuals and user guides at all-guides.com CONSIGNES DE SÉCURITÉ Consignes générales • Les enfants à partir de 8 ans ainsi que les personnes dont les capacités physiques, mentales ou sensorielles sont réduites peuvent utiliser l’appareil à condition d’avoir assimilé au préalable les consignes d’utilisation et de sécurité de l’appareil transmises par une personne responsable de leur sécurité.
  • Page 41 All manuals and user guides at all-guides.com • Ne branchez pas l‘appareil sur une rallonge électrique. • Installez le câble de façon à ce qu‘il ne soit pas pincé. Il risquerait de surchauffer et de déclencher un incendie. • Veillez à ce que la fiche reste toujours accessible. •...
  • Page 42 
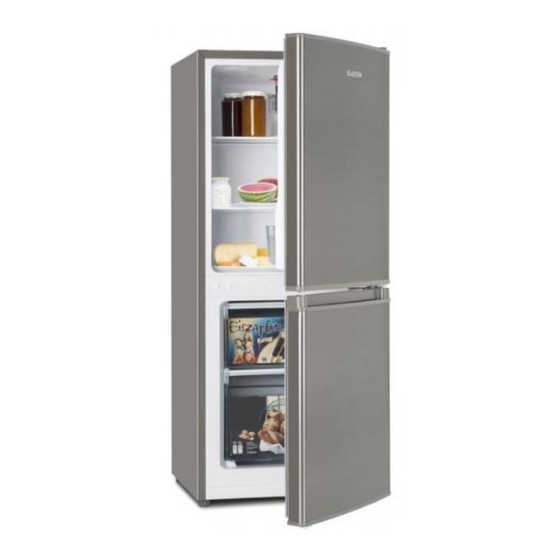
All manuals and user guides at all-guides.com APERÇU DE L‘APPAREIL 1 Compartiment réfrigérateur 5 Compartiment de porte supérieur (réfrigérateur) 2 Tiroir du congélateur 6 Compartiment de porte inférieur (réfrigérateur) 3 Pieds réglables 7 Porte du congélateur 4 Thermostat et éclairage...
  • Page 43 All manuals and user guides at all-guides.com INSTALLATION Modification du sens d‘ouverture de la porte Outils nécessaires : tournevis plat, tournevis cruciforme, clé Allen. • Assurez-vous que le courant est coupé. • Inclinez l‘appareil légèrement vers l‘arrière et adossez-le à un mur solide. •...
  • Page 44 All manuals and user guides at all-guides.com Posez l'appareil avec la Dévissez la tige du support, retournez le support et face arrière sur un support refixez la tige. doux. Dévissez le support inférieur et les pieds réglables de devant. Fixez le support inférieur Relevez l'appareil et Fixez ensuite le support et l'un des pieds de l'autre...
  • Page 45 All manuals and user guides at all-guides.com Fixez la porte supérieure Terminez en réinstallant les et le support supérieur. deux caches. Butées Vissez les butées à l‘arrière de l‘appareil. Conseils sur l‘emplacement • Installez l‘appareil de sorte que les portes puissent s‘ouvrir complètement. •...
  • Page 46 All manuals and user guides at all-guides.com UTILISATION Avant la première utilisation Avant d‘utiliser l‘appareil pour la première fois, essuyez l‘intérieur et tous les éléments intérieurs à ‚eau tiède avec un peu de nettoyant neutre. Puis séchez soigneusement les éléments. Important : n‘utilisez aucun produit de nettoyage agressif ou abrasif car ils pourraient endommager les surfaces.
  • Page 47 All manuals and user guides at all-guides.com Décongélation Vous pouvez décongeler les aliments surgelés ou congelés au réfrigérateur ou à température ambiante avant de les utiliser, en fonction du temps dont vous disposez pour les décongeler. Les petits morceaux peuvent même être cuits encore congelés, dans ce cas toutefois, la durée de cuisson est un peu rallongée.
  • Page 48 All manuals and user guides at all-guides.com NETTOYAGE ET ENTRETIEN Pour des raisons d‘hygiène, l‘intérieur doit être nettoyé régulièrement, y compris les éléments intérieurs. ATTENTION ATTENTION Risque de blessure ! Avant le nettoyage, éteignez l‘appareil et débranchez la fi che de la prise pour éviter les risques d‘électrocution. •...
  • Page 49 All manuals and user guides at all-guides.com IDENTIFICATION ET RÉSOLUTION DES PROBLÈMES Problème Cause possible Solution L'appareil ne Pas de courant. Branchez la fiche. fonctionne pas. Le fusible est hors service. Remplacez le fusible. La prise est hors service. Branchez l'appareil dans une autre prise.
  • Page 50 All manuals and user guides at all-guides.com CONSEILS POUR LE RECYCLAGE Le pictogramme ci-contre apposé sur le produit signifie que la directive européenne 2012/19/UE s‘applique (poubelle à roues barrée d’une croix). Ces produits ne peuvent être jetés dans les poubelles domestiques courantes. Renseignez- vous concernant les règles appliquées pour la collecte d’appareils électriques et électroniques.
  • Page 51 Accessori 59 Pulizia e manutenzione  60 Ricerca e risoluzione dei problemi 61 Smaltimento 62 DATI TECNICI Articolo numero 10032197, 10032198 Alimentazione 220-240 V ~ 50-60 Hz DICHIARAZIONE DI CONFORMITÀ Produttore: Chal-Tec GmbH, Wallstraße 16, 10179 Berlino, Germania. Questo prodotto è conforme alle seguenti direttive...
  • Page 52 All manuals and user guides at all-guides.com AVVERTENZE DI SICUREZZA Avvertenze generali • I bambini a partire dagli 8 anni e le persone con capacità fisiche e mentali ridotte possono utilizzare il dispositivo solo se una persona responsabile della loro sicurezza ha prima spiegato loro le avvertenze di sicurezza e come utilizzare il dispositivo.
  • Page 53 All manuals and user guides at all-guides.com • Non collegare il dispositivo ad una prolunga. • Sistemare il cavo di alimentazione in modo che non si pieghi. In caso contrario il cavo di alimentazione potrebbe surriscaldarsi e causare un incendio. •...
  • Page 54 All manuals and user guides at all-guides.com DESCRIZIONE DEL PRODOTTO 1 Scomparto frigorifero 5 Scomparto sportello superiore (frigorifero) 2 Scomparto congelatore 6 Scomparto sportello inferiore (frigorifero) 3 Piedi regolabili 7 Sportello congelatore 4 Termostato e luce...
  • Page 55 All manuals and user guides at all-guides.com INSTALLAZIONE Invertire il lato di apertura dello sportello Attrezzi necessari: cacciavite piatto, cacciavite a croce, chiave esagonale. • Assicurarsi di aver staccato la corrente. • Inclinare leggermente il dispositivo all‘indietro e appoggiarlo contro una parete solida.
  • Page 56 All manuals and user guides at all-guides.com Poggiare il dispositivo sul Svitare il perno posto sul cardine, ruotare il cardine e retro e posizionarlo su una fissare di nuovo il perno. superficie morbida. Svitare il cardine inferiore e i piedi regolabili frontali.
  • Page 57 All manuals and user guides at all-guides.com Fissare lo sportello Infine mettere entrambi i superiore e il cardine coperchi. superiore. Distanziatore Avvitare i distanziatori sul retro del dispositivo. Note sull´installazione • Posizionare il dispositivo in modo da poter aprire completamente gli sportelli. •...
  • Page 58 All manuals and user guides at all-guides.com UTILIZZO Avvertenze per il primo utilizzo Prima di utilizzare il dispositivo per la prima volta, lavare la parte interna e tutti i componenti interni con acqua tiepida e con un po‘ di detersivo non aggressivo. In seguito asciugare con cura i componenti.
  • Page 59 All manuals and user guides at all-guides.com Scongelamento Gli alimenti surgelati possono essere scongelati a temperatura ambiente prima di essere consumati in frigorifero. Alimenti piccoli possono essere cotti ancora congelati. In questo caso tenere presente che il tempo di cottura sarà maggiore. ACCESSORI Ripiani rimovibili Le pareti del frigorifero sono dotate di una serie di binari...
  • Page 60 All manuals and user guides at all-guides.com PULIZIA E MANUTENZIONE Per motivi igienici, la parte interna, compresi gli accessori interni, devono essere puliti regolarmente. ATTENZIONE ATTENZIONE Pericolo di infortuni! Prima di pulire il dispositivo, spegnerlo e staccare la spina dalla presa per evitare scosse elettriche. •...
  • Page 61 All manuals and user guides at all-guides.com RICERCA E RISOLUZIONE DEI PROBLEMI Problema Causa possibile Soluzione Il dispositivo Assenza di corrente. Inserire la spina nella presa. non funziona. Il fusibile è rotto. Sostituire il fusibile. La presa è rotta. Inserire il dispositivo in un´altra presa.
  • Page 62 All manuals and user guides at all-guides.com SMALTIMENTO Se sul prodotto è presente la figura a sinistra (il cassonetto dei rifiuti mobile sbarrato), si applica la direttiva europea 2012/19/UE. Questi prodotti non possono essere smaltiti con i rifiuti normali. Informarsi sulle disposizioni vigenti in merito alla raccolta separata di dispositivi elettrici ed elettronici.
  • Page 63 All manuals and user guides at all-guides.com...
  • Page 64 All manuals and user guides at all-guides.com...

Ce manuel est également adapté pour:

10032198