Publicité
Les langues disponibles
Les langues disponibles
Liens rapides
SPLIT TYPE ROOM AIR CONDITIONER
OPERATION MANUAL AND INDOOR INSTALLATION MANUAL
AS07NS3HRA
AS09NS3HRA
AS12NS3HRA
AS15NS3HRA
AS18NS3HRA
AS24NS3HRA
AS07BS4HRA
AS09BS4HRA
AS12BS4HRA
AS15BS4HRA
AS18BS4HRA
AS24BS4HRA
Haier WiFi APP
lease read this operation manual before using the air
conditioner.
Keep this operation manual for future reference.
0010580714
All manuals and user guides at all-guides.com
Contents
WARNING AND CAUTIONS....................................1
PARTS AND FUNCTIONS......................................4
OPERATION.........................................................5
INDOOR UNIT INSTALLATION...............................8
MAINTENANCE...................................................11
Table des matières
AVERTISSEMENT ET MISES EN GARDE...............12
PIÈCES ET FONCTIONS.......................................15
FONCTIONNEMENT.............................................16
INSTALLATION DE L'UNITE INTÉRIEURE..............19
ENTRETIEN.........................................................22
Indice
PRECAUZIONI E AVVERTENZE............................23
PARTI E FUNZIONI..............................................26
FUNZIONAMENTO..............................................27
INSTALLAZIONE DELL'UNITÀ INTERNA................30
MANUTENZIONE................................................33
Contenido
ADVERTENCIA Y PRECAUCIONES.......................34
COMPONENTES Y FUNCIONES............................37
FUNCIONAMIENTO..............................................38
INSTALACIÓN DE UNIDAD INTERIOR...................41
MANTENIMIENTO................................................44
Inhalt
WARNUNG UND VORSICHT..................................45
TEILE UND FUNKTIONEN.....................................48
BEDIENUNG........................................................49
INNENEINHEIT INSTALLATION.............................52
PFLEGE...............................................................55
Zawarto
RODKI OSTRO NO CI ......................................56
CZ
CI I FUNKCJE...............................................59
DZIA ANIE...........................................................60
MONTA
EDNOSTKI WEWN TRZNEJ..................63
KONSERWACJA URZ DZENIA..............................66
çindekiler
UYARI VE D KKAT.................................................67
PARÇALAR VE FONKS YONLAR...........................70
Operasyon.........................................................71
Ç MEKAN ÜN TES
URULUMU...........................74
BAKIM.................................................................77
.................................................78
....................................81
.....................................................82
..............85
....................................................88
Sadr aj
UPOZORENJA I MJERE OPREZA..........................89
DIJELOVI I FUNKCIJE.........................................92
RAD URE AJA...................................................93
INSTALACIJA UNUTARNJE JEDINICE...................96
ODR AVANJE....................................................99
Conteúdos
AVISO E CAUÇÕES............................................100
PARTES E FUNÇÕES.........................................103
OPERAÇÃO.......................................................104
INSTALAÇÃO DE UNIDADE INTERIOR................107
MANUTENÇÃO..................................................11 0
............................................114
................................................115
.......................118
.....................................................121
.......111
Publicité

Manuels Connexes pour Haier AS07NS3HRA


Sommaire des Matières pour Haier AS07NS3HRA
- Page 1 Sadr aj UPOZORENJA I MJERE OPREZA………....89 DIJELOVI I FUNKCIJE………………………....92 RAD URE AJA……………………………....93 INSTALACIJA UNUTARNJE JEDINICE…....96 ODR AVANJE………………………………....99 Haier WiFi APP Conteúdos AVISO E CAUÇÕES..........100 PARTES E FUNÇÕES.........103 OPERAÇÃO............104 lease read this operation manual before using the air INSTALAÇÃO DE UNIDADE INTERIOR....107 MANUTENÇÃO..........11 0...
- Page 2 All manuals and user guides at all-guides.com...
- Page 3 All manuals and user guides at all-guides.com WARNING: · If the supply cord is damaged, it must be replaced by the manufacturer,its service agent or similarly qualified persons in order to avoid a hazard. · This appliance can be used by children aged 8 years and above and persons with reduced physical, sensory or mental capabilities or lack of experience and knowledge if they have been given superivision or instruction concering use of the appliance in a safe way and understand the hazards involved.
- Page 4 All manuals and user guides at all-guides.com Cautions WARNING Please call Sales/Service Shop for the Installation. Do not attempt to install the air conditioner by yourself because improper works may cause electric shock, fire, water leakage. WARNING Check proper When abnormality such as burnt-small found, Use an exclusive immediately stop the operation button and power source...
- Page 5 All manuals and user guides at all-guides.com Trouble shooting Trouble shooting EUROPEAN REGULATIONS Before asking for service, check the following first. CONFORMITY FOR THE MODELS Climate:T1 Voltage:230V Cause or check points Phenomenon When unit is stopped, it won't restart The system does not restart All the products are in conformity with the following immediately until 3 minutes have immediately.
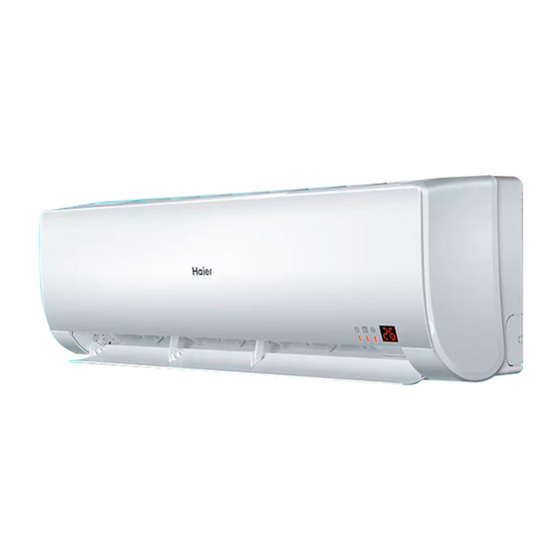
- Page 6 All manuals and user guides at all-guides.com Parts and Functions Indoor Unit Remote controller 6. TIMER OFF display Inlet Air Purifying Filter (inside) TIMER ON display 7. TEMP display 8. Additional functions display Inlet grille Supplemented electrical Operation mode QUIET SLEEP HEALTH TURBO...
- Page 7 All manuals and user guides at all-guides.com Operation Base Operation Emergency operation and test operation Emergency Operation: Turbo/Quiet Auto Use this operation only when the remote controller is defective or lost, and with function of emergency running, air conditoner Remote controller Cool Heat can run automatically for a while.
- Page 8 All manuals and user guides at all-guides.com Operation 5. When quiet sleeping function is set to 8 hours the quiet Comfortable SLEEP sleeping time can not be adjusted.When TIMER function is set,the quiet sleeping function can't be set up.After the sleeping function is set up,if user resets TIMER function, the SLEEP Press...
- Page 9 All manuals and user guides at all-guides.com Operation TURBO Operation Timer On/Off On-Off Operation (This function is unavailable on some models.) 1.After unit starts, select your desired operation mode. TIME 2.Press TIME button to change TIMER mode. Turbo/Quiet Auto TIME Press button "...
- Page 10 All manuals and user guides at all-guides.com Indoor Unit Installation Necessary Tools for Installation Power Source Torque wrench Driver Before inserting power into receptacle, check the voltage without (17mm,22mm,26mm) Nipper fail. Pipe cutter Hacksaw The power supply is the same as the corresponding nameplate. Flaring tool Hole core drill Install an exclusive branch circuit of the power.
- Page 11 All manuals and user guides at all-guides.com Indoor Unit Installation [ Left Left-rear piping ] Fitting of the Mounting Plate and Positioning of the wall Hole In case of left side piping, cut away, with a nipper, the lid for left piping.
- Page 12 All manuals and user guides at all-guides.com When connecting the cable after installing the indoor unit 1. Insert from outside the room cable into left side of the wall Lean Damage of flare Partial Too outside Crack hole, in which the pipe has already existed. 2.
- Page 13 All manuals and user guides at all-guides.com Maintenance For Smart Use of The Air Conditioner Remote Controller Indoor Body Setting of proper room Do not block the air inlet temperature or outlet Proper Wipe the air conditioner by using a soft and temperature dry cloth.For serious stains,use a neutral Do not use water ,wipe the controller with a...
- Page 14 All manuals and user guides at all-guides.com AVERTISSEMENT: Si le cordon d'alimentation est endommagé, il doit être remplacé par le fabricant, son agent de service ou un technicien qualifié afin d'éviter un danger. Cet appareil peut être utilisé par des enfants âgés de 8 ans et plus et des personne ayant des capacités physiques, sensorielles ou mentales réduites, ou qui manquent d’expérience et de connaissances, si elles ont été...
- Page 15 All manuals and user guides at all-guides.com Mises en garde Avertissement Veuillez appeler le magasin de vente/service pour l’installation. Ne pas essayer d'installer le climatiseur vous même, parce que les œuvres inadéquates peuvent provoquer un choc électrique, un incendie, une fuite d'eau. Avertissement Lorsque une anomalie comme un petit brûlé...
- Page 16 All manuals and user guides at all-guides.com Dépannage CONFORMITE DE LA REGLEMENTATION Avant de demander un service, vérifier d’abord la suite. EUROPEENNE POUR LES MODÈLES Phénomène Cause ou points de contrôle Climat: T1 Tension: 230V Lorsque l'unité s'arrête, elle ne Normale système redémarrera pas immédiatement...
- Page 17 All manuals and user guides at all-guides.com Eléments et fonctions Unité intérieure Télécommande 6. Affichage MINUTERIE DESACTIVEE Affichage MINUTERIE ACTIVEE 7. Affichage TEMP 8. Affichage des fonctions supplémentaires 9. Touche TURBO/SILENCIEUX 10. Touche CHAUFFAGE 11. Touche REFROIDISSEMENT 12. Touche BALAYAGE HAUT/BAS 13.
- Page 18 All manuals and user guides at all-guides.com Fon onnement d'urgence et mode de test onnement de base nt d'urg lisez ce mode de fo onnement uniquement en cas de perte ou de défaillance de la télécommande. Lorsque la fo on d'urgence est en marche, le clima r peut onner de manière auto e pendant un moment.
- Page 19 All manuals and user guides at all-guides.com Fonctionnement NOCTURNE tout confort 5. Lorsque la fonction Silencieux est définie sur 8 heures, la durée du mode nocturne silencieux ne peut pas ètre réglée. Une fois la fonction Appuyer sur la touche NOCTURNE, la télécommande affichera MINUTERIE réglée, la fonction Silencieux ne peut pas être configurée.
- Page 20 All manuals and user guides at all-guides.com Fonctionnement Mode TURBO Minuterie Activitée/Désactivée Mode Marche Arrêt (Cette fonction n’est pas disponible sur certains modèles.) Après le démarrage de l’unité, sélectionner le mode de fonctionnement ce que vous voulez. Appuyer sur la touche Minuterie Activée / Minuterie désactivée pour changer le mode MINUTERIE.
- Page 21 All manuals and user guides at all-guides.com Installation de l’unité intérieure Outils nécessaires pour l’installation Source d’alimentation Avant de mettre la prise sous tension, vérifier la tension à coup sûr. • • Pilote Clef dynamométrique L'alimentation est la même que la plaque signalétique •...
- Page 22 All manuals and user guides at all-guides.com Installation de l’unité intérieure 1 Montage de la plaque de montage et positionnement du [Gauche•Tuyauterie arrière gauche] trou de mur En cas de la tuyauterie latérale gauche, couper avec une pince le couvercle de la tuyauterie gauche. Lorsque la plaque de montage est d’abord fixée En case de la tuyauterie arrière gauche, plier les tuyaux selon la direction de la tuyauterie vers la marque du trou pour la...
- Page 23 All manuals and user guides at all-guides.com Lors de la connexion du câble après l'installation de l'unité intérieure 1. Insérer le câble de l'extérieur dans le côté gauche du trou de mur, dans lequel le tuyau a déjà existé. 2. Retirer le câble sur la face avant, et brancher le câble formant une boucle.
- Page 24 All manuals and user guides at all-guides.com Entretien Pour l'utilisation intelligente du climatiseur Réglage température Ne pas obstruer l'entrée ou la sortie Corps intérieur Télécommande ambiante adéquate d'air Essuyer le climatiseur à l'aide d'un chiffon doux et sec. Pour les taches Ne pas utiliser de l'eau, essuyer le graves, utiliser un détergent neutre contrôleur avec un chiffon sec.
- Page 25 All manuals and user guides at all-guides.com ATTENZIONE: -Se il cavo dell’alimentazione è danneggiato, deve essere sostituito da personale del servizio assistenza o comunque da personale qualificato. -Questo apparecchio non può essere utilizzato da minori di età superiore o inferiore agli 8 anni, da persone con ridotte capacità fisiche, sensoriali o mentali o da persone inesperte solo se preventivamente istruite all’utilizzo in sicurezza e solo se informati dei pericoli legati al prodotto stesso.
- Page 26 All manuals and user guides at all-guides.com Attenzione ATTENERSI ALLE SEGUENTI ISTRUZIONI. Per l’installazione, rivolgersi al rivenditore od a un tecnico qualificato. Non tentare di installare da soli il condizionatore d’aria. Eventuali errori di installazione possono causare perdite d’acqua, gas refrigerante,folgorazioni o incendi.
- Page 27 All manuals and user guides at all-guides.com GUIDA ALLA RICERCA DEI GUASTI Prima di rivolgersi al servizio assistenza, effettuare le CONFORMITÀ ALLE DIRETTIVE EUROPEE seguenti verifiche: Clima:T1 Tensione di alimentazione:230V Tutti i prodotti sono in conformità alle seguenti direttive Fenomeni Causa o punti di controllo europee: - Direttiva bassa tensione 2006/95/CEE...
- Page 28 All manuals and user guides at all-guides.com DENOMINAZIONE DEI COMPONENTI Unità interna TELECOMANDO 6. Visualizzazione TIMER disattivato Visualizzazione TIMER attivato 7. Visualizzazione temperatura 8. Visualizzazione funzioni aggiuntive 9.Tasto TURBO/Quiet 10.Tasto HEAT 11.Tasto COOL 12.Tasto SWING UP/DOWN 13.Tasto FAN SPEED 14.Tasto HEALTH Display 15.Tasto SLEEP 16.Tasto LOCK...
- Page 29 All manuals and user guides at all-guides.com Funzionamento Funzionamento di base Temperatura Temperatura Modalità Velocità Modalità ambiente impostata timer ventilatore operativa Superiore a 26 ºC AUTO COOL Telecomando 23 ºC • Non è possibile modificare l’impostazione della temperatura, la velocità della ventola e non è possibile utilizzare la modalità 1.Avvio del climatizzatore Premere il tasto ON/OFF sul telecomando, il Timer o deumidificatore.
- Page 30 All manuals and user guides at all-guides.com FUNZIONAMENTO Velocità ventilatore durante la funzione SLEEP Nel caso in cui, prima dell'impostazione della funzione SLEEP, la Funzione SLEEP velocità del ventilatore sia media o alta, dopo l'impostazione della funzione Premendo il tasto SLEEP prima di andare a dormire, il SLEEP il ventilatore girerà...
- Page 31 All manuals and user guides at all-guides.com Funzionamento Funzionamento TIMER ON/OFF ON-OFF Modalità Turbo (Questa funzione è disponibile solo per alcuni modelli) 1. Avviare l’unità e selezionare la modalità operativa desiderata Il display a cristalli liquidi visualizzerà la modalità operativa impostata.
- Page 32 All manuals and user guides at all-guides.com Installazione dell’unità interna Alimentazione elettrica Strumenti necessari per l'installazione -Prima di inserire la spina di alimentazione nella presa di corrente, si raccomanda di controllarne il corretto voltaggio. • • Caccia vite Chiavi dinamom etriche -La tensione di alimentazione deve corrispondere a quanto •...
- Page 33 All manuals and user guides at all-guides.com Installazione dell’unità interna Uscita sinistra e sinistra-posteriore -In caso di uscita delle tubazioni a sinistra dell'unità interna, FISSAGGIO DELLA DIMA DI MONTAGGIO e tagliare con un utensile il tappo pre-in ciso per l'uscita a sinistra. OSIZIONAMENTO DEL FORO NELLA PARETE -In caso di uscita sinistra-posteriore, piegare i tubi verso il foro segnato sul materiale termoisolante:...
- Page 34 All manuals and user guides at all-guides.com Collegamento del cavo dopo aver installato l'unità interna • Inserire il cavo dall'esterno, dalla parte sinistra del foro nella parete, in cui erano già state inserite le tubazioni refrigerante. • Tirare fuori il cavo dalla parte anteriore dell'unità interna e ollegare il cavo lasciando un po’...
- Page 35 All manuals and user guides at all-guides.com anutenzione Per un uso corrett del climatizzatore Impostare la temperatura ambiente Non collocare ostacoli davanti alle Pulizia del telecomand Pulizia dell'unità int erna in modo adeguato griglie di aspirazione e di uscita aria Pulire l'apparecchio con un panno morbido e asciutto.In caso di macchie persistenti, pulire l'apparecchio con detergenteneutro.
- Page 36 All manuals and user guides at all-guides.com PRECAUCIONES: Si el cable de alimentación está dañado deberá ser reemplazado por el fabricante, agente de servicio o persona cualificada similar. Este aparato no puede ser utilizado por niños de 8 años de edad y personas con facultades físicas, sensoriales o mentales reducidas, o con falta de experiencia y conocimiento si se les ha dado supervisión o instrucción acerca del uso del aparato un modo seguro y entienden los peligros involucrados.
- Page 37 All manuals and user guides at all-guides.com Precauciones ADVERTENCIA Llame al Departamento de Asistencia Técnica si desea obtener más información acerca de la Instalación. No intente instalar este aparato de aire acondicionado personalmente debido a que una instalación incorrecta podría provocar descargas eléctricas, incendios o fugas de agua. ADVERTENCIA Si aprecia alguna anomalías, como una pequeña Utilice una fuente de...
- Page 38 All manuals and user guides at all-guides.com Resolución de problemas Antes de solicitar asistencia técnica, compruebe los CONFORMIDAD DE LOS MODELOS SEGÚN LAS siguientes puntos. NORMATIVAS EUROPEAS Clima: T1 Tensión: 230V Problema Causa o puntos a comprobar Inspecci El sistema no se Cuando se detiene la unidad, ésta Todos los productos satisfacen los requisitos de las siguientes normas ón...
- Page 39 All manuals and user guides at all-guides.com Componentes y Funciones Unidad Interior Mando a distancia 6. Indicador de TEMPORIZADOR DE APAGADO Indicador de TEMPORIZADOR DE ENCENDIDO 7. Indicador de TEMPERATURA 8. Indicador de funciones adicionales 9.Botón TURBO/Silencioso 10. Botón CALOR 11.
- Page 40 All manuals and user guides at all-guides.com Funcionamiento Funcionamiento en modo de emergencia y en Funcionamiento Base modo de prueba Funcionamiento en modo de Emergencia: Utilice este modo de funcionamiento si el mando a distancia no funciona o se pierde. En el modo de emergencia, la unidad de aire acondicionado puede funcionar automáticamente durante un tiempo.
- Page 41 All manuals and user guides at all-guides.com Funcionamiento 5. Cuando la función silenciosa de sueño está establecida en 8 SUEÑO confortable horas, no es posible ajustar el tiempo silencioso de sueño. Si se configure la función TEMPORIZADOR, la función SUEÑO no se Pulse el botón SUEÑO , el mando a distancia mostrará...
- Page 42 All manuals and user guides at all-guides.com Funcionamiento Funcionamiento en modo TURBO Funcionamiento en modo Temporizador de (Esta función está disponible en algunos modelos.) Encendido/Apagado 1. Después de que se inicie la unidad, seleccione el modo de funcionamiento que desee. 2.
- Page 43 All manuals and user guides at all-guides.com Instalación de la Unidad Interior Fuente de alimentación Herramientas Necesarias para Instalación • Antes de insertar la alimentación en toma de corriente, mpruebe el voltaje sin fallo. • • • Destornillador Llave dinamométrica La alimentación es la misma que marca la placa de •...
- Page 44 All manuals and user guides at all-guides.com Instalación de la Unidad Interior [Entubado izquierdo y trasero izquierdo] En caso de entubado izquierdo, corte, con una pinza, la tapa 1 Instalación de la Placa de Montaje y para entubado izquierdo. Posicionamiento del Orificio de Pared En caso de entubado trasero izquierdo, doble los tubos según la dirección de entubado hasta la marca del orificio para Cuando se fija la placa de montaje por primera vez...
- Page 45 All manuals and user guides at all-guides.com Cuando se conecta el cable tras instalar la unidad interio 1. Inserte, desde el exterior de la sala, el cable en el lado izquierdo del orificio de pared, donde el tubo ya existe. 2.
- Page 46 All manuals and user guides at all-guides.com Mantenimiento Para Utilizar el Aire Acondicionado de Forma Inteligente Configure la temperatura de la sala No bloquee la entrada o salida de aire. Cuerpo Interior Mando a Distancia adecuada. Limpie el aire acondicionado con un trapo suave y seco.
- Page 47 All manuals and user guides at all-guides.com WARNUNG: Wenn die Netzleitung beschädigt ist, muss sie durch den Hersteller, seinen Kundendienst oder eine andere Fachkraft mit ähnlicher Fähigkeit ersetzt werden, damit die Gefahr vermieden werden kann. Dieses Gerät kann von 8 jährigen oder älteren Kindern und Personen mit eingeschränkten physischen, sensoriellen oder mentalen Fähigkeiten oder mangels Erfahrungen und Wissen verwendet werden, wenn sie eine Anleitung zum Gebrauch dieses Gerätes auf einer sicheren Weise gegeben werden, und die darin bergenden Gefahren kennen.
- Page 48 All manuals and user guides at all-guides.com Vorsicht WARNUNG Telefonieren Sie zur Installation mit dem Verkaufs-und Serviceladen. Installieren Sie die Klimaanlage bitte nicht selbst, sonst passieren sehr wahrscheinlich Stromschlag, Brand und das Auslaufen vom Wasser. WARNUNG Schalten Sie beim ungewöhnlichen Phänomen Überprüfen Sie die ordnungsgemäße Installation Verwenden Sie bitte gerade den Druckknopf ab und kommunizieren Sie...
- Page 49 All manuals and user guides at all-guides.com Fehlersuche Überprüfen Sie zuerst die Folgenden, bevor Sie sich für Service EUROPÄISCHE BESTIMMUNGEN DEN MODELLEN ENDSPRECHEND melden. Klima:TI Stromspannung:230V Phänomen Ursache oder Überprüfenspunkte Das System kann Wenn das Gerät gestoppt wird, Alle produnkte beachten folgenden europäischen...
- Page 50 All manuals and user guides at all-guides.com Teile und Funktionen Gerät im Haus Fernbedienung 6. Zeitmesser OFF-Anzeige Zeitmesser ON-Anzeige 7. Temperatur- Anzeige 8. Zusätzliche Funktionen-Anzeige 9. TURBOMOTOR/Ruhig Druckknopf 10.Heizungsdruckknopf 11.Kühlungsdruckknopf 12.Wiegen oben/unten Druckknopf 13.Fansgeschwindigkeit Druckknopf 14.Gesundheitsdruckknopf 15.Ausruhensdruckknopf 16.Schlossdruckknopf 17.Lichtsdruckknopf Kontrollieren Sie bitte das Gläntzen Auslöschen LED- Anzeigetafel im Haus.
- Page 51 All manuals and user guides at all-guides.com Bedienung Notfall-betrieb und Testbetrieb Grundlegende Bedienung Notfall-Betrieb: Verwenden Sie diesen Betieb, nur wenn die Fernbedienung defekt oder verloren ist. Und mit dieser Funktion kann die Klimaanlage automaisch noch für einige Zeit laufen. Wenn der Notfall-Betriebsschalter gedrückt wird, können Sie den Ton “Pi”...
- Page 52 All manuals and user guides at all-guides.com Durchführung Betriebsart“Ruhemodus” 5.Wenn die LEISE-Funktion auf acht Stunden eingestellt ist, kann die Zeit für den Ruhemodus nicht eingestellt werden. Bei eingestelltem Timer kann der Ruhemodus nicht eingestellt Drücken Sie den Schalter NOCTURNE, dann wird die werden.
- Page 53 All manuals and user guides at all-guides.com Durchführung TURBO Betrieb Schaluhr Ein/Aus Ein/Aus Betrieb (Diese Funktion ist nicht verfügbar für manche Modelle.) 1. Nach dem Start von Einheit, können Sie Ihren gewünschten Modus wählen. 2. Drücken Sie die Tasten Minuterie Activée / Minuterie désactivée , den Modus von SCHALUHR zu wechseln.
- Page 54 All manuals and user guides at all-guides.com Installation von Innengerät Stromquelle Erforderliche Werkzeuge für Installation Bevor Sie den Strom in den Behälter einfügen, überprüfen Sie die Stromspannung, • • Driver Schraubenschlüssel für Die Stromversorgung ist gleich wie das entsprechende • Kneifzange all (17mm, 22mm, 26mm) Namenschild.
- Page 55 All manuals and user guides at all-guides.com Installation von Innengerät 1 die Montageplatte einbauen und das Loch an der [Links Hinter links Leitung] Wand positionieren Für links seitliche Leitung schneiden Sie mit einer Kneifzange den Deckel für linke Leitung ab. Wenn die Montageplatte zuerst fixiert wird Für die hinter links Leitung verbiegen Sie die Leitungen nach der Leitungsrichtungen zur Markierung von Loch für hinter links...
- Page 56 All manuals and user guides at all-guides.com Wenn Sie das Kabel nach der Installation von Innengerät verbinden 1.Fügen Sie das Kabel außer dem Zimmer in der linken Seite von Wandloch ein, wo die Leitungen schon existiert haben. 2.Ziehen Sie das Kabel von der Vorderseite und verbinden Sie das Kabel, eine Schleife zu machen.
- Page 57 All manuals and user guides at all-guides.com Instandhaltung Für Smart-Betrieb von Klimagerät Einstellung passenden Blockieren Sie nicht Einlass und Innengerät Fernbedienung Zimmertemperatur Auslass der Luft Putzen Sie das Klimagerät mit einem soften trockenen Tuch. Für schwerwiegende Flecke benutzen Sie Putzen Sie bitte die Fernbedienung ein neutrales Reinigungsmittel, das nicht mit Wasser, sondern einem mit Wasser verdünnet wird.
- Page 58 All manuals and user guides at all-guides.com OSTRZE ENIE: Je eli przewód zasilaj cy ulegnie uszkodzeniu, w celu unikni cia zagro enia powinien zosta wymieniony przez producenta, autoryzowany serwis lub wykwalifikowan osob . Dzieci w wieku powy ej 3 lat, osoby o obni onej sprawno ci fizycznej, sensorycznej lub umys owej, a tak e osoby bez odpowiedniej wiedzy i do wiadczenia, mog korzysta z tego urz dzenia wy cznie pod nadzorem lub po uzyskaniu wskazówek dotycz cych u ytkowania urz dzenia w sposób bezpieczny i zwi zanych z tym potencjalnych zagro e .
- Page 59 All manuals and user guides at all-guides.com rodki ostro no ci OSTRZE ENIE Monta urz dzenia nale y zleci sprzedawcy lub serwisowi. Zabrania si samodzielnego monta u klimatyzatora, gdy grozi to pora eniem pr dem, po arem lub wyciekiem wody. OSTRZE ENIE W sytuacji wyst pienia nieprawid owo ci, takich jak Urz dzenie powinno...
- Page 60 All manuals and user guides at all-guides.com Wykrywanie i usuwanie usterek ZGODNO MODELI Przed skontaktowaniem si z serwisem nale y Z NORMAMI UNII EUROPEJSKIEJ sprawdzi poni sz list . Klimat: T1 Napi cie: 230V Problem Przyczyna lub punkty kontrolne Wszystkie produkty s zgodne z nast puj cymi przepisami Ze wzgl dów bezpiecze - Kontrola...
- Page 61 All manuals and user guides at all-guides.com ci i funkcje Pilot zdalnego sterowania ci i funkcje 6. Lampka wy czenia zegara TIMER OFF Lampka w czenia zegara TIMER ON 7. Lampka temperatury TEMP 8. Lampka dodatkowych funkcji 9. Przycisk TURBO/QUIET 10.
- Page 62 All manuals and user guides at all-guides.com Dzia anie Tryb awaryjny i testowy Dzia anie podstawowe Tryb awaryjny: Trybu tego nale y u ywa wy cznie w sytuacji nieprawid owego dzia ania pilota lub jego zagubienia; w trybie awaryjnym klimatyzator mo e dzia a automatycznie przez jaki czas.
- Page 63 All manuals and user guides at all-guides.com Tryb pracy 5. Je eli tryb spokojnego snu jest ustawiony na 8 godzin, nie Tryb komfortowego snu (SLEEP) mo na regulowa czasu dzia ania w tym trybie. Podczas pracy w trybie zegara TIMER, nie mo na aktywowa funkcji spokojnego Wcisn przycisk ;...
- Page 64 All manuals and user guides at all-guides.com Tryb pracy Tryb TURBO W czanie/wy czanie trybu zegara TIMER (W niektórych modelach funkcja ta jest niedost pna). 1. Po uruchomieniu urz dzenia nale y wybra tryb pracy. 2. Wcisn przycisk zegara TIMER , aby zmieni ustawienia zegara.
- Page 65 All manuals and user guides at all-guides.com Monta jednostki wewn trznej Narz dzia niezb dne do monta u ród o zasilania • • Wkr tarka Klucz dynamometryczny Przed pod czeniem urz dzenia do ród a zasilania, nale y • Obc gi (17 mm, 22 mm, 26 mm) sprawdzi napi cie.
- Page 66 All manuals and user guides at all-guides.com Monta jednostki wewn trznej [ Ruroci g lewostronny • z ty u po lewej stronie ] Mocowanie p yty monta owej i ustalenie miejsca na otwór w W przypadku lewostronnego monta u ruroci gu, za pomoc cianie obc gów odci za lepk odpowiedni do monta u...
- Page 67 All manuals and user guides at all-guides.com Pod czenie kabla po zamontowaniu jednostki wewn trznej 1.Z zewn trznej strony pomieszczenia umie ci kabel po lewej stronie otworu w cianie, w którym ju znajduje si rura. 2.Wyci gn kabel z przodu i pod czy go, tworz c p tl . Pod czenie kabla przed...
- Page 68 All manuals and user guides at all-guides.com Konserwacja urz dzenia Inteligentne u ytkowanie klimatyzatora Nastawianie odpowiedniej Swobodny dop yw i wylot powietrza Obudowa Pilot zdalnego temperatury w pomieszczeniu sterowania Klimatyzator przetrze mi kk i such cierk . Powa ne plamy usuwa naturalnie dzia aj cym detergentem Nie u ywa...
- Page 69 All manuals and user guides at all-guides.com...
- Page 70 All manuals and user guides at all-guides.com...
- Page 71 All manuals and user guides at all-guides.com...
- Page 72 All manuals and user guides at all-guides.com...
- Page 73 All manuals and user guides at all-guides.com COOL/DRY: HEAT:...
- Page 74 All manuals and user guides at all-guides.com...
- Page 75 All manuals and user guides at all-guides.com...
- Page 76 All manuals and user guides at all-guides.com...
- Page 77 All manuals and user guides at all-guides.com...
- Page 78 All manuals and user guides at all-guides.com...
- Page 79 All manuals and user guides at all-guides.com...
- Page 80 All manuals and user guides at all-guides.com 07R F. 3 mm. . 3.15A / 250V. T.25A/250V : D.B/W.B 32°C/23°C : D.B/W.B 21°C/15°C : D.B/W.B 43°C/26°C : D.B 18°C : D.B 27°C WiFi : D.B 15°C WiFi. : D.B/W.B 24°C/18°C : D.B/W.B -7°C/-8°C : D.B/W.B 24°C/18°C (INVERTER) : D.B -15°C...
- Page 81 All manuals and user guides at all-guides.com...
- Page 82 All manuals and user guides at all-guides.com Climate : T1 Voltage: 230V 2006/95/EC 2004/108/EC ROHS 2011/65/ RoHS ) swishing WEEE 2012/19/EU COOL DRY. DRY, +2 C, :R410A GWP*:1975 GWP= (global warming potential) ( . .
- Page 83 All manuals and user guides at all-guides.com 6. TIMER OFF TIMER ON 7. TEMP TURBO/ QUIET HEAT COOL SWING UP/DOWN HEALTH TIMER SLEEP LOCK LIGHT POWER ON/OFF TEMP SWING LEFT/RIGHT EXTRA – 10°C – – CANCEL/CONFIRM 3. SWING FAN SPEED RESET...
- Page 84 All manuals and user guides at all-guides.com "Pi" Timer ON/OFF temp.se ng AUTO COOL TEMP+/TEMP AUTO HEAT TEMP+ temp.s (DRY). TEMP 3. L 16oC, EXTRA FONCTION "Pi" CONFIRMER/ANNULER "Hi". (FAN) AUTO COOL/DRY: HEAT: COOL DRY, +2 C, HEAT HEAT, AUTO COOL FAN, COOL...
- Page 85 All manuals and user guides at all-guides.com NOCTURNE, TIMER TIMER, NOCTURNE, la fonction nocturne sera annulée. COOL, DRY SLEEP, TIMER, TIMER, HEAT SLEEP, EXTRA FONCTION CONFIRMER/ANNULER AUTO SLEEP SLEEP. (DRY)
- Page 86 All manuals and user guides at all-guides.com Minuterie Activée / Minuterie désactivée TIMER. Minuterie Activée «ON 0.5» «ON 0.5» «OFF 0.5» Minuterie Désactivée, TIMER ( TIMER ON TIMER OFF. « » « ». Minuterie Activée / Minuterie désactivée CONFIRMER/ANNULER CONFIRMER/ANNULER, TIMER ON TIMER OFF, R 03 “+”/ “...
- Page 87 All manuals and user guides at all-guides.com • • • , 26 • • • • • • (17,19 • • • R 03 04 25 ) (1) 09K 12K ø 6.35x0.8mm ø 9.52x0.8mm ø 6.35x0.8mm ø 12.7x0.8mm ø 9.52x0.8mm ø...
- Page 88 All manuals and user guides at all-guides.com , “ “, 70 mm,...
- Page 89 All manuals and user guides at all-guides.com Indoor unit To Outdoor unit 4G0,75mm² · · H05RN F H07RN F. EEPROM EEPROM· T.3.15A/250VAC ( EEPROM· · · · PCB. R410A 0 0.5mm 1.0 1.5mm 0 0.5mm...
- Page 90 All manuals and user guides at all-guides.com 40 C, "FRONT" stopper.
- Page 91 All manuals and user guides at all-guides.com UPOZORENJE: Ako je priklju ni kabel ošte en, mora ga zamijeniti proizvo a ili ovlašteni servis ili sli na kvalificirana osoba. Ovaj proizvod mogu koristiti djeca u starosti od 8 godina i više, kao i osobe smanjenih fizi kih, osjetnih ili mentalnih sposobnosti ili osobe nedovoljnog iskustva i znanja ako im se osigura nadzor ili upute za sigurno korištenje proizvoda i razumiju s time povezane opasnosti.
- Page 92 All manuals and user guides at all-guides.com Upozorenja POZOR Molimo za ugradnju se javite ovlaštenom servisu. Nemojte pokušavati instalirati klima ure aj sami jer bi nepravilno izvo enje radova moglo uzrokovati strujni udar, požar i istjecanje vode. POZOR Kad se jave nepravilnosti u radu kao što su kratki Za ure aj osigurati Provjerite je li odvodno crijevo pravilno spojevi, isklju ite ure aj i javite se servisu.
- Page 93 All manuals and user guides at all-guides.com Rješavanje poteško a Prije nego se obratite servisu, provjerite prvo SUKLADNOST MODELA sljede e: S PROPISIMA EUROPSKE UNIJE Klima: T1 Napon: 230V Pojava Uzroci ili kriteriji provjere Kad je ure aj zaustavljen, ne e se Ponovno Svi proizvodi su sukladni s odredbama sljede ih propisa EU: ponovno pokrenuti dok ne pro u 3...
- Page 94 All manuals and user guides at all-guides.com Dijelovi i funkcije Unutarnja jedinica Daljinski upravlja 6. Prikaz isklju enosti timera Filter za pro iš avanje zraka Prikaz uklju enosti timera 7. Indikator temperature 8. Prikaz dodatnih funkcija TURBO/QUIET tipka HEAT tipka COOL tipka SWING UP/DOWN tipka FAN SPEED tipka...
- Page 95 All manuals and user guides at all-guides.com Rad ure aja Osnovne operacije Rad u slu aju i testiranje U slu aju nu Ovaj na in samo u slu aju upravlja zagubili ili spravan. U ovoj funkciji automatski. pritisnut u slu aju an zvu ni signal ("pi"), što ozna ava zapo...
- Page 96 All manuals and user guides at all-guides.com Rad ure aja 5.Kad je QUIET (tihi) na in rada uz SLEEP na in rada podešen Ugodan san na 8 sati, vrijeme spavanja se ne može podešavati.Kad je uklju en TIMER, funkcija tihog spavanja može Nakon pritiska na tipku...
- Page 97 All manuals and user guides at all-guides.com Rad ure aja TURBO na in TIMER na in rada (Ova funkcija nije dostupna na nekim modelima.) 1. Nakon po etka rada jedinice odaberite željeni na in rada. 2. Pritiskom tipke promijenite TIMER na in rada.
- Page 98 All manuals and user guides at all-guides.com Ugradnja unutarnje jedinice Izvor napajanja Prije nego priklju ite ure aj, obvezno morate provjeriti napon Alati potrebni za ugradnju Izvor elektri ne energije mora odgovarati onome koji je naveden na natpisnoj plo ici. Ugradite zaseban krak elektri ne instalacije za napajanje ovog •...
- Page 99 All manuals and user guides at all-guides.com Ugradnja unutarnje jedinice [Lijevo - Lijevo-stražnji cjevovoda] U slu aju cijevi s lijeve strane, izraditi kliještima otvor u poklopcu 1 Postavljanje montažne plo e i odre ivanje mjesta za njih. za bušenje zida U slu aju stražnjih lijevih cijevi, savijte cijevi prema otvoru za njih koji je ozna en na materijalima za toplinsku izolaciju.
- Page 100 All manuals and user guides at all-guides.com Prilikom spajanja kabela nakon instalacije unutarnje jedinice 1.Provucite kabel izvana kroz lijevu stranu otvora u zidu u kojem je ve montirana cijev. 2.Izvucite kabel na prednju stranu i spojite kabel ine i petlju. Prilikom spajanja kabela prije ugradnje unutarnje jedinice Odvodnja...
- Page 101 All manuals and user guides at all-guides.com Održavanje Za pametno kori štenje klima ure aja Ne stavljajte predmete u dijelove za Tijelo unutarnje jedinice Postavite odgovaraju u temperaturu Daljinski upravlja ispuh ili usis zraka. Obrišite klima ure aj mekom i suhom krpom. Ne koristite vodu, obrišite daljinski upravlja Za teža one iš...
- Page 102 All manuals and user guides at all-guides.com AVISO: Se o fio de fornecimento é avariado, o qual deve ser substituido por fabricante, o seu agente de serviço ou pessoa qualificada similária para evitar uma ferida. Este aparelho pode ser usado por crianças de 8 anos e mais e as pessoas com as capacidades fisicais reduzidas, sensorias ou mentais ou falta de experiência e conhecimento se eles foram dados supervisão ou instrução respeito a uso de aparelho numa maneira segura e saber os prejuízos envolvidos.
- Page 103 All manuals and user guides at all-guides.com Cauções AVISO Favor chame Vendas/Loja de Serviço para a Instalação. Não tente instalar o ar condicionado por si próprio, porque os trabalhos impróprios podem causar o choque eléctrico, fogo, vazamento de água. AVISO Quando anormalidade tal como queimado-cheiro Use um recurso de Verifique a instalação apropriada de drenagem...
- Page 104 All manuals and user guides at all-guides.com Solução de problemas Antes de perguntar para o serviço, verifique o REGULAÇÕES EUROPEIAS seguinte primeiro. CONFORMIDADE PARA OS MODELOS Clima: T1 Voltagem: 230V Fenômeno Causa ou pontos de verificção Todos os produtos são na conformidade com a provisão Inspecç...
- Page 105 All manuals and user guides at all-guides.com Partes e Funções Unidade Interior Controlador remoto 6.TEMPORIZADOR DESLIGAR display TEMPORIZADOR LIGAR display 7. TEMPERATURA display 8. Funções adicionais display 9. TURBO / Silêncio tecla 10. AQUECIMENTO tecla 11. FRESCO tecla 12. BALANÇAR CIMA/BAIXO tecla 13.VELOCIDADE DE VENTILADOR tecla...
- Page 106 All manuals and user guides at all-guides.com Operação Operação de emergência e operação de teste Operação de Base Operação de Emergência: Use esta operação apenas quando o controlador remoto é defectivo ou perdido, e com a função de emergência rodando, o ar condicionado pode rodar automaticamente por um tempo.
- Page 107 All manuals and user guides at all-guides.com Operação 5.Quando a função de dormir silenciosa é ajustada para 8 horas, DORMIR Confortável o tempo de dormir silencioso não pode ser ajustado. Quando a função de TEMPORIZADOR é ajustada, a função de dormir silenciosa não pode ser ajustada.
- Page 108 All manuals and user guides at all-guides.com Operação Opeação de TURBO Temporizador Ligar/Desligar Opeação Ligar-Desligar (Esta função é indisponível em alguns modelos.) 1.Depois de iniciar a unidade, seleccione o seu modo de operação desejo. 2.Clique tecla para mudar modo TEMPORIZADOR. Clique a tecla vai aparecer, depois de 10 segundos, o Quando você...
- Page 109 All manuals and user guides at all-guides.com Instalação de Unidade Interior Recurso de Potência Ferramentas Necessárias para Instalação Antes de inserir a potência no receptáculo, verifique a voltagem sem falha. • • Driver Chave inglesa de torque O fornecimento de potência é mesmo com a etiqueta •...
- Page 110 All manuals and user guides at all-guides.com Instalação de Unidade Interior [Esquerda ·Esquerda – traseiro tubo] No caso de tubo de lado esquerda, corte, com uma pinça, e a 1 Apropriado à Placa de Montagem e Posição de tampa para o tubo esquerda. Furo de Parede No caso de tubo esquerda-traseiro, dobre os tubos segundo a direcção de tubo para a marca de furo para o tubo...
- Page 111 All manuals and user guides at all-guides.com Quando está a ligar o cabo depois de instalar a unidade interior 1.Insera de lado exterior o cabo de quarto no lado esquerda de furo de parede, em que o tubo já existe. 2.Puxe o cabo no lado dianteiro, e ligeu o cabo marcando um loop.
- Page 112 All manuals and user guides at all-guides.com Manutenção Para Uso Esperto de Ar Condicionado Ajuste de temperatura de quarto Não bloquea a entrada nem saída do Corpo Interior Controlador remoto apropriada Limpe o ar condicionado por usar um tecido suave e seco. Para as manchas sérias, use Não use água, limpe o controlador com um um detergente neutral diluído com água.
- Page 113 All manuals and user guides at all-guides.com H07RN-F. T.3.15A/250V. T.25A/250V. 1. 1. : D.B/W.B 32°C/23°C : D.B/W.B 21°C/15°C : D.B/W.B 43°C/26°C : D.B 18°C WiFi : D.B 27°C WiFi : D.B 15°C : D.B/W.B 24°C/18°C : D.B/W.B -7°C/-8°C : D.B/W.B 24°C/18°C : D.B -15°C...
- Page 114 All manuals and user guides at all-guides.com...
- Page 115 All manuals and user guides at all-guides.com : 230 V 2006/95/ 2004/108/ 2011/65/ RoHS 2012/19/ +2° , : R410A GWP* : 1975 GWP= 1 + 2...
- Page 116 All manuals and user guides at all-guides.com TURBO/Quiet HEAT COOL SWING UP/DOWN FAN SPEED HEALTH SLEEP LOCK LIGHT Auto POWER ON/OFF 1 – 2 – TEMP 3 – SWING LEFT/RIGHT ( 4 – TIMER OFF/ON 5 – EXTRA FUNCTION 3. SWING FAN SPEED LOCK TIMER OFF...
- Page 117 All manuals and user guides at all-guides.com „ “ ON/OFF TEMP+/TEMP- TEMP+ 1° ; 23° 26° AUTO COOL TEMP- 1° ; 16° ; „ “ „Hi”. AUTO AUTO COOL/DRY: HEAT: COOL +2° , HEAT...
- Page 118 All manuals and user guides at all-guides.com SLEEP TIMER ( TIMER ( TIMER ( COOL, DRY ( TIMER ( SLEEP, 1° 1° . HEAT ( SLEEP, 2° 2° . 1° . AUTO ( FAN ( SLEEP (...
- Page 119 All manuals and user guides at all-guides.com TURBO ( TIMER ( Turbo ( Quiet TIMER ( Turbo Quiet. (TIMER ON TIMER OFF). ”ON” ”OFF”. Turbo, Quiet, . 2 R-03 „+“ / „-„ TIMER TIMER OFF, HEALTH ( HEALTH, HEALTH...
- Page 120 All manuals and user guides at all-guides.com • • • , 22 , 26 • • • • • • • (17,19 • • R-03 Ø4 25 ) (1) 09 12 Ø 6,35 0,8 Ø 9,52 0,8 Ø 6,35 0,8 Ø...
- Page 121 All manuals and user guides at all-guides.com „ “...
- Page 122 All manuals and user guides at all-guides.com 4G0,75mm² PCB; H05RN H07RN-F. EEPROM EEPROM T.3.15A/250VAC ( EEPROM; PCB; PCB; R410A 0-0.5 1.0-1.5 0-0.5...
- Page 123 All manuals and user guides at all-guides.com 40°C (104°F) “FRONT”...