Publicité

Les langues disponibles

Les langues disponibles

Liens rapides

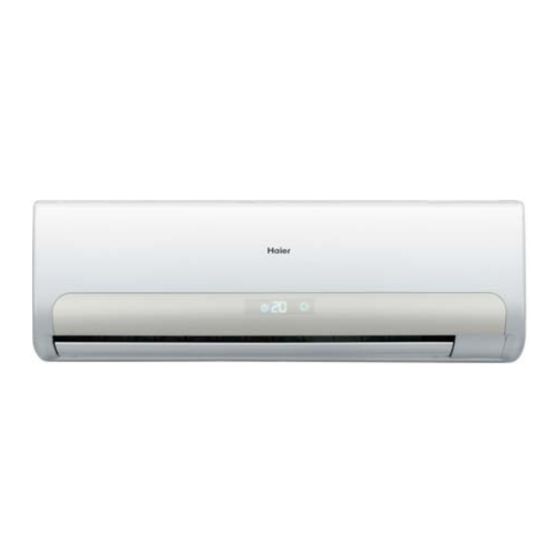
SPLIT TYPE ROOM AIR CONDITIONER
OPERATION MANUAL
AS07GS2ERA
AS09GS2ERA
AS12GS2ERA
AS18GS2ERA
AS24GS2ERA
Please read this operation manual before using the air conditioner.
Keep this operation manual for future reference.
0010535381
Contents
Contenido
PARTES Y FUNCIONES
Indice

Table des matières

ÉLÉMENTS ET FONCTIONS
ENTRETIEN
1
2
5
8
9
10
11
12
15
18
19
20
21
22
25
28
29
30
31
32
35
38
39
40

Publicité

Table des Matières
loading

Sommaire des Matières pour Haier AS07GS2ERA

  • Page 1: Table Des Matières

    Contents PARTS AND FUNCTIONS OPERATION INDOOR UNIT INSTALLAION MAINTENANCE CAUTIONS TROUBLE SHOOTING Contenido PARTES Y FUNCIONES FUNCIONAMIENTO INSTALACIÓN DE LA UNIDAD INTERIOR AS07GS2ERA MANTENIMIENTO PRECAUCIONES AS09GS2ERA RESOLUCIÓN DE PROBLEMAS AS12GS2ERA AS18GS2ERA Indice AS24GS2ERA PARTI E FUNZIONI FUNZIONAMENTO INSTALLAZIONE UNITÀ INTERNA...
  • Page 3: Parts And Functions

    Parts and Functions Indoor Unit Remote controller Additional functions display Supplemented electrical Operat on mode QUITE SLEEP HEALTH POWER heating Inlet Air Purifying Filter Remote controller (inside) 9. QUIET button 10. HEAT button 11. COOL button Inlet grille 12. AUTO button 13.
  • Page 4: Operation

    Operation Base Operation Emergency operation and test operation Emergency Operation: Use this operation only when the remote controller is defective or lost, and with function of emergency running, air conditoner Remote controller can run automatically for a while. When the emergency operation switch is pressed, the " Pi " sound is heard once, which means the start of this operation.
  • Page 5: Sleep Operation

    Operation Sleep Operation 4. In FAN mode It has no SLEEP function. Press button to enter additional options, when 5.Set the wind speed change when sleeping cycle display to will flash. And then press If the wind speed is high or middle before setting for the enter to sleep function.
  • Page 6: Disposal Requirements

    EUROPEAN REGULATIONS Operation CONFORMITY FOR THE MODELS Timer On/Off On-Off Operation All the products are in conformity with the following European provision: 1.After unit starts, select your desired operation mode. - Low Voltage Directive 73/23/EEC 2.Press TIMER button to change TIMER mode. Every - Low Voltage Directive 2006/95/EC time the button is pressed, display changes as follows: -Electomagnetic CompatibilitY 89/336/EEC...
  • Page 7: Indoor Unit Installaion

    Indoor Unit Installaion Necessary Tools for Installation Power Source Torque wrench Driver Before inserting power into receptacle, check the voltage without (17mm,22mm,26mm) Nipper fail. Pipe cutter Hacksaw The power supply is the same as the corresponding nameplate. Flaring tool Hole core drill Install an exclusive branch circuit of the power.
  • Page 8: Indoor Unit Installation

    Indoor Unit Installation · [ Left Left-rear piping ] Fitting of the Mounting Plate and Positioning of the wall Hole In case of left side piping, cut away, with a nipper, the lid for left piping. In case of left rear piping, bend the pipes according to the piping When the mounting plate is first fixed direction to the mark of hole for left rear piping which is marked on heat insulation materials.
  • Page 9 If wiring is not correct, proper operation can not be carried out and will cause defect. Indoor fan m otor F aulty connector connection; m alfunction F aulty therm istor; H eat exc hange AS07GS2ERA F aulty P C B ; Model AS18GS2ERA AS24GS2ERA AS09GS2ERA sensor failure AS12GS2ERA F aulty E E P R O M data;...
  • Page 10: Maintenance

    Maintenance For Smart Use of The Air Conditioner Remote Controller Indoor Body Setting of proper room Do not block the air inlet temperature or outlet Proper wipe the air conditioner by using a temperature soft and dry cloth.For serious stains, use a neutral detergent diluted with Do not usewater,wipe the controller water.Wring the water out of the...
  • Page 11: Cautions

    Cautions WARNING Please call Sales/Service Shop for the Installation. Do not attempt to install the air conditioner by yourself because improper works may cause electric shock, fire, water leakage. WARNING Check proper When abnormality such as burnt-small found, Use an exclusive immediately stop the operation button and power source installation of the...
  • Page 12: Trouble Shooting

    Is there any direct sunlight through the window during the cooling operation?(Use curtain) Are there too much heat sources or too many people in the room during cooling operation? Haier Group Address:No.1 Haier Road,Hi-tech Zone,Qingdao 266101 P.R.China Contacts: TEL +86-532-8893-6943;FAX +86-532-8893-1010 Website: www.haier.com...
  • Page 13: Componentes Y Funciones

    Componentes y funciones Unidad interior Mando a distancia 8. Indicador de funciones adicionales Filtro purificador de aire Toma de entrada Modo de Ayuda con calor S LENCIO SUELO SALUDABLE INTENSO (interior) funcionamiento eléctrico Mando a distancia 9. Botón SILENCIO 10. Botón CALOR Rejilla de 11.
  • Page 14: Funcionamiento

    Funcionamiento Funcionamiento en modo de Funcionamiento básico emergencia en modo de prueba Funcionamiento de emergencia: Mando a distancia Utilice esta operación únicamente cuando el mando a distancia esté defectuoso o se haya perdido. Si la función de emergencia está en funcionamiento, el acondicionador de aire podrá funcionar automáticamente durante un tiempo.
  • Page 15 Funcionamiento Funcionamiento en modo Sueño 3. En el modo AUTO La unidad funcionará en el modo de sueño Pulse el botón para acceder a opciones adicionales. correspondiente, adaptado al modo de funcionamiento Cuando la secuencie muestre parpadeará. Y, a seleccionado automáticamente. continuación, pulse para entrar en la función Sueño.
  • Page 16 CONFORMIDAD DE LOS MODELOS Funcionamiento SEGÚN LAS NORMATIVAS EUROPEAS Uso del temporizador de encendido/ Todos los productos satisfacen los requisitos de las apagado siguientes normas europeas: 1. Una vez que la unidad se encuentre en marcha, seleccione el modo - Directiva de baja tensión, 73/23/CEE de funcionamiento que desee.
  • Page 17: Instalación De La Unidad Interior

    Instalación de la unidad interior Herramientas necesarias para realizar la instalación Fuente de alimentación Antes de insertar el enchufe de alimentación en la toma, Destornillador Llave dinamométrica compruebe que el voltaje no falla. (17 mm, 22 mm, 26 mm) Alicate La fuente de alimentación es la que figura en la placa de Sierra para metales Cortatubos...
  • Page 18 Instalación de la unidad interior [Izquierda · Entubación trasera izquierda] Instalar la placa de montaje y ubicar el orificio en la pared ● En caso de realizar la entubación por el lado izquierdo, corte con una cuchilla la cubierta de la entubación izquierda. ●...
  • Page 19 Correcto Incorrecto Al conectar el cable después de instalar la unidad de interior 1. Inserte desde fuera el cable en la sala a través del lado izquierdo del orificio de la pared en el que ya se encuentra el tubo. Delgado Daño de conicidad Grieta Parcial...
  • Page 20: Mantenimiento

    Mantenimiento Para utilizar el aparato de aire acondicionado de forma inteligente mando a distancia Equipo interior Configure una temperatura No bloquee las tomas de adecuada para la habitación. entrada o salida de aire. Limpie el aparato de aire acondicionado utilizando un paño suave y seco. Si Temperatura aprecia manchas graves, utilice un adecuada...
  • Page 21: Precauciones

    Precauciones ADVERTENCIA Llame al departamento de ventas / asistencia técnica si desea obtener más información acerca de la Instalación. No intente instalar este aparato de aire acondicionado personalmente. Una instalación incorrecta podría provocar descargas eléctricas, incendios o fugas de agua. ADVERTENCIA Si aprecia alguna anomalía, como una pequeña Utilice una fuente...
  • Page 22: Resolución De Problemas

    ¿Existen demasiadas fuentes de calor o la alimentación después de 30 segundos. demasiadas personas en la habitación durante la refrigeración? Haier Group Dirección: No.1 Haier Road, Hi-tech Zone, Qingdao 266101 República Popular China Contactos: TEL: +86-532-8893-6943; FAX: +86-532-8893-1010 Sitio web: www.haier.com...
  • Page 23: Parti E Funzioni

    Parti e funzioni Unità interna Telecomando 8. Icona funzioni aggiuntive Filtro di purificazione QUITE Riscaldamento Moda ità BENES ALIMEN dell’aria (s len SPEN elettrico operativa SERE TAZIONE zioso) SIONE integrato pannello (interno) Telecomando 9. Pulsante SILENZIOSO 10. Pulsante RISCALDAMENTO 11. Pulsante CONDIZIONATORE Griglia presa 12.
  • Page 24: Funzionamento

    Funzionamento Funzionamento di base Funzionamento emergenza e collaudo Funzionamento d’emergenza: Usare questa modalità solo quando il telecomando è difettoso o è Telecomando andato perso. In caso di emergenza, il condizionatore può funzionare in automatico per un po'. Quando è premuto l’interruttore d’emergenza, sarà emesso un BEEP una volta a significare l’inizio della procedura.
  • Page 25 Funzionamento Funzionamento sospensione in base alla modalità di funzionamento selezionata auto- maticamente. Premere il pulsante per inserire opzioni aggiuntive, 4. In modalità ventilatore Non ha la funzione sospensione quando viene visualizzato il ciclo su lampeggerà. Quin- 5. Impostare il cambio della velocità del ventilatore di premere per entrare nella funzione sospensione.
  • Page 26 Funzionamento CONFORMITÀ AI REGOLAMENTI EUROPEI PER I MODELLI Funzionamento timer On/Off On-Off Tutti i prodotti sono conformi alle seguenti disposizioni euro- 1. Una volta avviata l'unità, selezionare la modalità di funzio- pee: namento desiderata. - Direttiva bassa tensione 73/23/CEE 2. Premere il pulsante TIMER per cambiare la modalità - Direttiva bassa tensione 2006/95/CEE timer.
  • Page 27: Installazione Unità Interna

    Installazione unità interna Attrezzi necessari per l’’installazione Origine d'alimentazione Prima di collegare la spina alla presa di corrente, accer- Cacciavite Chiave dinamometrica (17 mm, 22 mm, 26 mm) tarsi che la tensione sia corretta. Pinza L'alimentazione deve essere uguale a quella dell'etichetta Seghetto Tagliatubi corrispondente.
  • Page 28 Installazione unità interna [Sinistra · tubi parte posteriore sinistra] Regolazione della piastra di montaggio e collocazione del foro ● Se la tubatura è a sinistra, tagliare con una pinza, il coperchio della tuba tubatura sinistra. su parete ● Se la tubatura è posteriore sinistra, piegare i tubi seguendo la direzio ne delle tubature verso il contrassegno del foro per la tubatura sinistra posteriore che è...
  • Page 29 Corretto Scorretto Collegamento del cavo dopo avere installato l’unità interna 1. Inserire dall’esterno il cavo della stanza nella sinistra del foro su parete, nel quale è già stato installato il tubo. Inclinato Danno alla Rottura Parziale Troppo 2. Estrarre il cavo sulla parte frontale e collegarlo facendo un anello. svasatura esterno Sullo scarico...
  • Page 30: Manutenzione

    Manutenzione Per un utilizzo intelligente del condizionatore Impostazione della temperatu Non bloccare la presa o lo Telecomando Condizionatore ra ambiente adeguata scarico dell'aria. pulire il condizionatore usando un pan- Temperatura no soffice e asciutto. Per le macchie adeguata Non usare acqua, pulire il teleco- resistenti, usare un detergente neutro mando con un panno asciutto.
  • Page 31: Avvertenze

    Attenzione AVVISO Per l'installazione chiamare il negozio preposto alla vendita/assistenza. Non tentare di installare il condizionatore da soli, poiché lavori inadeguati possono causare scosse elettriche, incendi, perdite d'acqua. AVVISO In caso di anomalie come odore di bruciato, spegne Usare una presa dedicata Verificare che lo scarico sia installato adeguatamente re subito l'apparecchio e contattare il rivenditore.
  • Page 32: Risoluzione Dei Problemi

    30 secondi. Ci sono troppe sorgenti di calore o troppe persone nella stanza mentre è in funzione il condizionatore? Haier Group Indirizzo: N. 1 Haier Road, Hi-tech Zone, Qingdao 266101, Repubblica Popolare Cinese Contatti: TEL +86-532-8893-6943; FAX +86-532-8893-1010 Sito Internet: www.haier.com...
  • Page 33: Pièces Et Fonctions

    Pièces et fonctions Unité intérieure Télécommande 8. Affichage des fonctions supplémentaires Filtre de purification d'air Chauffage Entrée d'air Mode de fonctionne ALIMENTA SILENCE VEILLE SANTÉ électrique ment TION (à l'intérieur) a dé Té écommande 9. Bouton SILENCE 10. Bouton CHAUFFAGE Grille d'entrée 11.
  • Page 34: Utilisation

    Utilisation Opération de base Fonctionnement d'urgence et fonction- nement de test Fonctionnement d'urgence : Télécommande Utilisez cette fonction uniquement lorsque la télécommande est en panne ou a été perdue ; en mode de fonctionnement d'urgence, le climatiseur peut fonctionner pendant un moment. Lorsque l'on appuie sur le le commutateur du fonctionnement, un bip sonore est émis, indiquant le démarrage de cette fonction..
  • Page 35: Fonction Veille

    Utilisation Fonction veille 3. En mode AUTO L'appareil fonctionne dans le mode de veille correspon- Appuyez sur le bouton pour accéder aux options sup- dant adapté au mode de fonctionnement sélectionné plémentaire, lorsque vous faites basculer l'écran sur automatiquement. clignote. Puis appuyez sur pour accéder à...
  • Page 36: Fonction Souffle D'air Sain

    CONFORMITÉ DES MODÈLES Utilisation À LA LÉGISLATION EUROPÉENNE Utilisation de la minuterie Marche/Arrêt. Tous les appareils sont conformes aux directives Européen- 1. Une fois l'appareil démarré, sélectionner le mode de fonc- nes suivantes : tionnement désiré : - Directive basse tension 73/23/CEE 2.
  • Page 37: Installation De L'unité Intérieure

    Installation de l'unité intérieure Outillage requis pour l'installation Source d'alimentation Avant de brancher la fiche dans la prise, il faut absolu- Clé Clé dynamométrique ment vérifier la tension. (17 mm, 22 mm, 26 mm) Pince La source d'alimentation correspond aux informations sur Scie à...
  • Page 38: Connexion Du Câble Des Unités Intérieure/Extérieure

    Installation de l'unité intérieure [Gauche · Tuyauterie arrière gauche] Installation de la plaque de fixation et positionnement du trou dans le mur Dans le cas d'une tuyauterie à gauche, découpez, avec une pince, le couvercle pour la tuyauterie gauche. Pour une tuyauterie à l'arrière gauche, cintrez les tuyaux selon le sens Lorsque la plate de montage est fixée en premier de la tuyauterie jusqu'à...
  • Page 39: Installation Du Bloc D'alimentation

    Correct Incorrect Connexion du câble après l'installation de l'unité intérieure 1. Insérez le câble de l'extérieur de la pièce dans le côté gauche du trou dans le mur dans lequel se trouve le tuyau. Insuffisant Dommage Fissure Partiel Trop à l'extérieur par flambée 2.
  • Page 40: Pour Une Utilisation Intelligente Du Climatiseur

    Maintenance Pour une utilisation intelligente du climatiseur Télécommande Paramétrage d'une tempéra- Ne pas obstruer l'entrée ou la Boîtier intérieur ture de pièce appropriée sortie d'air Essuyez le cimatiseur avec un doux et Température appropriée sec. Pour les saletés rebelles, utilisez un détergent neutre dilué...
  • Page 41: Mises En Garde

    Mises en garde AVERTISSEMENT Merci de contacter le point de vente ou de maintenance pour l'installation. Ne tentez pas d'installer le climatiseur vous-même car des travaux mal faits risquent de causer une électrocution, un incendie ou une fuite d'eau. AVERTISSEMENT Si une anomalie telle qu'une petite combustion se Utiliser une source d'ali- Vérifier soigneusement l'installation adéquate du...
  • Page 44: Dépannage

    Dépannage Mises en garde Avant de demander de l'assistance, vérifier la Ne pas obstruer ni couvrir la grille de ventilation du climatieseur. Ne pas pla- liste suivante. cer les doigts ou des objets dans les entrées et sorties d'air ni dans le volet de positionnement.

Ce manuel est également adapté pour:

As09gs2eraAs12gs2eraAs18gs2eraAs24gs2era

Table des Matières