Asus Q9066 Guide D'installation Rapide
Table des Matières
Liens rapides
All manuals and user guides at all-guides.com
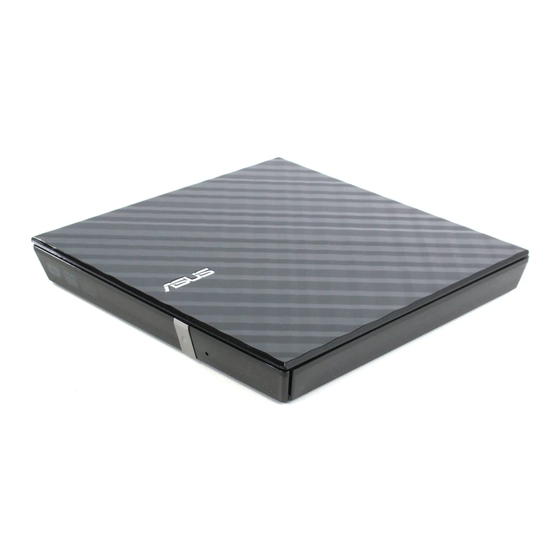
External Slim Optical Drive
Quick Installation Guide
Dansk
English
Français
Nederlands
Eesti
Deutsch
Suomi
Italiano
Español
Ελληνικά
Русский
Magyar
Bahasa Indonesia
български
Česky
Latviski
Model /
v6.2 Published December 2014
Copyright © 2014 ASUSTeK Computer INC. All Rights Reserved.
15060-34310200
In 36 Languages
Lietuvių
Bahasa Malaysia
Norsk
Polski
Português
Română
Slovensky
Slovenščina
: SDRW-08D2S-U
Q9066
Svenska
한국어
ไทย
Türkçe
(Kurulum Kılav uzu)
Tiếng Việt
Қазақ
Українська
繁體中文
簡体中文
日本語
Table des Matières

Manuels Connexes pour Asus Q9066


Sommaire des Matières pour Asus Q9066
- Page 1 All manuals and user guides at all-guides.com Q9066 External Slim Optical Drive Quick Installation Guide In 36 Languages Dansk Lietuvių Svenska English 한국어 ไทย Français Nederlands Bahasa Malaysia Eesti Norsk Türkçe Deutsch (Kurulum Kılav uzu) Suomi Polski Italiano Tiếng Việt Қазақ...
-
Page 2: Safety Information
CLASS 1 LASER PRODUCT REACH Complying with the REACH (Registration, Evaluation, Authorisation, and Restriction of Chemicals) regulatory framework, we published the chemical substances in our products at ASUS REACH website at http://csr.asus.com/english/REACH.htm. Package contents Optical drive Stand (optional) USB Y cable... - Page 3 All manuals and user guides at all-guides.com 电子信息产品污染控制标示:图中之数字为产品之环保 使用期限。仅指电子信息产品中含有的有毒有害物质或 元素不致发生外泄或突变从而对环境造成污染或对人身 ,财产造成严重损害的期限。 有毒有害物质或元素的名称及含量说明标示: 有害物质 部件名称 六价铬 多溴联 多溴二苯 铅(Pb) 汞(Hg) 镉(Cd) (Cr(VI)) 苯(PBB) 醚(PBDE) 印刷电路板及 × ○ ○ ○ ○ ○ 其电子组件 外壳 × ○ ○ ○ ○ ○ 外部信号连接 × ○...
- Page 4 REACH Die rechtliche Rahmenbedingungen für REACH (Registration, Evaluation, Authorisation, and Restriction of Chemicals) erfüllend, veröffentlichen wir die chemischen Substanzen in unseren Produkten auf unserer ASUS REACH webseite unter http://csr.asus.com/english/REACH.htm. ASUS COMPUTER GmbH HARKORT STR. 21-23, 40880 RATINGEN, GERMANY ASUSTeK COMPUTER INC.
-
Page 5: Български
All manuals and user guides at all-guides.com Place the optical drive on a stable surface. NOTE: You can either lay the optical drive horizontally on a stable surface, or use it with the bundled stand. To install the optical drive onto the vertical stand (model with stand only): A. -
Page 6: Bahasa Indonesia
All manuals and user guides at all-guides.com Čeština Dansk Umístěte optickou jednotku na stabilní povrch. Anbring det optiske drev på en stabil POZNÁMKA: Můžete umístit optickou jednotku vodorovně BEMÆRK: Du kan enten lægge det optiske drev vandret på en na stabilní povrch nebo ji můžete použít s dodaným stabil eller bruge det med den medfølgende konsol. -
Page 7: Bahasa Malaysia
All manuals and user guides at all-guides.com Latviski Lietuvių Padėkite optinį diską ant stabilaus paviršiaus. Novietojiet optisko draivu uz stabilas virsmas. PASTABA: Galite optinį diską paguldyti horizontaliai ant PIEZĪME: Optisko draivu ir iespējams novietot horizontāla stabilaus paviršiaus arba jį įstatyti į stovelį. pozīcijā... - Page 8 All manuals and user guides at all-guides.com Slovenščina Svenska Placera den optiska enheten på en stabil yta. Položite optični gonilnik na trdno površino. NOTERA: Du kan antingen lägga den optiska enheten OPOMBA: Optični gonilnik lahko položite na ravno in trdno horisontellt på...
-
Page 9: Tiếng Việt
All manuals and user guides at all-guides.com 한국어 Қазақ Оптикалық жетекті қалыпты бетке қойыңыз. 광드라이브를 안정된 표면에 놓습니다. 주의: 광드라이브를 안정된 표면에 수평으로 눕히거나 ЕСКЕРТПЕ: Оптикалық жетекті қалыпты бетке 번들 받침대를 사용할 수 있습니다. көлденең қоюға немесе бірге берілетін тірекпен бірге пайдалануға... - Page 10 • Удължителят трябва да бъде закупен отделно. • USB удлини тель приобретае тся отдельно. • НЕ гарантираме производителността на оптичното • ASUS не гарант ирует производит ельность опти ческого устройство свързано посредством USB хъб. привода, подклю ченного через USB хаб.
- Page 11 All manuals and user guides at all-guides.com Čeština Dansk Připojte optickou jednotku k počítači. Forbind det optiske drev til computeren. A. Připojte dodaný kabel USB Y k počítači. A. Forbind det medfølgende USB Y kabel til computeren. POZNÁMKY: BEMÆRKINGER: • Dodaný kabel USB Y je opatřen dvěma konektory USB a •...
- Page 12 All manuals and user guides at all-guides.com Lietuvių Latviski Prijunkite optinį diską prie kompiuterio. Pievienojiet optisko draivu jūsu datoram. A. Prie kompiuterio prijunkite pridedamą USB Y laidą. A. Savienojiet komplekta USB Y kabeli ar jūsu datoru. PASTABOS : PIEZĪMES: • Pridedamas USB Y laidas turi dvi USB jungtis ir vieną •...
- Page 13 All manuals and user guides at all-guides.com Slovenščina Svenska Povežite optični gonilnik z računalnikom. Anslut den optiska enheten till din dator. A. Povežite priložen USB Y kabel z vašim računalnikom. A. Anslut den förpackade USB Y-kabeln till din dator. OPOMBE: NOTERA: •...
- Page 14 All manuals and user guides at all-guides.com 한국어 Қазақ Оптикалық жетекті компьютерге қосу. 컴퓨터에 광드라이버를 연결합니다. A. Бірге берілетін USB Y кабелін компьютерге жалғаңыз. A. 컴퓨터에 USB Y케이블을 연결합니다. ЕСКЕРТПЕЛЕР: 주의: • Бірге берілетін USB Y кабелінде екі USB қосқышы мен •...
- Page 15 All manuals and user guides at all-guides.com Ensure that your system detects the external optical drive. A. From your Windows ® desktop, right-click My Compu ter, then click Properties > Hardware > Device Manager . B. Click before DVD/CD-ROM drives to unfold the list. When the external optical drive is detected, the name of the external optical drive appears in the list.
- Page 16 All manuals and user guides at all-guides.com Nederlands Eesti Controleer of uw systeem het externe Veenduge, et teie süsteem tuvastab välise optische station kan detecteren. optilise seadme. Klik op het bureaublad van Windows ® met de A. Windows ® 'i töölaual paremklõpsake ikooni My Computer rechtermuisknop op My Computer (D eze computer) , (Minu arvuti) , seejärel valige Properties (Atribuudid) en klik vervolgens op Properties (Eigenschappen) >...
- Page 17 All manuals and user guides at all-guides.com Polski Português Upewnij się, że posiadany system wykrywa zewnętrzny napęd optyczny. unidade óptica. ® A. Na pulpicie Windows , kliknij prawym przyciskiem A. A partir do ambiente de trabalho do Windows ® , clique com My Computer (Mój komputer) , a następnie kliknij o botão direito em My Computer (O meu computador) , Properties (Właściwości) >...
- Page 18 All manuals and user guides at all-guides.com 簡体中文 日本語 请确认您的系统已侦测到外接光驱。 光学ドライブがシステムで検出されるかを確認する A. 从 Windows 桌面,右键点选“我的电 A. Windows ® デスクトップから「マイ コンピュータ」を右 脑“ , 接着点选 属性 > 硬件 > 设备管理 クリックし、「プロパティ」→「ハードウェア」→「デ バイス マネージャ」の順に開きます。 器。 (右の写真は英語版です) 点 选 DVD/CD-ROM 驱动器前面的 以 B. DVD/CD-ROMドライブの左にある マークをクリッ...
- Page 19 All manuals and user guides at all-guides.com Safely remove the external optical drive. The external optical drive supports Plug & Play. Follow the steps below to safely remove the drive. A.From the task bar of your computer, click the Safely Remove Hardware icon ( B.When a message Safely remove USB Mass Storage Device pops up, click the message.
- Page 20 All manuals and user guides at all-guides.com Čeština Dansk Bezpečně odeberte externí optickou jednotku. Du kan nu fjerne det optiske drev. Det eksterne, optiske drev understøtter “plug and play”. Fjern Tato externí optická jednotka podporuje technologii Plug & Play. drevet på følgende måde. Podle následujících pokynů...
- Page 21 All manuals and user guides at all-guides.com Lietuvių Latviski Išorinio optinio disko saugus šalinimas. Droša ārējā optiskā draiva noņemšana. Išorinis optinis diskas palaiko „Plug & Play“. Norėdami Ārējais optiskais draivs atbalsta Plug & Play tehnoloģiju. saugiai pašalinti įrenginį, sekite žemiau aprašytus žingsnius. Draiva drošai noņemšanai, izpildiet sekojošos soļus.
- Page 22 All manuals and user guides at all-guides.com Slovenščina Svenska Pazljivo odstranite zunanji optični gonilnik. Säker borttagning av den externa optiska enheten. Zunanji optični gonilnik podpira Plug & Play sistem. Pri odstranitvi gonilnika, upoštevajte spodaj opisana navodila. Den externa optiska enheten stödjer plug-and-play. Följ A.
- Page 23 All manuals and user guides at all-guides.com Қазақ 한국어 Сыртқы оптикалық жетекті қауіпсіз түрде 안전하게 외장 광드라이버를 제거합니다. ажырату. Сыртқы оптикалық жетек Plug & Play мүмкіндігін 외장 광드라이버는 Plug & Play 를 지원합니다. 안전하게 қолдайды. Жетекті қауіпсіз түрде ажырату үшін 장치를...
-
Page 24: Dépannage
2. Check if the USB Y cable is connected properly. See Step 2 Connect the optical drive to your computer for details. 3. Turn on your computer. NOTE: For more technical service, contact your retailer or the ASUS Technical Support. Deutsch Français Dépannage... - Page 25 . 3. Schakel uw computer in. 3. Lülitage arvuti sisse. OPMERKING: neem contact op met uw leverancier of MÄRKUS: Täiendavaks tehniliseks teeninduseks võtke met de technische ondersteuning van ASUS voor meer ühendust ASUS'e tehnilise toega. technische ondersteuning. Suomi Ελληνικά Vianetsintä...
- Page 26 3. Ligue o computador. 3. Włącz komputer. NOTA: Para serviço mais técnico, contacte o seu vendedor UWAGA: W celu uzyskania dalszych informacji technicznych, ou o Suporte técnico ASUS. skontaktuj się ze sprzedawcą lub z pomocą techniczną ASUS. Română Slovensky Riešenie problémov Remedierea defecţiunilor Pokiaľ...
- Page 27 “스텝 2. 컴퓨터에 광드라이버를 연결합니다 .” 를 атты 2-қадамды қараңыз. 참고하십시오. 3. Компьютерді қосыңыз. 3. 컴퓨터를 켜십시오. ЕСКЕРТПЕ: Қосымша техникалық қызмет алу үшін 주의: 추가 기술지원은 판매점 또는 ASUS 기술지원으로 сатушыға немесе ASUS компаниясының техникалық 문의하십시오. қолдау қызметіне хабарласыңыз. Tiếng Việt Khắc phục sự cố...
- Page 28 If you require assistance please call ASUS Customer Service 1300 2787 88 or visit us at http://support.asus.com.