Télécharger Imprimer la page

Publicité

Les langues disponibles
  • FR

Les langues disponibles

  • FRANÇAIS, page 14

Liens rapides

D
Montageanleitung für
Basisträgersystem
ES Instrucciones de montaje para el
sistema de transporte.
F
Instructions de montage pour Basic
Carrier
GB Fitting Instructions for Basic Carrier
NO Monteringsanvisning for takstativ
PT Instruções de Montagem para
sistema de transporte.
RU Установочные Инструкции для
Поперечных Балок
x 1
Revision No:
2C
WHISPBAR THROUGH BAR
x 4
1
x 2
S17W
x 1

Publicité

loading

Sommaire des Matières pour Whispbar S17W

  • Page 1 S17W WHISPBAR THROUGH BAR Montageanleitung für Basisträgersystem ES Instrucciones de montaje para el sistema de transporte. Instructions de montage pour Basic Carrier GB Fitting Instructions for Basic Carrier NO Monteringsanvisning for takstativ PT Instruções de Montagem para sistema de transporte.
  • Page 2 WHISPBAR THROUGH BAR S17W Erstinstallation Komponenten aus der Verpackung nehmen und überprüfen. Setzen Sie sich mit Ihrem Händler in Verbindung, sollten Teile fehlen oder beschädigt sein! Sicherstellen, dass der Dachträger in Fahrtrichtung zeigt (s. Abb.). 1. Stellschraube 2. Befestigungsschraube 3. Sicherungsschraube...
  • Page 3 WHISPBAR THROUGH BAR S17W Einstellen der Querträger Abdeckungen mit Schlüsseln abnehmen. Innensechskantschlüssel benutzen und Stellschraube mit 10 Umdrehungen lösen. Obere Stellschraube eindrücken und Querträger (je nach Fall) reinschieben oder herausziehen. Sicherstellen, dass beide Enden der Querträger gleich lang eingestellt sind (Maß...
  • Page 4 WHISPBAR THROUGH BAR S17W Zur Montage s. Montageanleitung des Kits. Stellschraube mit 5 Nm / 3.7 ft lb anziehen. Abdeckungen aufsetzen und mit Schlüsseln verschließen (s. Abb.).
  • Page 5 WHISPBAR THROUGH BAR S17W Sicherheitshinweise & Tipps Dach sowie alle Trägerflächen, die mit dem Dach Kontakt haben reinigen. Träger anhand der Montageanleitung montieren. Alle Schritte unbedingt in der richtigen Reihenfolge ausführen! Wenn in der Anleitung nicht anders angegeben, Querträger im Abstand von min.
  • Page 6 WHISPBAR THROUGH BAR S17W Dachlasten verändern das Fahr- und Bremsverhalten Ihres Fahrzeugs! Vorsicht bei Seitenwind, Richtungswechseln, Bremsmanövern! Kein schnelles Beschleunigen und Abbremsen! Vorsicht! Dachlasten erhöhen die Gesamthöhe des Fahrzeugs! Dachträger während der Reise verschließen. Komponenten regelmäßig überprüfen und defekte oder verschlissene Teile gegen Originalteile ersetzen.
  • Page 7 WHISPBAR THROUGH BAR S17W Yakima Products, Inc. 15025 SW Koll Pkwy. Beaverton, OR 97006-6056 www.whispbar.de...
  • Page 8 WHISPBAR THROUGH BAR S17W Primera instalación Retire las piezas del embalaje y confirme su contenido. Póngase en contacto con su vendedor en el caso de que falten piezas o éstas estén dañadas. Asegúrese de que la cara frontal de barra de techo está...
  • Page 9 WHISPBAR THROUGH BAR S17W Ajuste de barra de techo. Utilice las llaves para retirar la tapa. Utilice la llave Allen para desatornillar los tornillos de ajuste en 10 vueltas. Presione el tornillo de ajuste y deslice la barra hacia dentro o hacia fuera de acuerdo con lo deseado.
  • Page 10 WHISPBAR THROUGH BAR S17W Para montaje de las barras de techo en el vehículo consulte el manual del Kit de Fijación. Apriete el tornillo de ajuste a 5Nm (3.7 ft lb). Utilice las llaves para instalar y cerrar las cubiertas.
  • Page 11 WHISPBAR THROUGH BAR S17W Mantenimiento Limpie el techo del vehículo y las superfícies del producto que estarán en contacto con el techo. Siga las instrucciones de montaje para la instalación del producto en su vehículo. Asegúrese de que todos los pasos se siguen correctamente.
  • Page 12 WHISPBAR THROUGH BAR S17W Retire todos los objetos sueltos o que puedan soltarse, antes de iniciar el transporte. Asegúrese de que toda la carga esté sujetada de forma segura con cintas no elásticas. Verifique regularmente en viajes largos. Transportar carga en el techo del vehículo cambia el comportamiento del mismo.
  • Page 13 WHISPBAR THROUGH BAR S17W Accesorios disponibles para este producto: Maletero de techo Porta-esquís, snowboard Porta-kayaks, canoas Porta-bicicletas Para más accesorios por favor consulte nuestro catálogo de productos. Yakima Products, Inc. 15025 SW Koll Pkwy. Beaverton, OR 97006-6056 www.whispbar.es www.whispbar.com.mx...
  • Page 14 
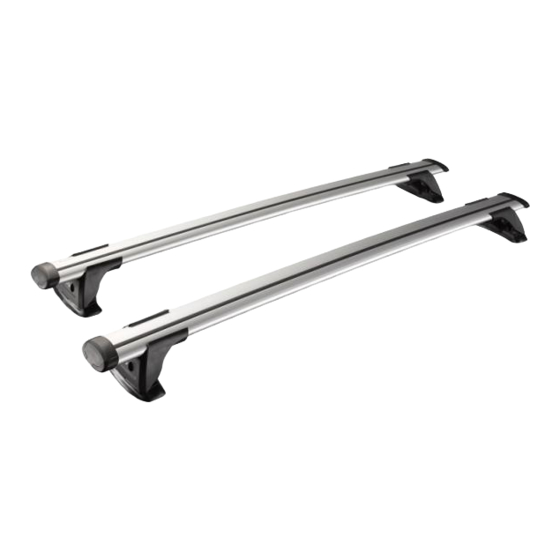
WHISPBAR THROUGH BAR S17W Première installation Retirer les pièces de contenu de l'emballage et vérifier. Contactez votre revendeur si certaines pièces sont manquantes ou endommagées. Veiller à ce que les barres de toit soient tournées vers l'avant du véhicule. 1. Vis de réglage 2.
  • Page 15 WHISPBAR THROUGH BAR S17W Réglage des barres latérales Utiliser les clés pour retirer les caches Utiliser le tournevis cruciforme pour repositionner la vis de réglage et faire 10 tours. Appuyer sur la vis de réglage et faire glisser la barre transversale vers l'intérieur ou l'extérieur selon les besoins.
  • Page 16 WHISPBAR THROUGH BAR S17W Pour fixer les barres de toit sur un véhicule, veuillez consulter les instructions du kit d'installation. Serrer la vis de réglage jusqu'à 5 Nm (3.7 ft lb). Utiliser les touches pour installer et verrouiller les couvercles...
  • Page 17 WHISPBAR THROUGH BAR S17W Maintenance Nettoyer le toit de la voiture et les surfaces des produits qui seront en contact avec le toit de la voiture. Suivre les instructions de montage pour l'installation du produit sur votre véhicule. S'assurer que toutes les étapes sont réalisées dans l'ordre.
  • Page 18 WHISPBAR THROUGH BAR S17W S'assurer que toutes les charges sont solidement attachées avec des sangles non élastiques. Vérifier régulièrement pendant les longs trajets. Un système de galerie de toit chargé peut altérer les performances de votre véhicule. Soyez particulièrement conscients des effets de vents latéraux, le changement de...
  • Page 19 WHISPBAR THROUGH BAR S17W Yakima Products, Inc. 15025 SW Koll Pkwy. Beaverton, OR 97006-6056 www.whispbar.fr www.whispbar.ca/fr...
  • Page 20 WHISPBAR THROUGH BAR S17W First Time Installation Remove parts from inside the package and check. Contact your dealer if any parts are missing or damaged. Ensure the roof rack face towards the front of vehicle. 1. Adjusting Screw 2. Locking Screw...
  • Page 21 WHISPBAR THROUGH BAR S17W Crossbar Adjustment Use keys to remove covers. Use hex screwdriver to reverse adjusting screw 10 turns. Hold adjusting screw in and slide crossbar in or out as required. Ensure each end of the crossbar is adjusted...
  • Page 22 WHISPBAR THROUGH BAR S17W To fit roof rack to vehicle, refer to Fitting Kit instructions. Tighten adjusting screw to 5 Nm (3.7 ft lb). Use keys to fit and lock covers...
  • Page 23 WHISPBAR THROUGH BAR S17W Maintenance Clean the car roof and surfaces of the product that will be in contact with the car roof. Follow the fitting instructions for fitting the product to your vehicle. Make sure all steps are carried out in order.
  • Page 24 WHISPBAR THROUGH BAR S17W A loaded roof rack system can alter the performance of your vehicle. Be especially aware of the effects of side winds, changing of direction, and braking performance. Avoid rapid acceleration and deceleration. Drive carefully. Note that the total height of the vehicle increases when upright loads are carried.
  • Page 25 WHISPBAR THROUGH BAR S17W Yakima Products, Inc. 15025 SW Koll Pkwy. Beaverton, OR 97006-6056 www.whispbar.com www.whispbar.ca www.whispbar.eu www.whispbar.co.uk www.whispbar.co.za...
  • Page 26 WHISPBAR THROUGH BAR S17W Montering første gang Pakk ut delene og kontroller innholdet. Kontakt din forhandler hvis deler mangler eller er skadet. Forsikre deg om at takstativet vender riktig vei mot fronten av bilen. 1. Justerskrue 2. Låseskrue 3. Sikkerhetsskrue...
  • Page 27 WHISPBAR THROUGH BAR S17W Justering av stativer Bruk nøklene for å ta av dekslene Bruk unbracoskrutrekker for å skru ut justeringsskruen 10 omdreininger. Trykk inn justeringsskruen og juster lengdene på stativet inn eller ut. Forsikre deg om at stativet er justert likt i...
  • Page 28 WHISPBAR THROUGH BAR S17W For å montere takstativ se bruksanvisning. Trekk til justeringskruen med et moment på 5Nm / 3.7 ft lb. Bruk nøkkelen og sett på dekslene...
  • Page 29 WHISPBAR THROUGH BAR S17W Vedlikehold Rengjør grundig taket og alle overflater på produktet som kommer i kontakt med taket på bilen. Følg bruksanvisningen når du monterer produktet på bilen. Sørg for at trinn følges i rett rekkefølge. Avstanden mellom stengene skal være minimum 700 mm hvis noe annet ikke er spesifisert i bruksanvisningen.
  • Page 30 WHISPBAR THROUGH BAR S17W Produkter bør løses under transport hvis mulig. Kontroller og bytt ut slitte eller defekte deler. Hold produktet rent og vedlikeholdt. Kjør aldri inn i en bilvaskemaskin med takstativet på. Smør låsene og juster skruer hvis nødvendig med jevne intervaller.
  • Page 31 WHISPBAR THROUGH BAR S17W Primeira instalação Retire as peças da embalagem e confirme o conteúdo. Contacte a sua loja no caso de faltarem peças ou na eventualidade de estarem danificadas. Certifique-se que a barra de tejadilho tem a parte frontal na direcção da frente do veículo.
  • Page 32 WHISPBAR THROUGH BAR S17W Ajuste da barra de tejadilho. Utilize as chaves para retirar a tampa. Utilize a chave hexagonal para desapertar o parafuso de ajuste. 10 voltas. Pressione o parafuso de ajuste e faça deslizar a barra para dentro ou para fora conforme pretendido.
  • Page 33 WHISPBAR THROUGH BAR S17W Para a montagem das barras de tejadilho no veículo consulte as Instruções de Montagem do Kit de Fixação. Aperte parafuso de ajuste a 5Nm / 3.7 ft lb. Utilize as chaves para colocar e fechar as...
  • Page 34 WHISPBAR THROUGH BAR S17W Manutenção Limpe o tejadilho do carro e as superficies do produto que estarão em contacto com o tejadilho. Siga as Instruções de Montagem para a colocação do produto no seu veículo. Certifique-se que todos os passos são seguidos correctamente.
  • Page 35 WHISPBAR THROUGH BAR S17W Certifique-se que toda a carga está presa de forma segura com cintas não elásticas. Verifique regularmente durante viagens longas. Transportar carga no tejadilho do veículo pode alterar o comportamento do mesmo. Tenha especial atenção para o efeito dos ventos laterais, mudanças de direcção e...
  • Page 36 WHISPBAR THROUGH BAR S17W Yakima Products, Inc. 15025 SW Koll Pkwy. Beaverton, OR 97006-6056 E.U.A www.whispbar.pt www.whispbar.br...
  • Page 37 WHISPBAR THROUGH BAR S17W Первая Установка Распакуйте установочный комплект и проверьте наличие всех компонентов. В случае отсутствия или повреждения каких либо компонентов обратитесь к вашему представителю Prorack Убедитесь что багажник установлен в правильном направлении Регулировочный Винт Винт Зажима Винт Замка...
  • Page 38 WHISPBAR THROUGH BAR S17W Регулировка Поперечных Балок Используйте ключи чтобы снять крышки багажника Используйте шестигранную отвертку чтобы открутить регулировочный винт. Около 10- ти оборотов. Нажмите на регулировочный винт и двигайте упор попречной балки в требуемом направлении (вперед или на зад).
  • Page 39 WHISPBAR THROUGH BAR S17W При установке багажника на ваш автомобиль обратитесь к инструкции Установочного Комплекта Затяните регулировочный винт до 5Nm / 3.7 ft lb. Используйте ключи чтобы установить и закрыть крышки багажника...
  • Page 40 WHISPBAR THROUGH BAR S17W Эксплуотация Крыша автомобиля, а также все компоненты набора которые будут с ней соприкосатся должны быть чистыми Следуйте инструкции при установке продукции на ваш автомобиль. Установите поперечные балки с минимальным промежутком 700мм (27 1/2") если в инструкциях не указаны...
  • Page 41 WHISPBAR THROUGH BAR S17W Все перевозимые предметы должны быть крепко закреплены на багажнике неэластичными верёвками. Регулярно проверяйте тугость верёвок во время длинных поездок. Багажник с нагрузкой может повлиять на характеристики вашего автомобиля. Старайтесь вести ваш автомобиль аккуратно, не превышая скорость и...
  • Page 42 WHISPBAR THROUGH BAR S17W Аксессуары доступные для данного продукта: Бокс Лыжное крепление лодочное крепление Велокрепление Смотрите каталог нашей продукции чтобы узнать больше о вспомогательном оборудовании доступном для вашего багажника Yakima Products, Inc. 15025 SW Koll Pkwy. Beaverton, OR 97006-6056 www.whispbar.ru...
  • Page 43 V. Kontaktaufnahme mit Whispbar Bei allen speziellen Fragen zur Garantie von Whispbar setzen Sie sich bitte mit dem nächsten Whispbar-Händler oder mit dem Händler in Verbindung, bei dem das Produkt gekauft wurde. Informationen über entsprechende Händler finden Sie auf www.whispbar.eu Garantiegeber ist Yakima Products, Inc., 15025 SW Koll Parkway, Beaverton, OR 97006 USA...
  • Page 44 GARANTÍA LIMITADA DE POR VIDA SI NECESITA ASISTENCIA TÉCNICA O REPUESTOS Contacte un vendedor, visite el sitio www.whispbar.com o llame al (888)925-4621De lunes a viernes, 7:00 AM a 5:00 PM, hora del Pacífico Esta garantía limitada de por vida cubre todos los productos y accesorios de marca Whispbar, fabricados por Yakima Products, Inc.
  • Page 45 Whispbar garantizará que los sistemas de transporte de cargas, cofres de techo y accesorios, fabricados por Whispbar y vendidos bajo la denominación comercial Whispbar, estén exentos de defectos en los materiales o la mano de obra durante cinco años a partir de la fecha de entrega del producto al comprador minorista original.
  • Page 46 Whispbar auquel il a acheté le produit, qui lui donnera des instructions sur la marche à suivre. Si l'acheteur au détail original n'est pas en mesure de contacter le distributeur de la marque Whispbar, ou si le distributeur n'est pas à même de remédier au défaut, l'acheteur au détail original devra communiquer avec Yakima par e-mail à...
  • Page 47 La garantie Whispbar couvre les systèmes de porte-charges, les coffres de toit et les accessoires fabriqués par Whispbar et commercialisés sous la marque Whispbar, pour une durée de cinq ans à compter de la date de la remise du produit à l'acheteur au détail d'origine.
  • Page 48 Whispbar dealer from whom it purchased the product, who will give the original retail purchaser instructions on how to proceed. If the original retail purchaser is unable to contact the Whispbar dealer, or the dealer is not able to remedy the defect, the original retail purchaser should contact Yakima by e-mail at: yakwarranty@yakima.com, or phone...
  • Page 49 Whispbar will warranty load carrier systems, roof boxes and accessories produced by Whispbar and sold under the brand name Whispbar up to five years from the date of the delivery of the product to the original retail purchaser to be free from defect in materials or workmanship.
  • Page 50 Whispbar 5 års garanti (EU) I Whispbar setter vi vår ære i å sørge for at alle produktene våre er konstruert, testet og produsert etter de høyeste kvalitetsstandardene. Alle Whispbar-produkter som selges i EU har dessuten 5 års garanti på materialer og utførelse.
  • Page 51 A garantia da Whispbar, que abrange sistemas de transporte de cargas, caixas de tejadilho e acessórios produzidos pela Whispbar e vendidos com o nome comercial Whispbar, tem uma duração de cinco anos a partir da data de entrega do produto (sem defeitos a nível de material e acabamento) ao comprador final original.
  • Page 52 I. Покрываемые гарантией продукты и область применения Компания Whispbar предоставляет гарантию на отсутствие дефектов материалов и качества изготовления производимых Whispbar и продаваемых с маркой Whispbar багажных систем, устанавливаемых на крыше багажников и аксессуаров на срок до 5 лет с момента поставки продукта первоначальному розничному покупателю.
  • Page 53 WHISPBAR THROUGH BAR S17W...